In these days of expensive SSDs, high RAM prices, and gaming GPU stagnation, it’s not often that even we find a good reason to build a PC. So when Asus reached out asking if we’d be interested in building a system based around its extensive Edition 20 anniversary lineup, I instinctively said yes. Having seen most of the components at Computex 2026 earlier this summer, I knew I was going to be dealing with premium, high-end parts that would make for a striking, powerful PC.
What I didn’t expect was to receive five large packages, weighing over 150 pounds, and for the motherboard and cooler to come in their own ROG suitcase (yes, that’s a thing), or for the 3,000W PSU to sell for $899 all on its own. This was clearly going to be a unique PC building experience, but it’s certainly not for everyone. In fact, considering the high price of pretty much all of the parts here, this is a build for the select few. But that doesn’t mean the build process wasn’t interesting.
Let's just get this out of the way early on, though: Building any gaming PC right now is expensive. Building one with an RTX 5090 is prohibitively pricey. Building one with these specific parts will set you back roughly $15,000, including the matching peripherals and OLED monitor with a translucent back panel. Think of this as the PC build for Saudi princes, the Elon Musks of the world, or for those of you who, unlike me, were smart enough to use your GPU for Bitcoin mining starting sometime in 2010, and cashed out when the cryptocurrency was trading high.
So yes, this might just be about the most expensive PC you could build today – at least with consumer-focused parts and not maxing out the RAM and storage. But many of us are likely finding ways to deal with the PC hardware we have right now; let’s take a look at what piecing together a new build is like if money is no object and you want the cohesive design that comes from sourcing all (or at least most) of your components from one company.
We’ll go step-by-step through the rather unique build process of this Asus ROG Edition 20 build shortly. But first, here’s a look at the parts, their prices, and, in some cases, how much the components weigh. Because, gold accents or not, there’s a whole lot of heavy metal involved in this build.
PC Case
Asus ROG GR20 Edition 20 open-frame EATX PC case
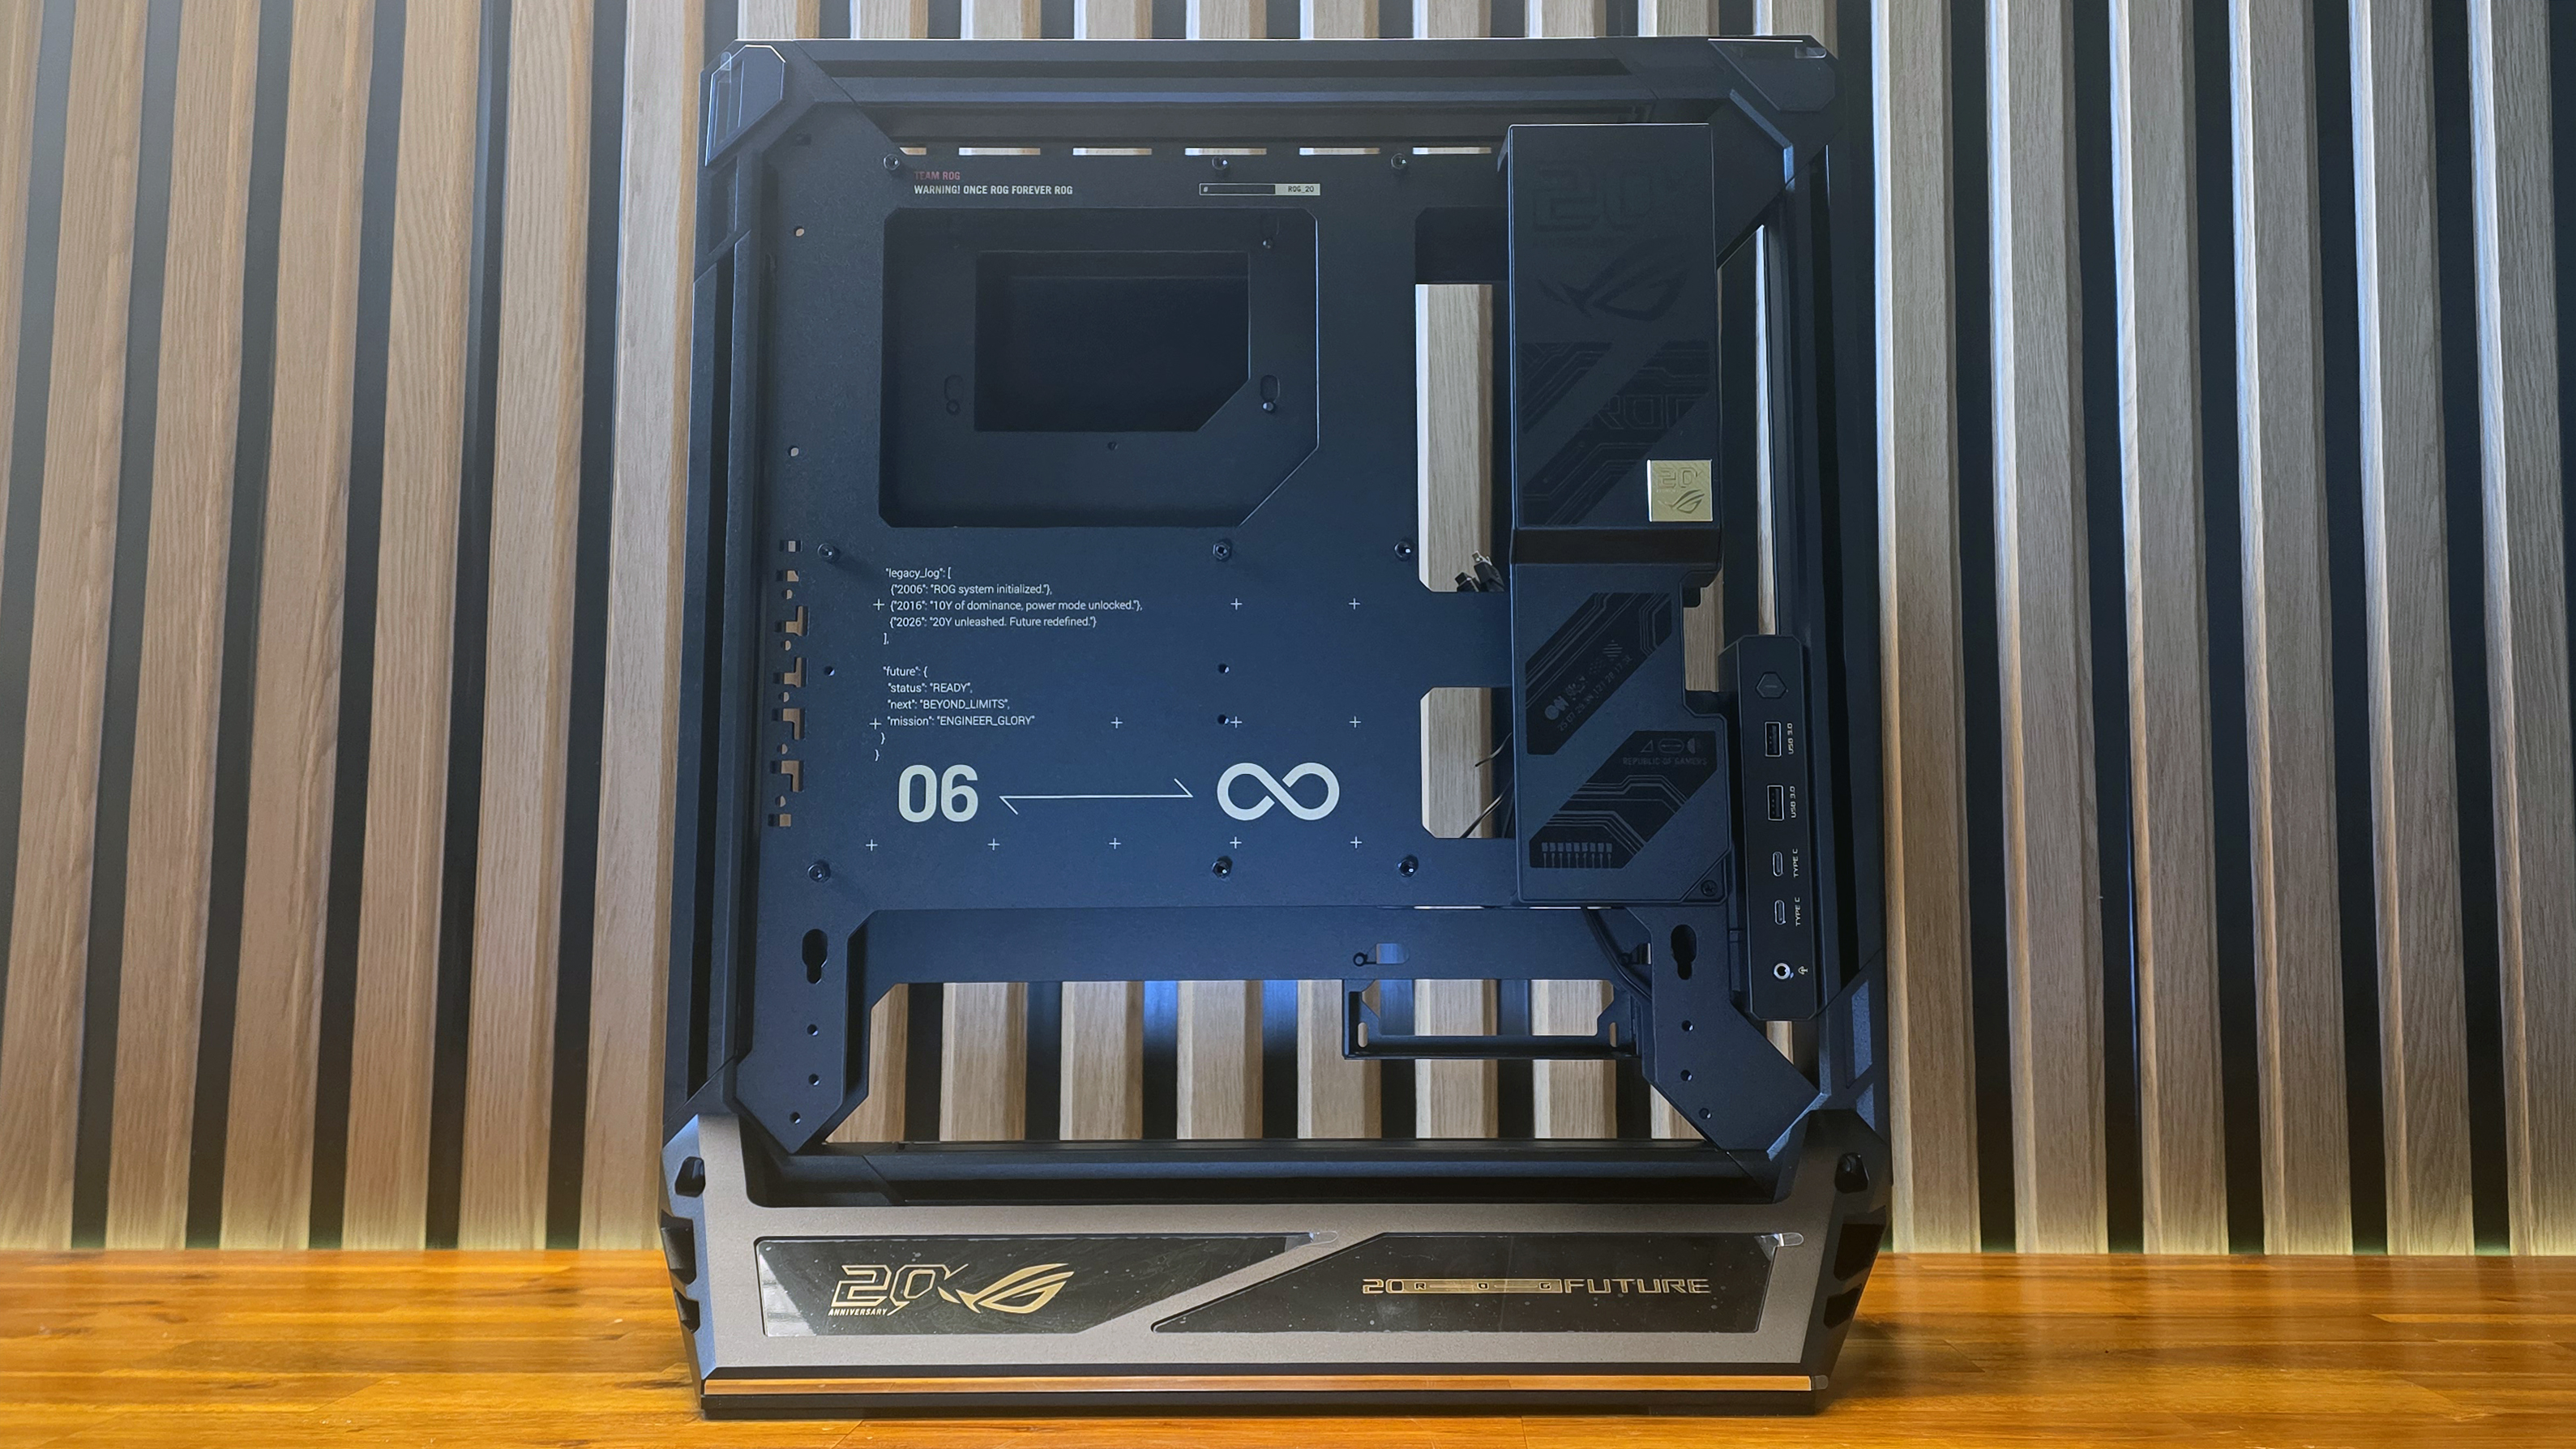
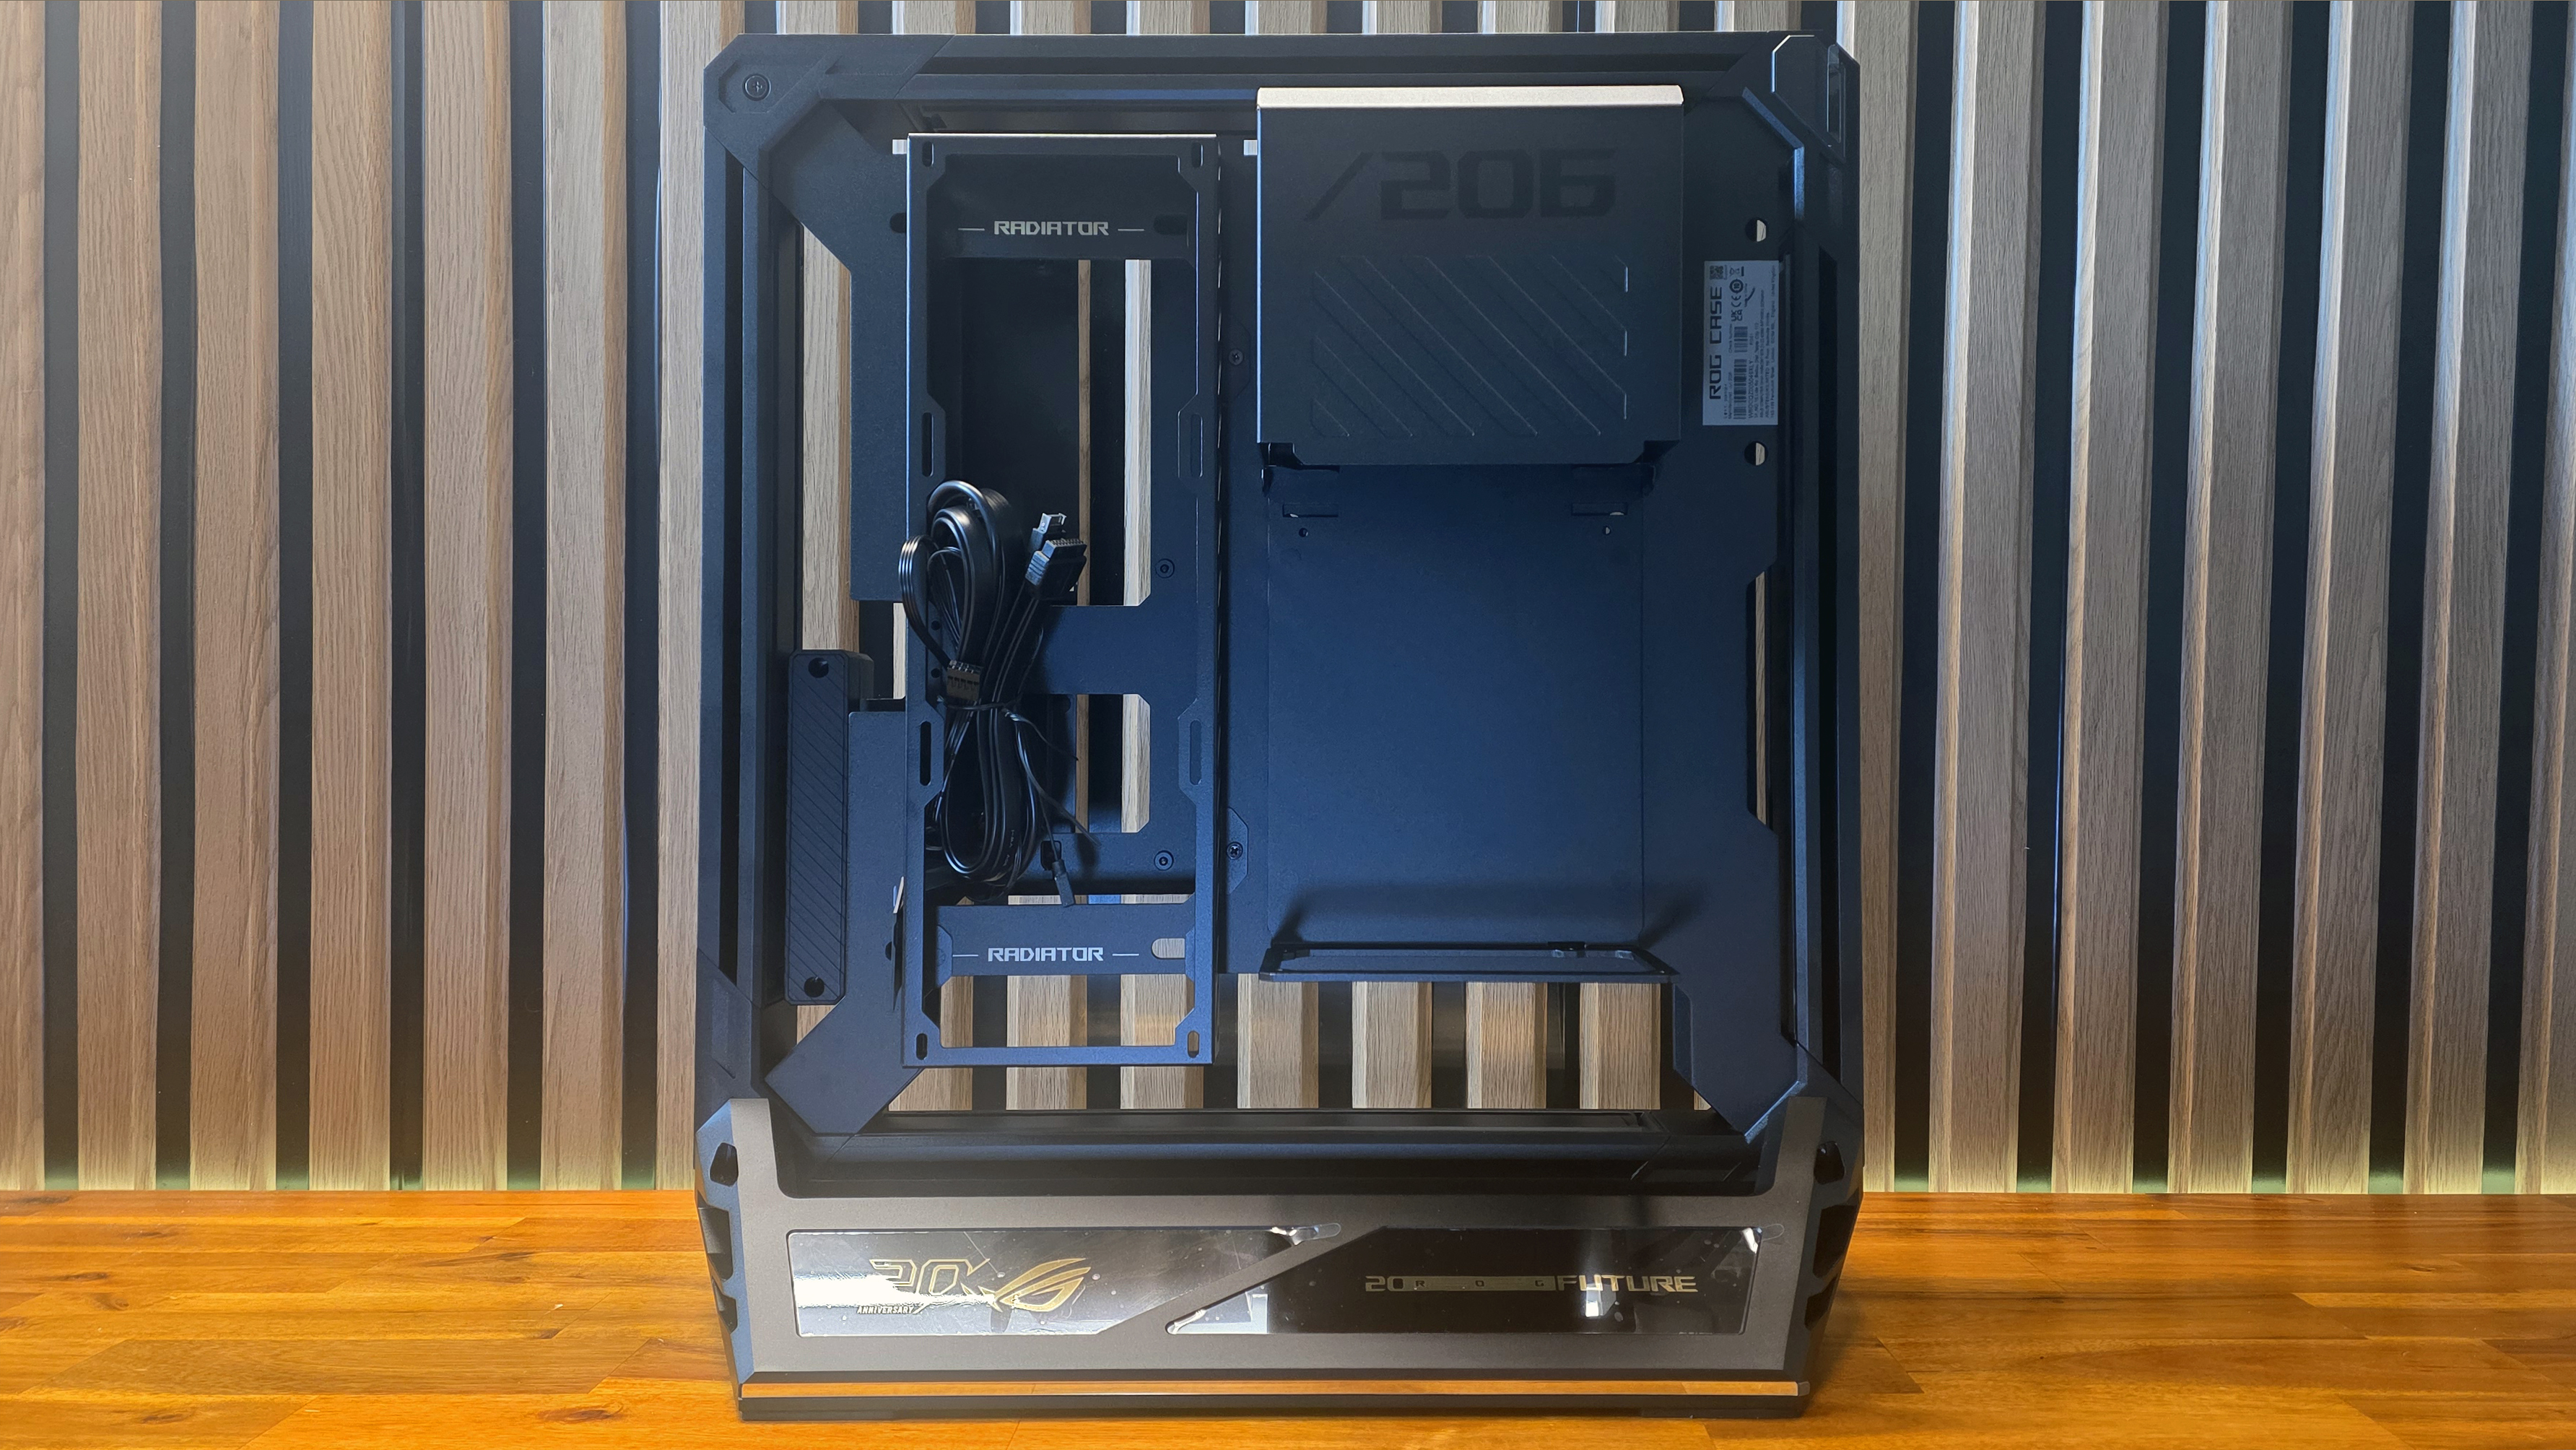
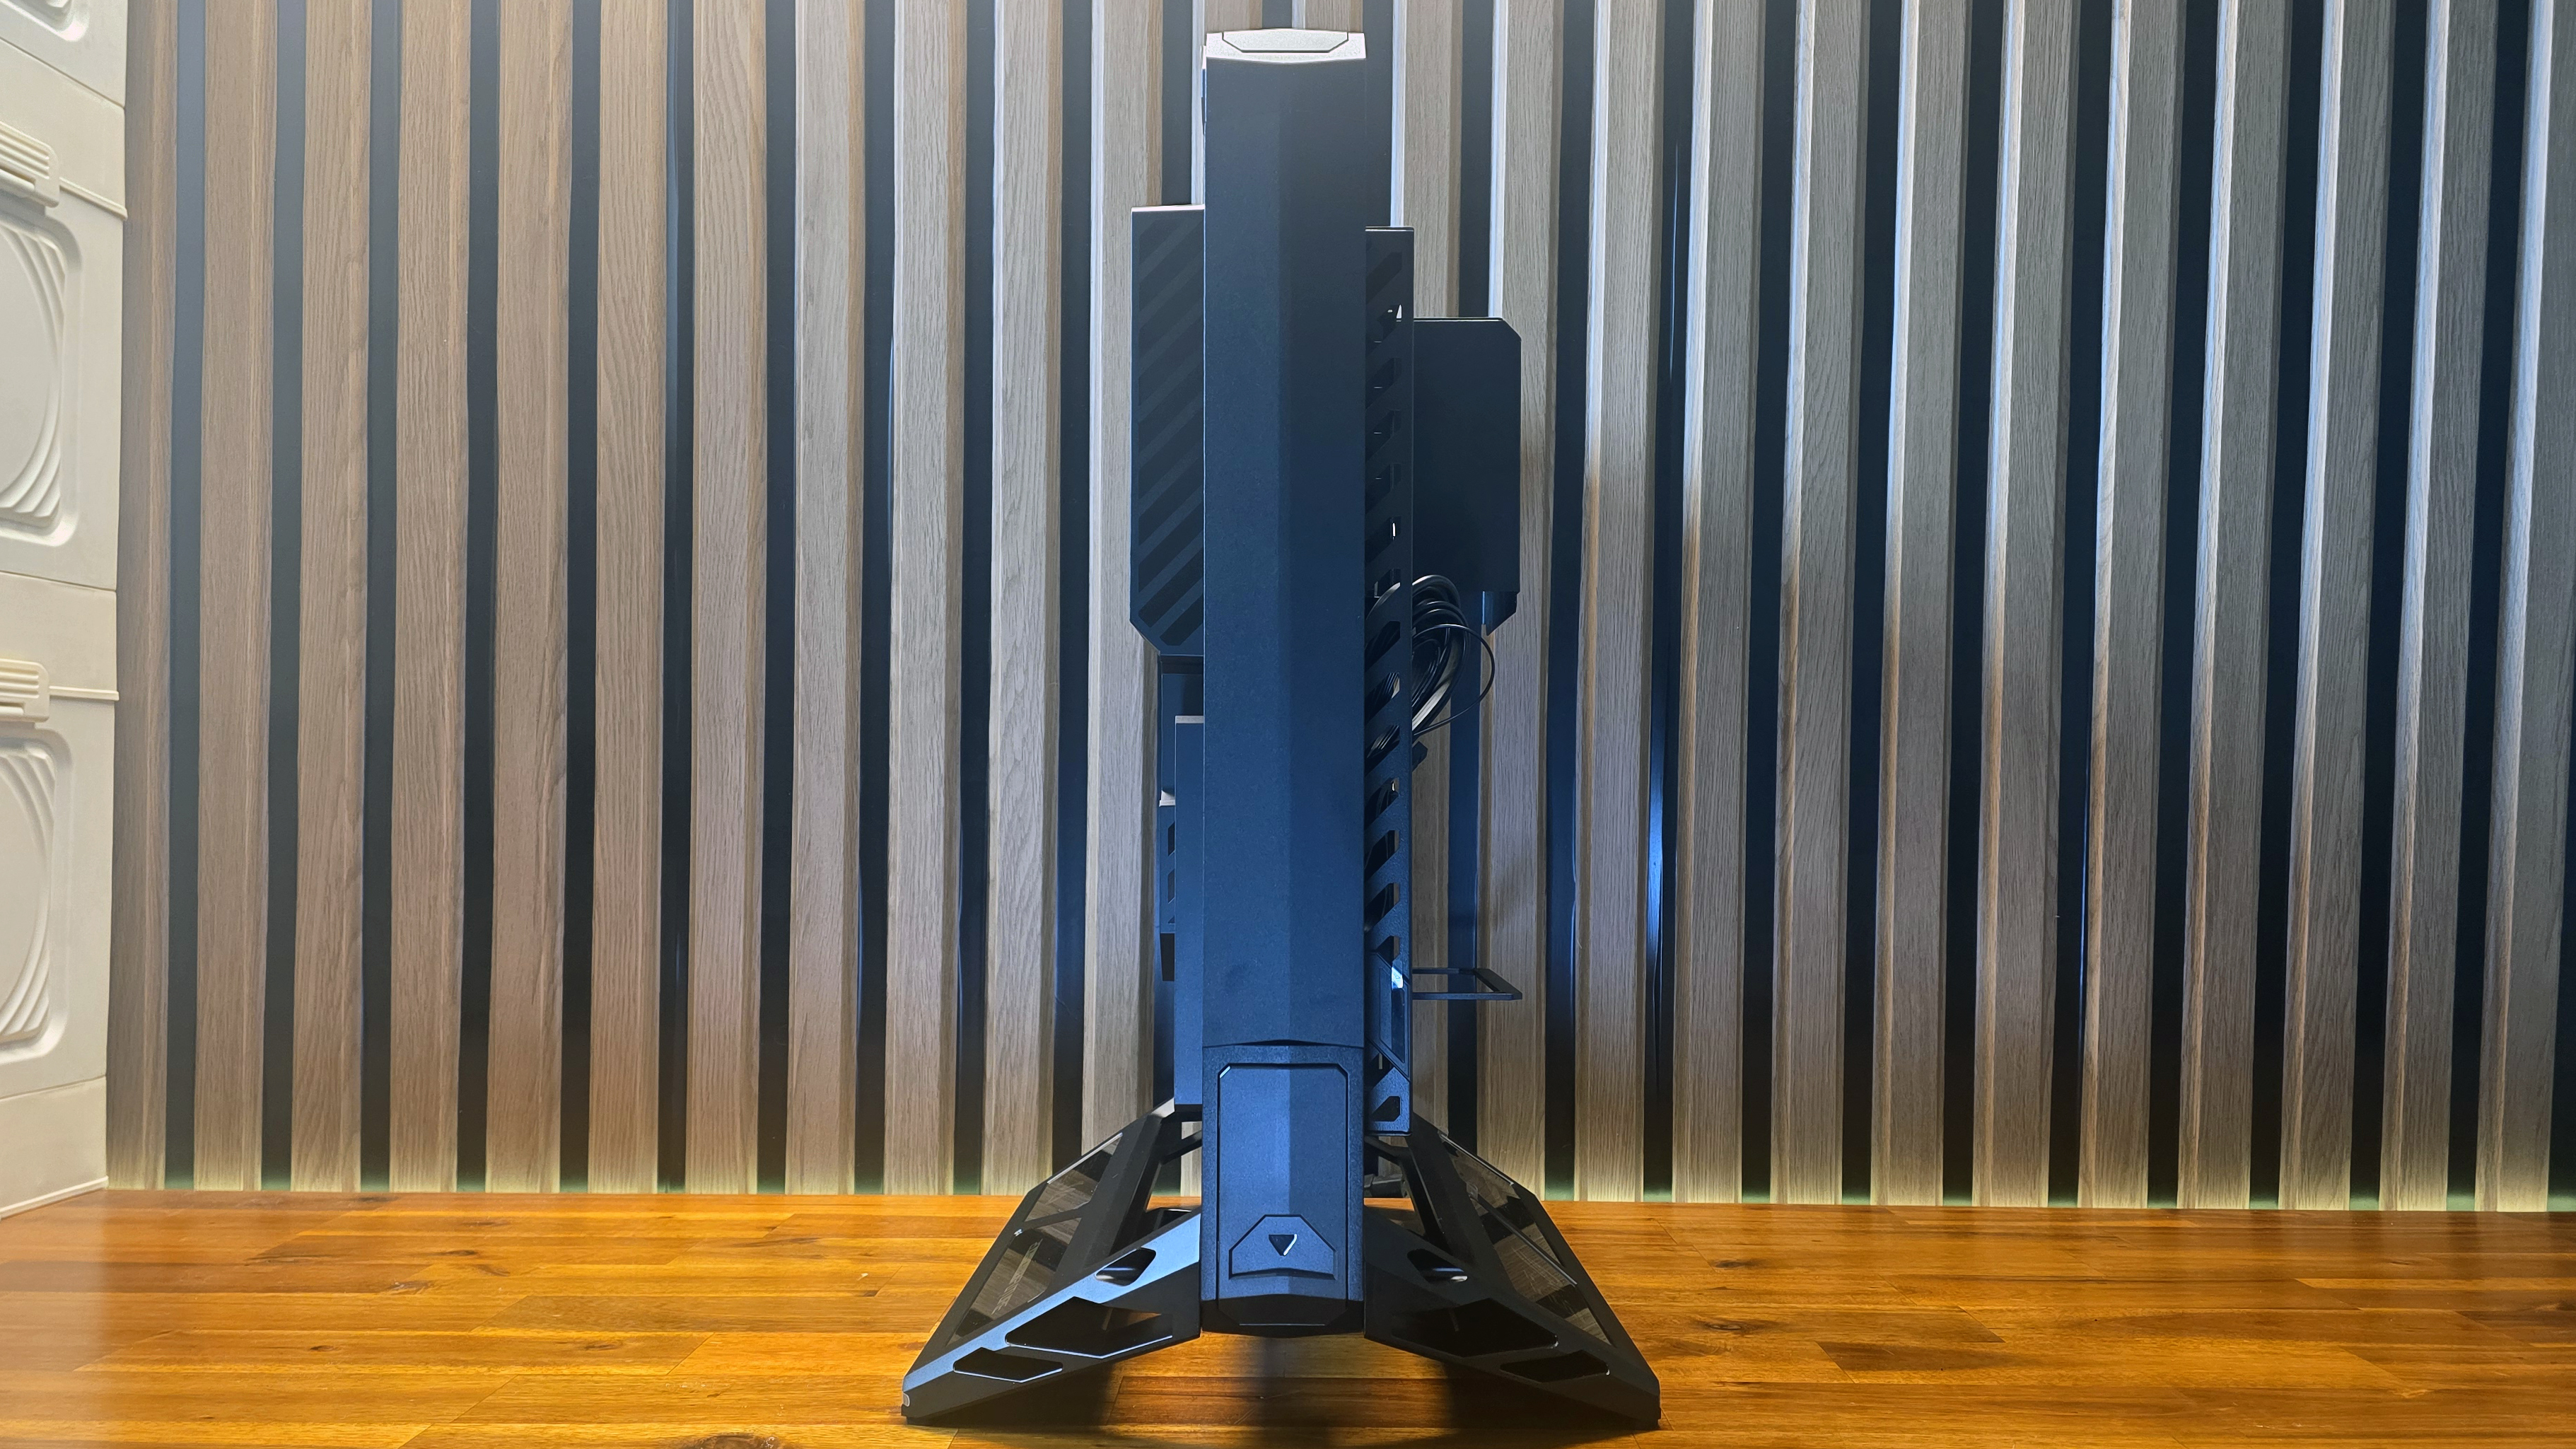
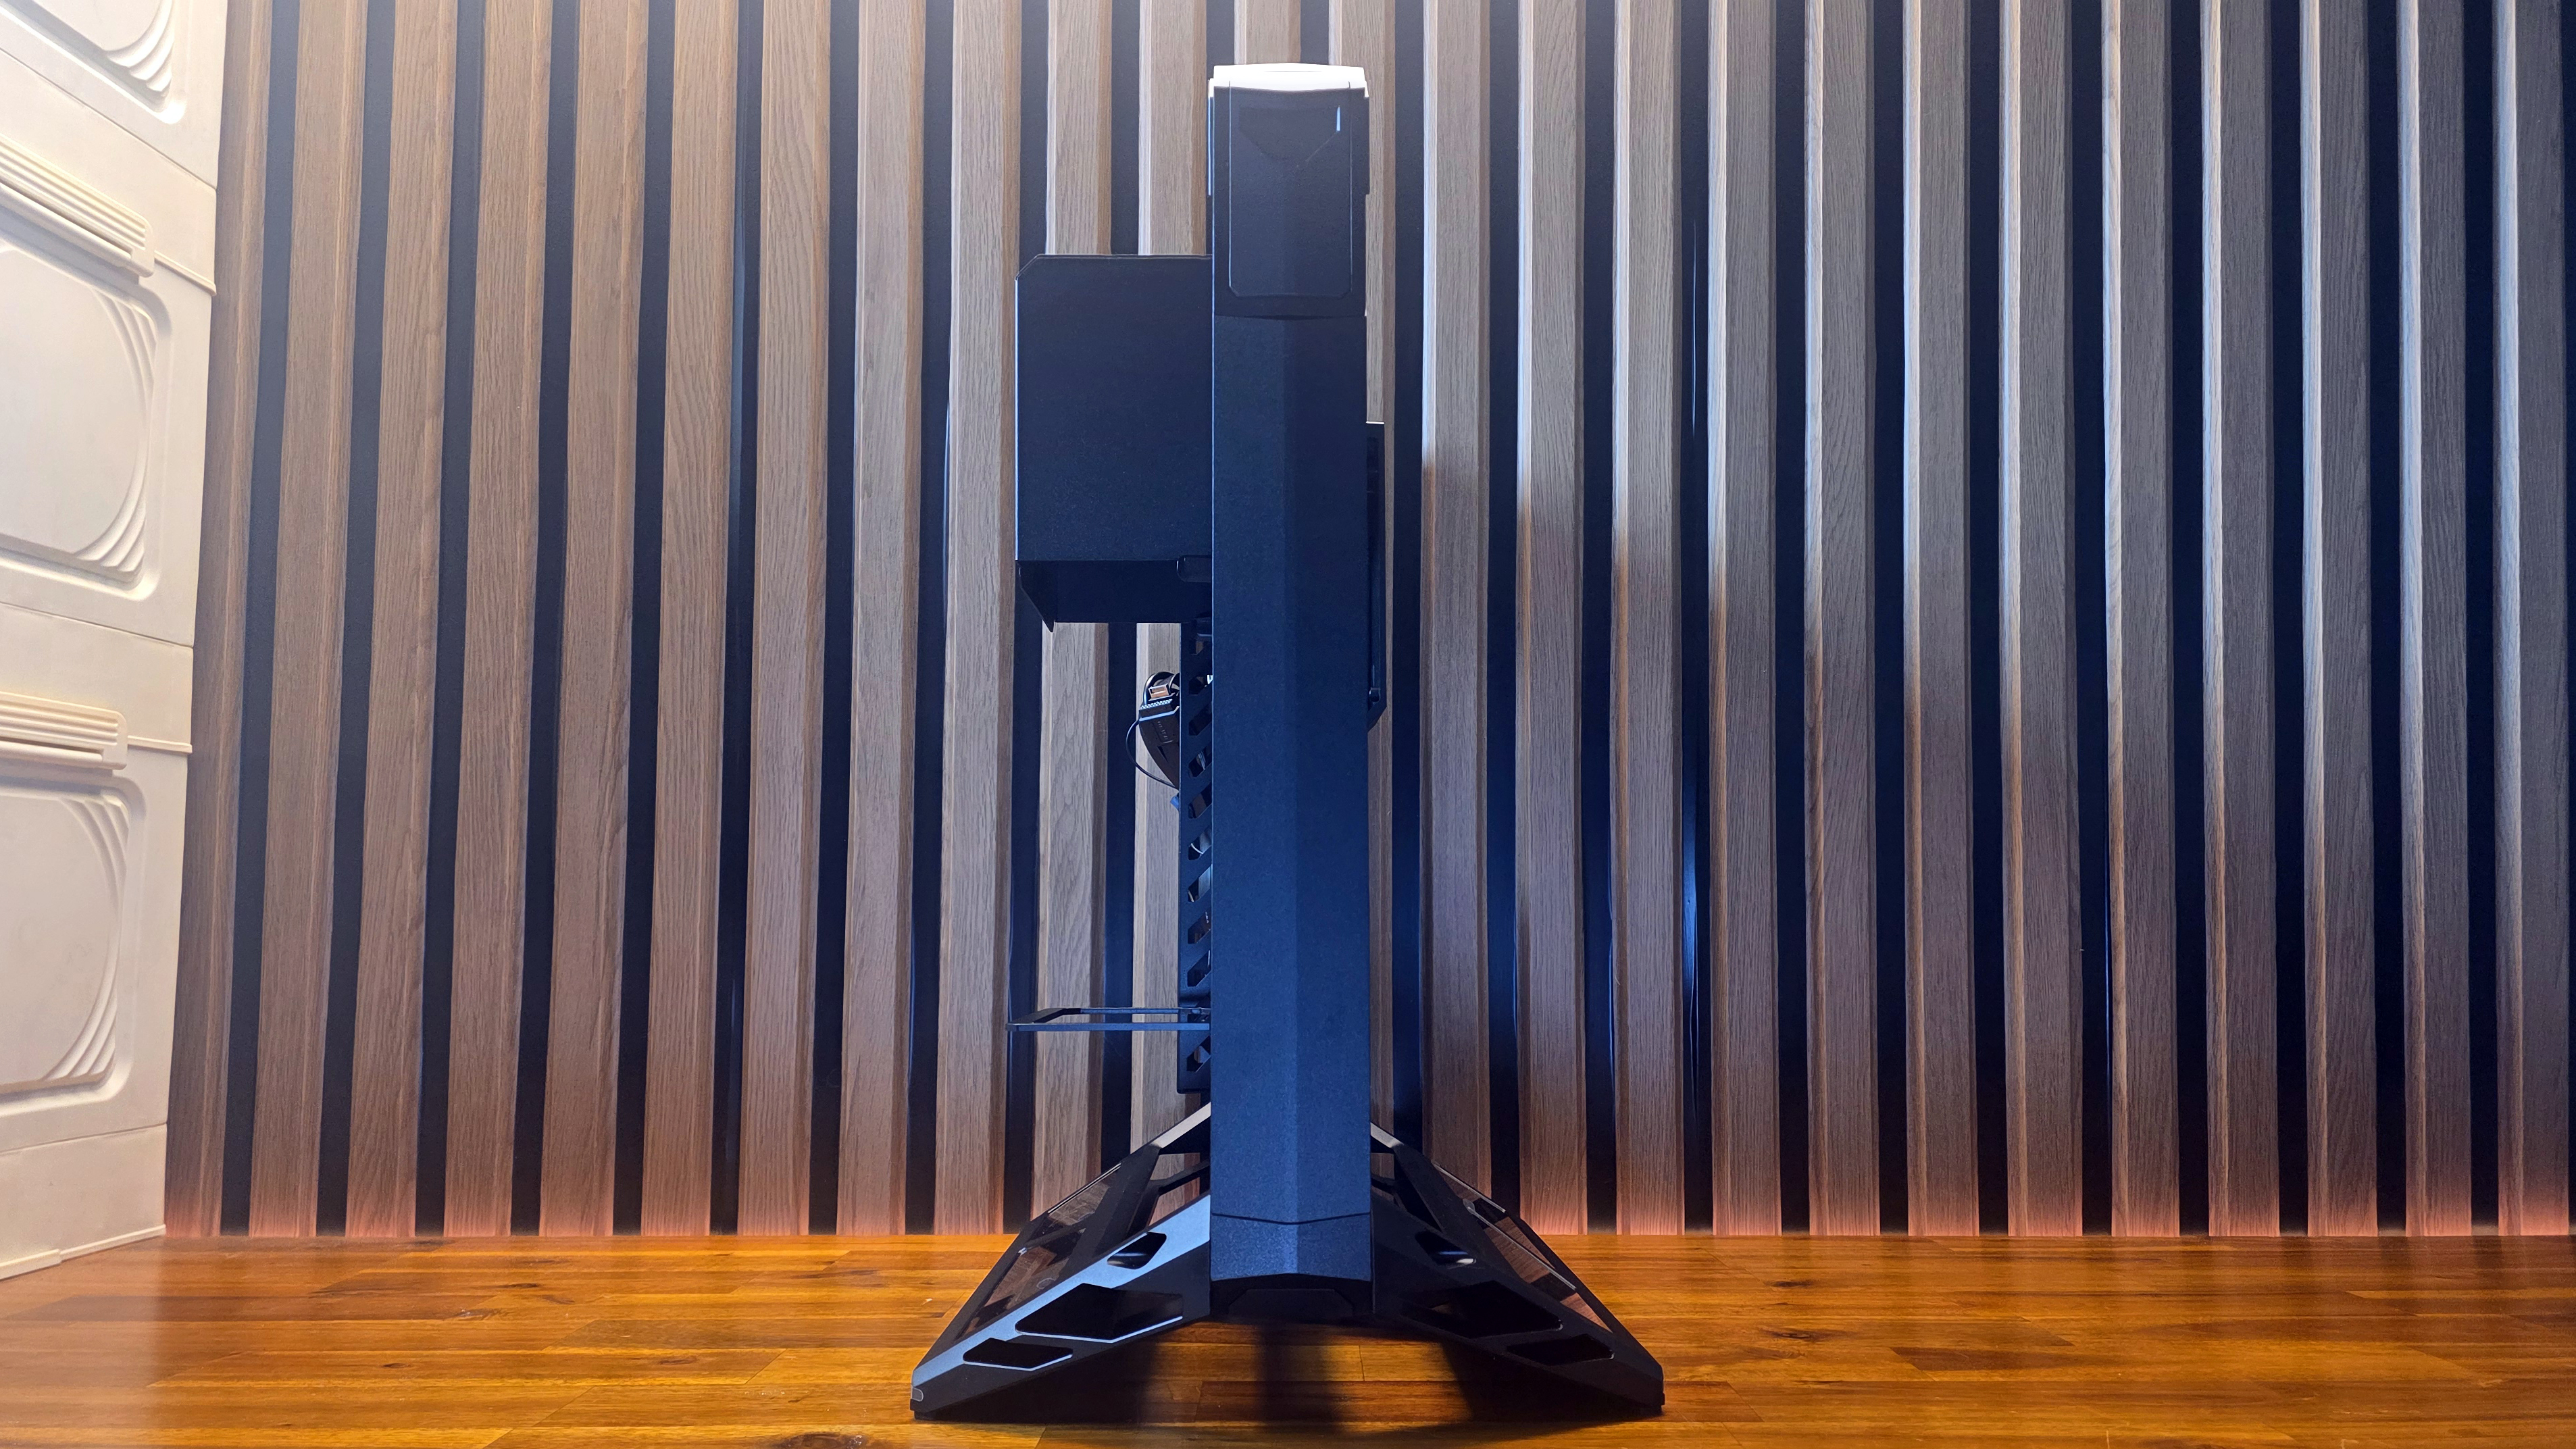
Many of the components here are based on existing parts, with some new aesthetic accents and features, but the ROG G20 is a new open-frame chassis that supports large EATX motherboards and can be converted to stand vertically, horizontally as a testbed, and even diagonally for a striking leaning-back look.
It has a crossflow fan that mounts on the bottom to blow cool air onto the GPU, RGB light strips around the edges, and four fast USB ports (two 5Gbps Type-A and two 20 Gbps Type-C) that can be mounted near the bottom (default) or up top. It’s extremely solidly built, mostly from aluminum, and weighs 20.5 pounds. But some of the cosmetic covers, particularly around the edges, are plastic and magnetically attached. They have a tendency to move and become misaligned easily. In fact, one was stuck to a steel part, several inches from where it belonged when I first took the case out of the box.
It sells for between $650 and $730. If that sounds like a lot for a case, it is. But if you’re feeling sticker shock already, buckle up because we’re just getting started.
Motherboard
Asus ROG Crosshair X870E Edition 20 motherboard with integrated ROG Ryujin 360 liquid cooler
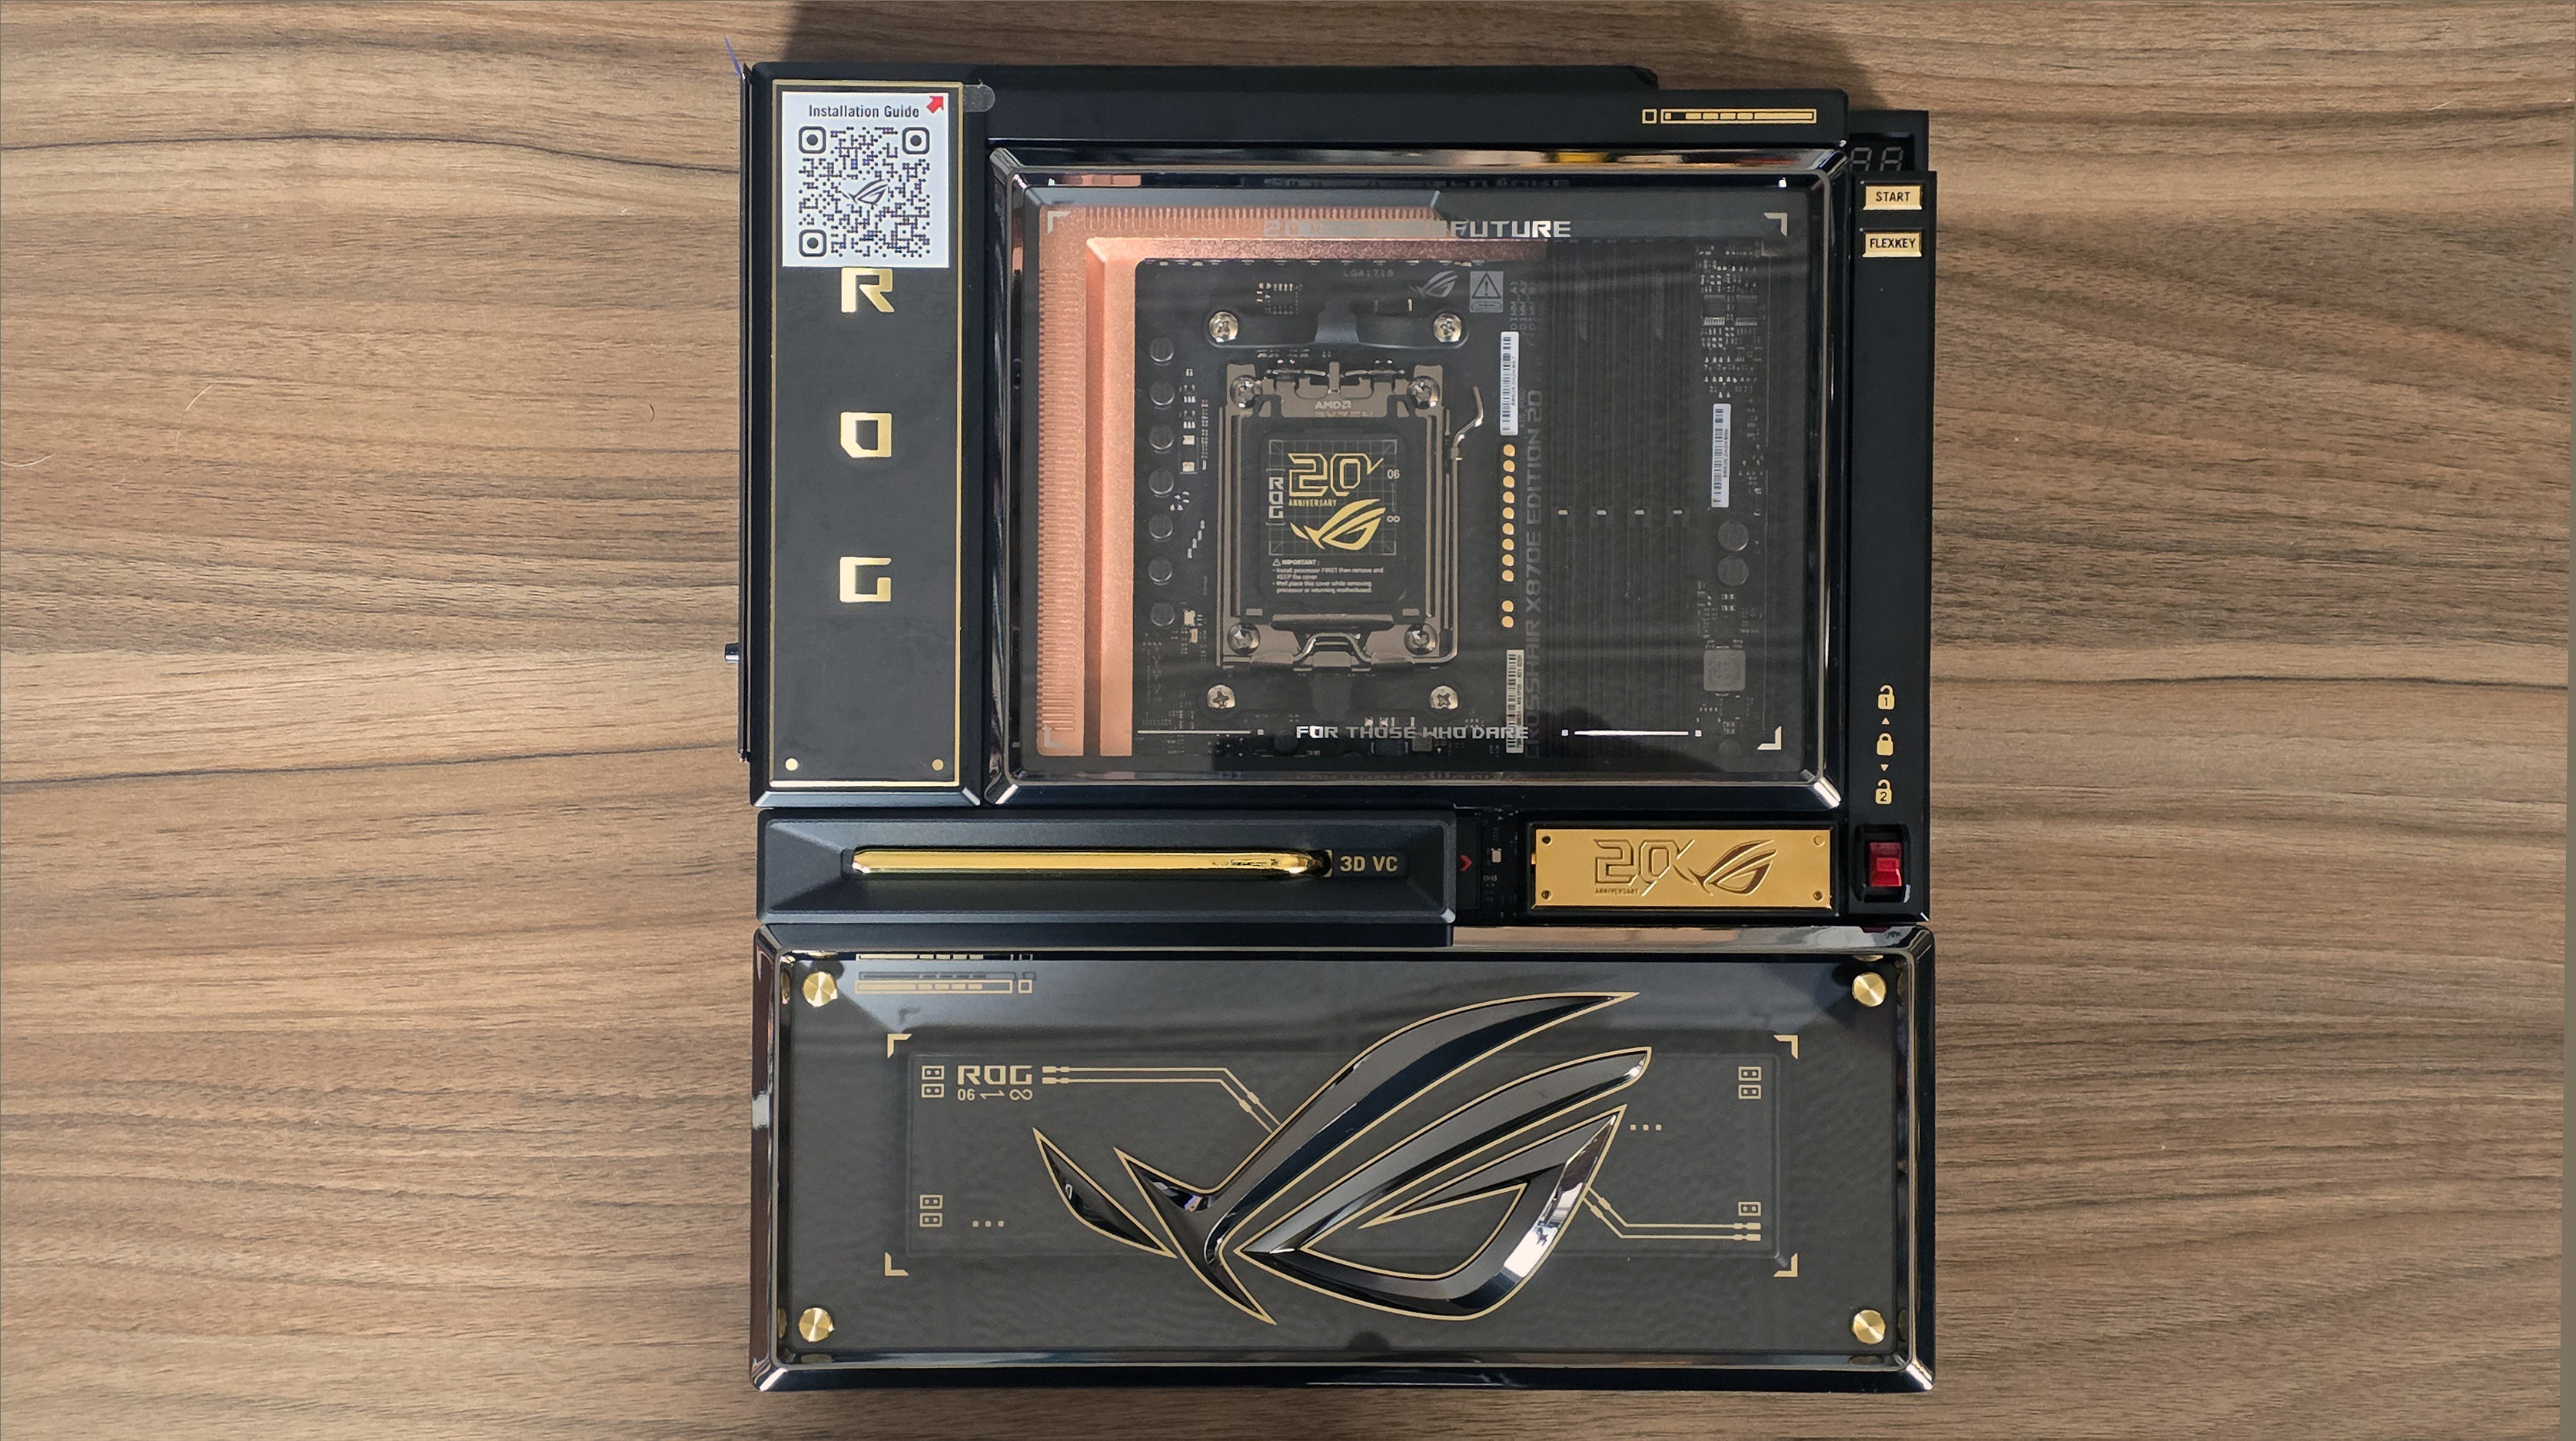
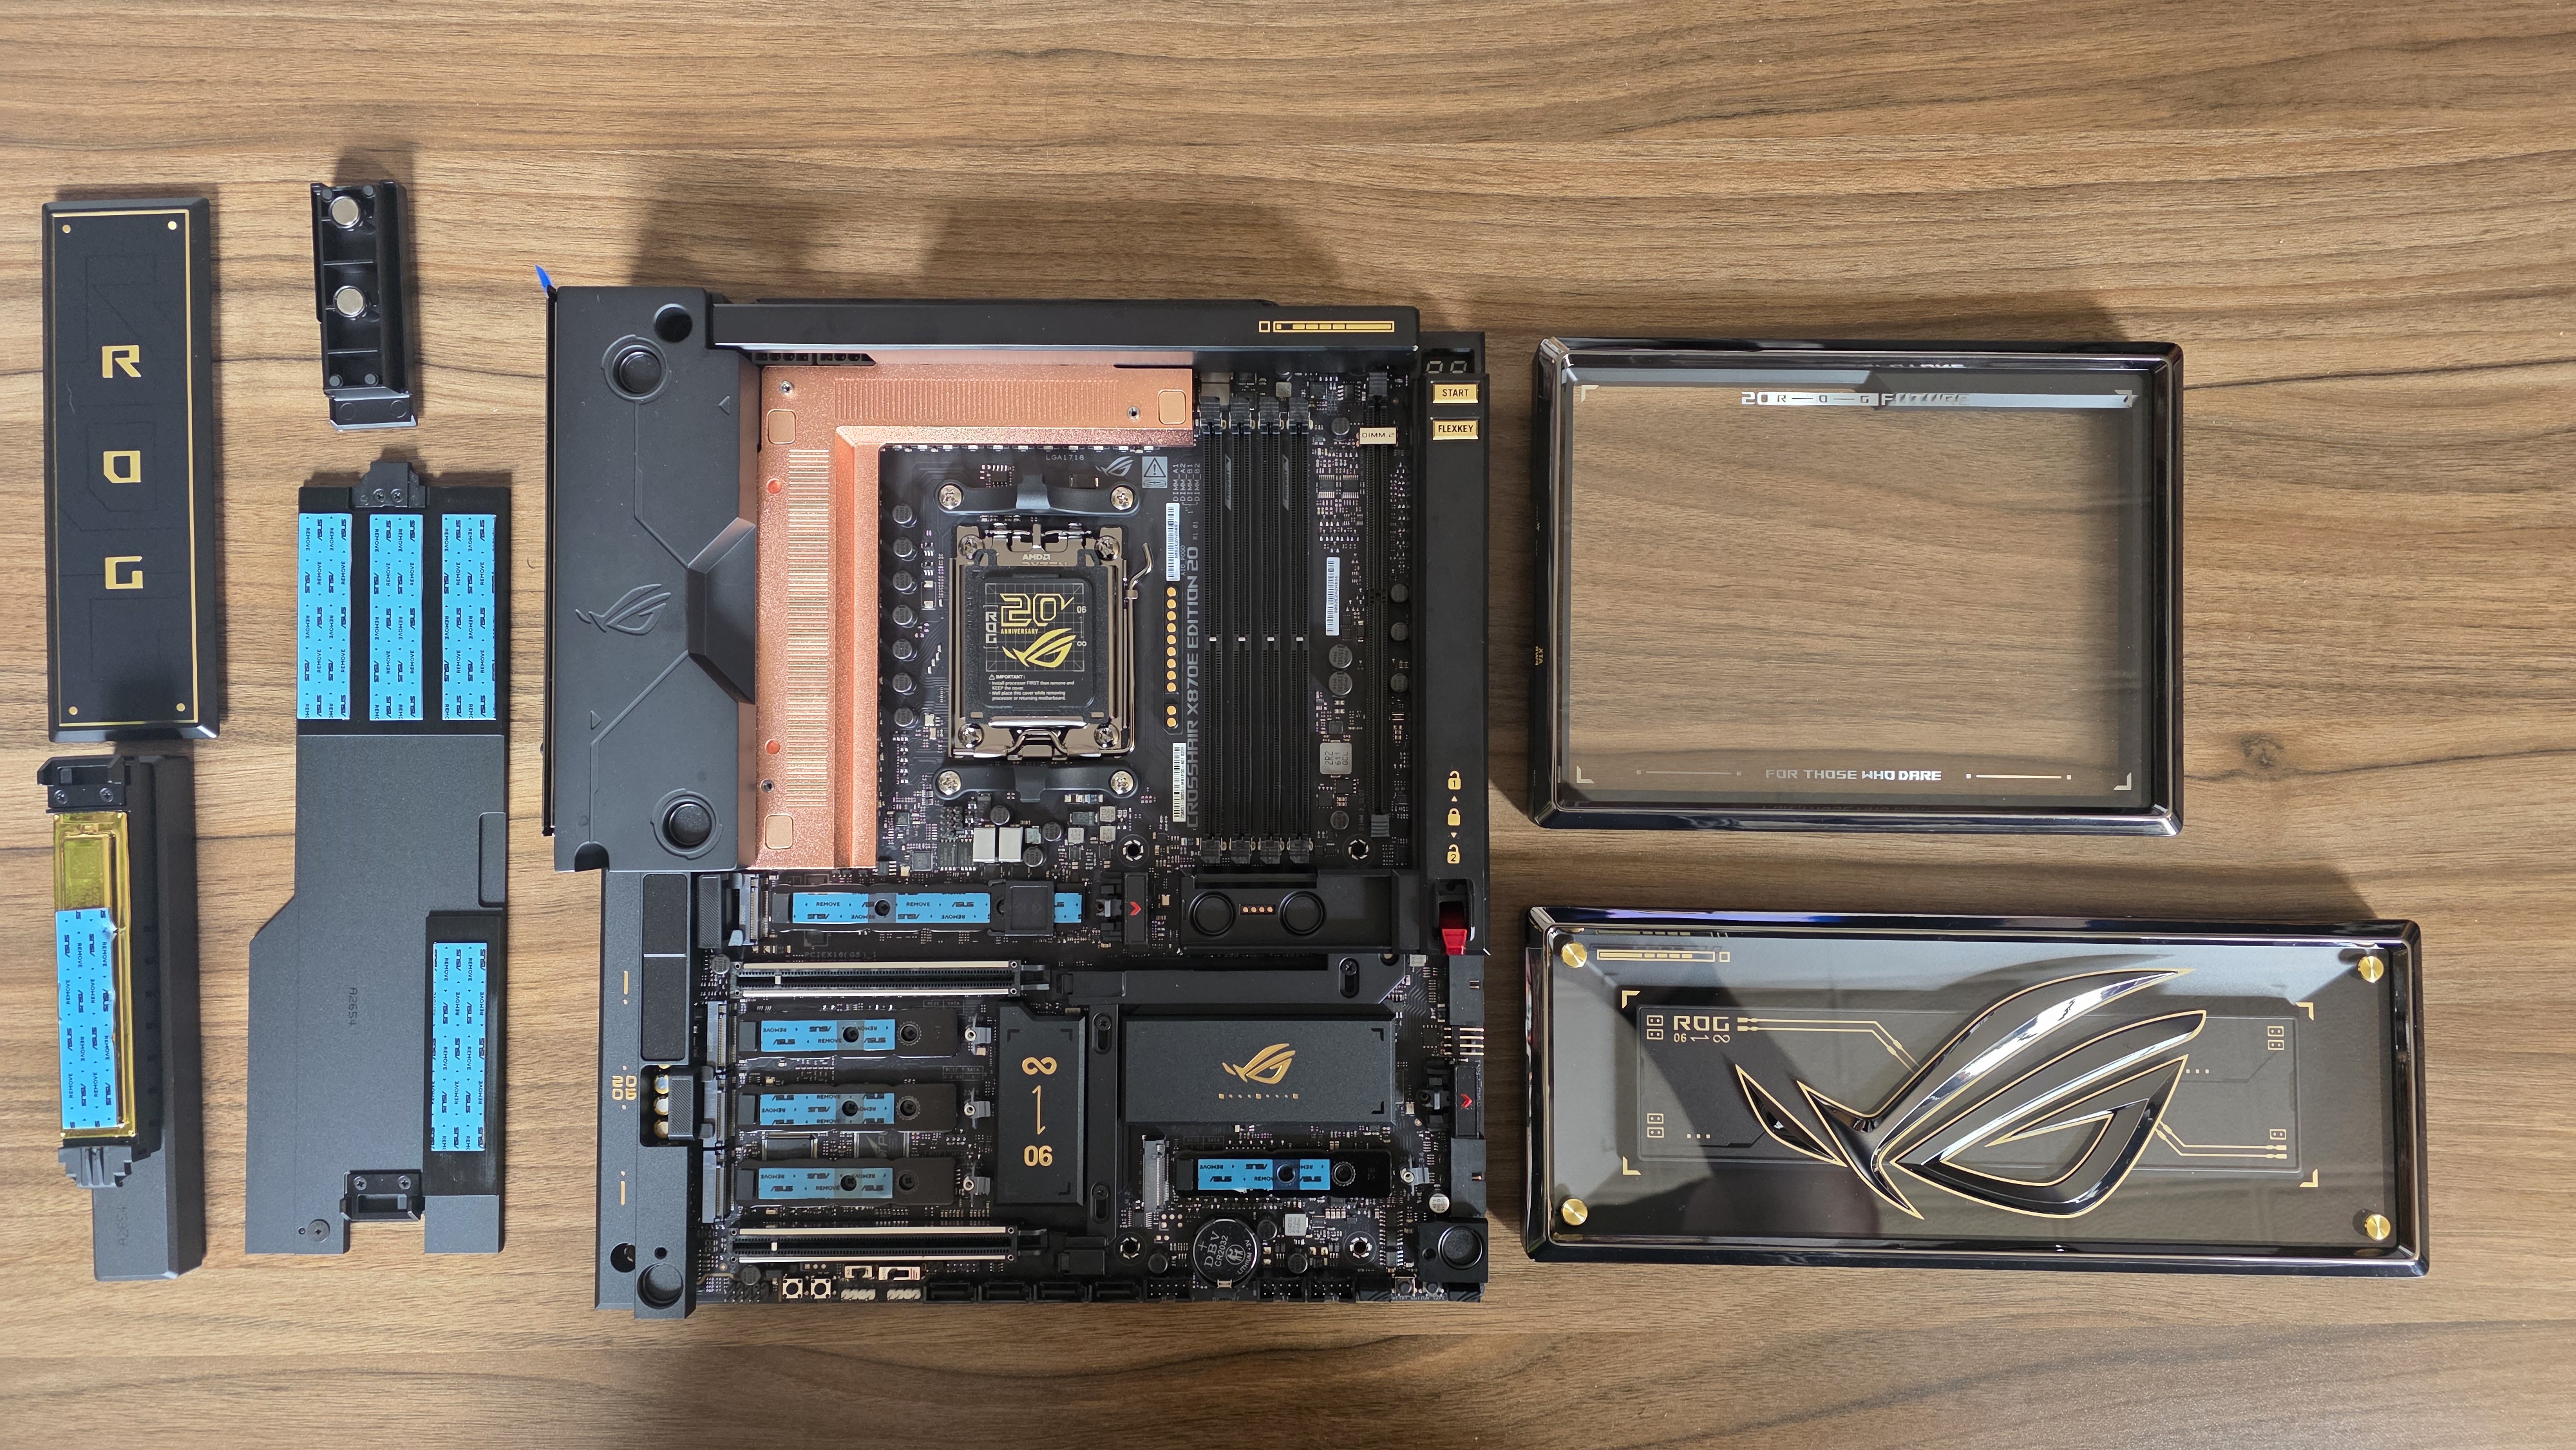
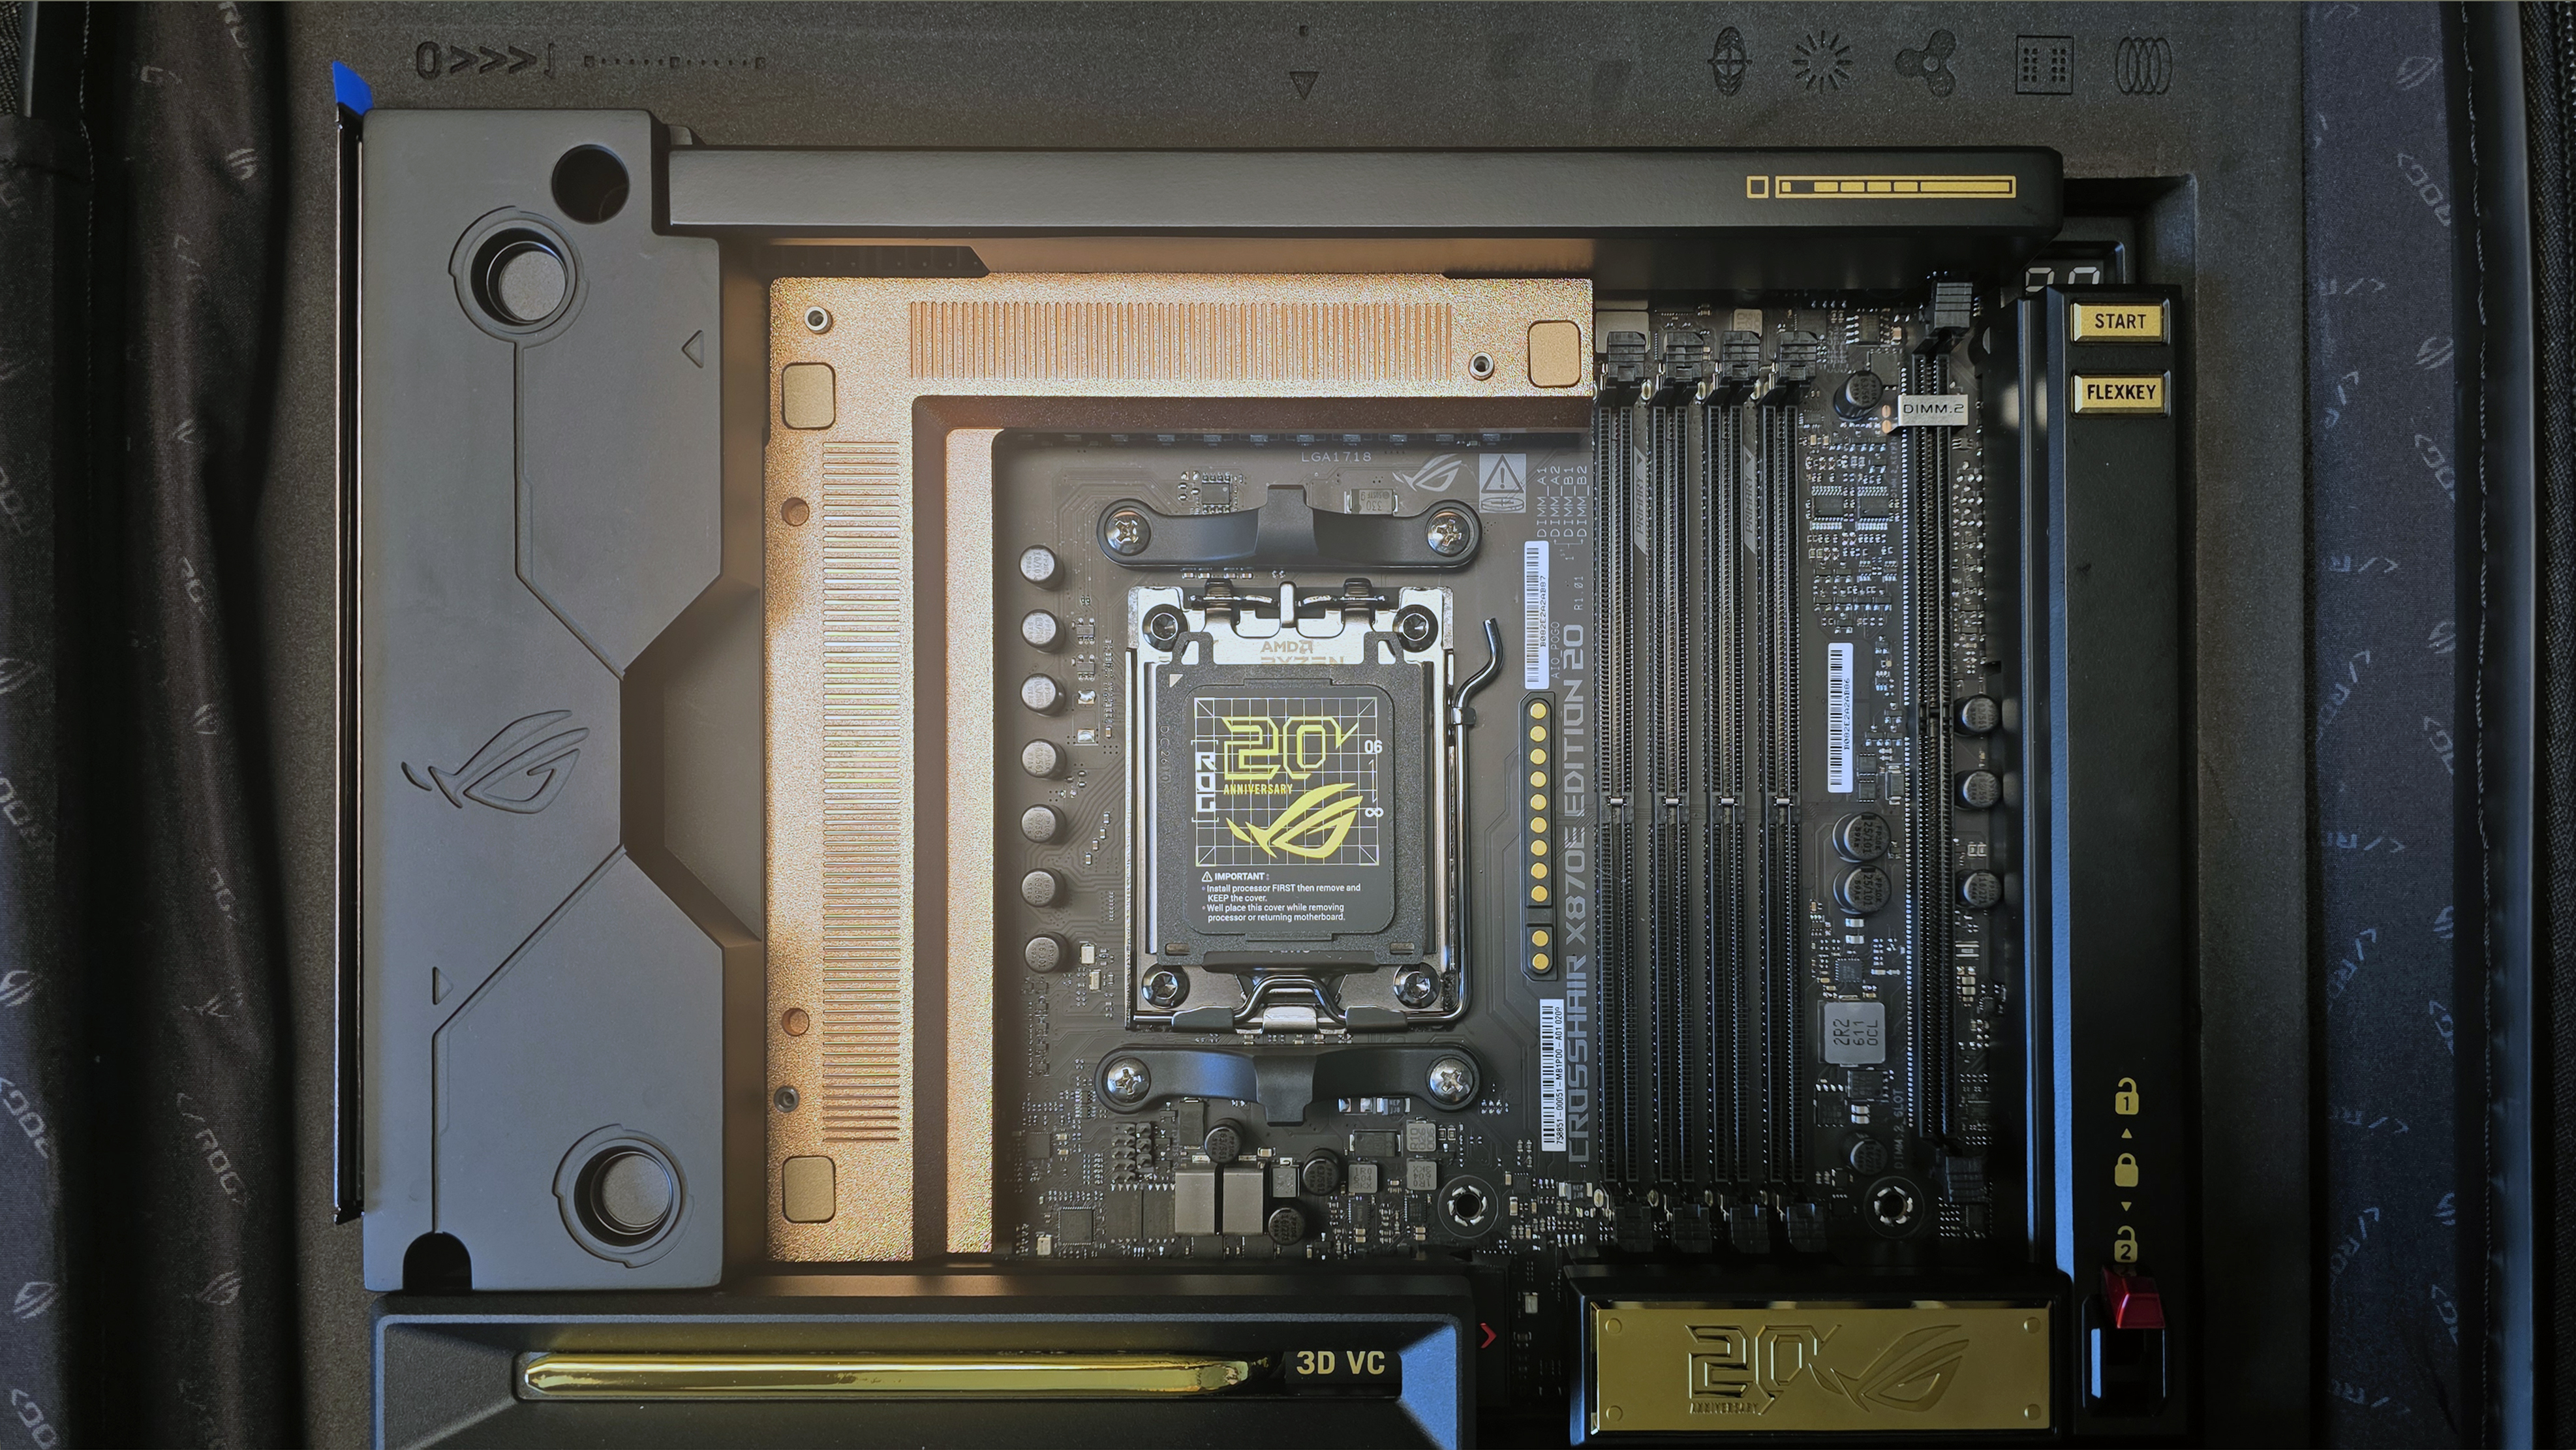
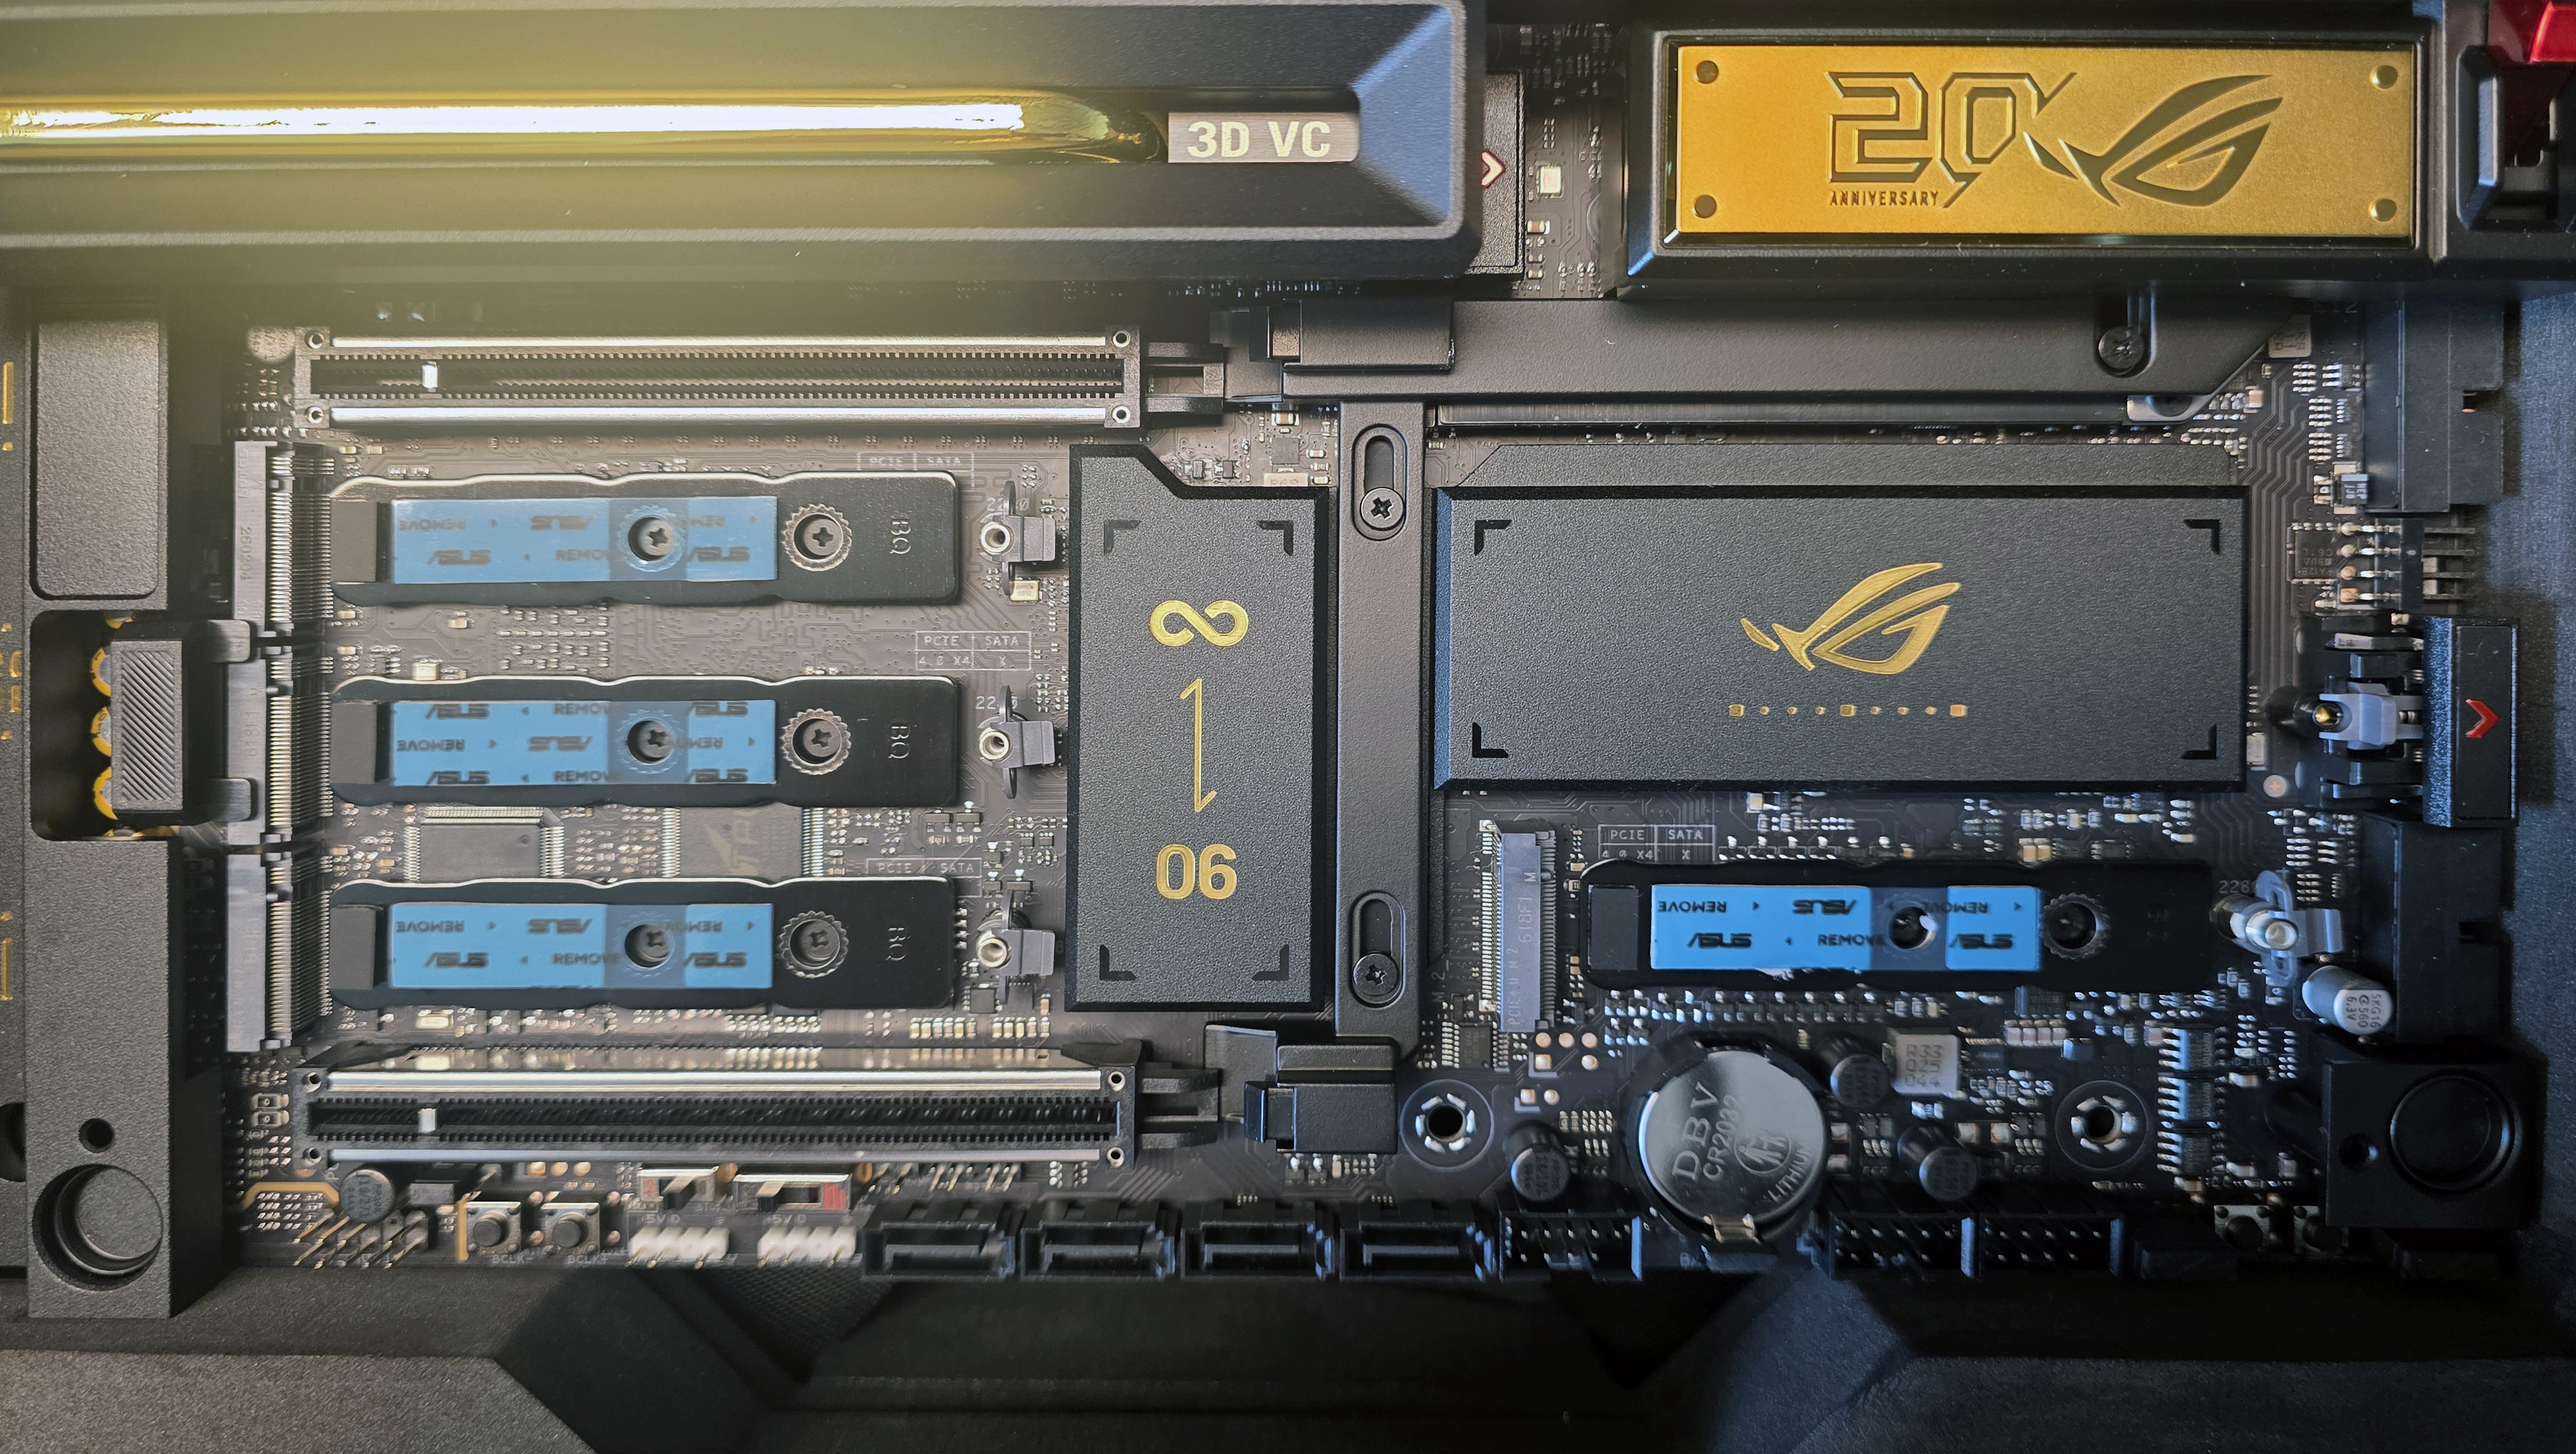
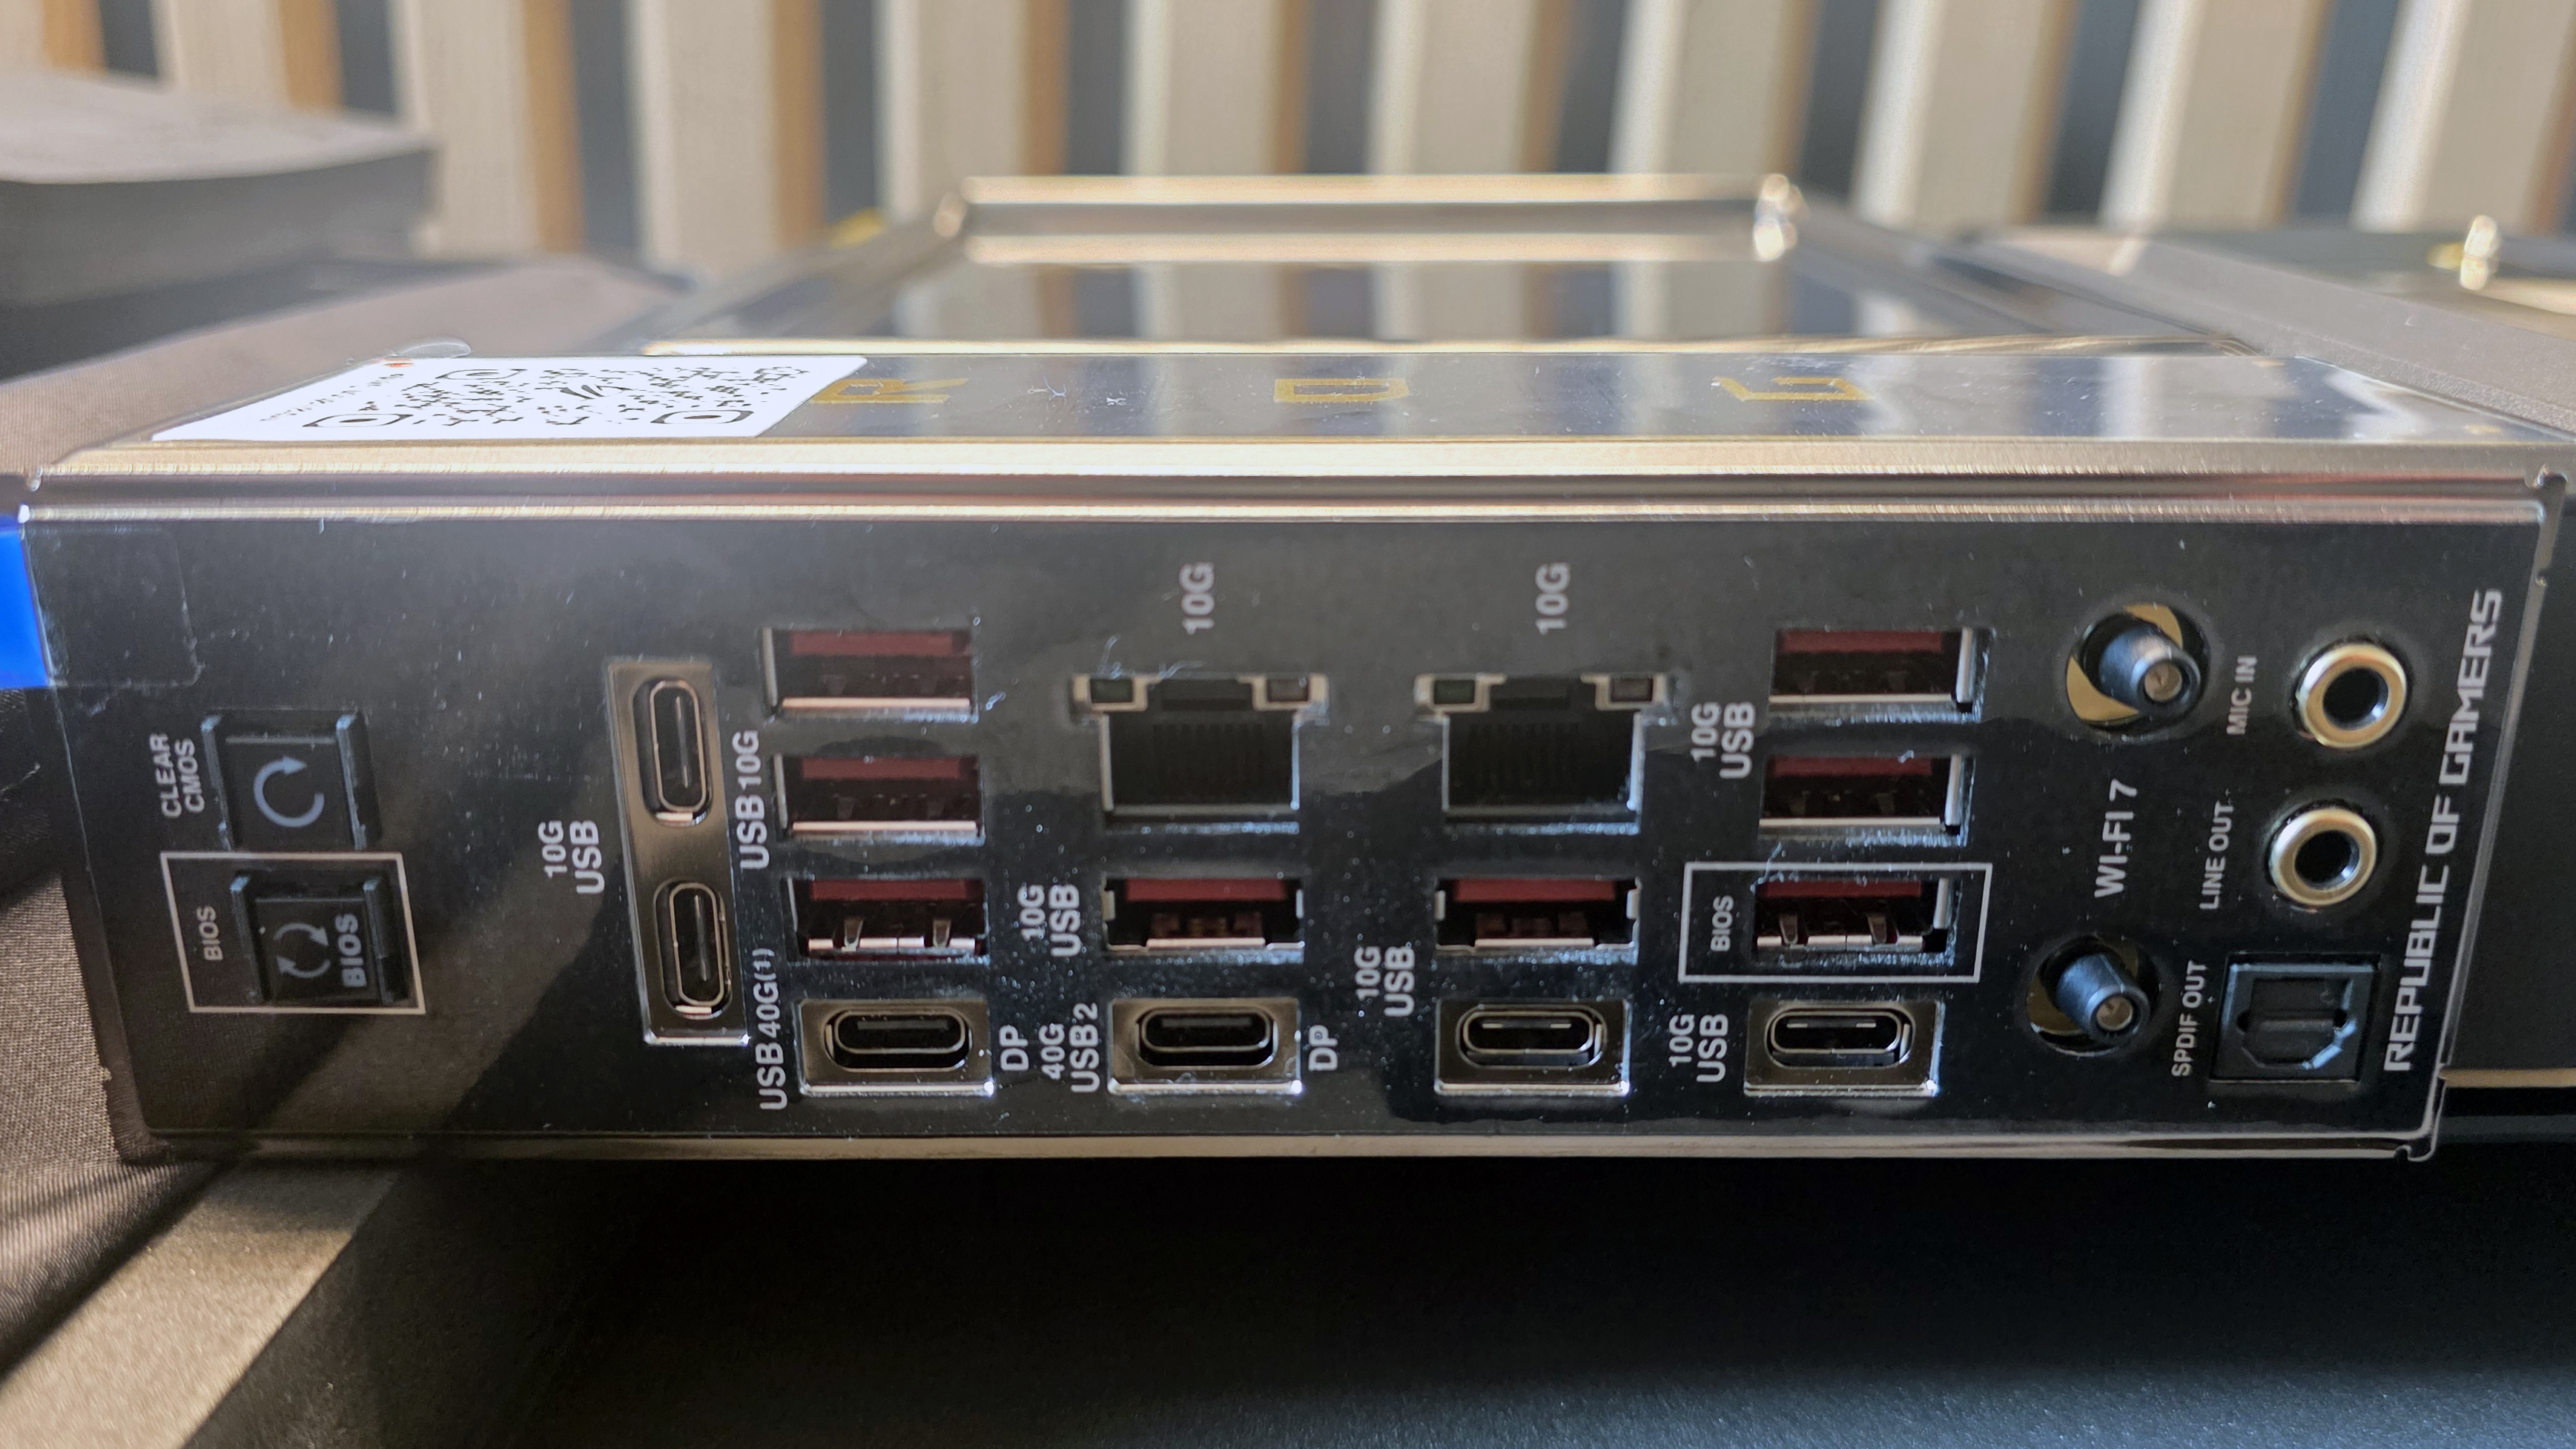
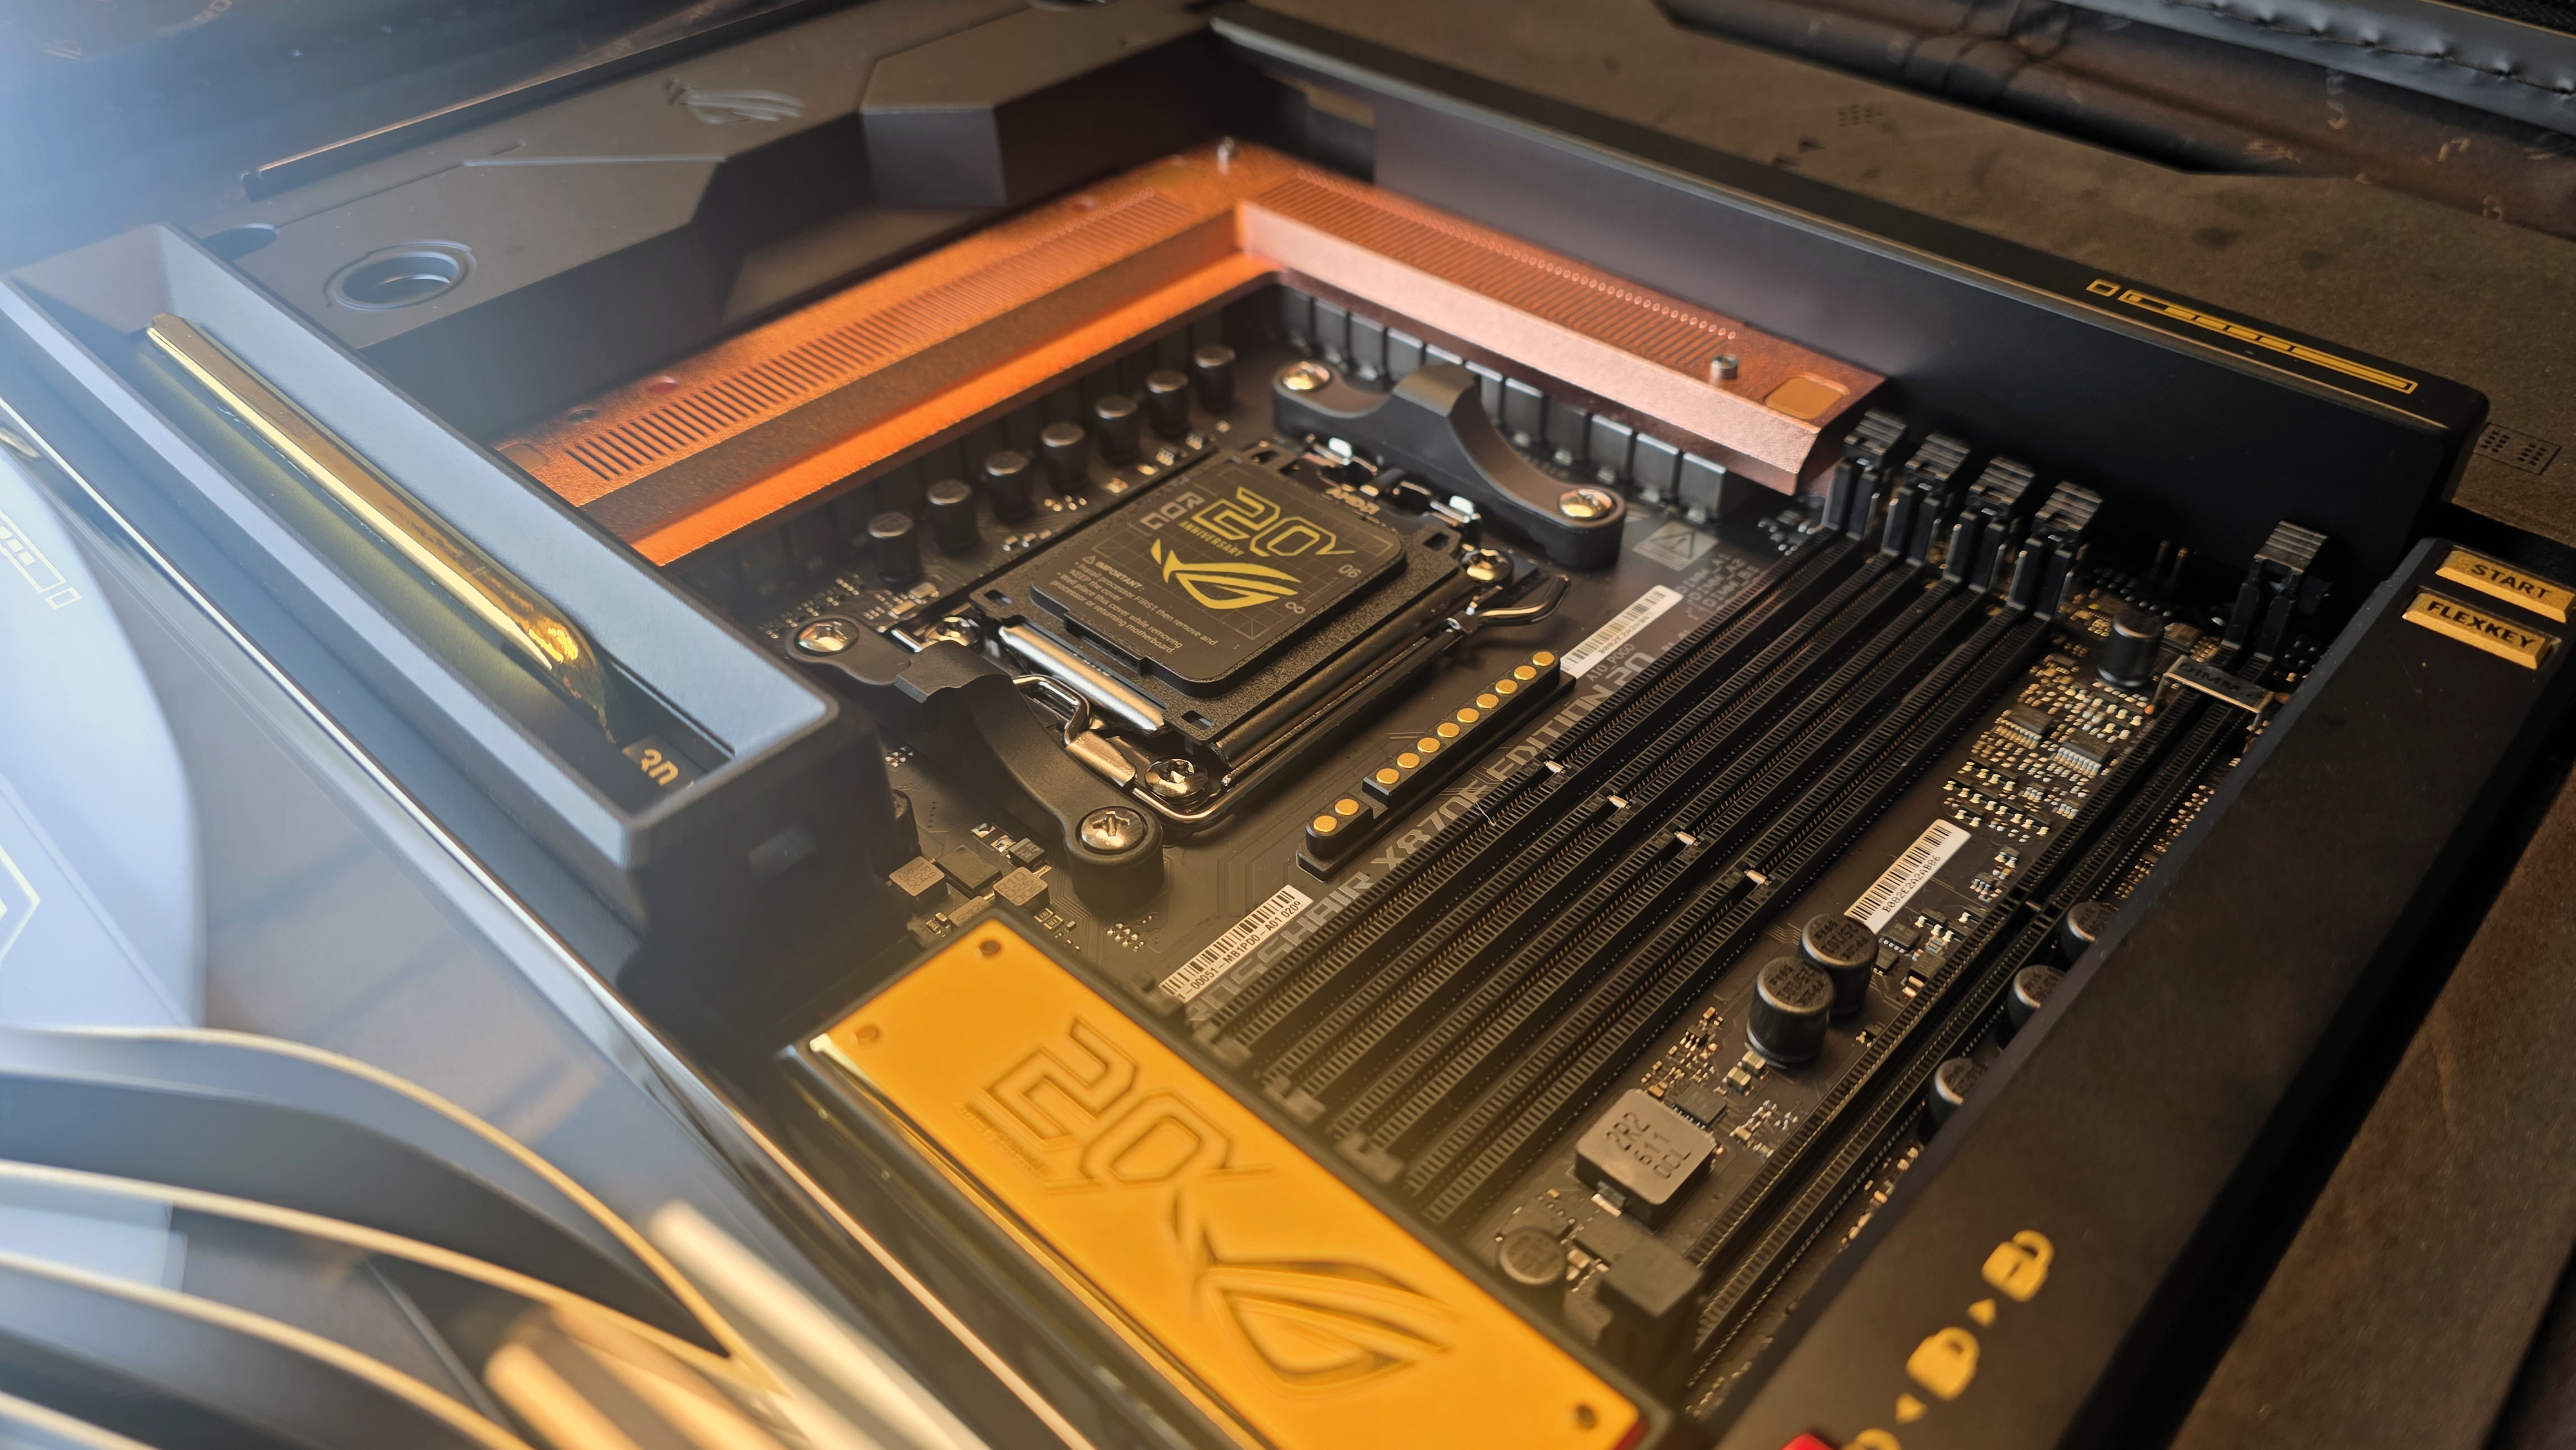
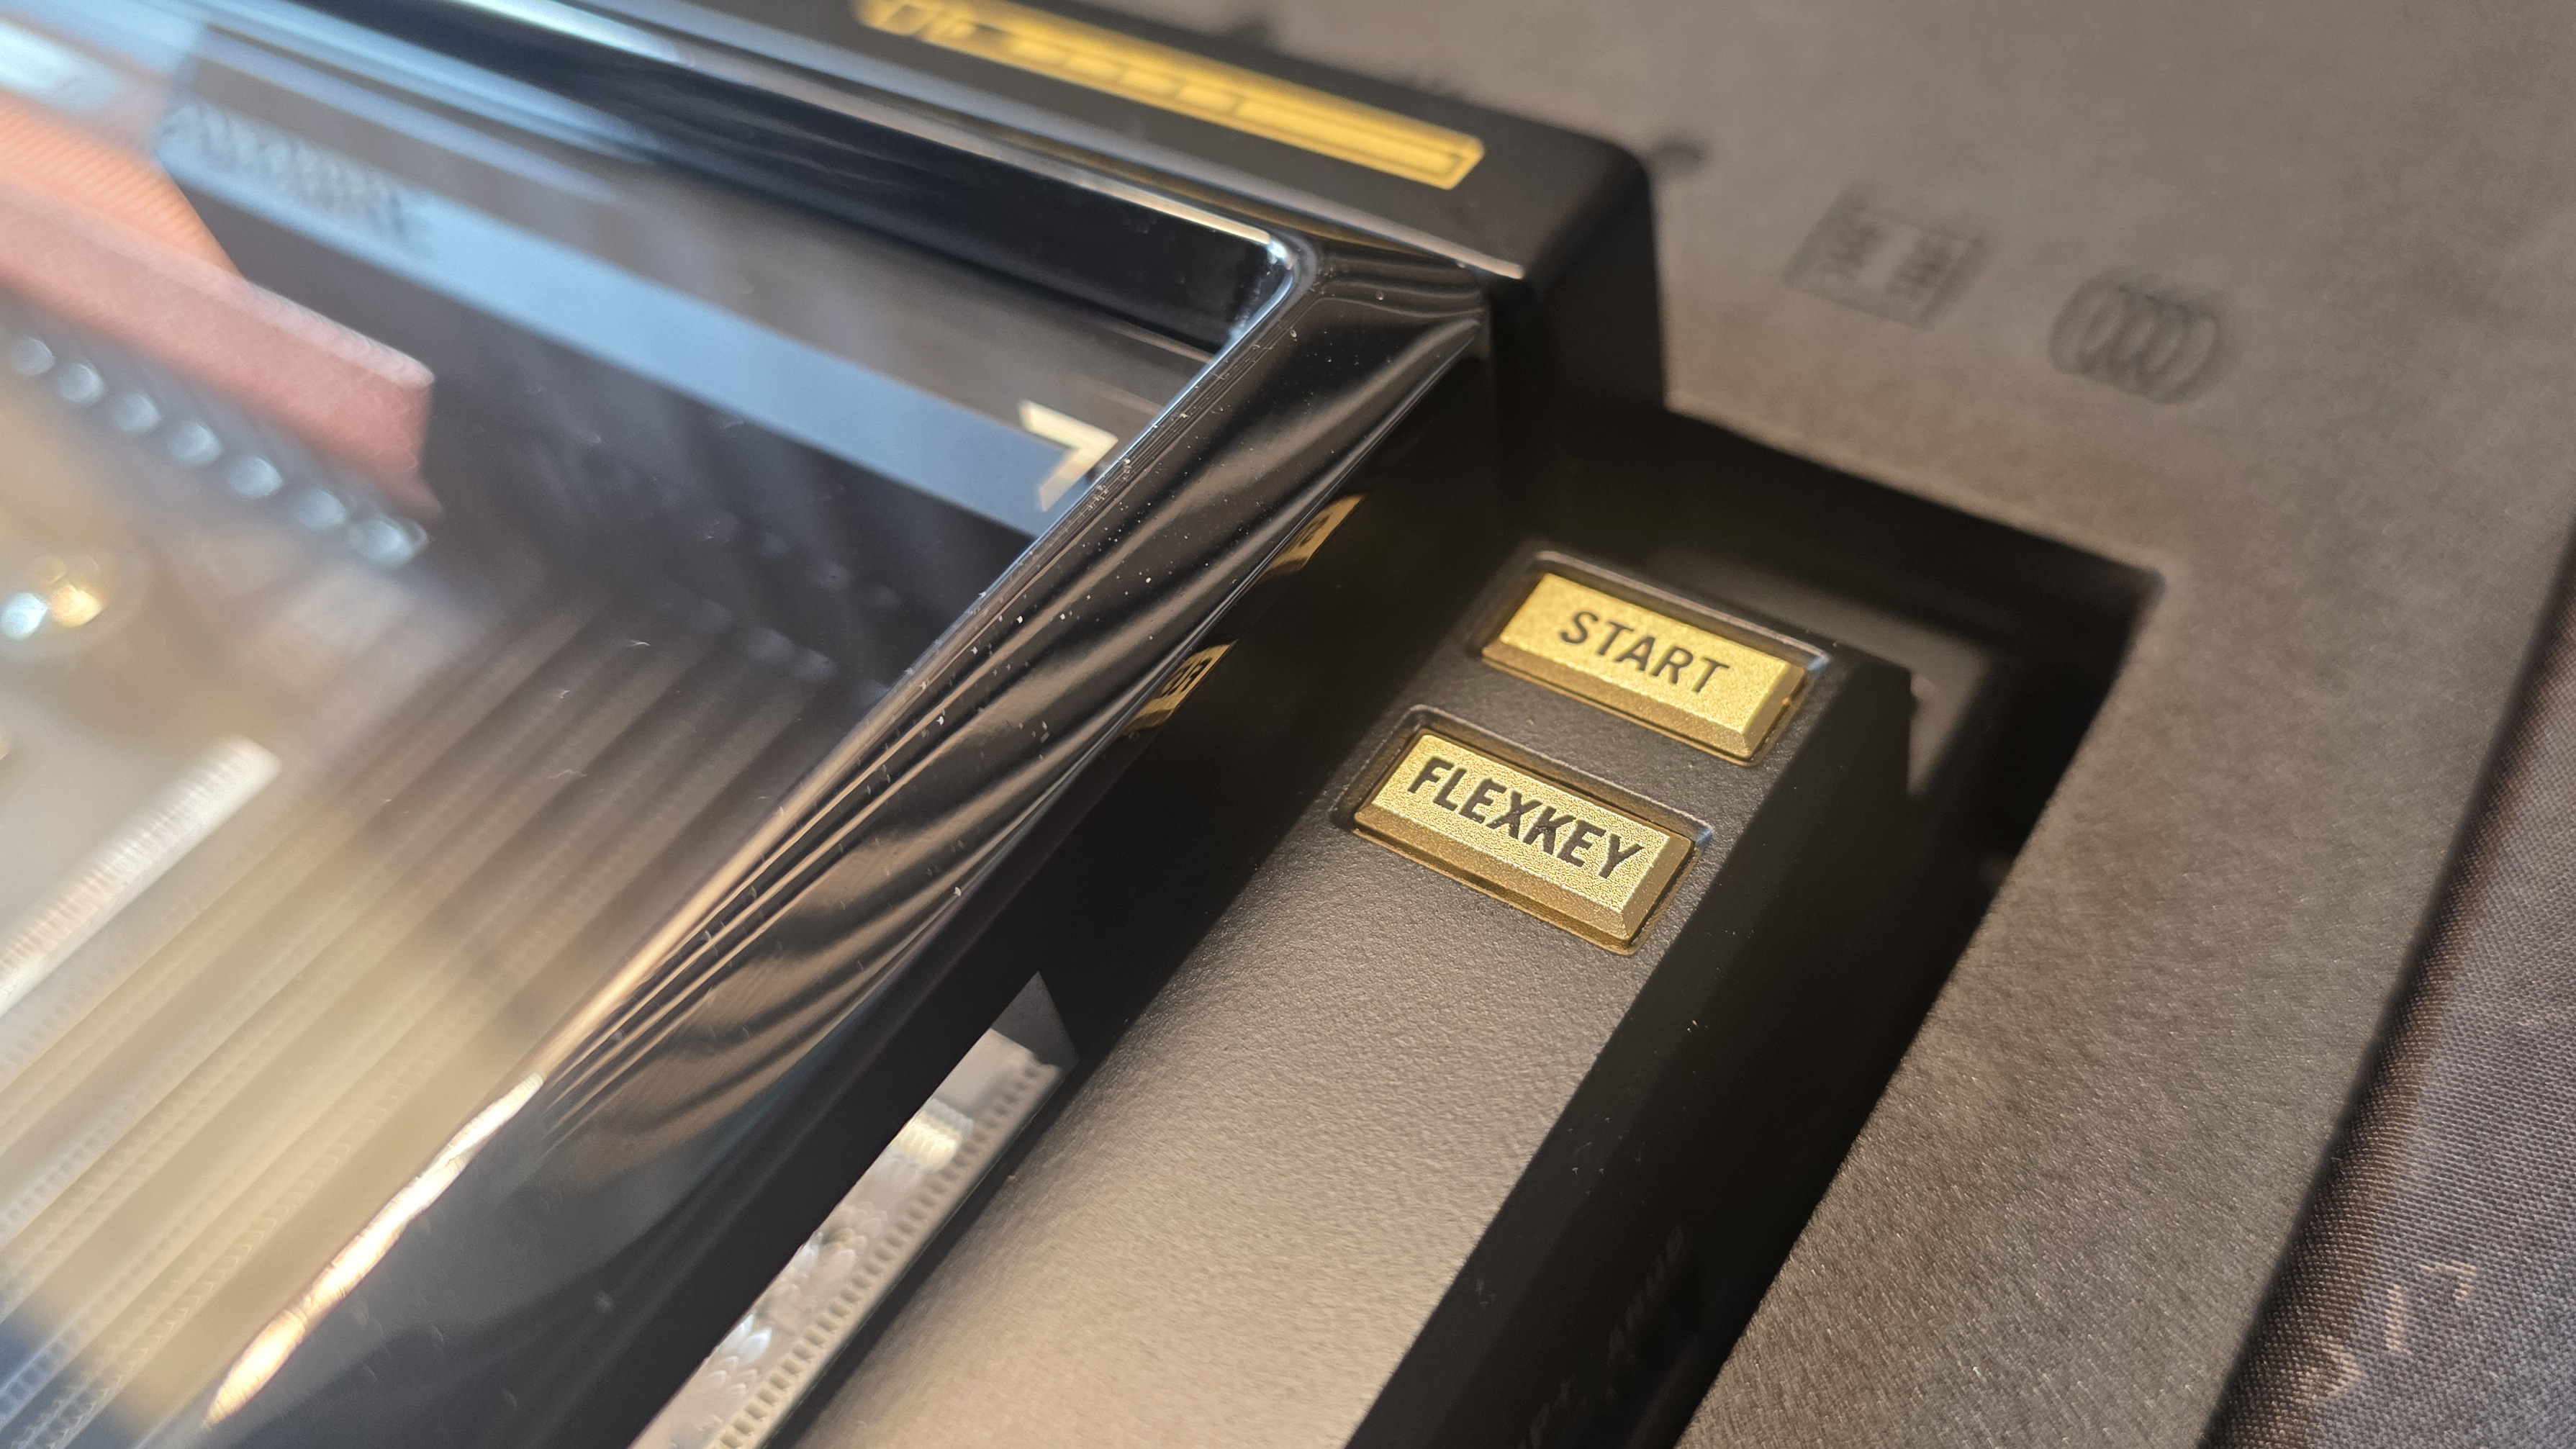
Asus offers a few iterations of its Crosshair X870E E-ATX flagship board. This Crosshair X870E Edition 20 variant, apart from the gold accents of the Edition 20 lineup, supports up to nine M.2 SSDs (five on the board and four via two included add-in cards), and has more USB-C ports than any board I’ve seen outside of a trade show (six, plus two 20 Gbps front-panel connectors).
It also has large copper VRM heatsinks designed to specifically thermally mesh with the bundled Ryugin 260 Edition 20 AIO cooler. The cooler has a massive curved 6.7-inch AMOLED screen (actually two of the curved screens we’ve seen on some other AIOs, stacked on top of one another). The cooler also features a massive copper heatsink bigger than my hand. It’s arguably overkill for anything AMD has put out on AM5 to date. But of course, high-end motherboards and coolers are all about overkill. And when you’re paying $3,299.99 for a motherboard and cooler combo, some level of overkill should probably be expected.
GPU
Asus ROG Astral GeForce RTX 5090 Edition 20 graphics card
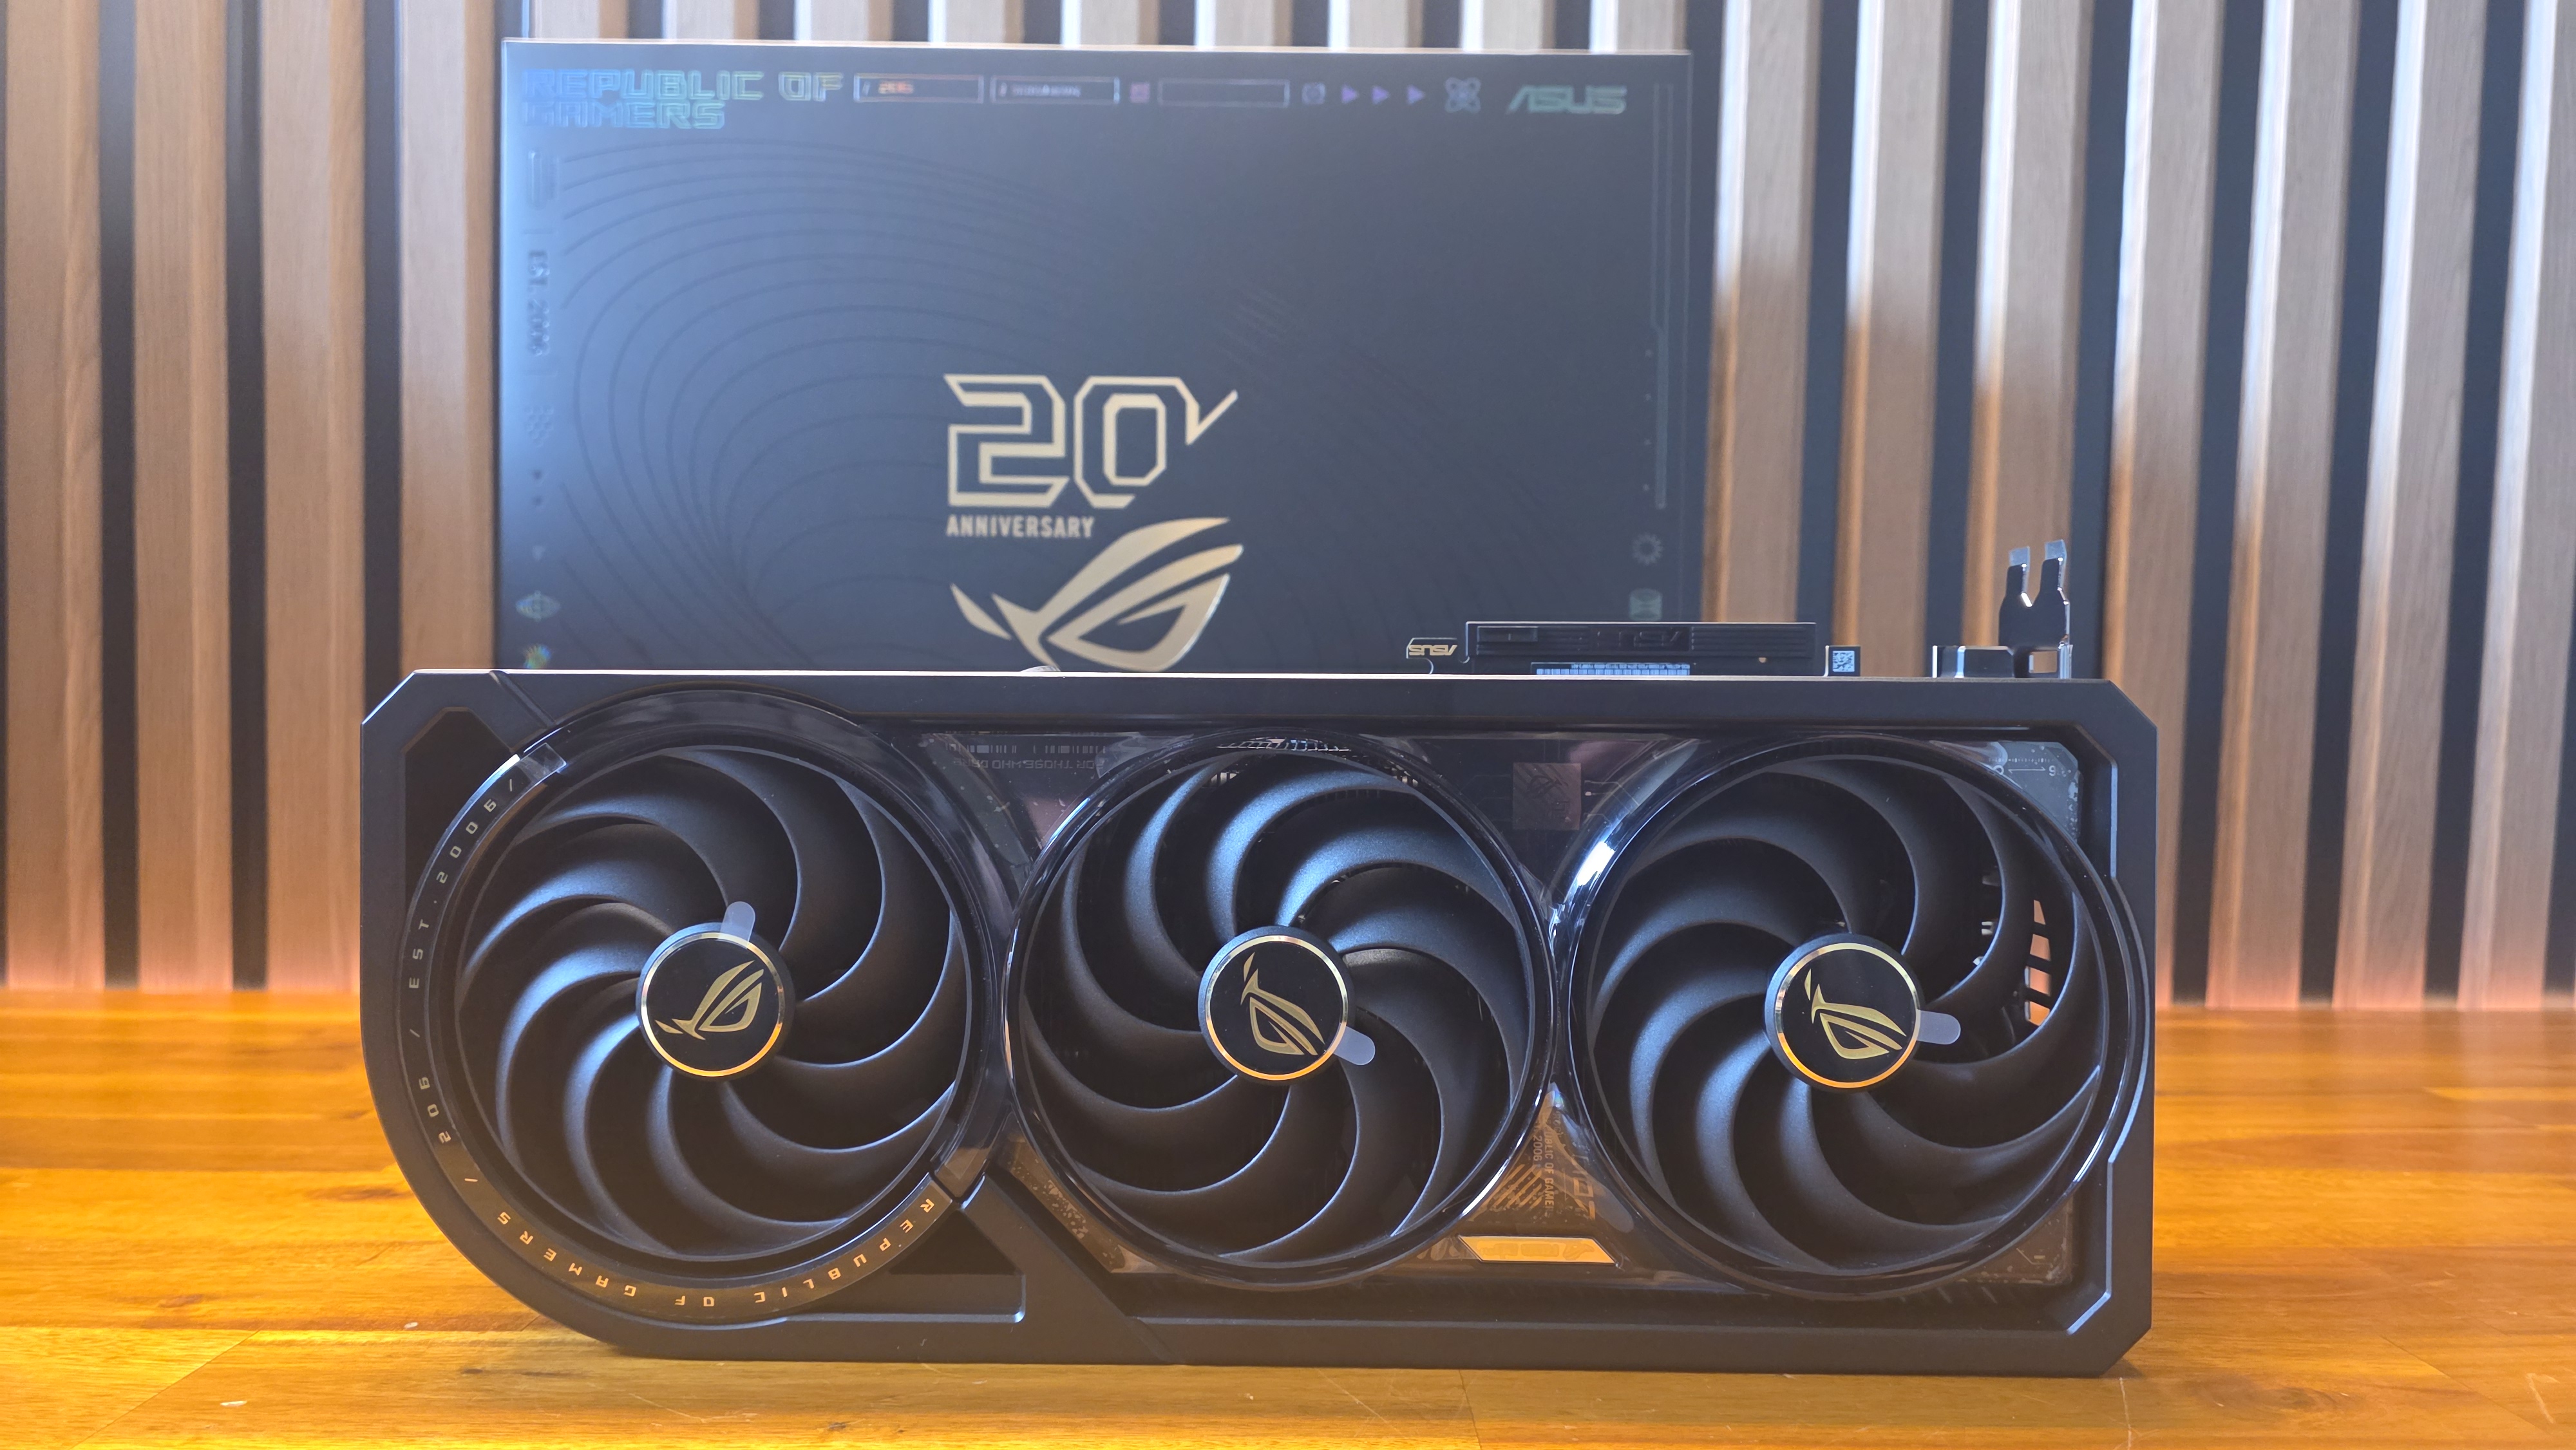
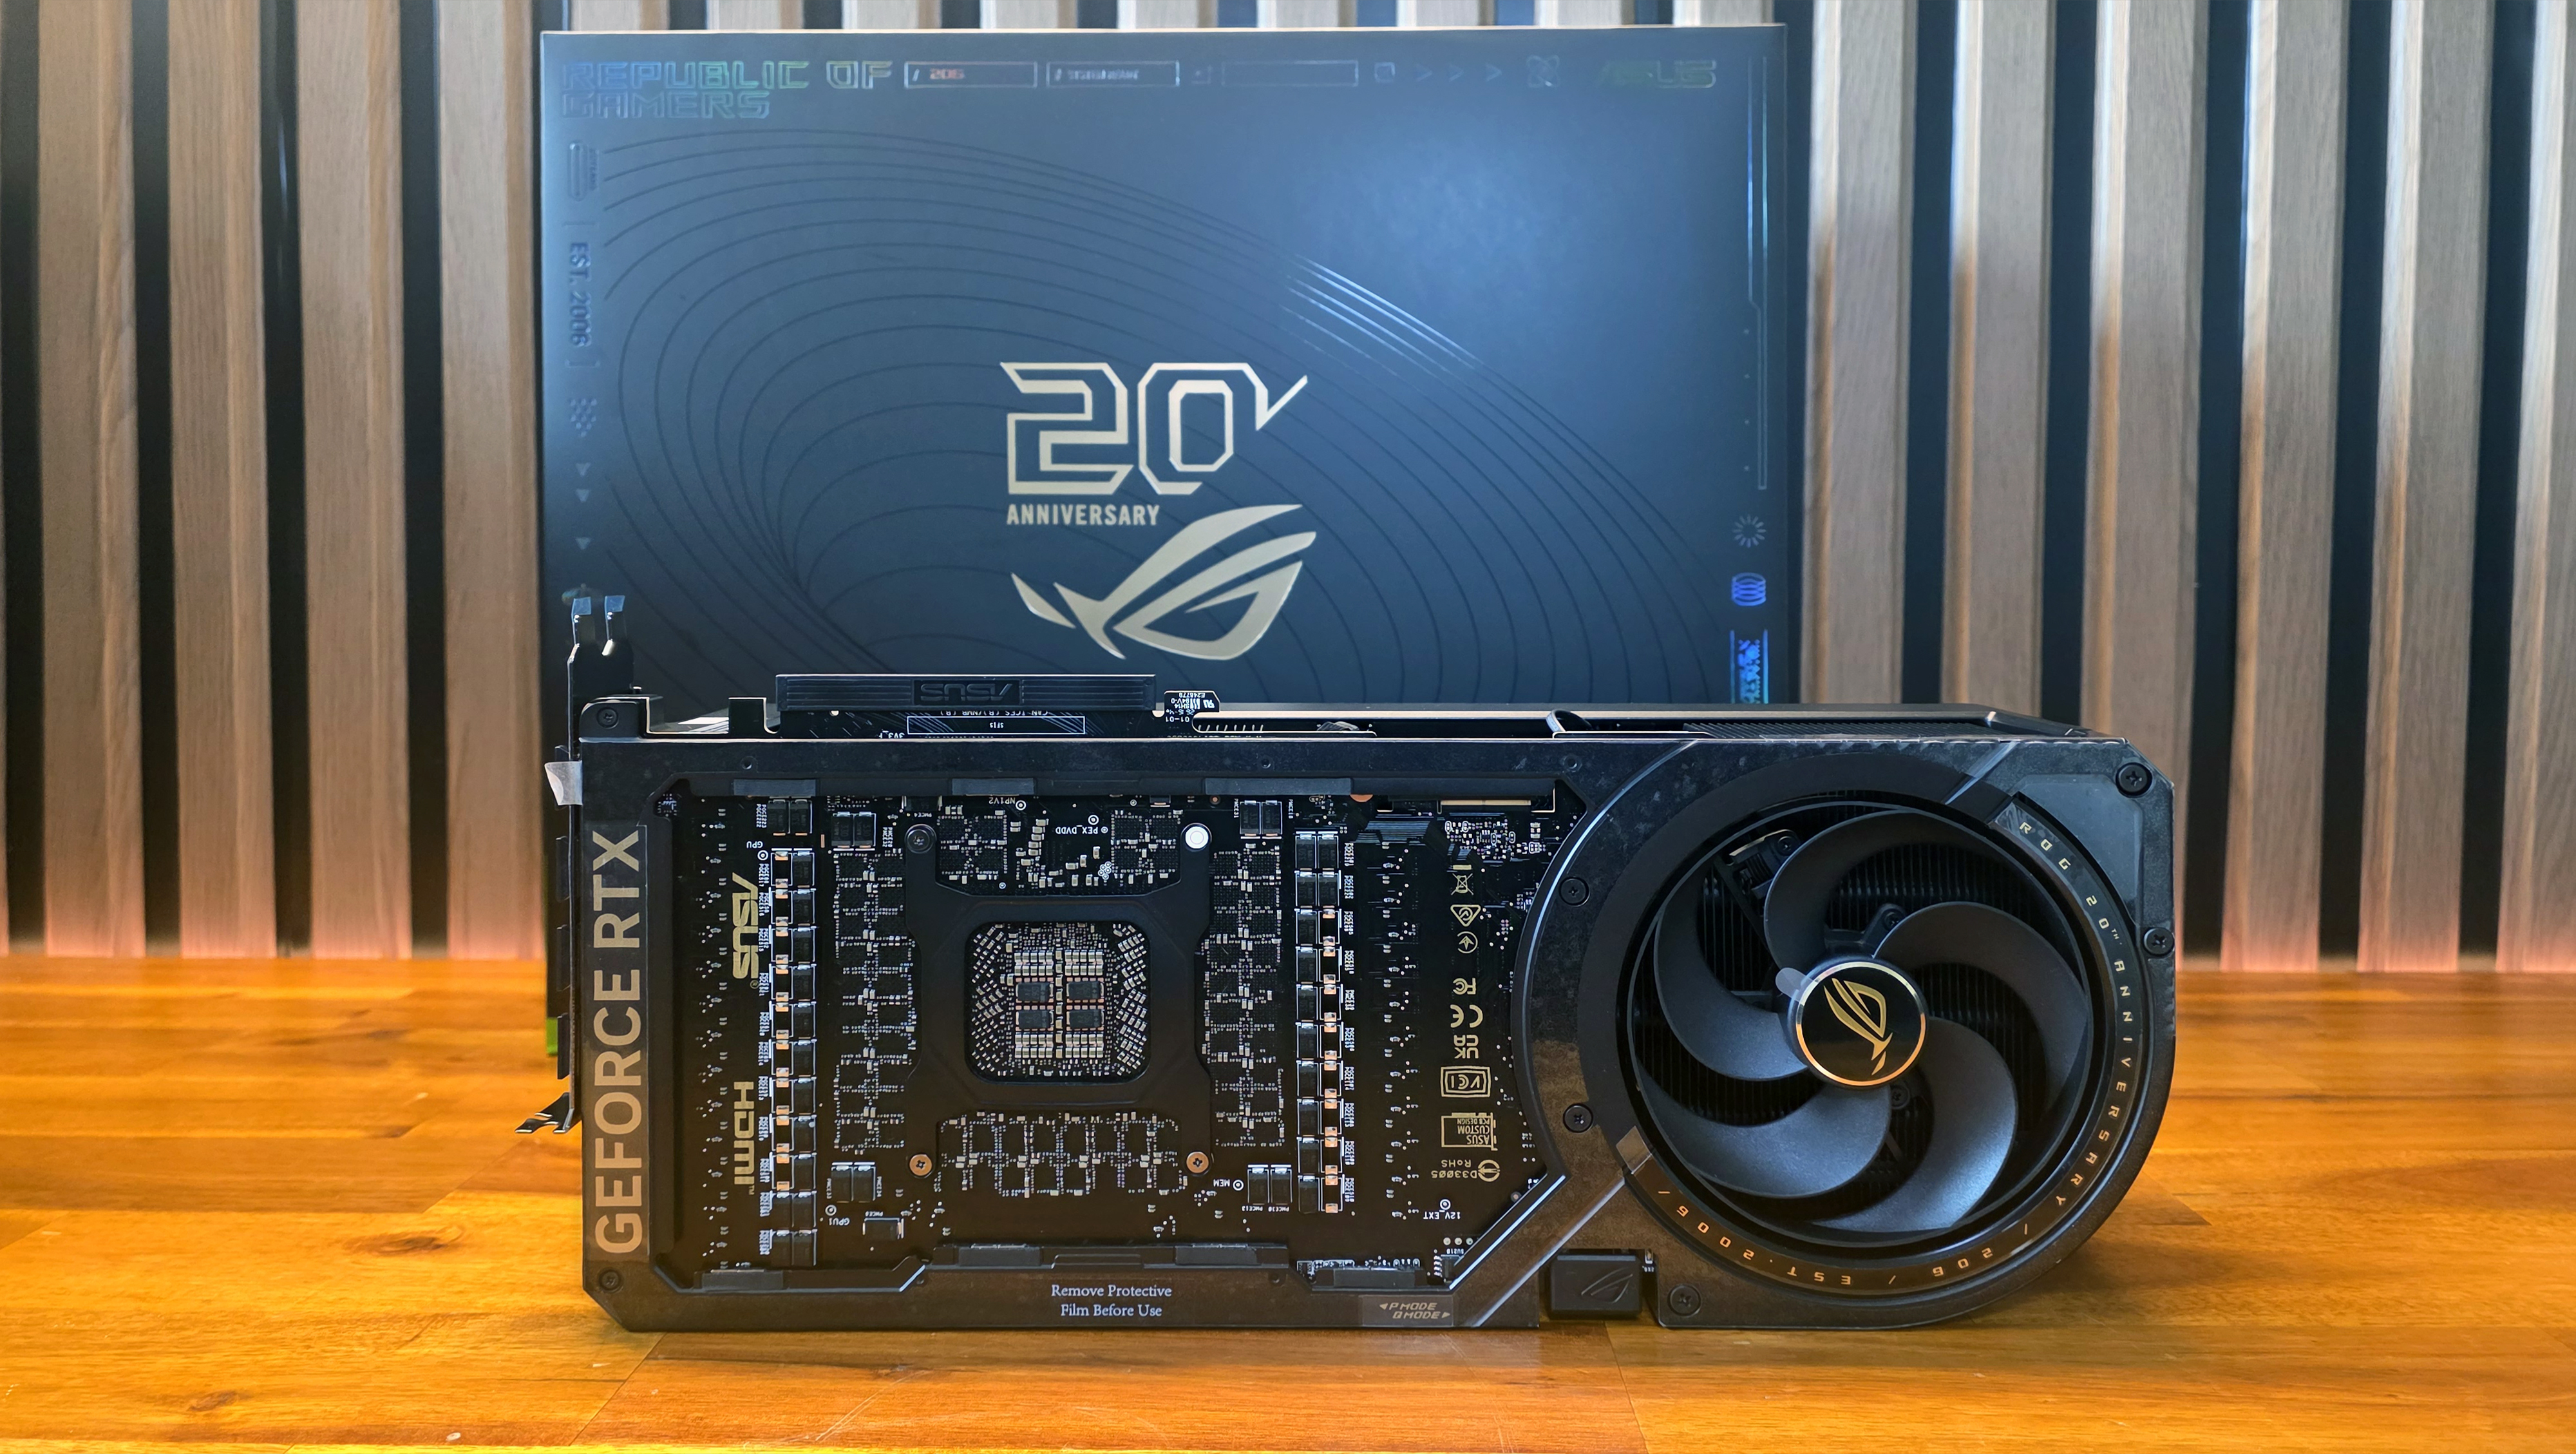
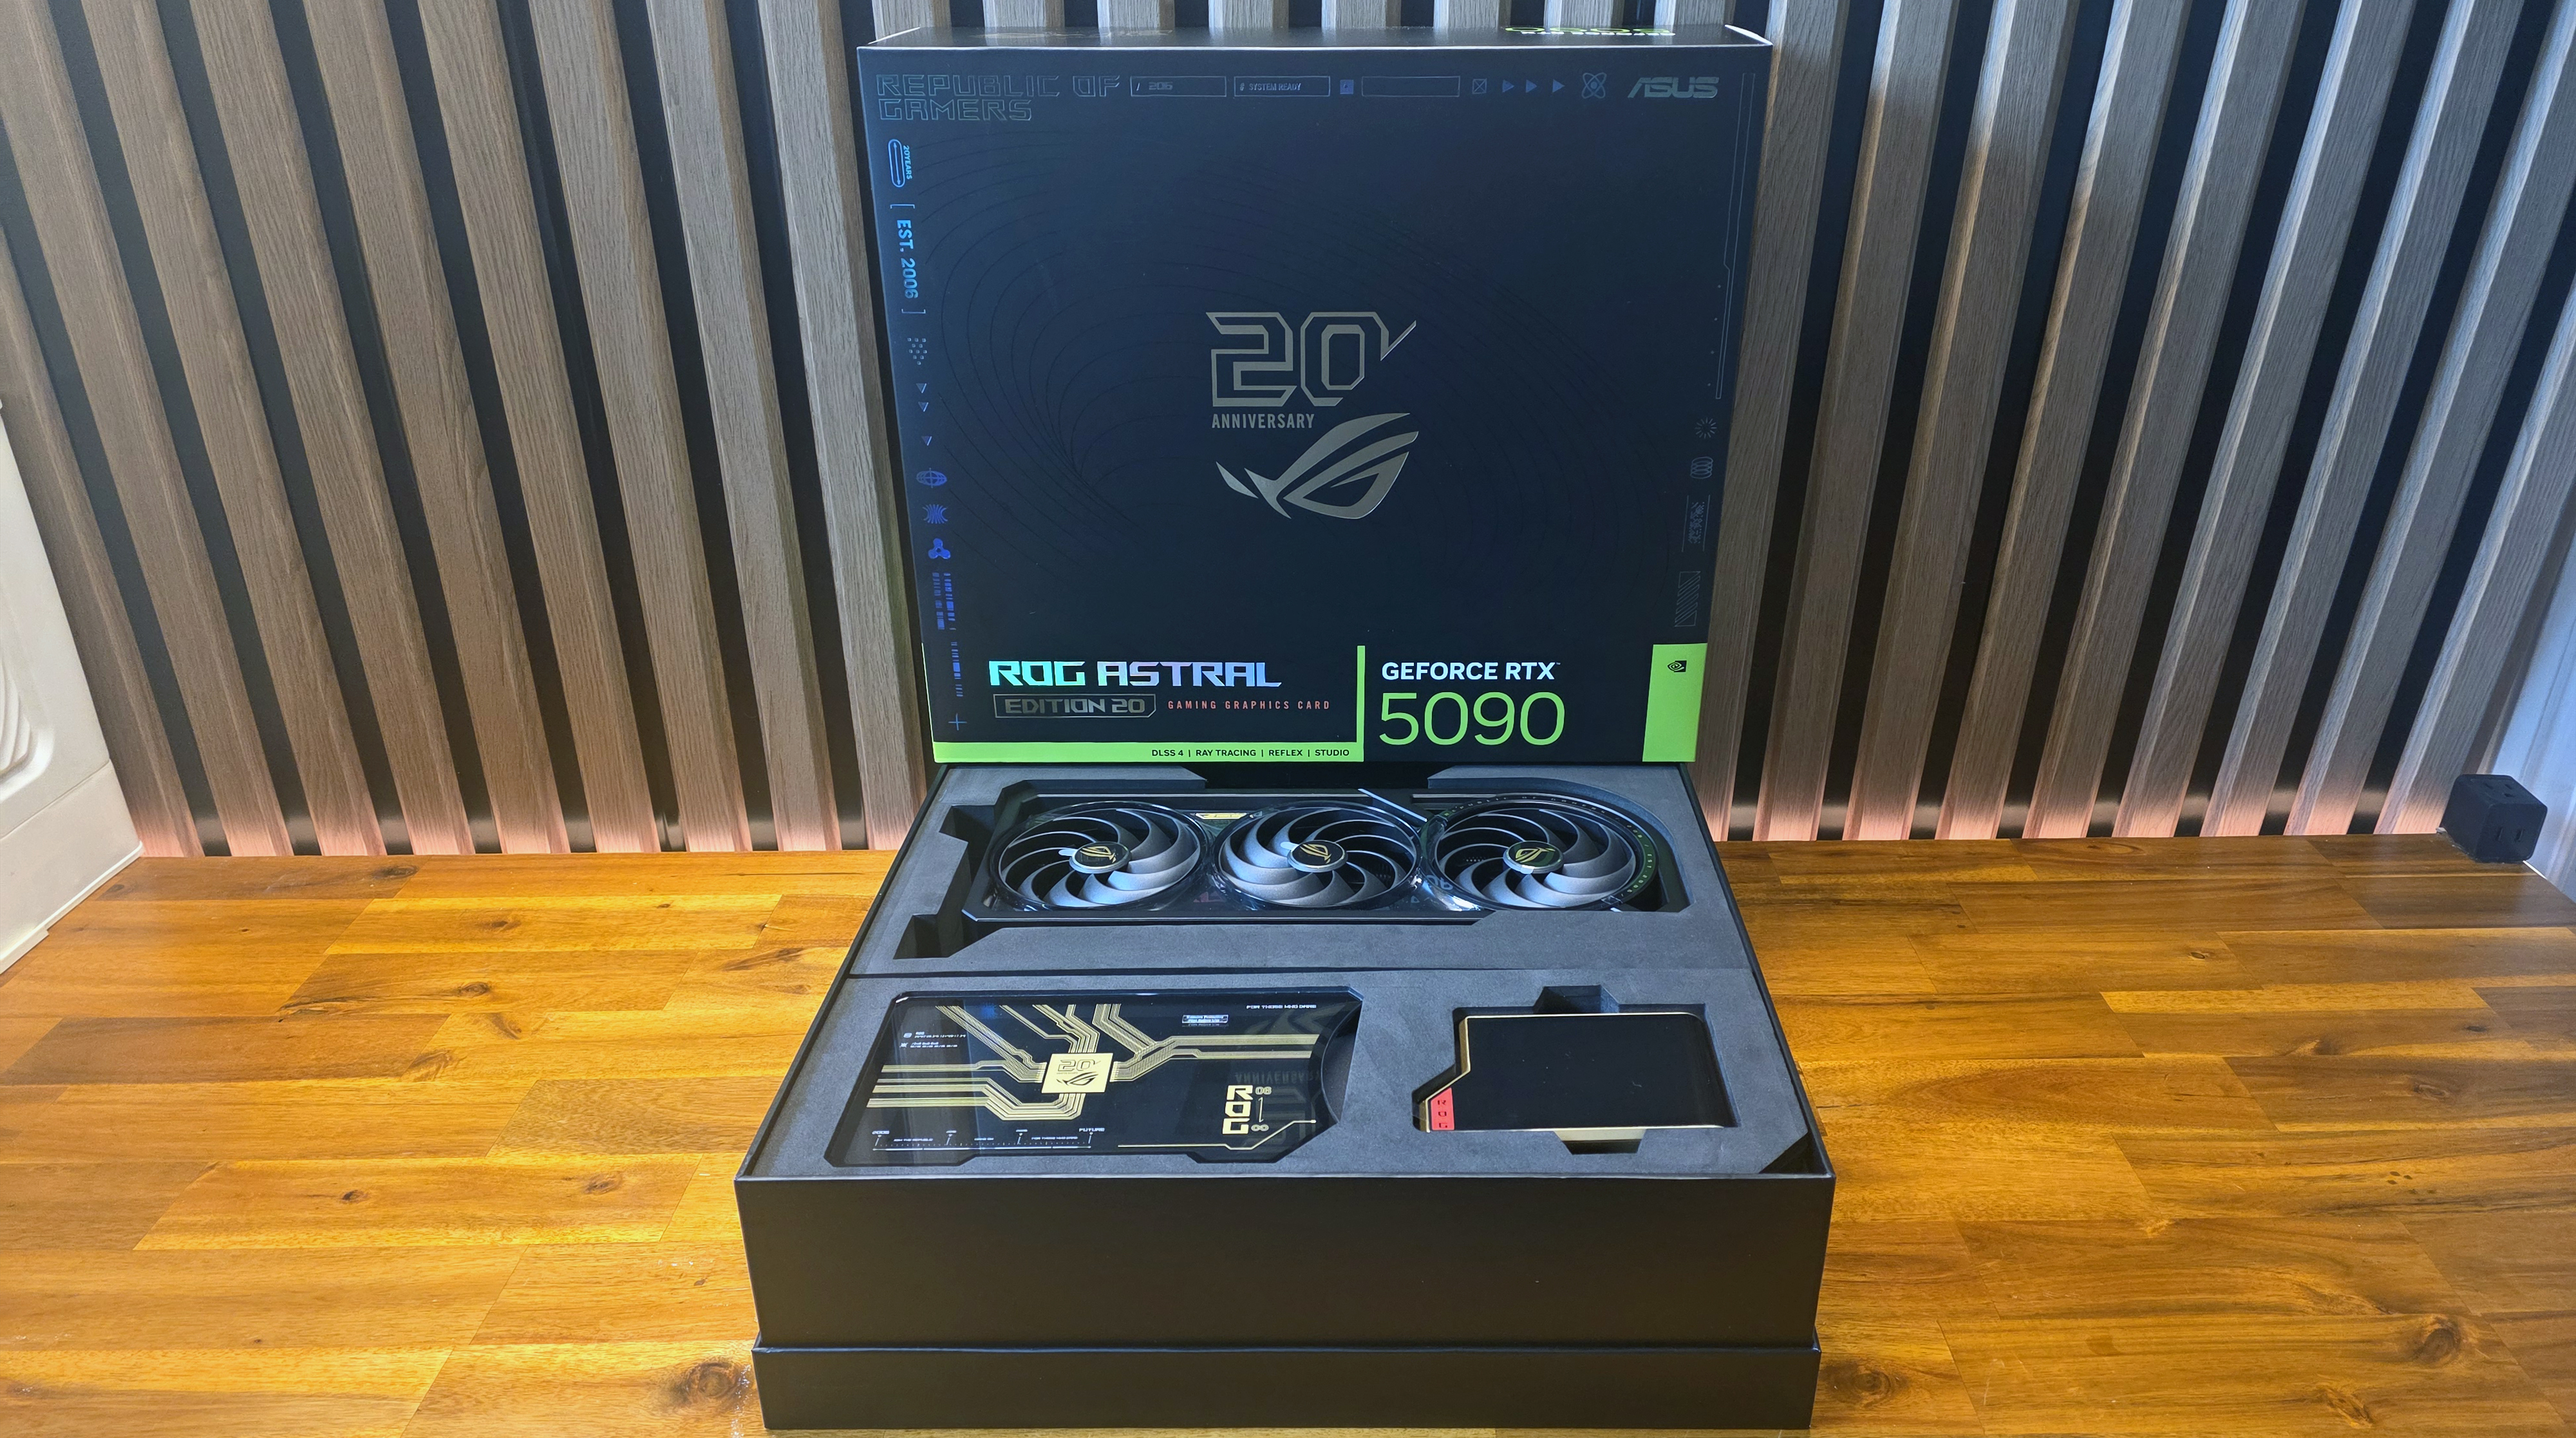
How do you top the record-setting ROG Astral 5090? If you’re Asus’ design team, you add a second back-connector power option so it can pull up to 800 watts, a glass backplate, and a curved OLED screen all its own. Unfortunately, since the Crosshair Edition 20 motherboard isn’t a BTF model, we can’t test the card’s performance with extra power here.
The GPU’s curved screen also requires you to run a USB cable from the back of the GPU to the motherboard for power and data, which feels a little lame given the sky-high $5,999 asking price.
PSU
Asus ROG Thor Titanium III 3000W Edition 20 power supply
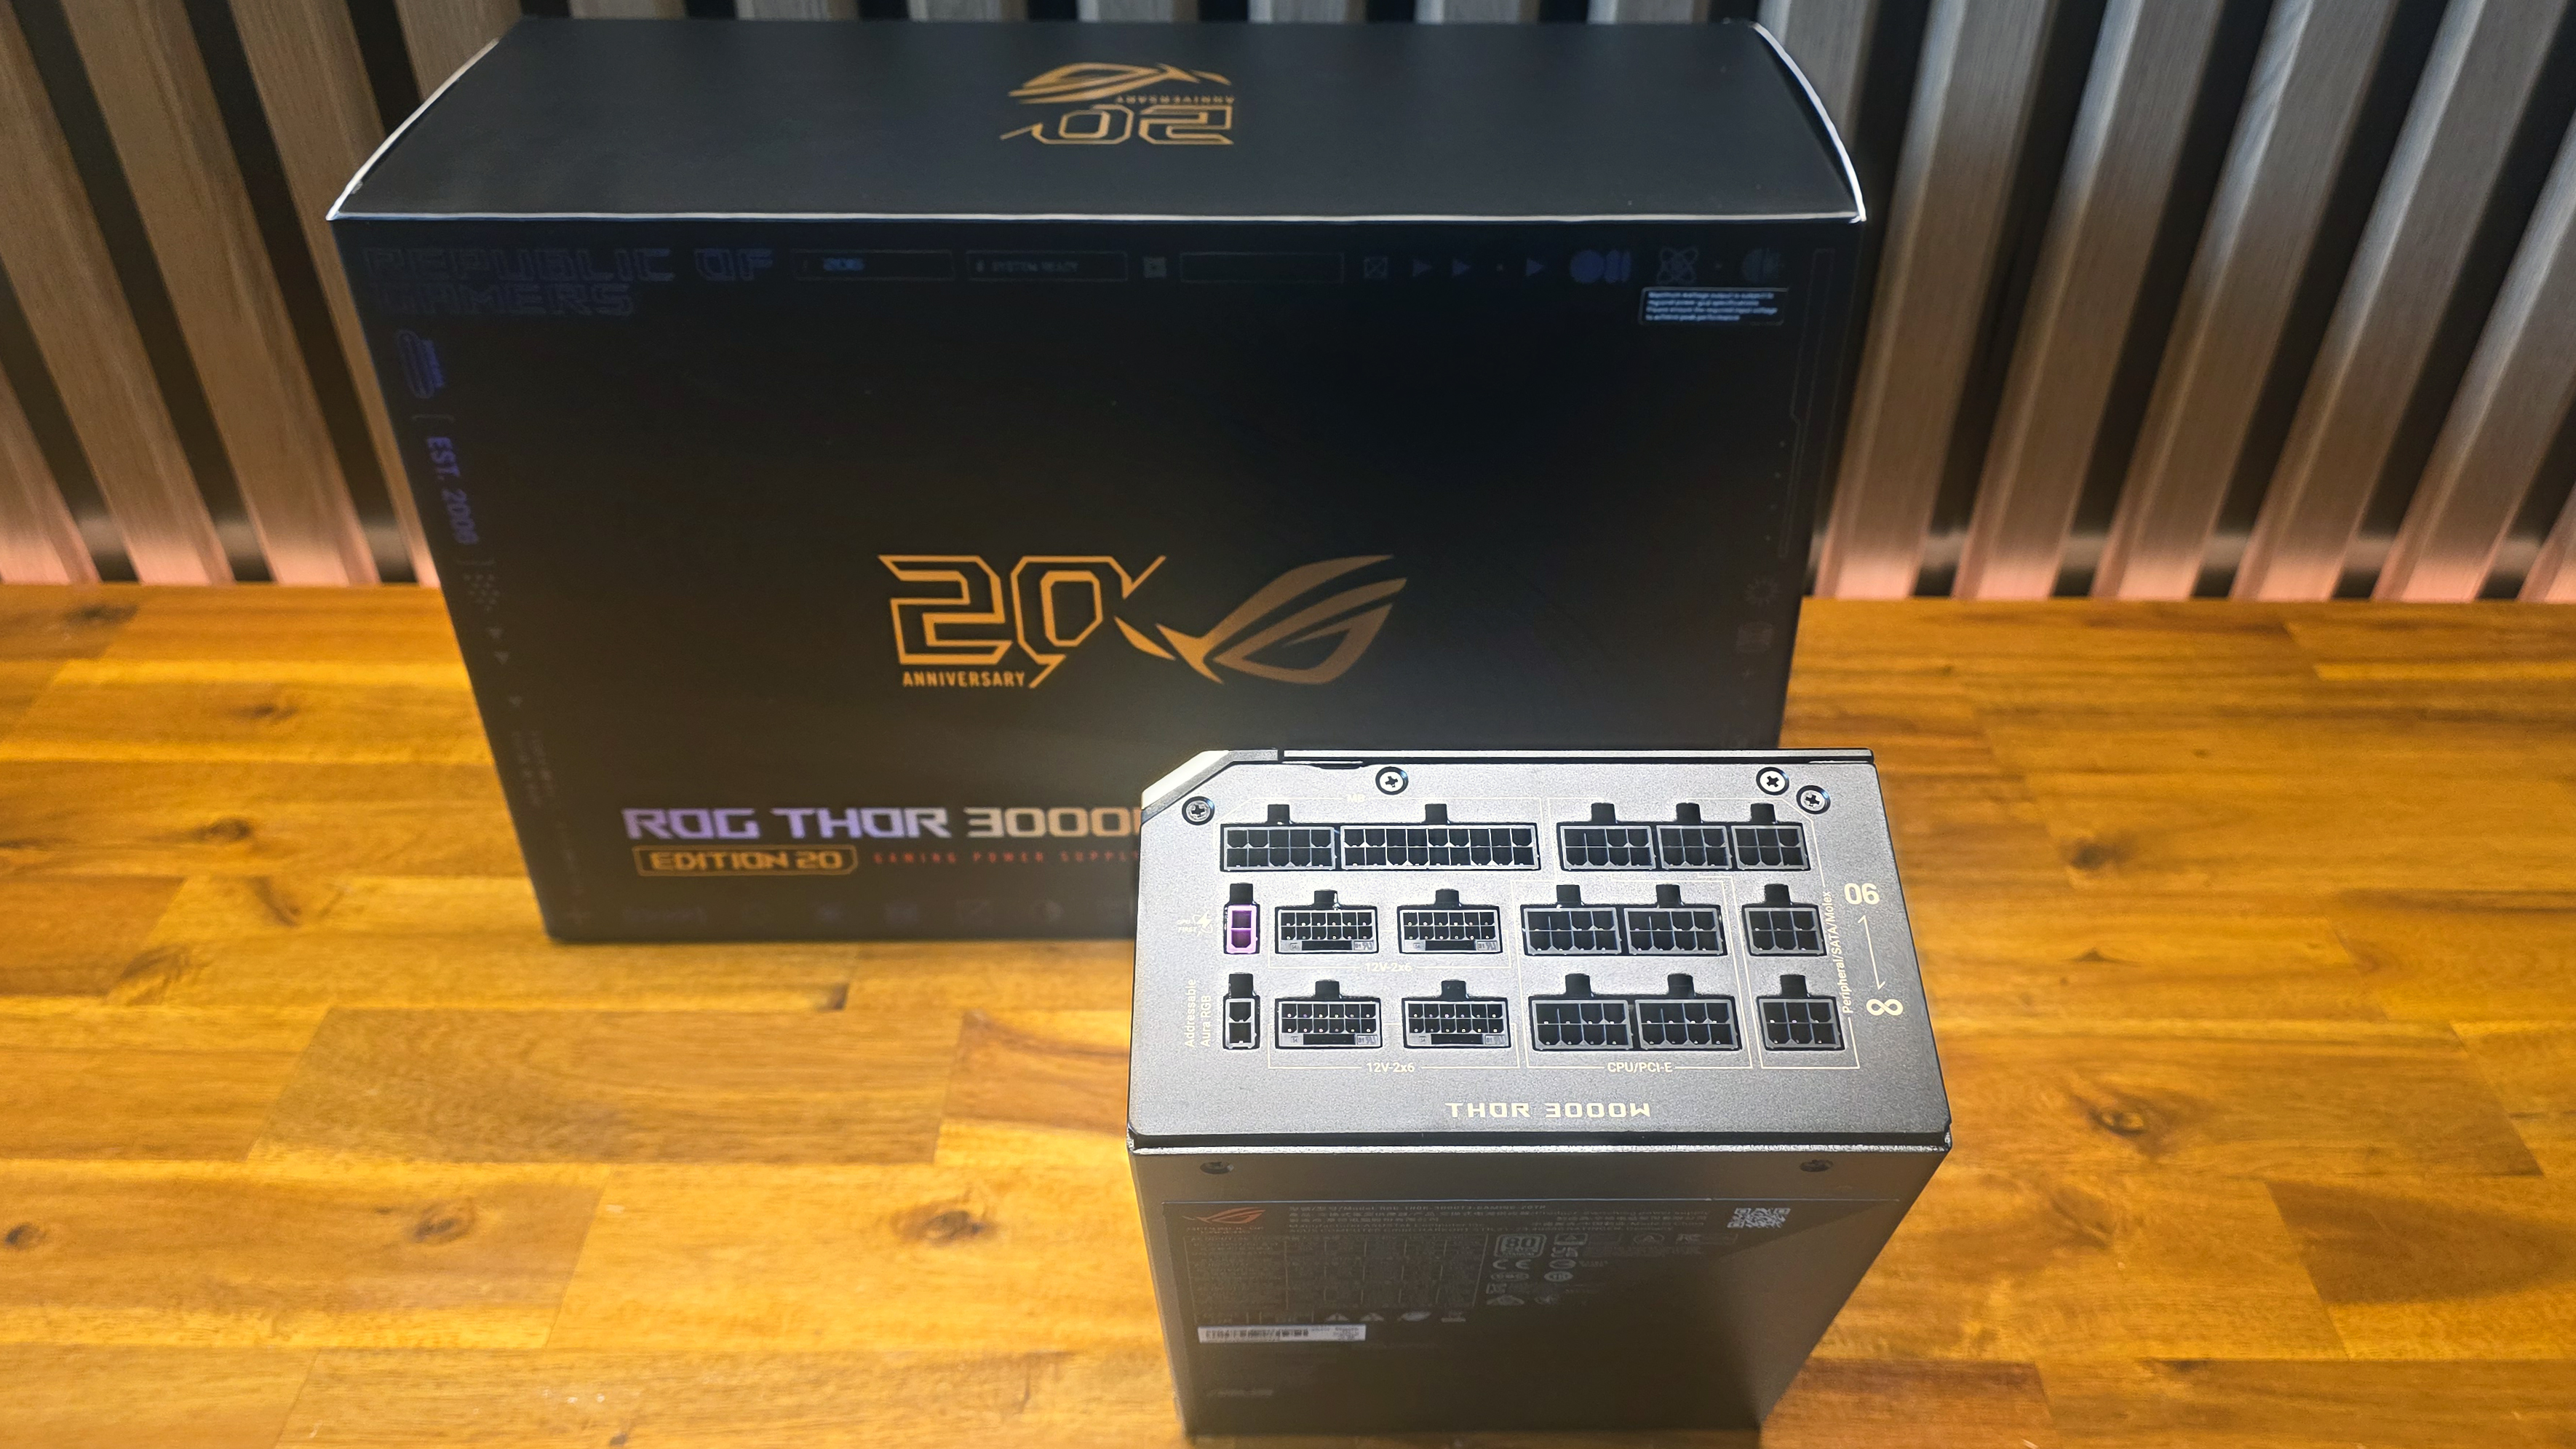
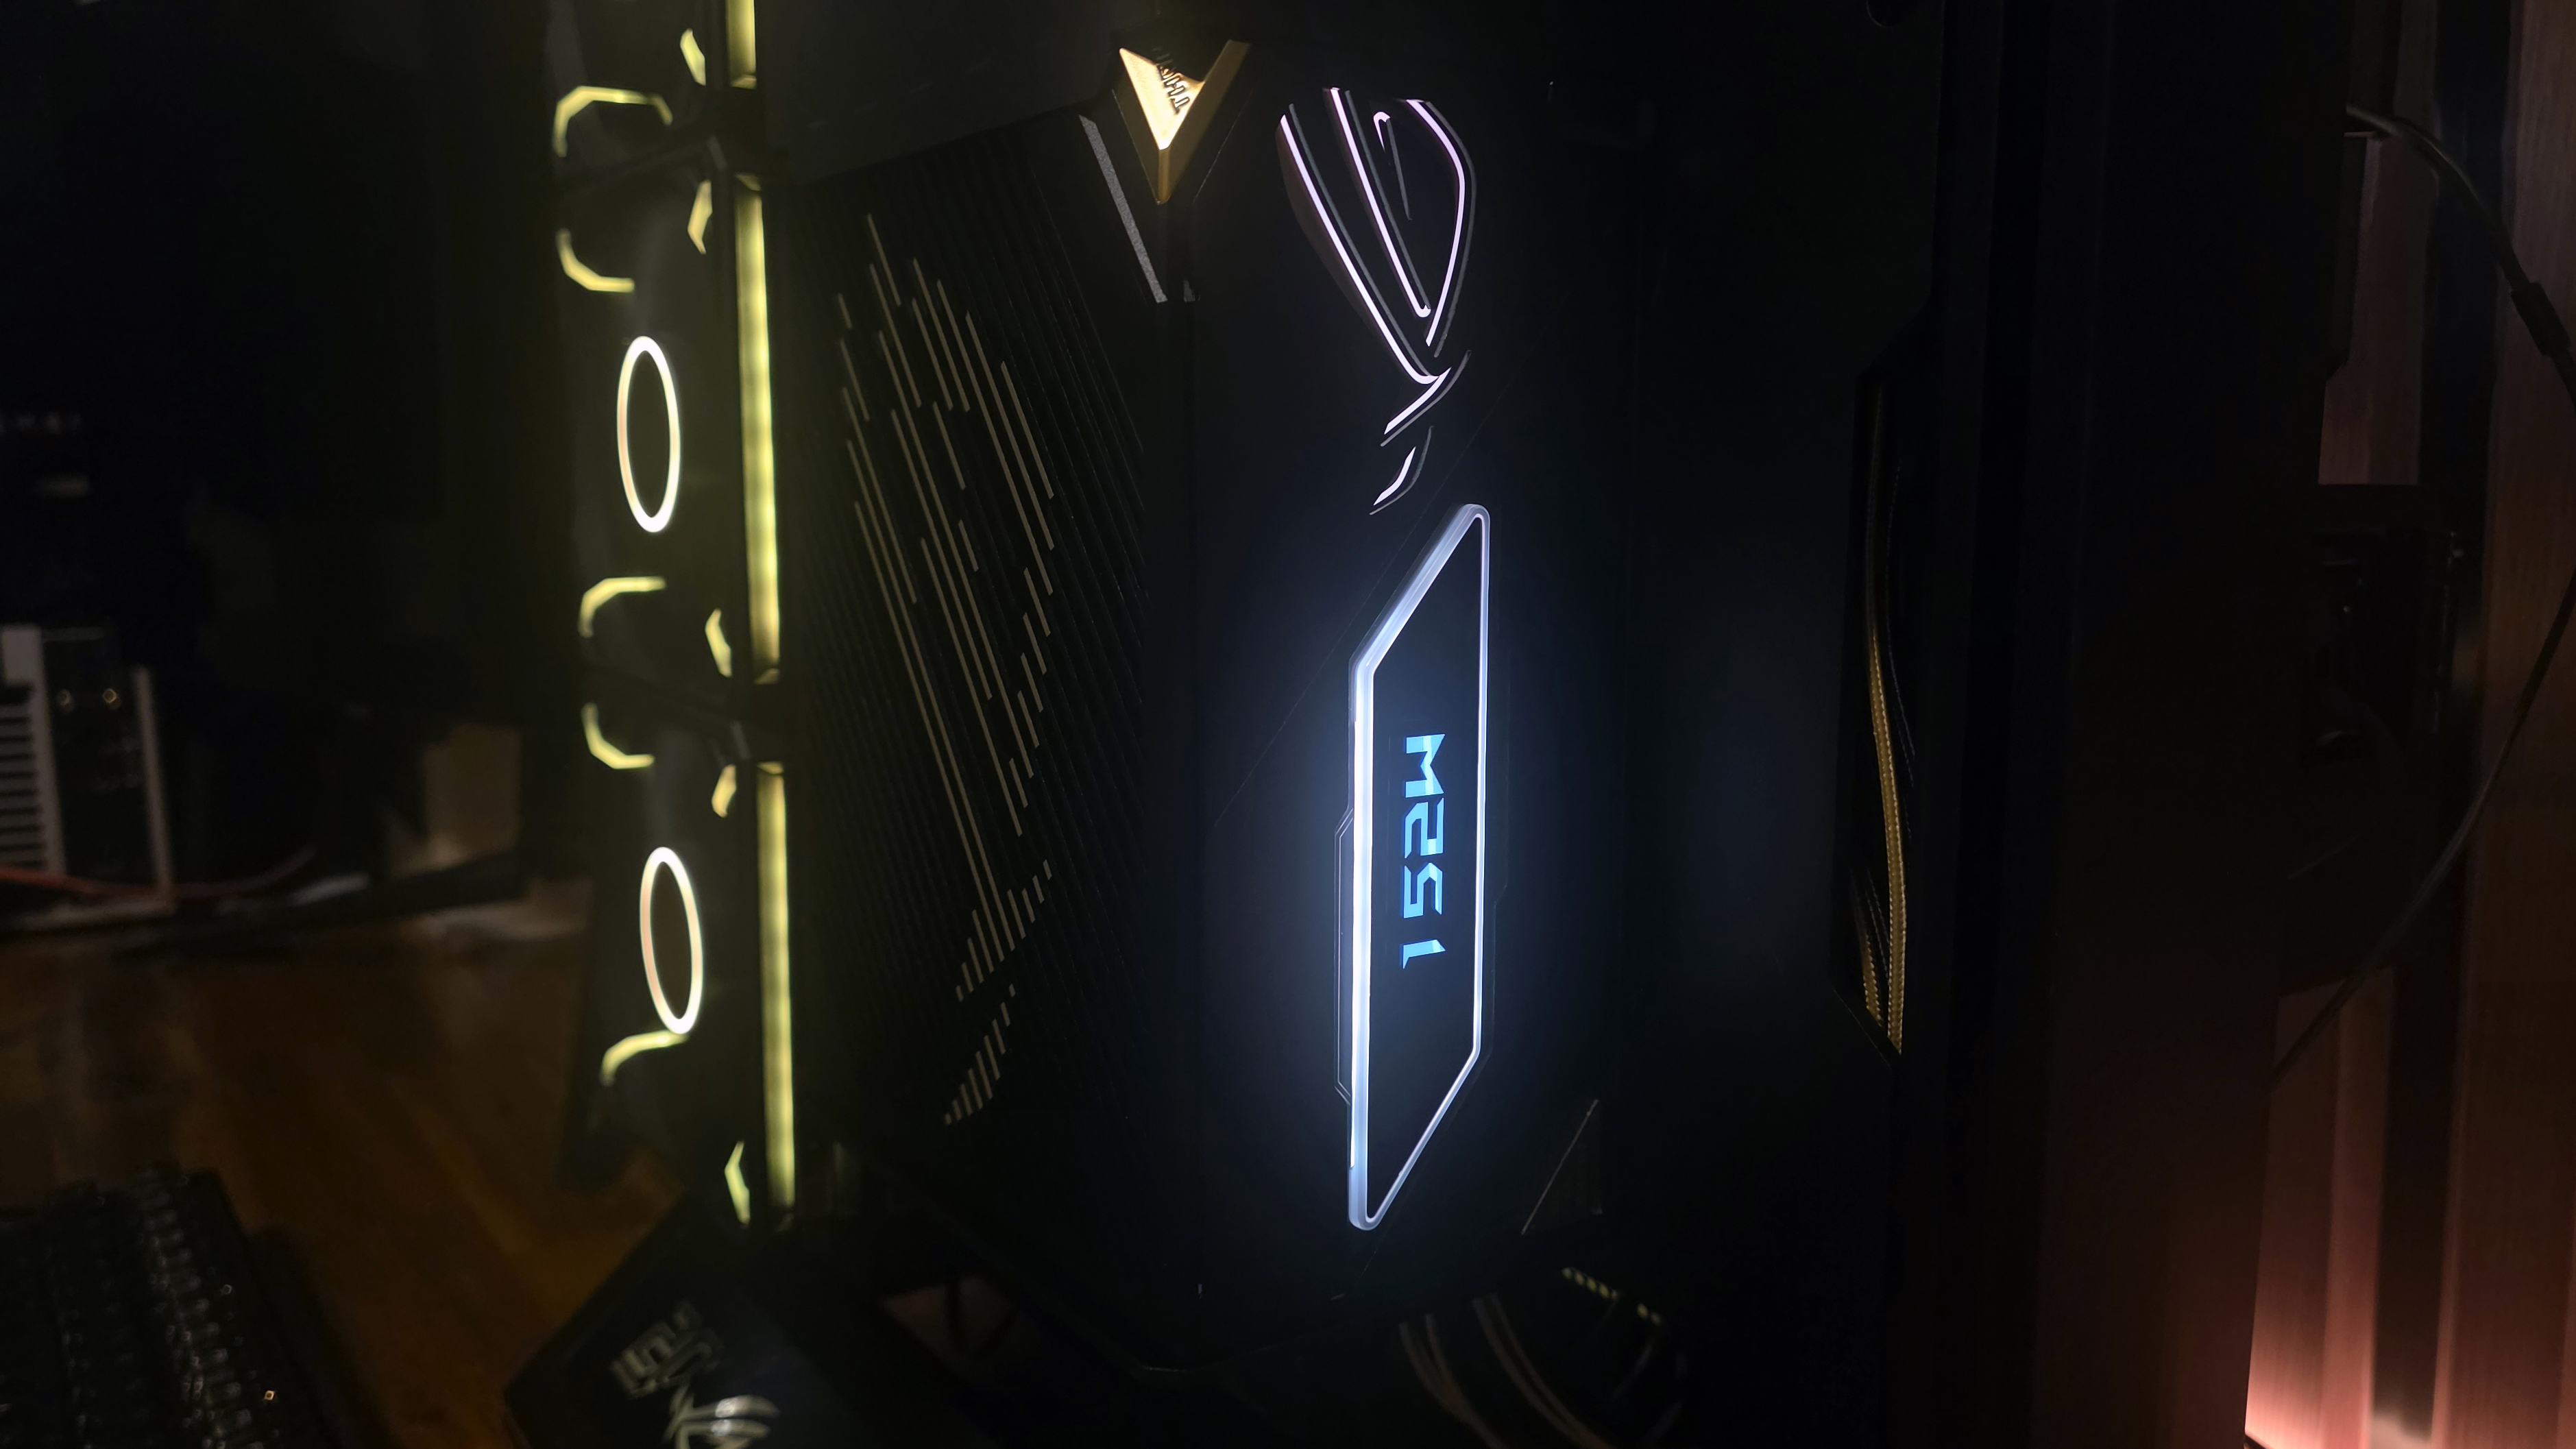
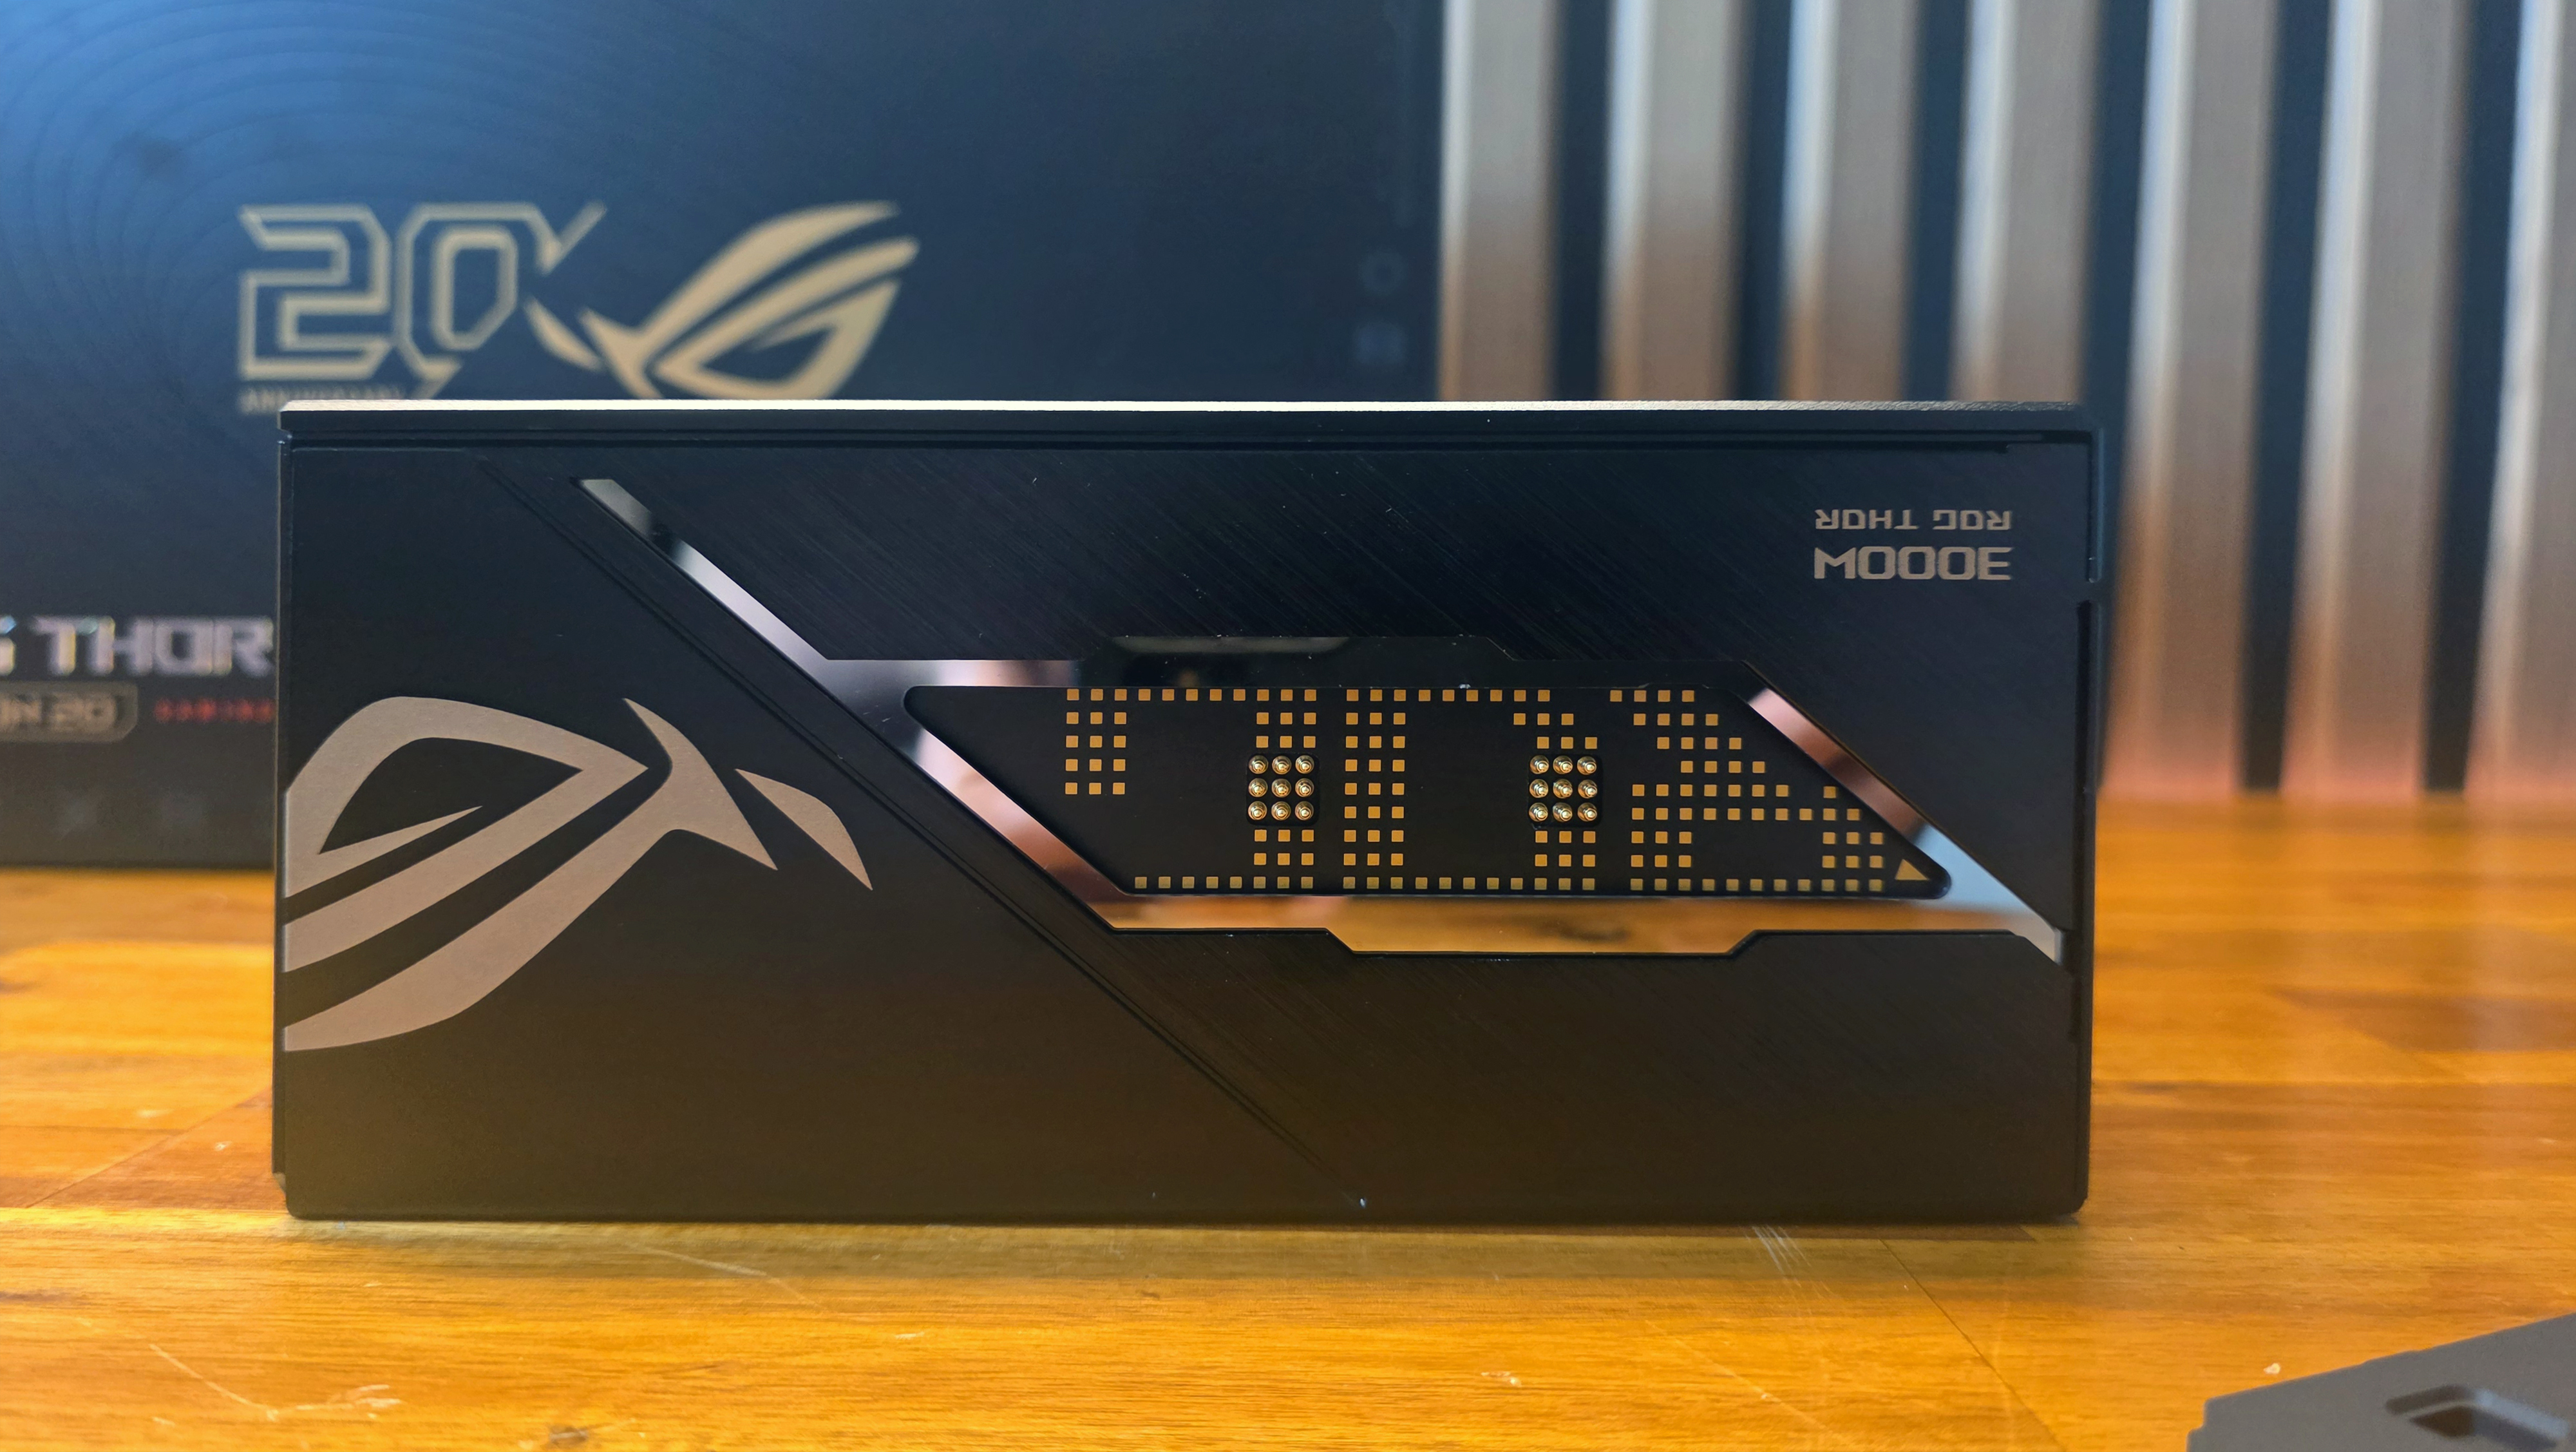
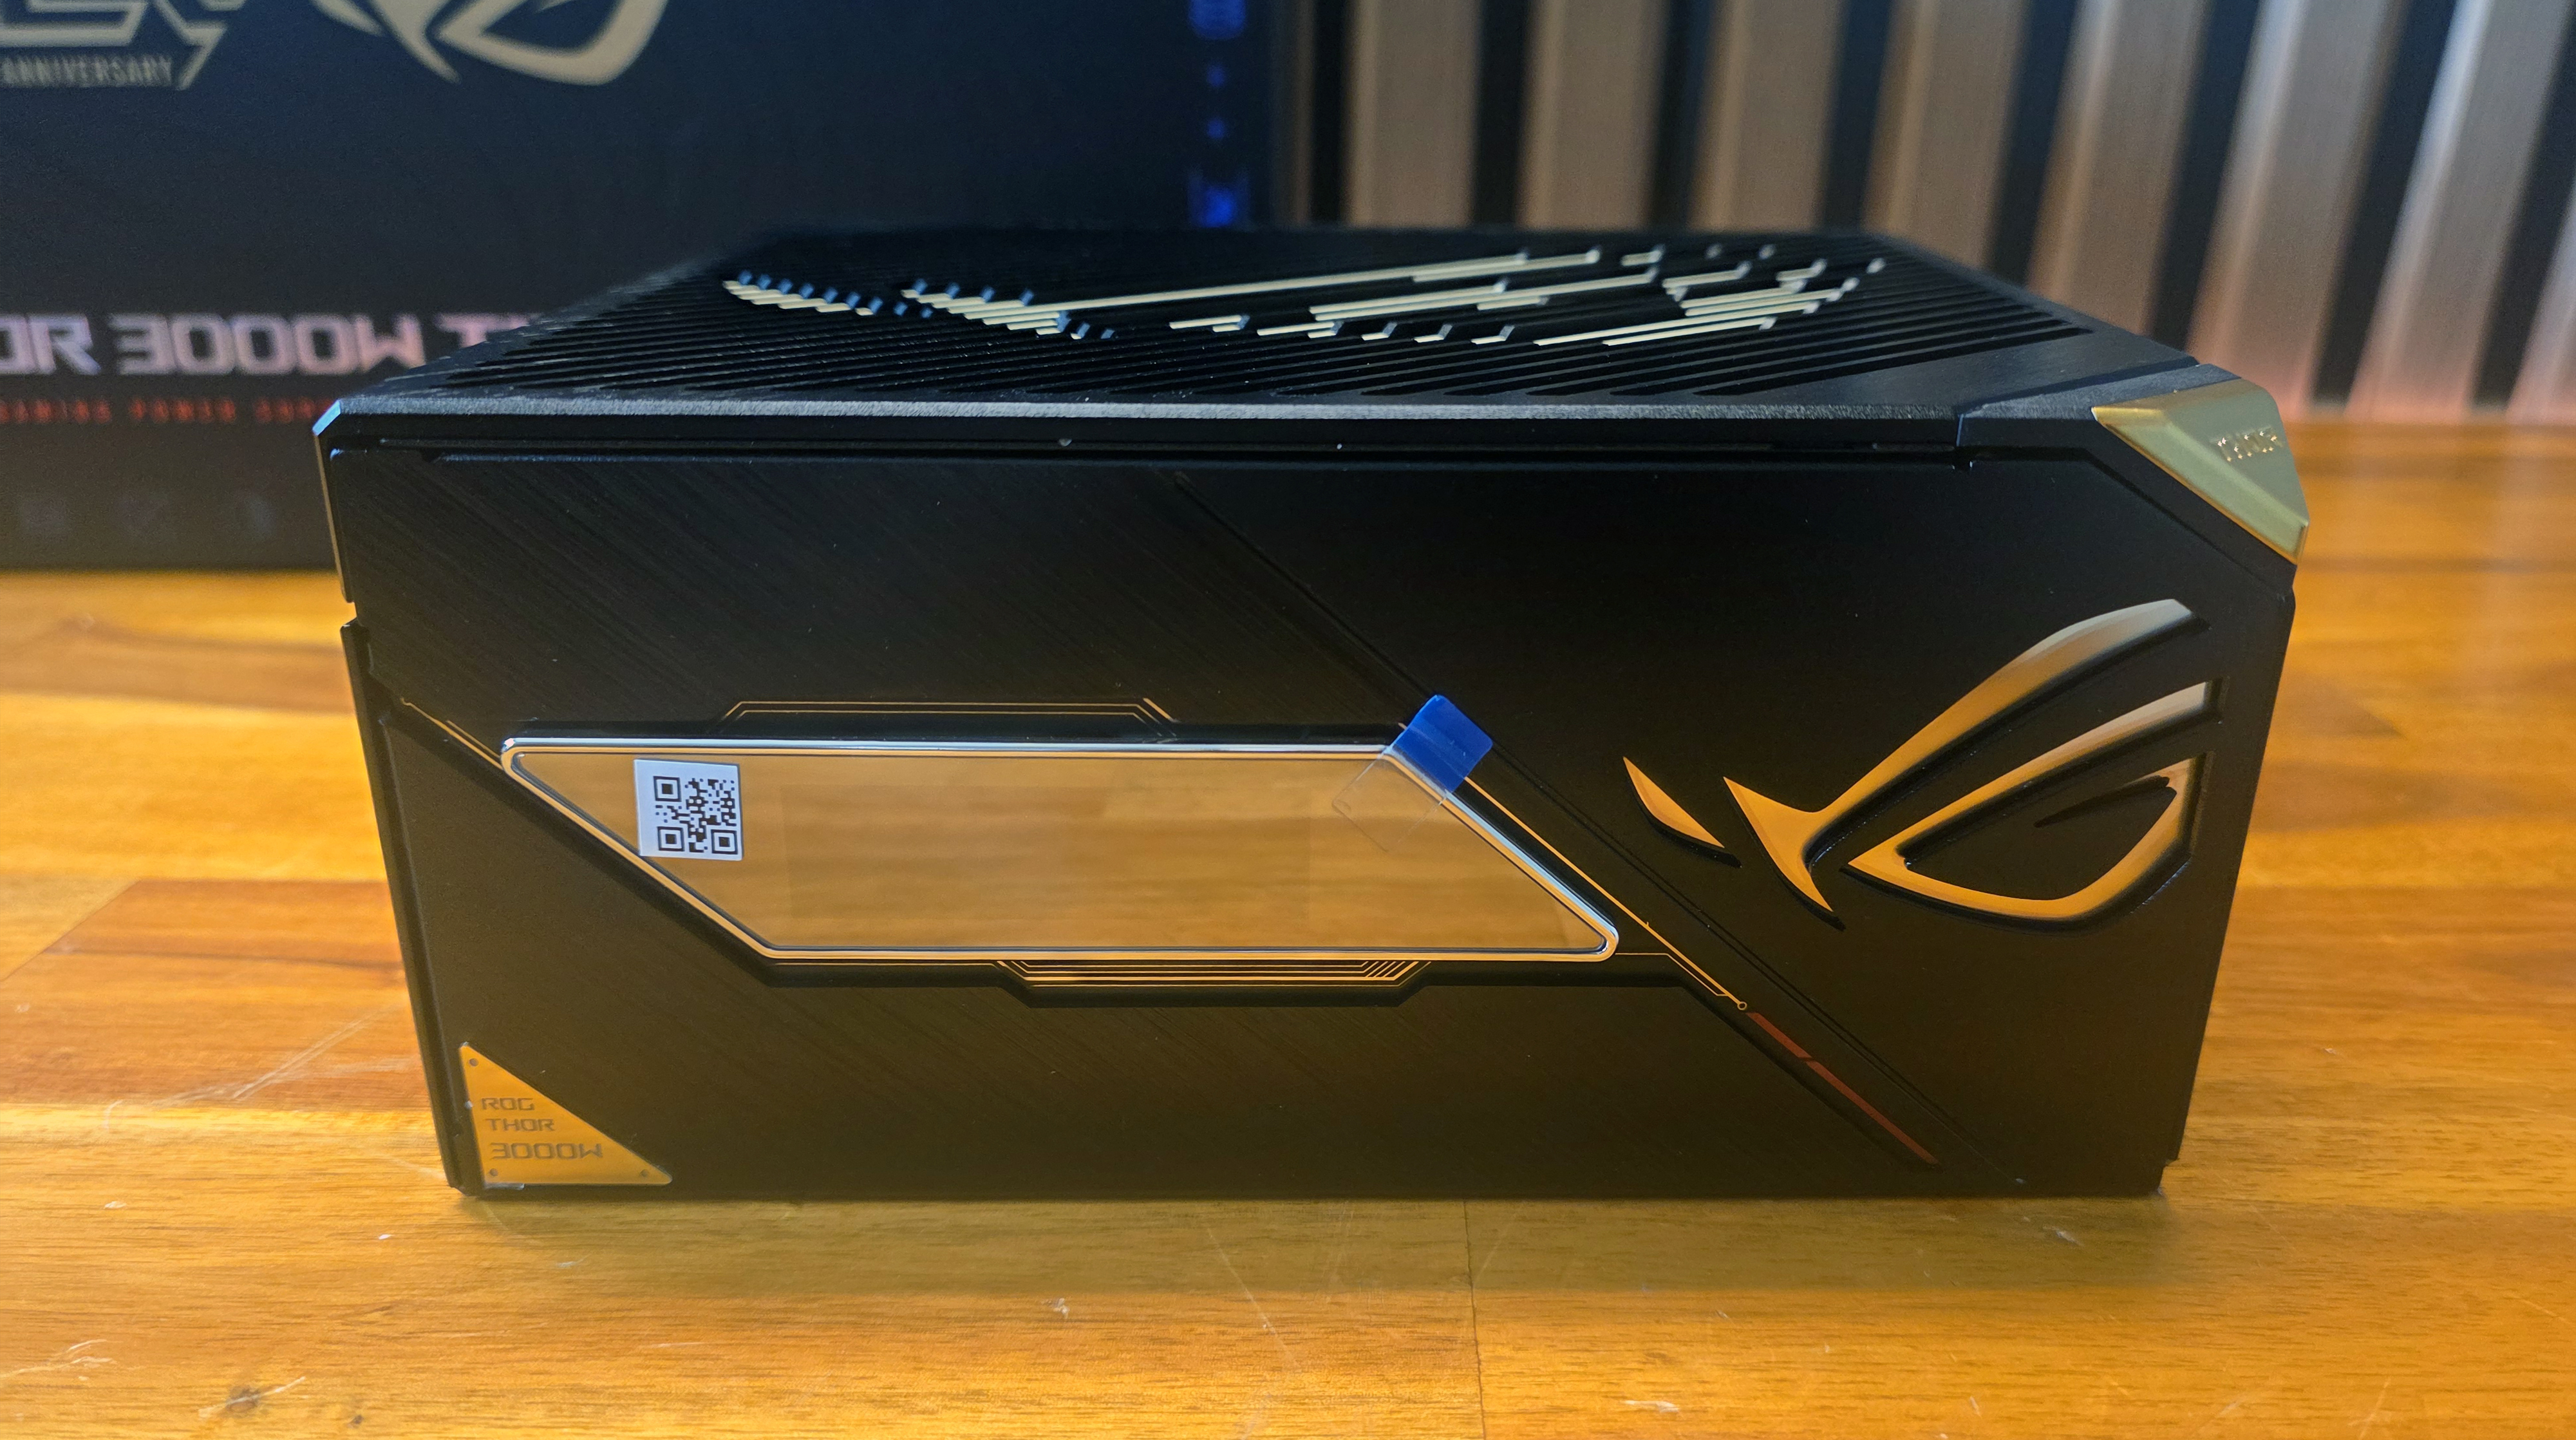
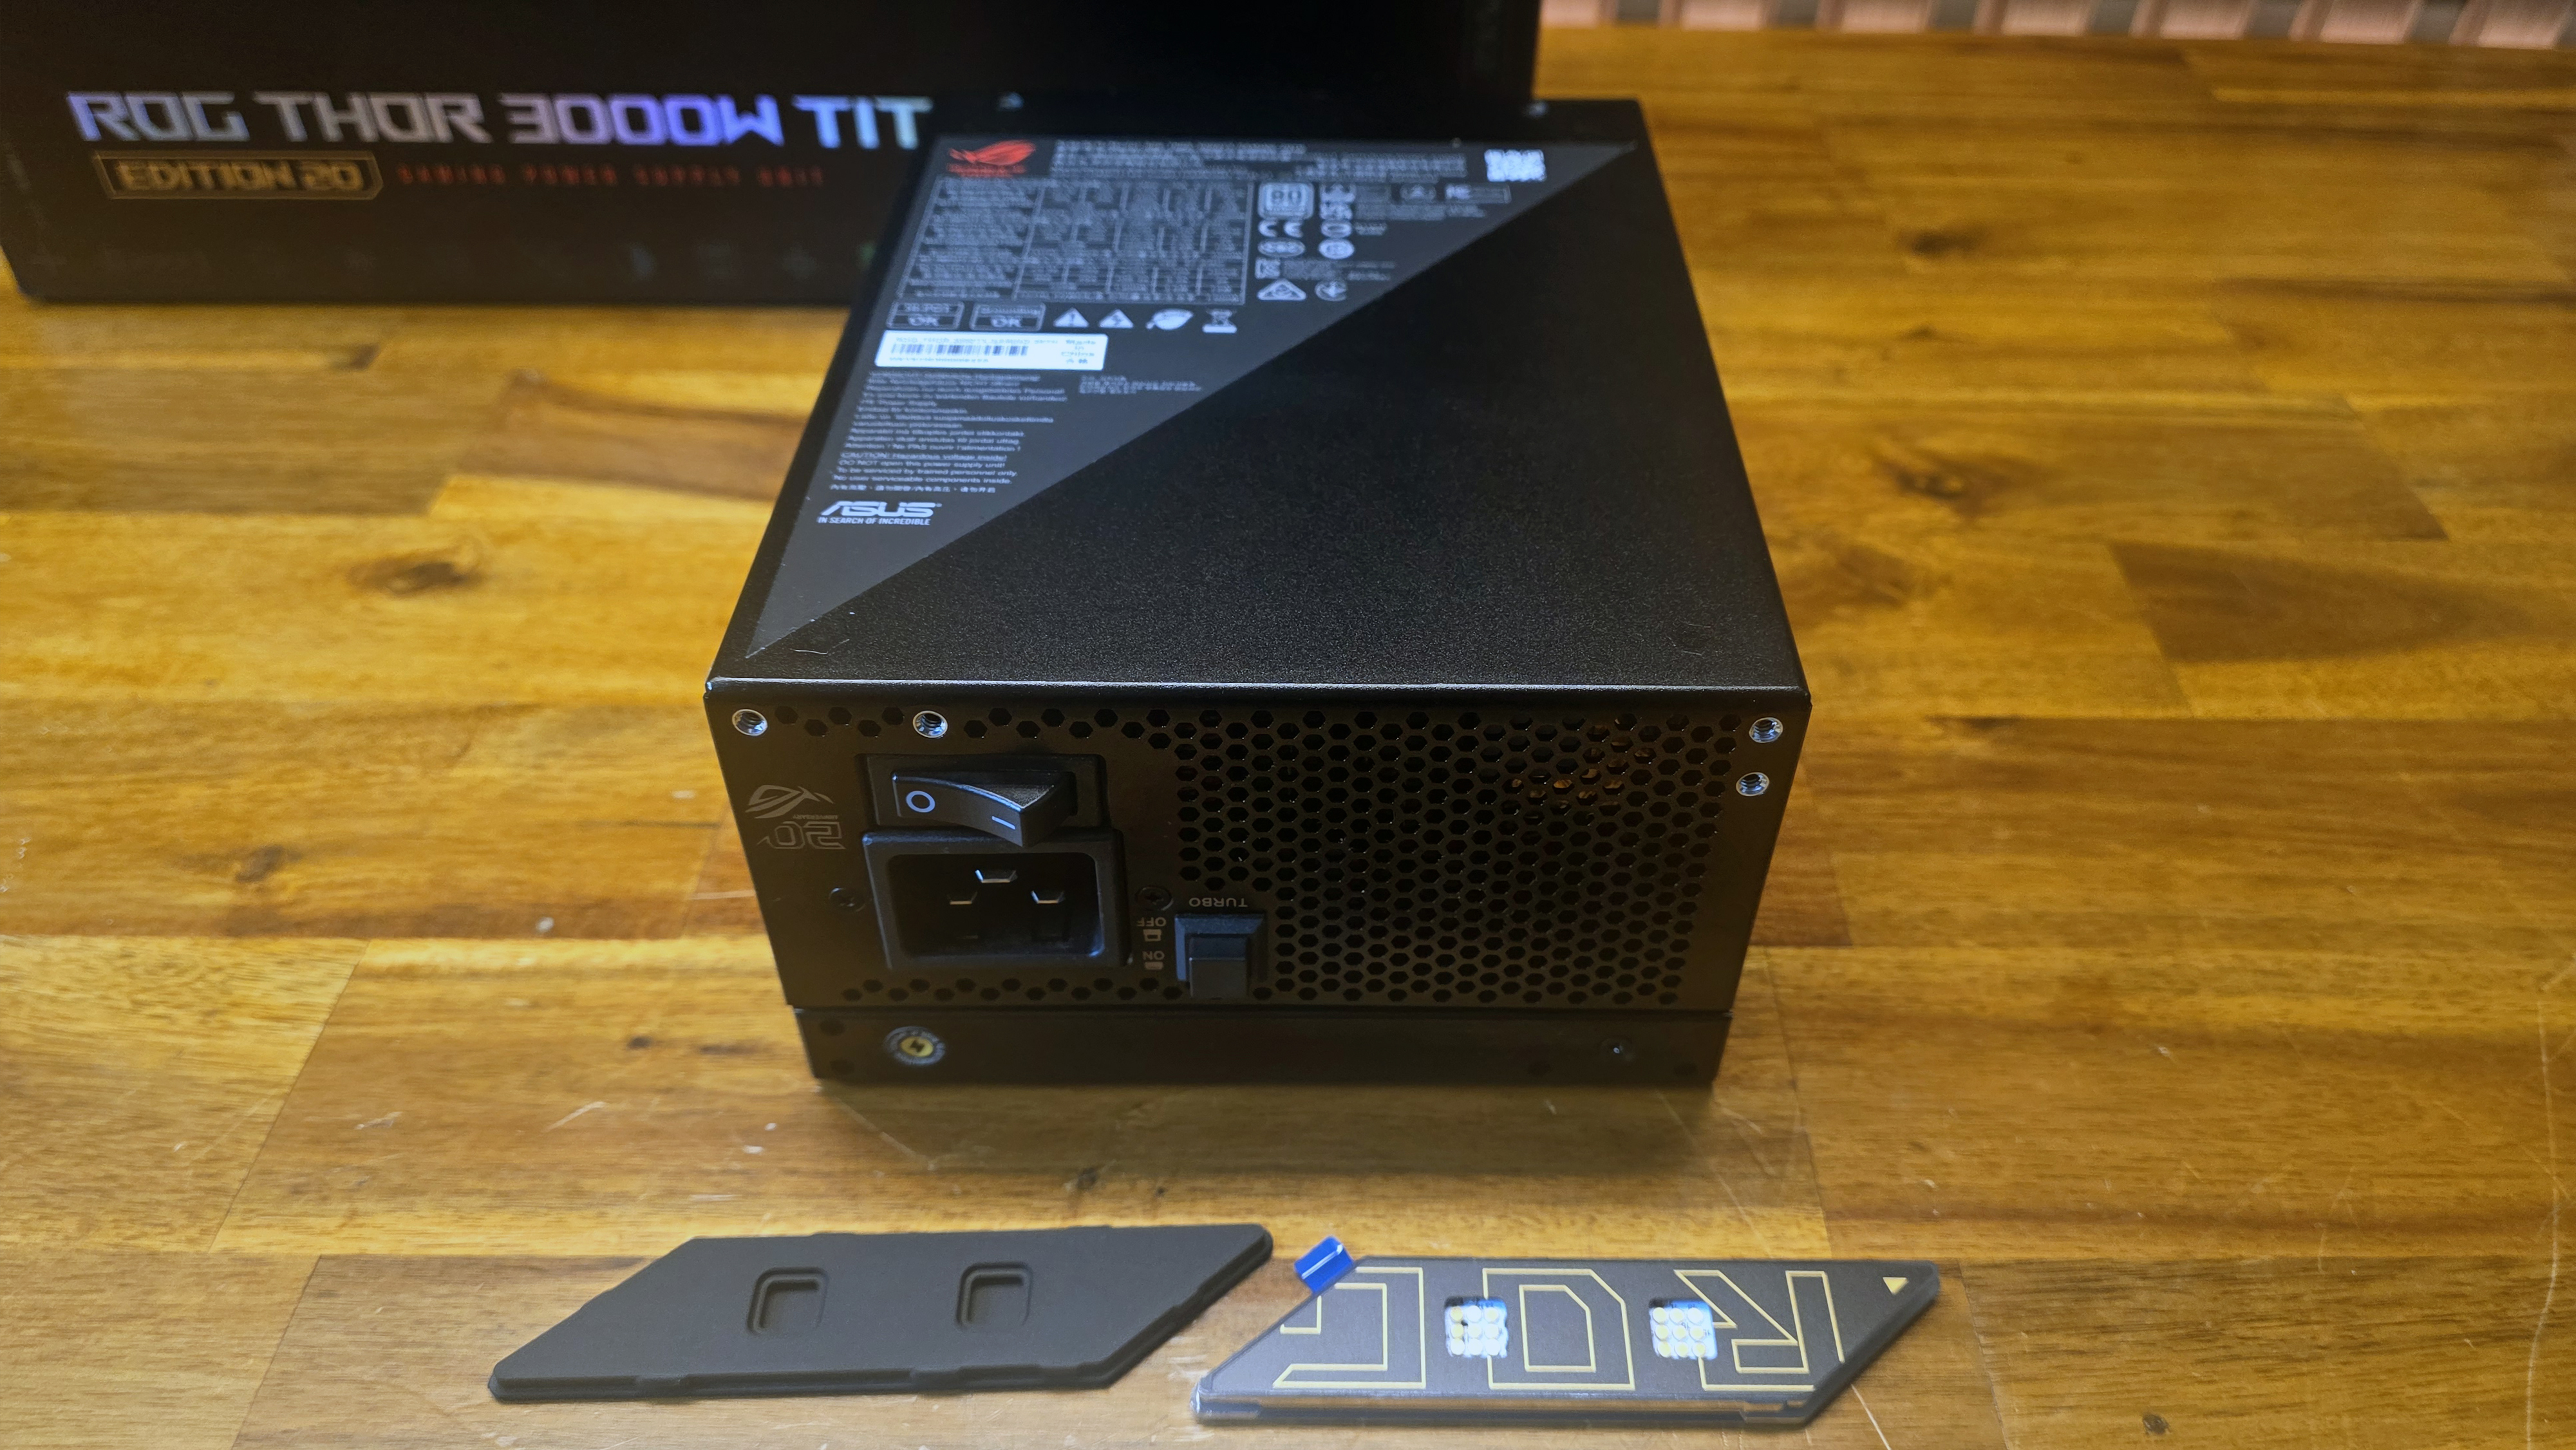
Most RTX 5090 builds don’t need anywhere near this much juice, but the dual-voltage ROG Thor Titanium III 3000W Edition 20 is a PSU monster designed to deliver up to 3000W of power, specifically for the above Astral 5090 Edition 20 GPU (or, I guess, any other PC with extreme power needs). At 190 x 150 x 86 mm, it’s large, but not massive, given its power rating. It’s fully modular (naturally, for this class). And it sports its own magnetic OLED display, which can be mounted on either side, or extended via a cable to somewhere more visible in your case.
At $899, this PSU is an option you can easily skip if you aren’t looking to push the most power possible through Asus’ singular Edition 20 RTX 5090. Without a 230V power outlet, you’re going to be limited to 1600W from the Thor, anyway. You can get a good 1300W ATX 3.1 power supply for less than half this price, which would be more than enough to run an RTX 5090 system. But then, of course, you would have one less screen.
You can grab the above components separately or, if you want to save about $80, you could buy the board, cooler, case, GPU, and PSU together in a bundle from Best Buy for the small sum of $10,849.
Peripherals
Asus’ ROG Azoth Extreme 75% Edition 20 mechanical keyboard
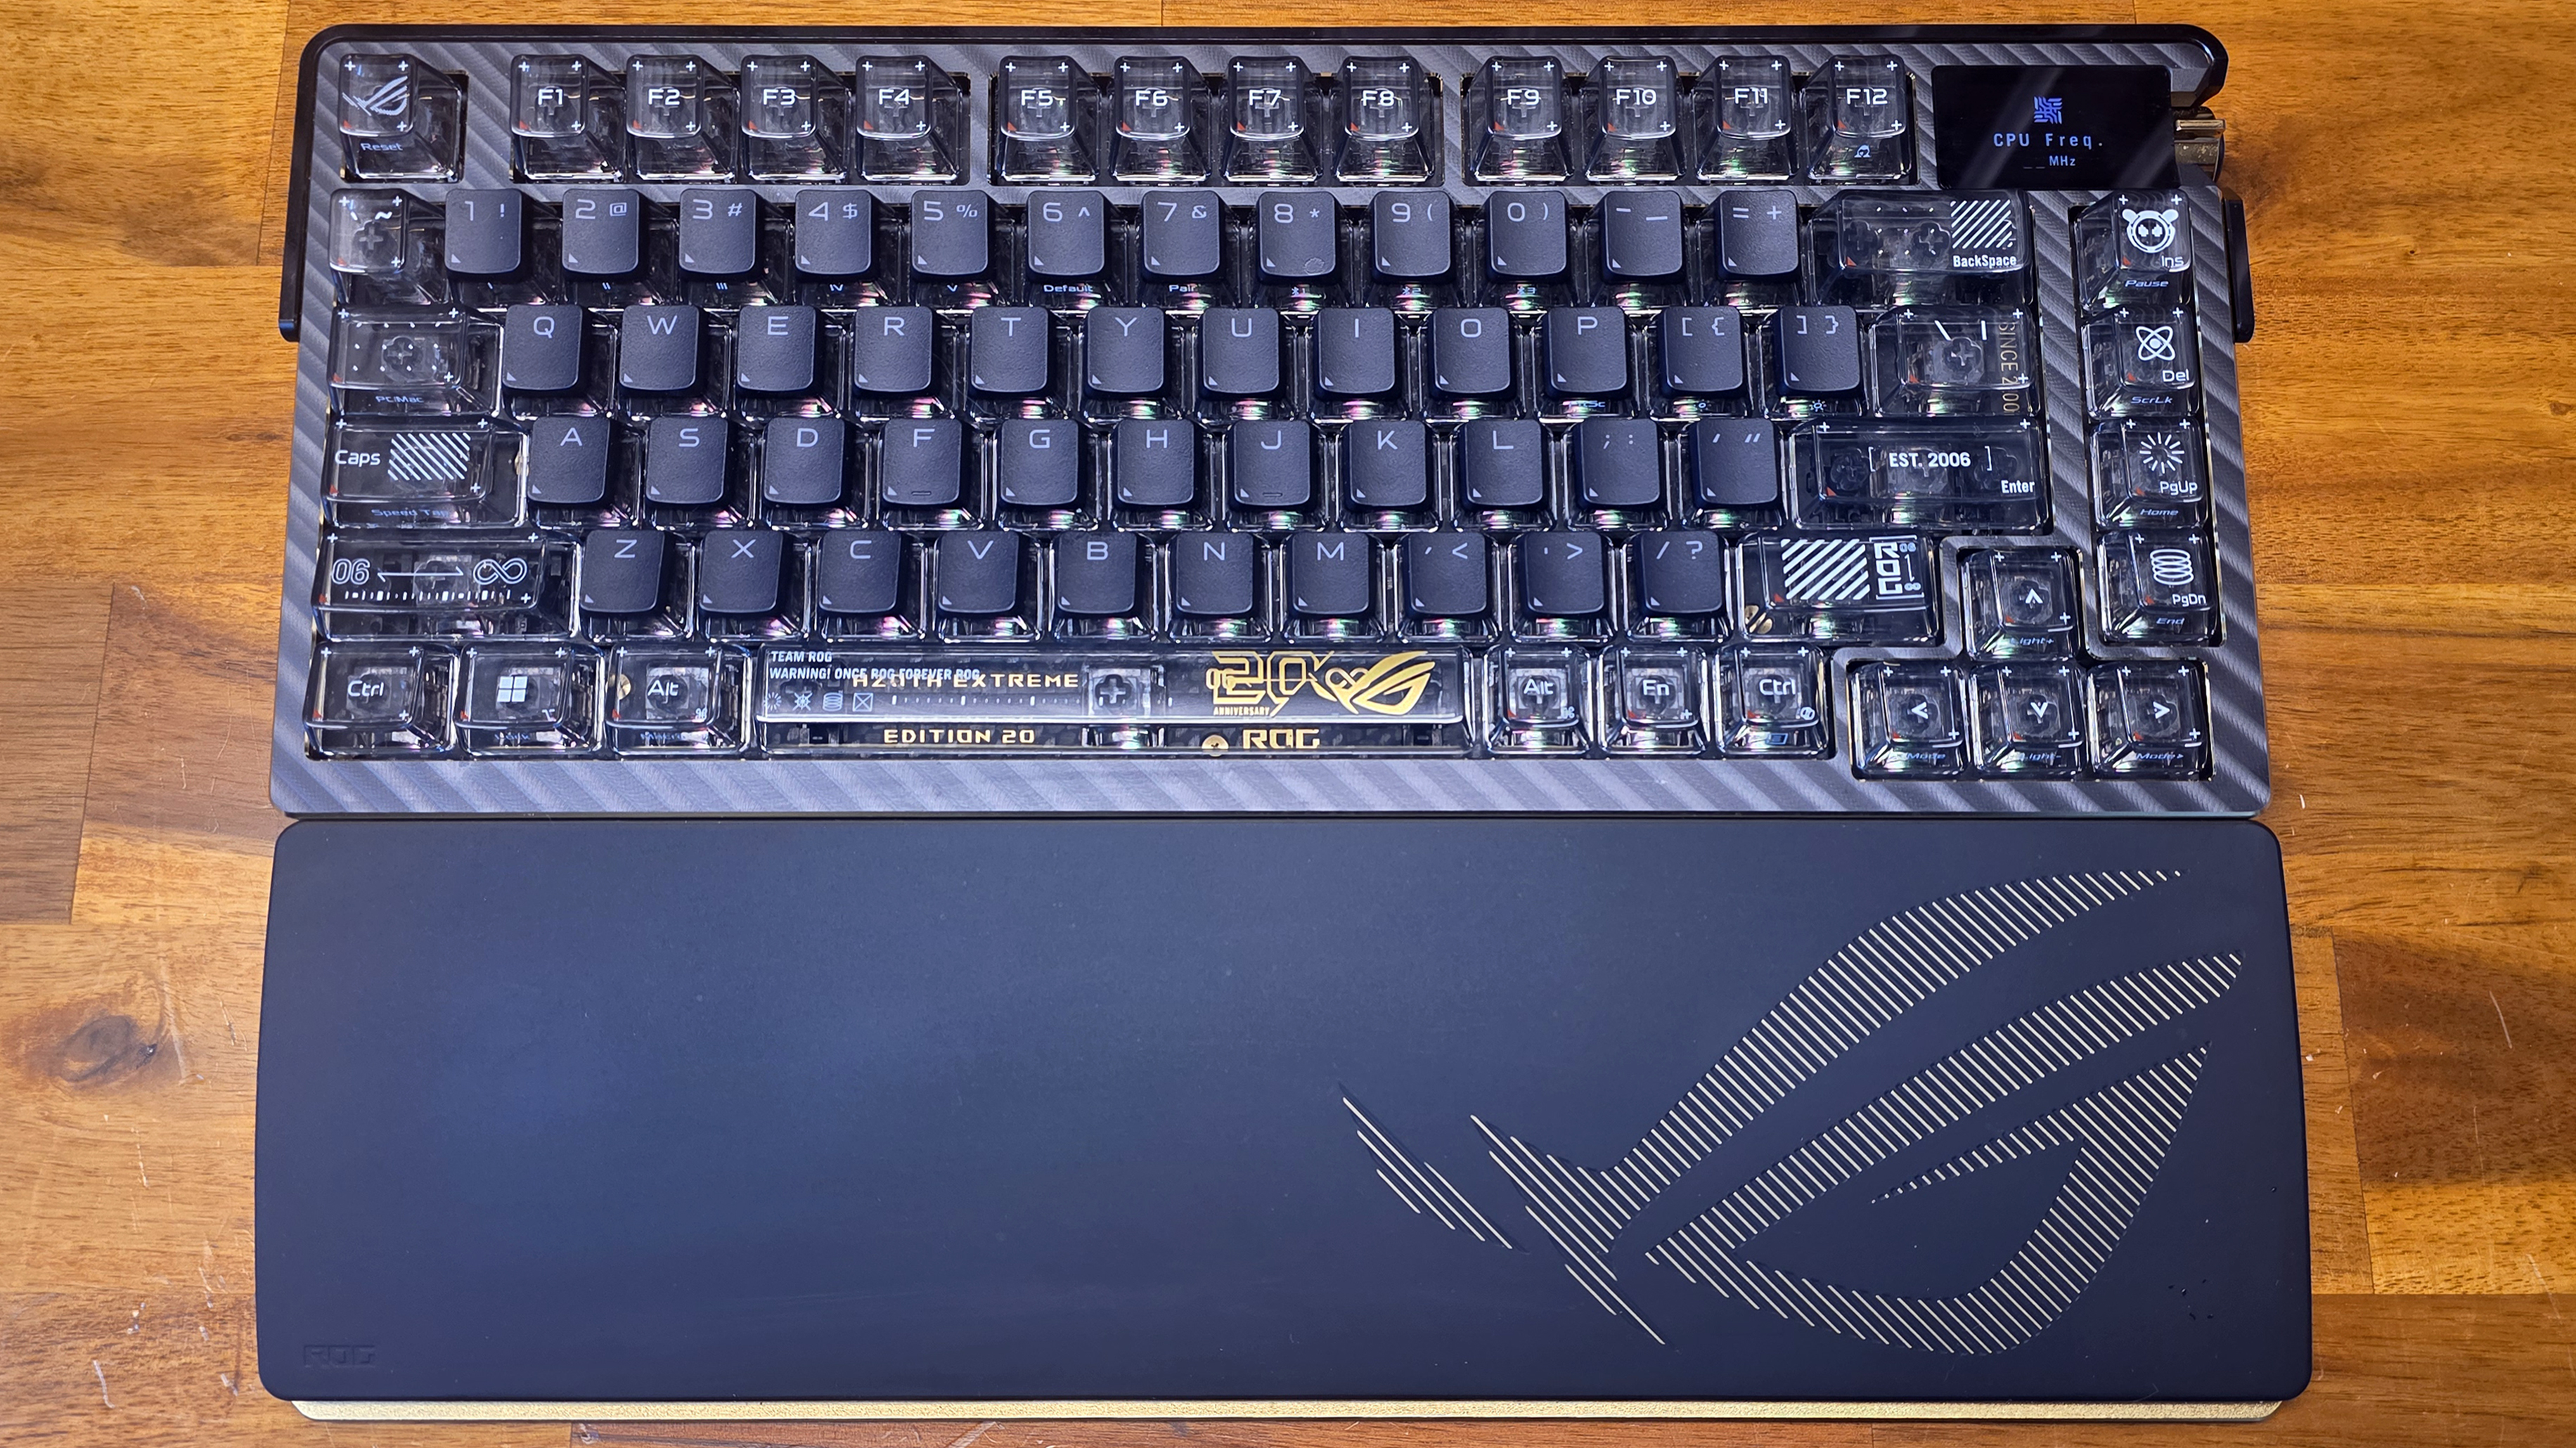
We covered the Azoth Extreme 75% Edition 20 pretty extensively ahead of Computex. It’s a reimagining of the carbon fiber-adorned ROG Azoth Extreme we looked at in 2024, with a mix of transparent and partially transparent keycaps. It’s $100 more expensive than the launch price of the previous Azoth, pegging this keyboard at $599. There’s also a gold metal jog wheel, gold accents along the back, magnetic gold feet (in two sizes), and even gold screws holding the whole thing together. And, naturally, the RGB backlighting under the switches defaults to a gold color out of the box.
Asus ROG Harpe II Extreme Edition 20 gaming mouse
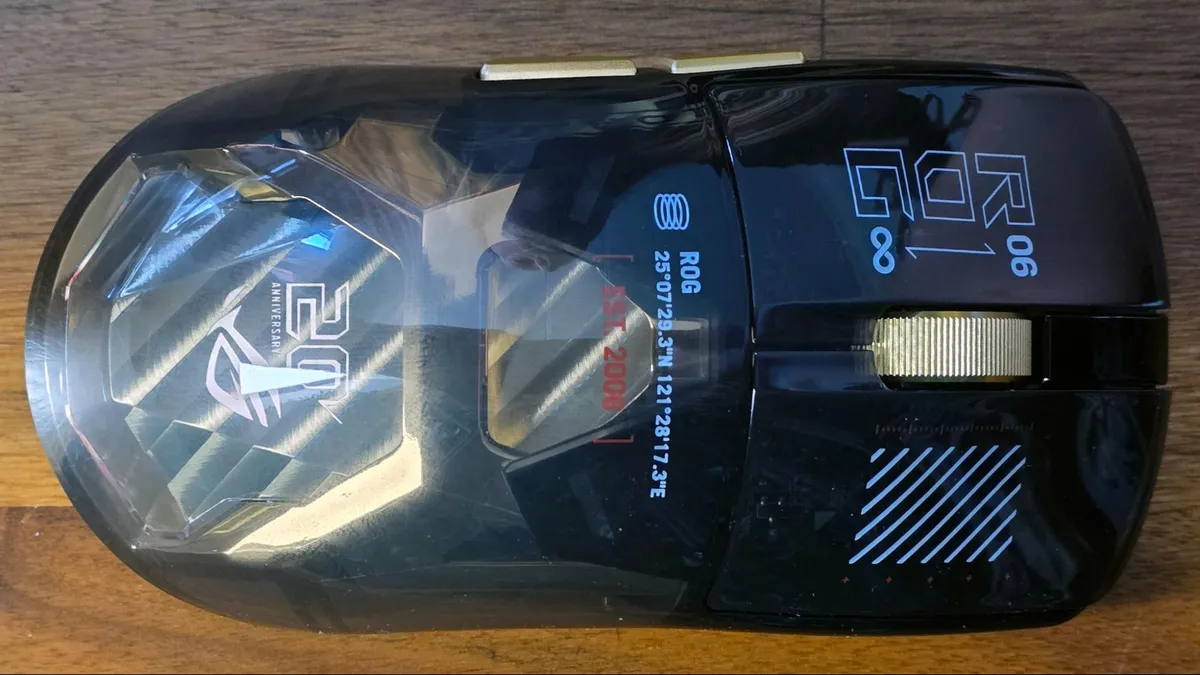
We also checked out the ROG Harpe II Extreme Edition 20 mouse ahead of Computex earlier this year. It packs a 65K sensor, a gold scroll wheel and side buttons, and a transparent chassis with RGB that illuminates the ROG 20th Anniversary logo. There isn’t much to complain about in terms of specs, although many will balk at the $259 price. Having used it extensively for a couple of weeks, it feels and performs well. My main concern is what the transparent plastic will look like after years of regular gaming.
Asus ROG Swift OLED PG27AQWP-W Edition 20 gaming monitor
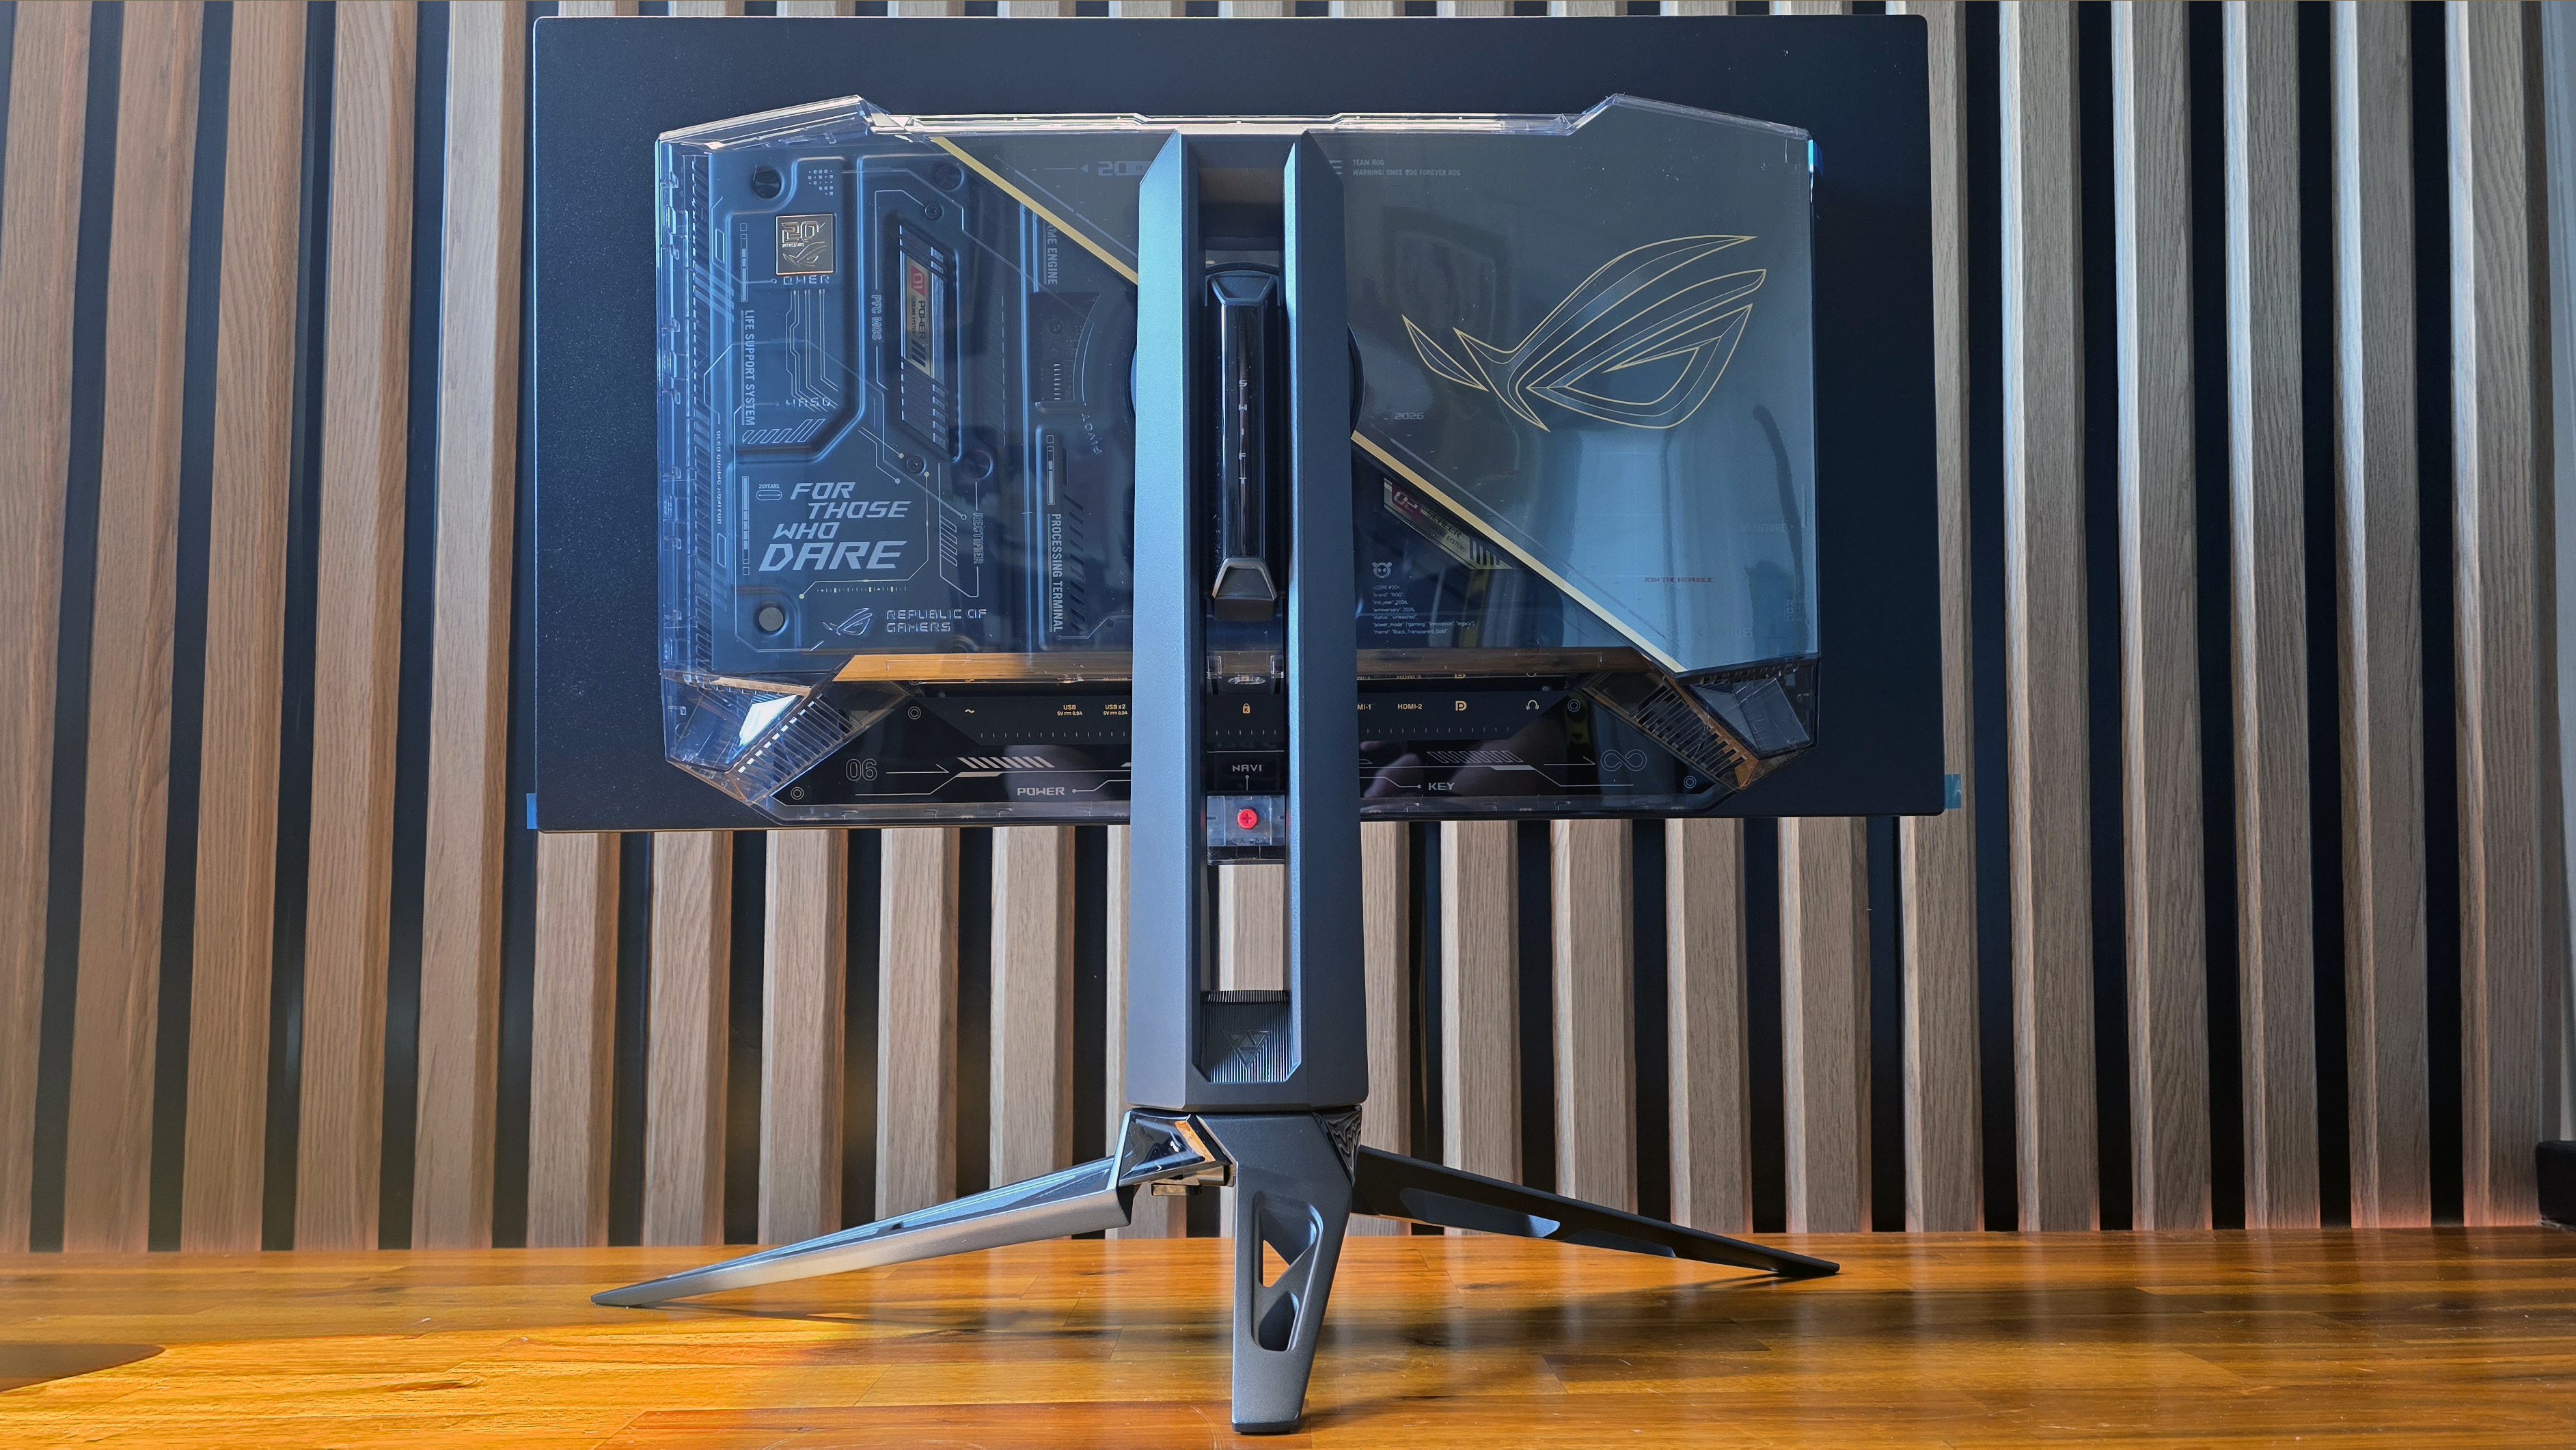
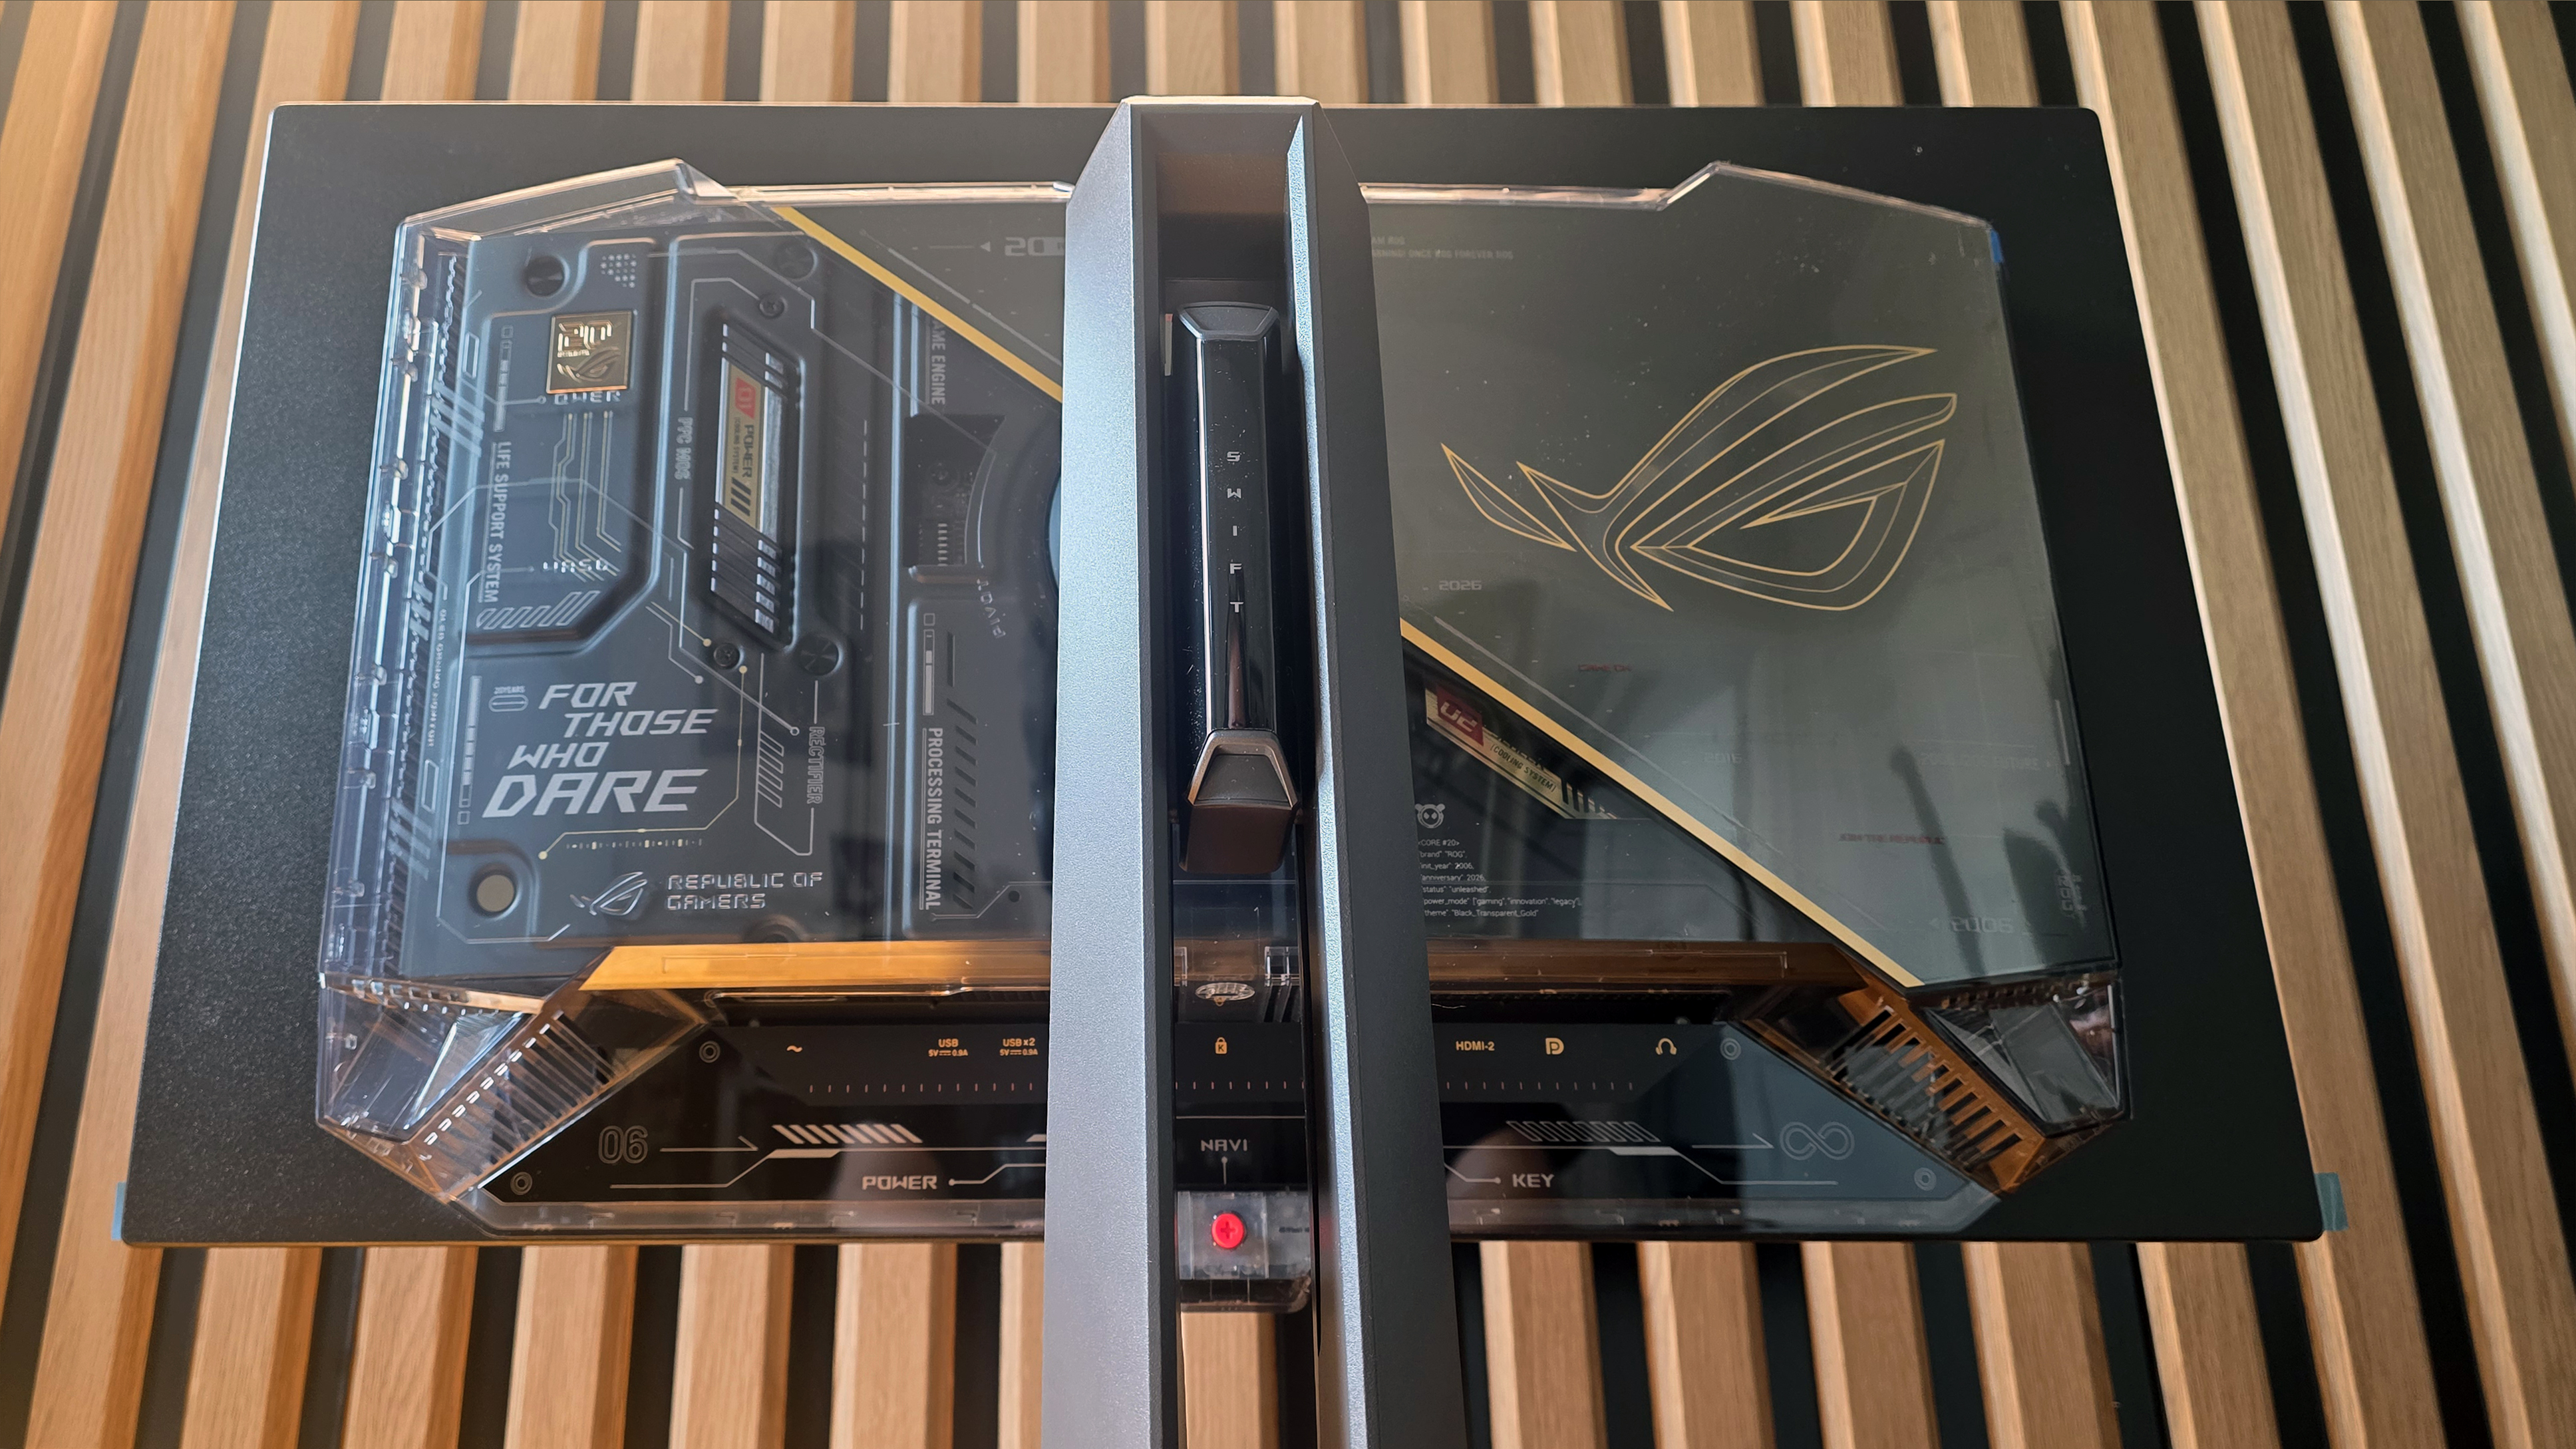
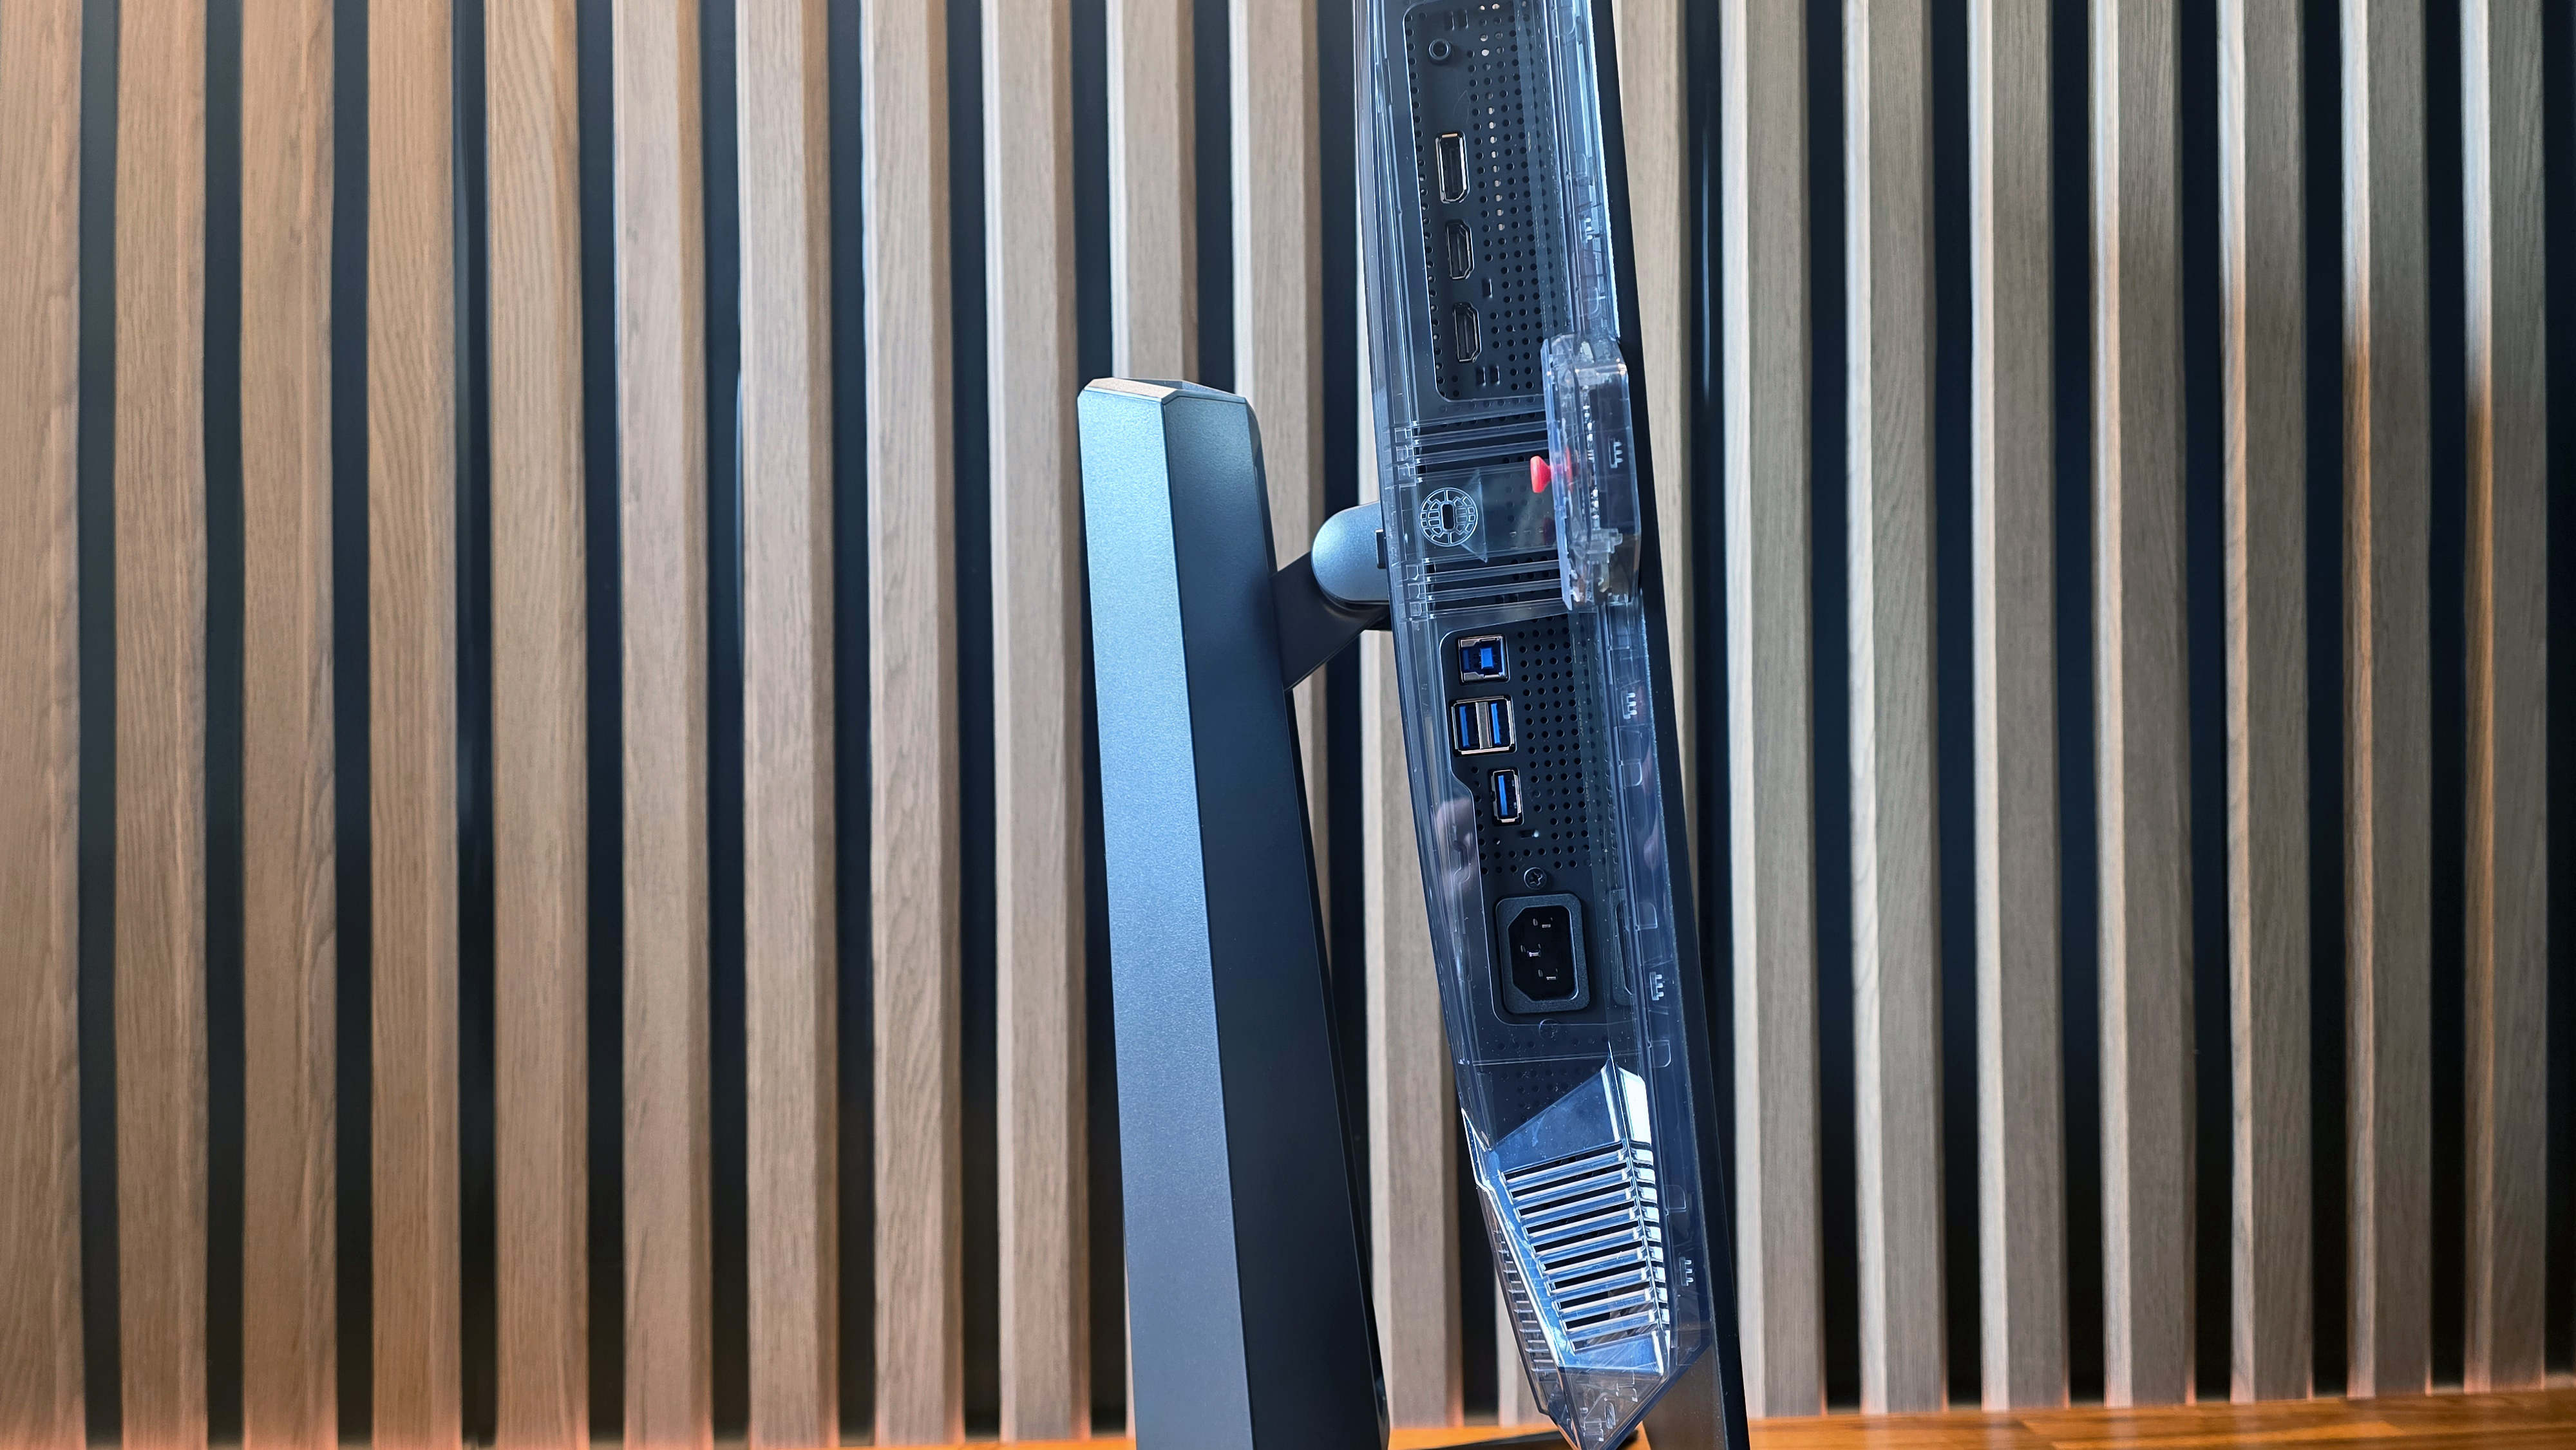
We tested the non-Edition 20 version of this OLED earlier this year and gave it a perfect score. It can do 540 Hz refresh at its native 2560 x 1440 resolution, or a wild 720 Hz at 720p. It was also bright and color accurate. The Edition 20 variant looks to have generally the same specs, and costs about $100 more for the addition of some gold plating, stealth-black futuristic looks, and an undoubtedly striking transparent rear chassis panel that matches the look of the above Harpe II Extreme Edition 20 mouse.
Its tandem OLED panel is rated to 1,500 nits of peak brightness, and a button below the screen lets you easily switch between the panel’s 540 Hz and 720 Hz modes. It’s a nice gaming screen, to be sure, and Asus hasn’t tacked on as much Edition 20 tax here as elsewhere, but high-refresh panels tend to kick out a lot of heat, and I have to wonder how soon the pretty back panel will start to change from clear to yellow, or just cloudy.
SSD and RAM
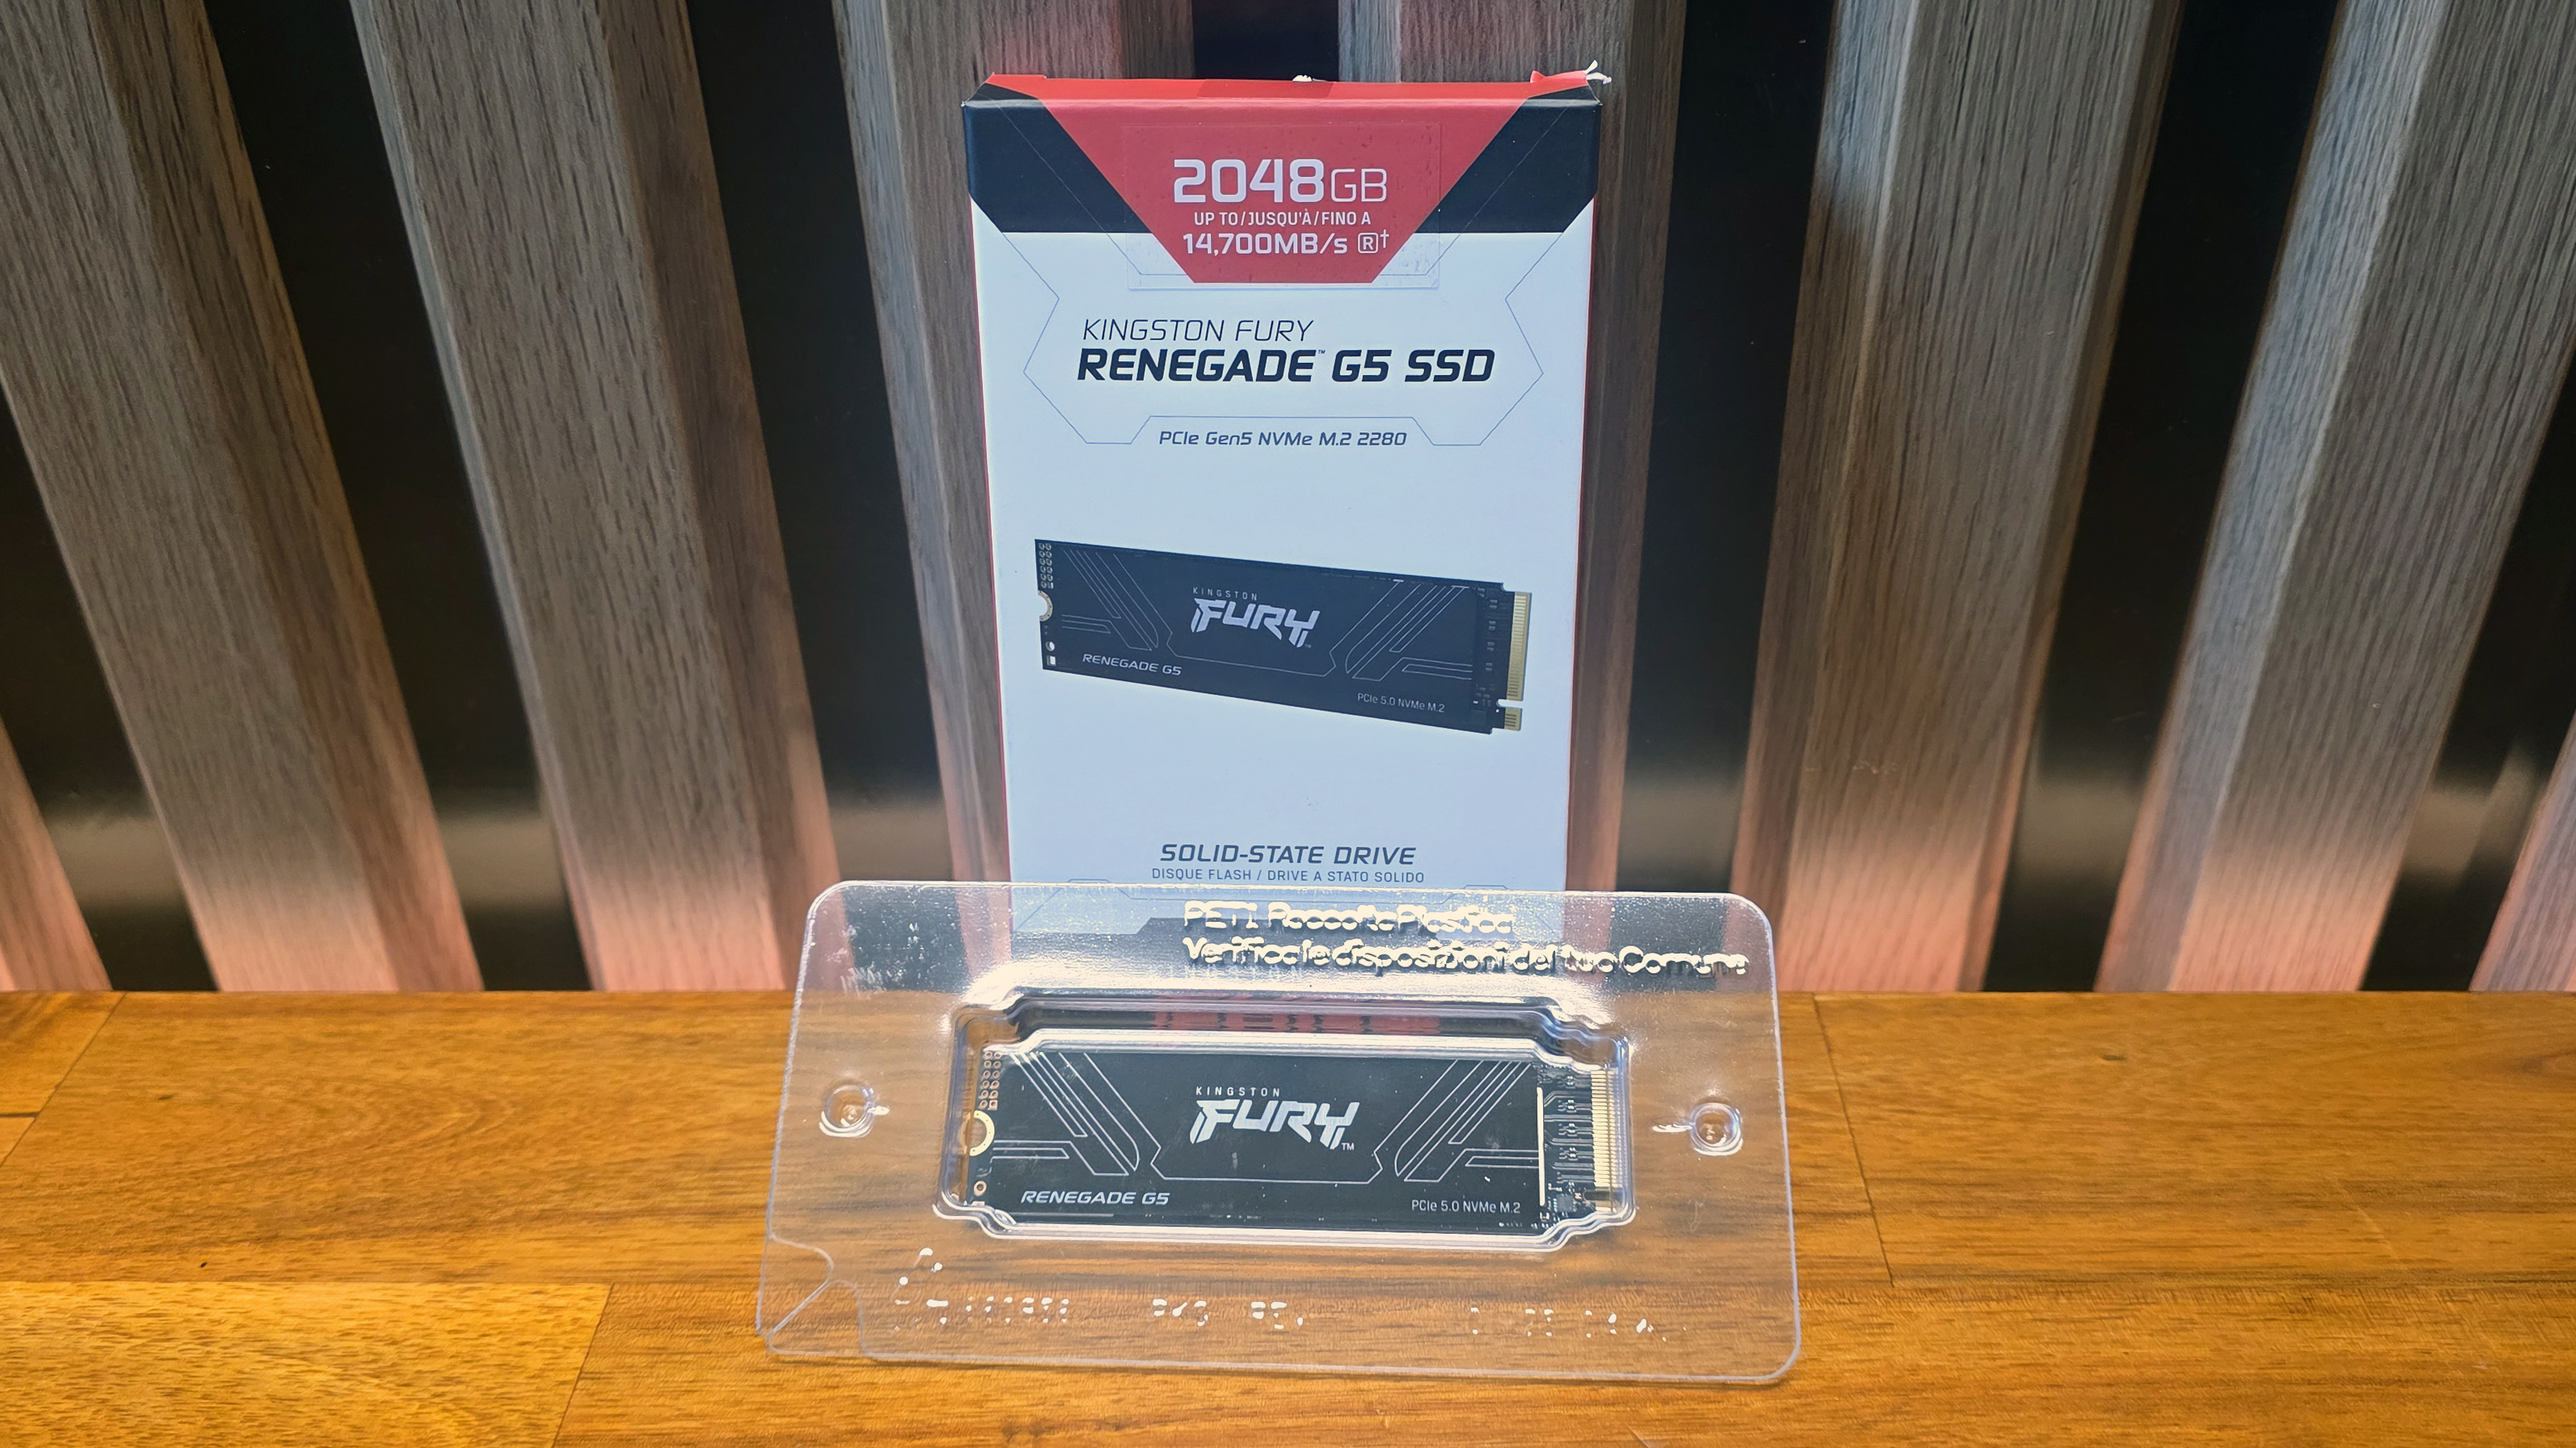
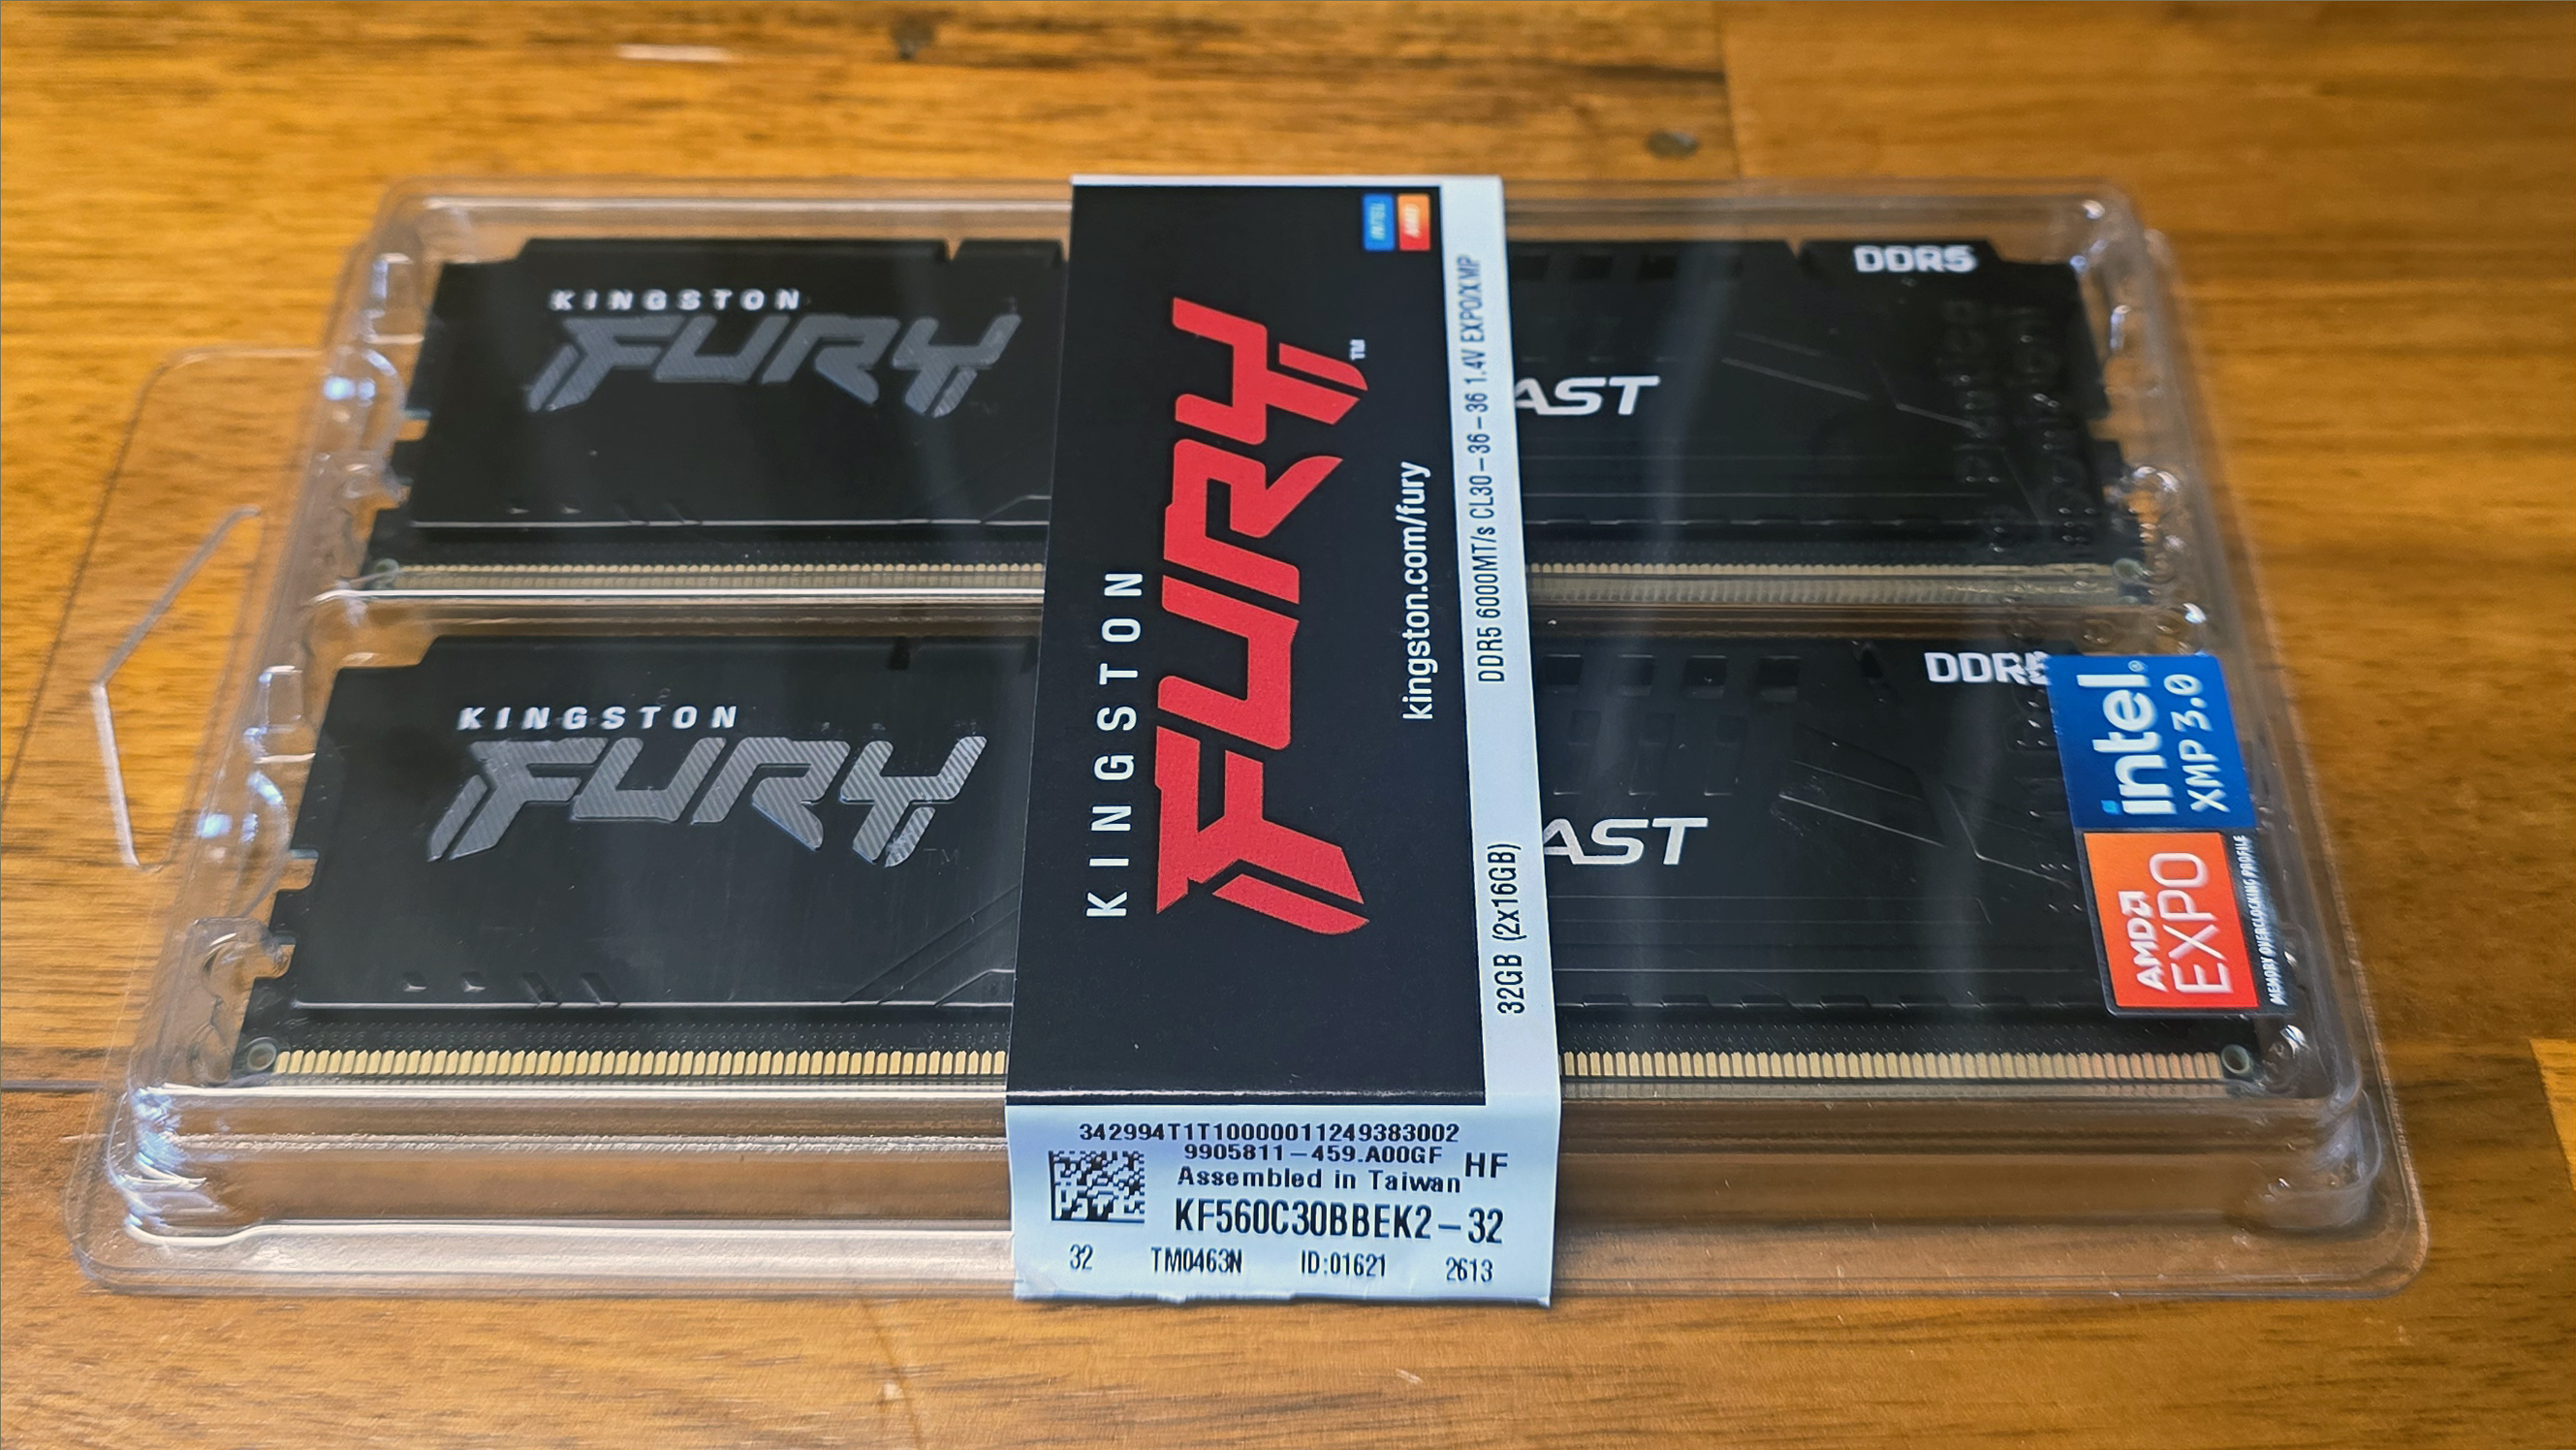
Along with the above parts, we were also sent a speedy Fury Renegade PCIe 5 SSD from Kingston, as well as 32GB of DDR5 for testing the system. We added our own 9950X CPU.
I was hoping to get my hands on some of the Asus-branded RAM we also saw at Computex, but I was told by a rep that the Asus RAM is solely destined for the Chinese market. Perhaps it’s made by CXMT.
Kingston Fury Renegade G5 M.2 2TB PCIe 5.0 SSD
Kingston Fury Beast 32GB (2x16GB) 6000MT/s DDR5 CL30 RAM
Building an Asus ROG Edition 20 PC: The good, the bad, and the AMOLED
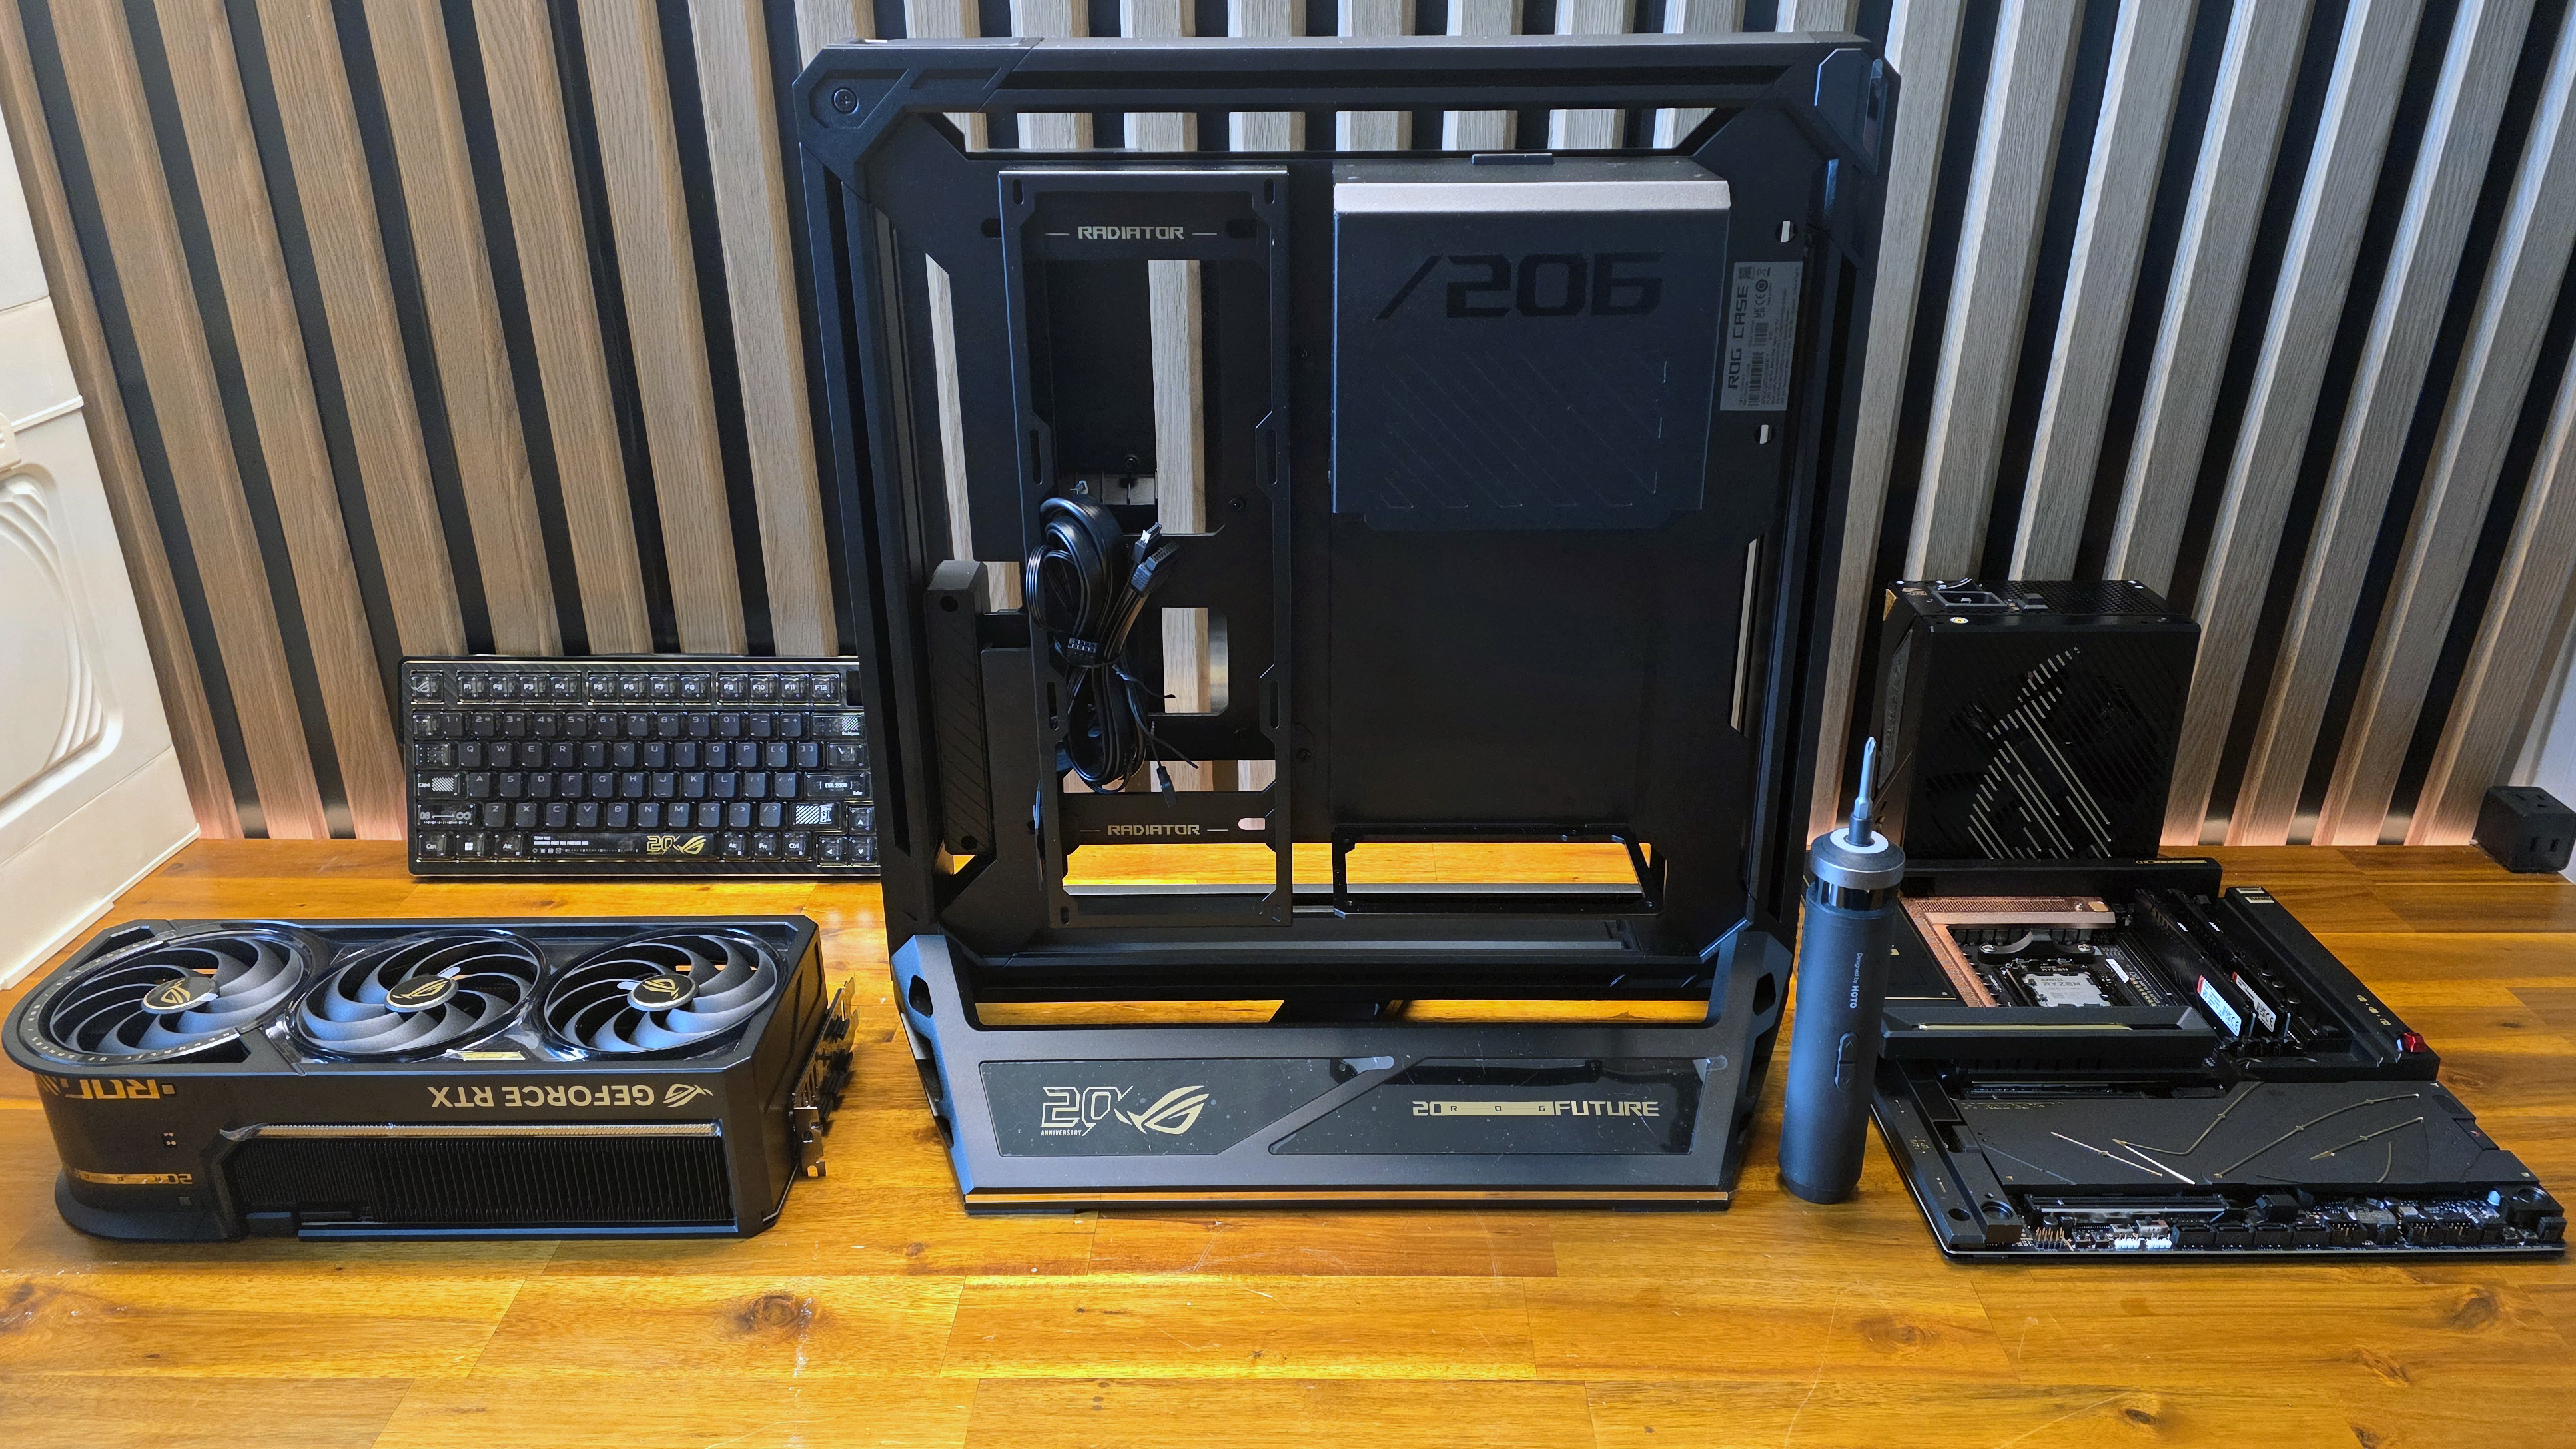
Asus offers up a 17-step system build guide for putting together a PC with its Edition 20 parts, complete with a nearly 19-minute YouTube video, which it points buyers to via a QR code stuck on the upper-right corner of the motherboard.
For the most part, the two key things I needed for installation were lots of space (the build process alternated between my workbench and my coffee table) and my trusty Hoto screwdriver. But as we’ll see later on, there was one instance where I needed a long screwdriver to get screws into some recessed holes inside the case.
I haven’t followed instructions much when building a PC for decades now, but I did here, in part because I was pretty pressed for time, but also because some of these components, like the case, motherboard, and cooler, have pretty specific features and assembly steps. And I also didn’t want to be sorting through five or more different manuals every time I ran into a roadblock.
To Asus’ credit, the video is pretty thorough and clear. Only a couple of times (as I’ll detail below) did I have to jump back several seconds to catch something I missed or, on one occasion, something Asus missed in its assembly guide.
Starting with the motherboard, you’ll first need to remove several covers, the two largest of which (on the right in the image above) are magnetically attached, and basically there in case you want to display the board as “art” on its own at some point. The large windowed frame over the socket and RAM area, and the layered section covering the PCIe slots can’t be in place if you’re actually using the board – at least presuming you are using this board with a GPU or anything else in the slots.
There are also two M.2 heatsinks covering the five drive slots native to the board. Both have latches and come away easily.
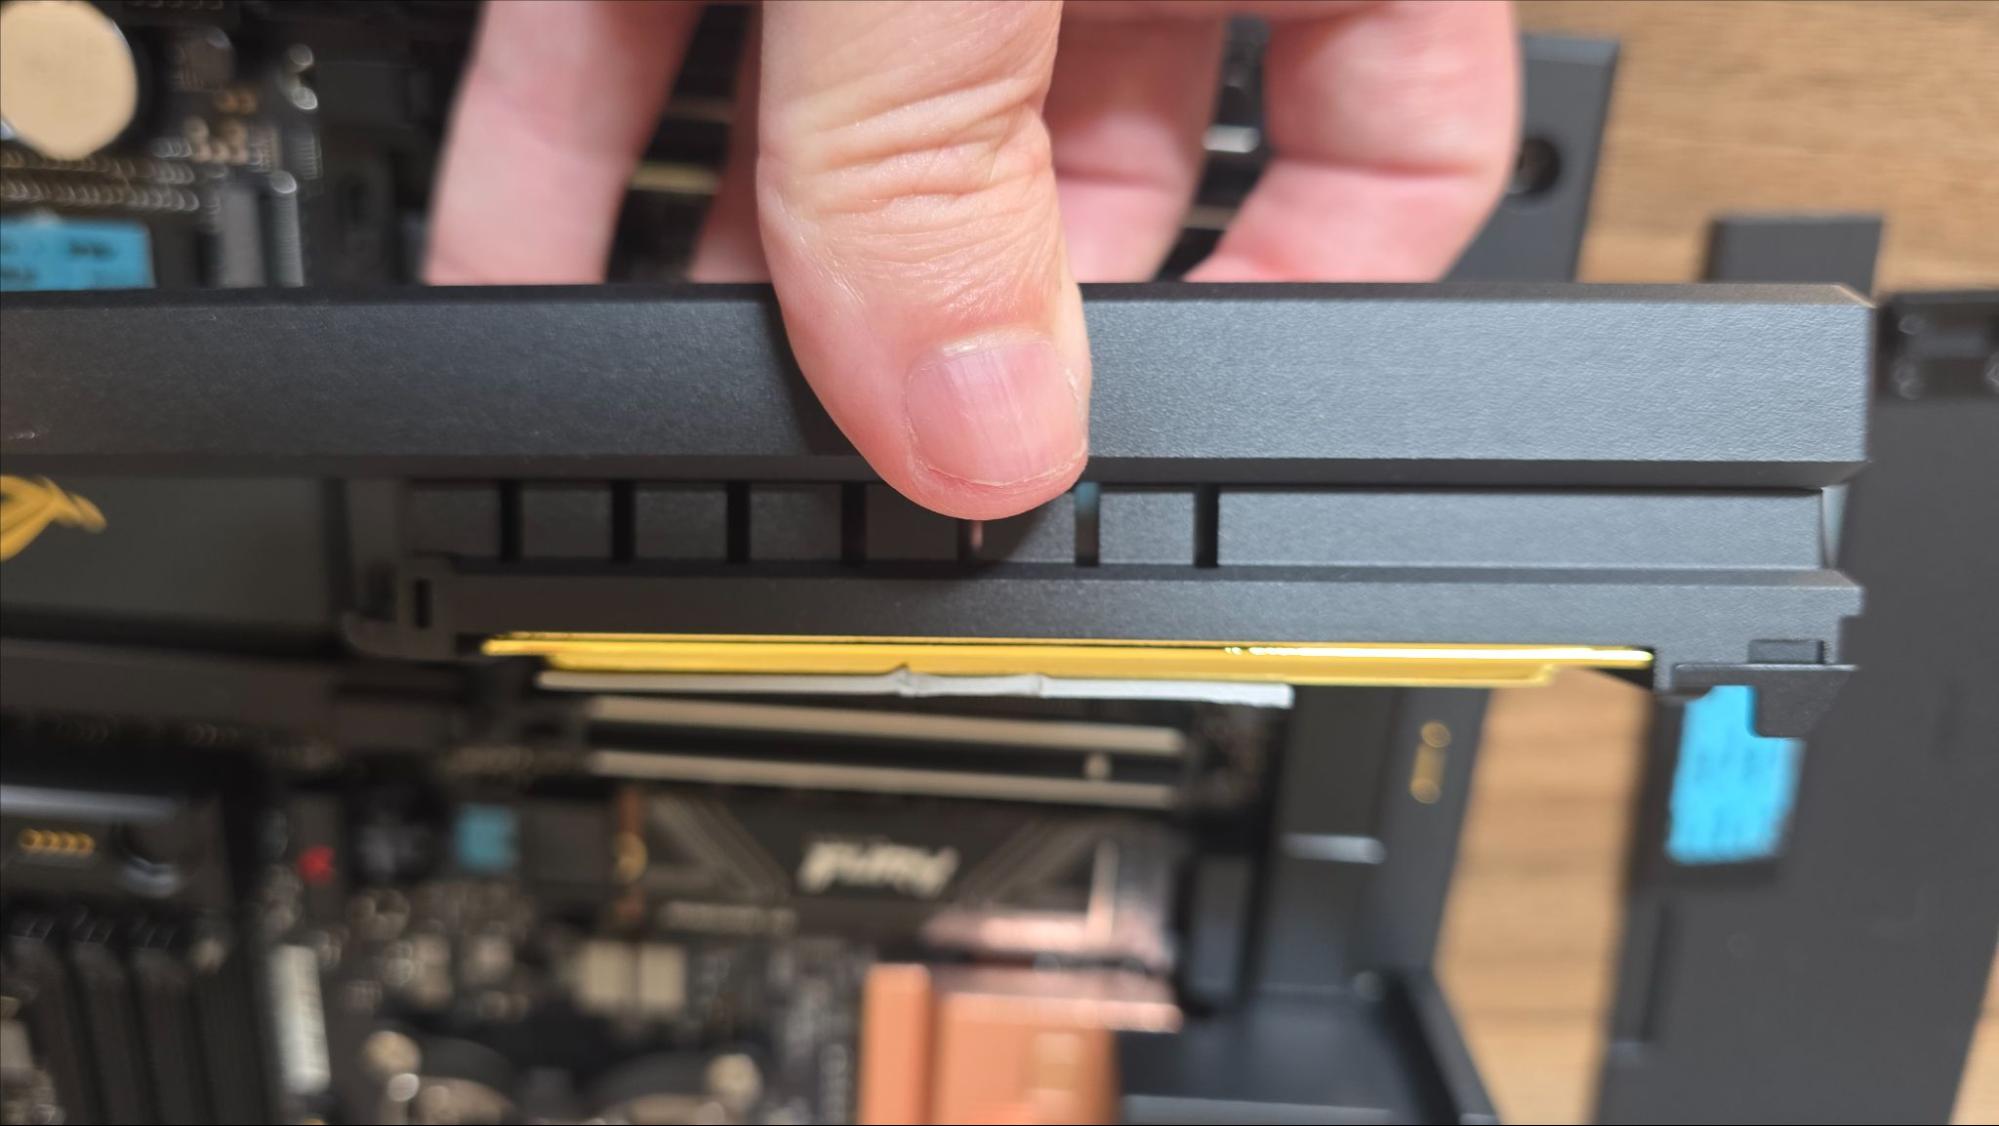
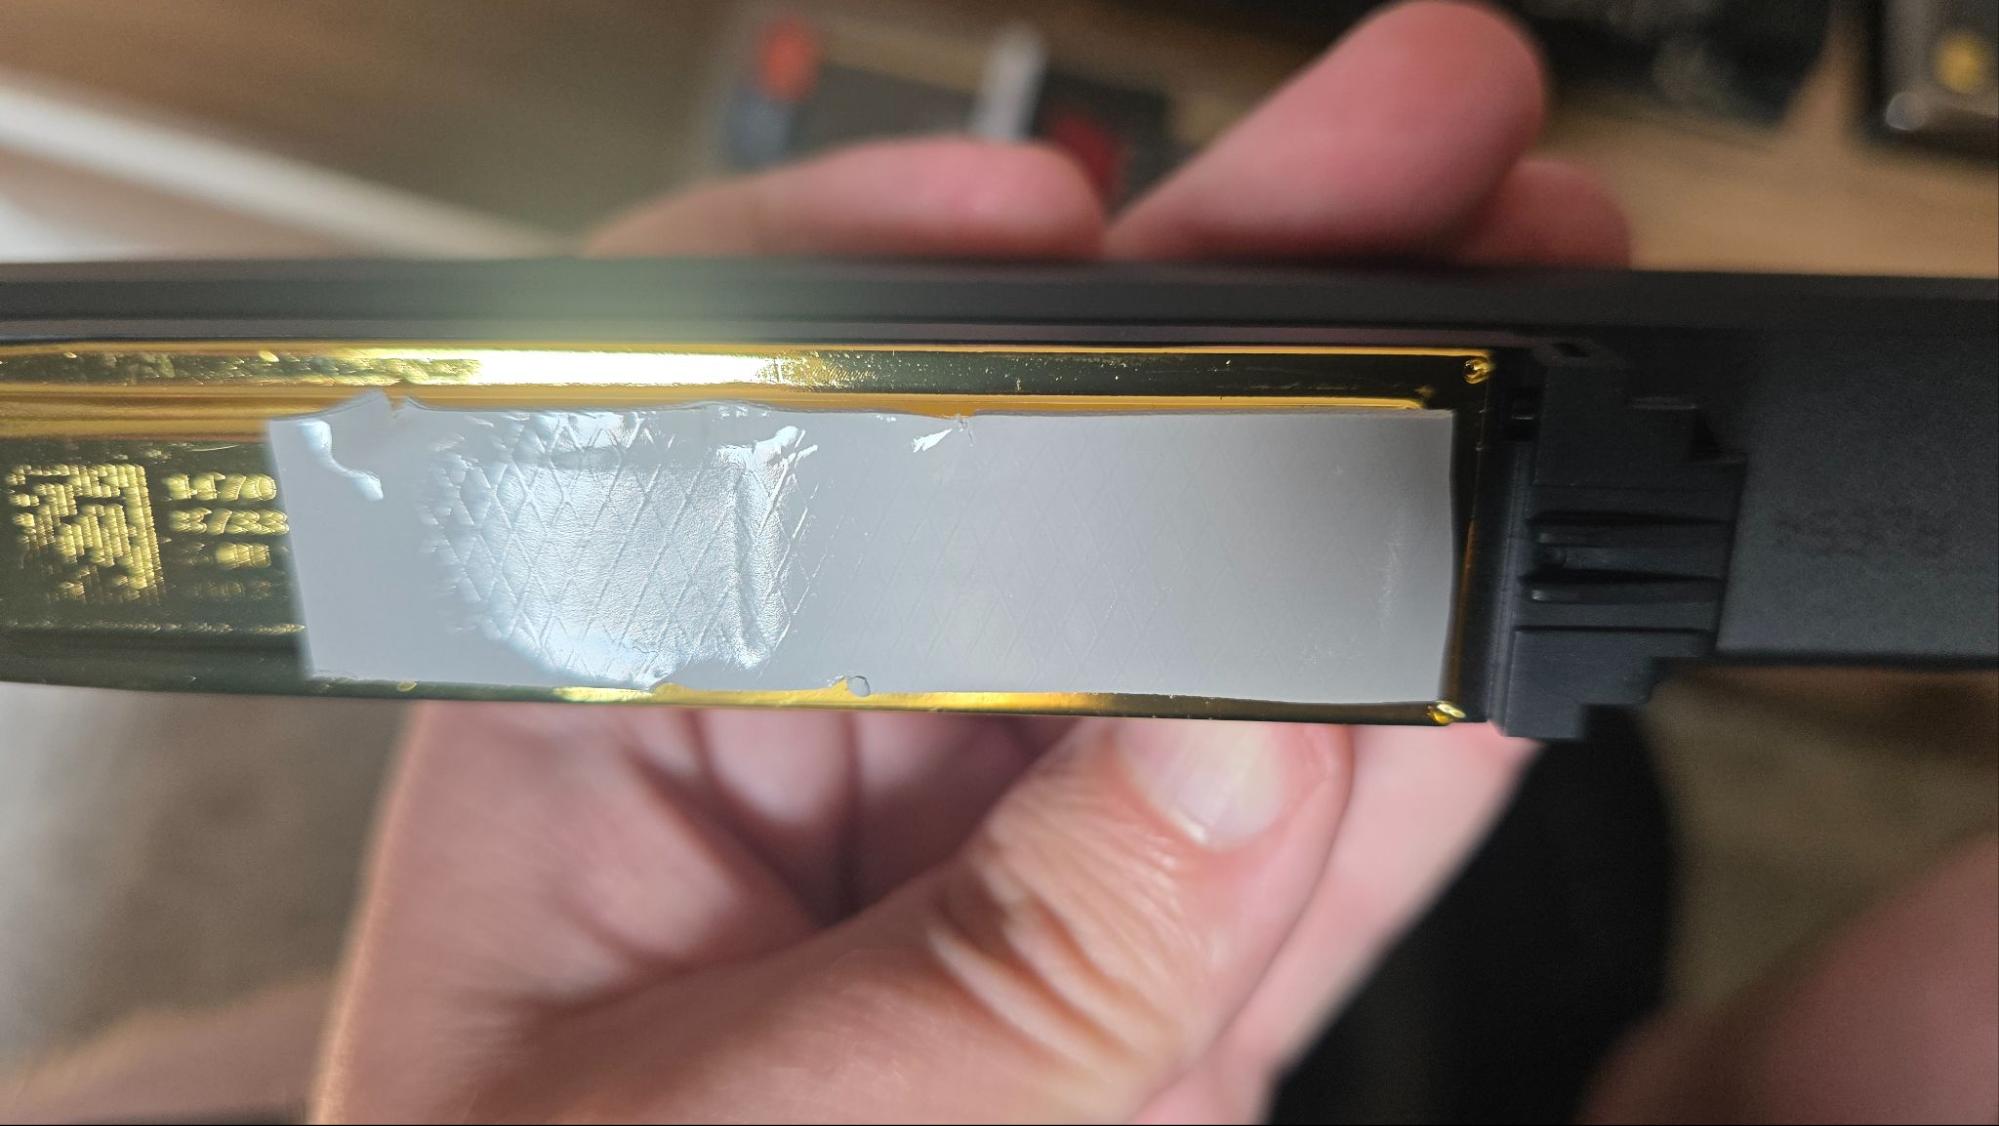
The primary heatsink is quite large, with a gold-metal base and heatpipe that is visible from the top, around the black aluminum of the rest of the sink. There are thermal pads on the top and bottom of all the drive areas, and Asus includes small rubber stoppers for single-sided drives, which go in between the bottom heatinks, to prevent PCB flexing. I naturally checked after installing the sink to make sure the thermal pad made contact with the Kingston drive. Like we saw in previous motherboard testing of a few other Asus boards, the pad definitely makes contact with the SSD, but the compression looks a little light. Still, as long as the drive is connected to the pad, the cooler should be able to do its job. I’m only installing one M.2 drive, so next were the fairly typical steps of installing the CPU and RAM.
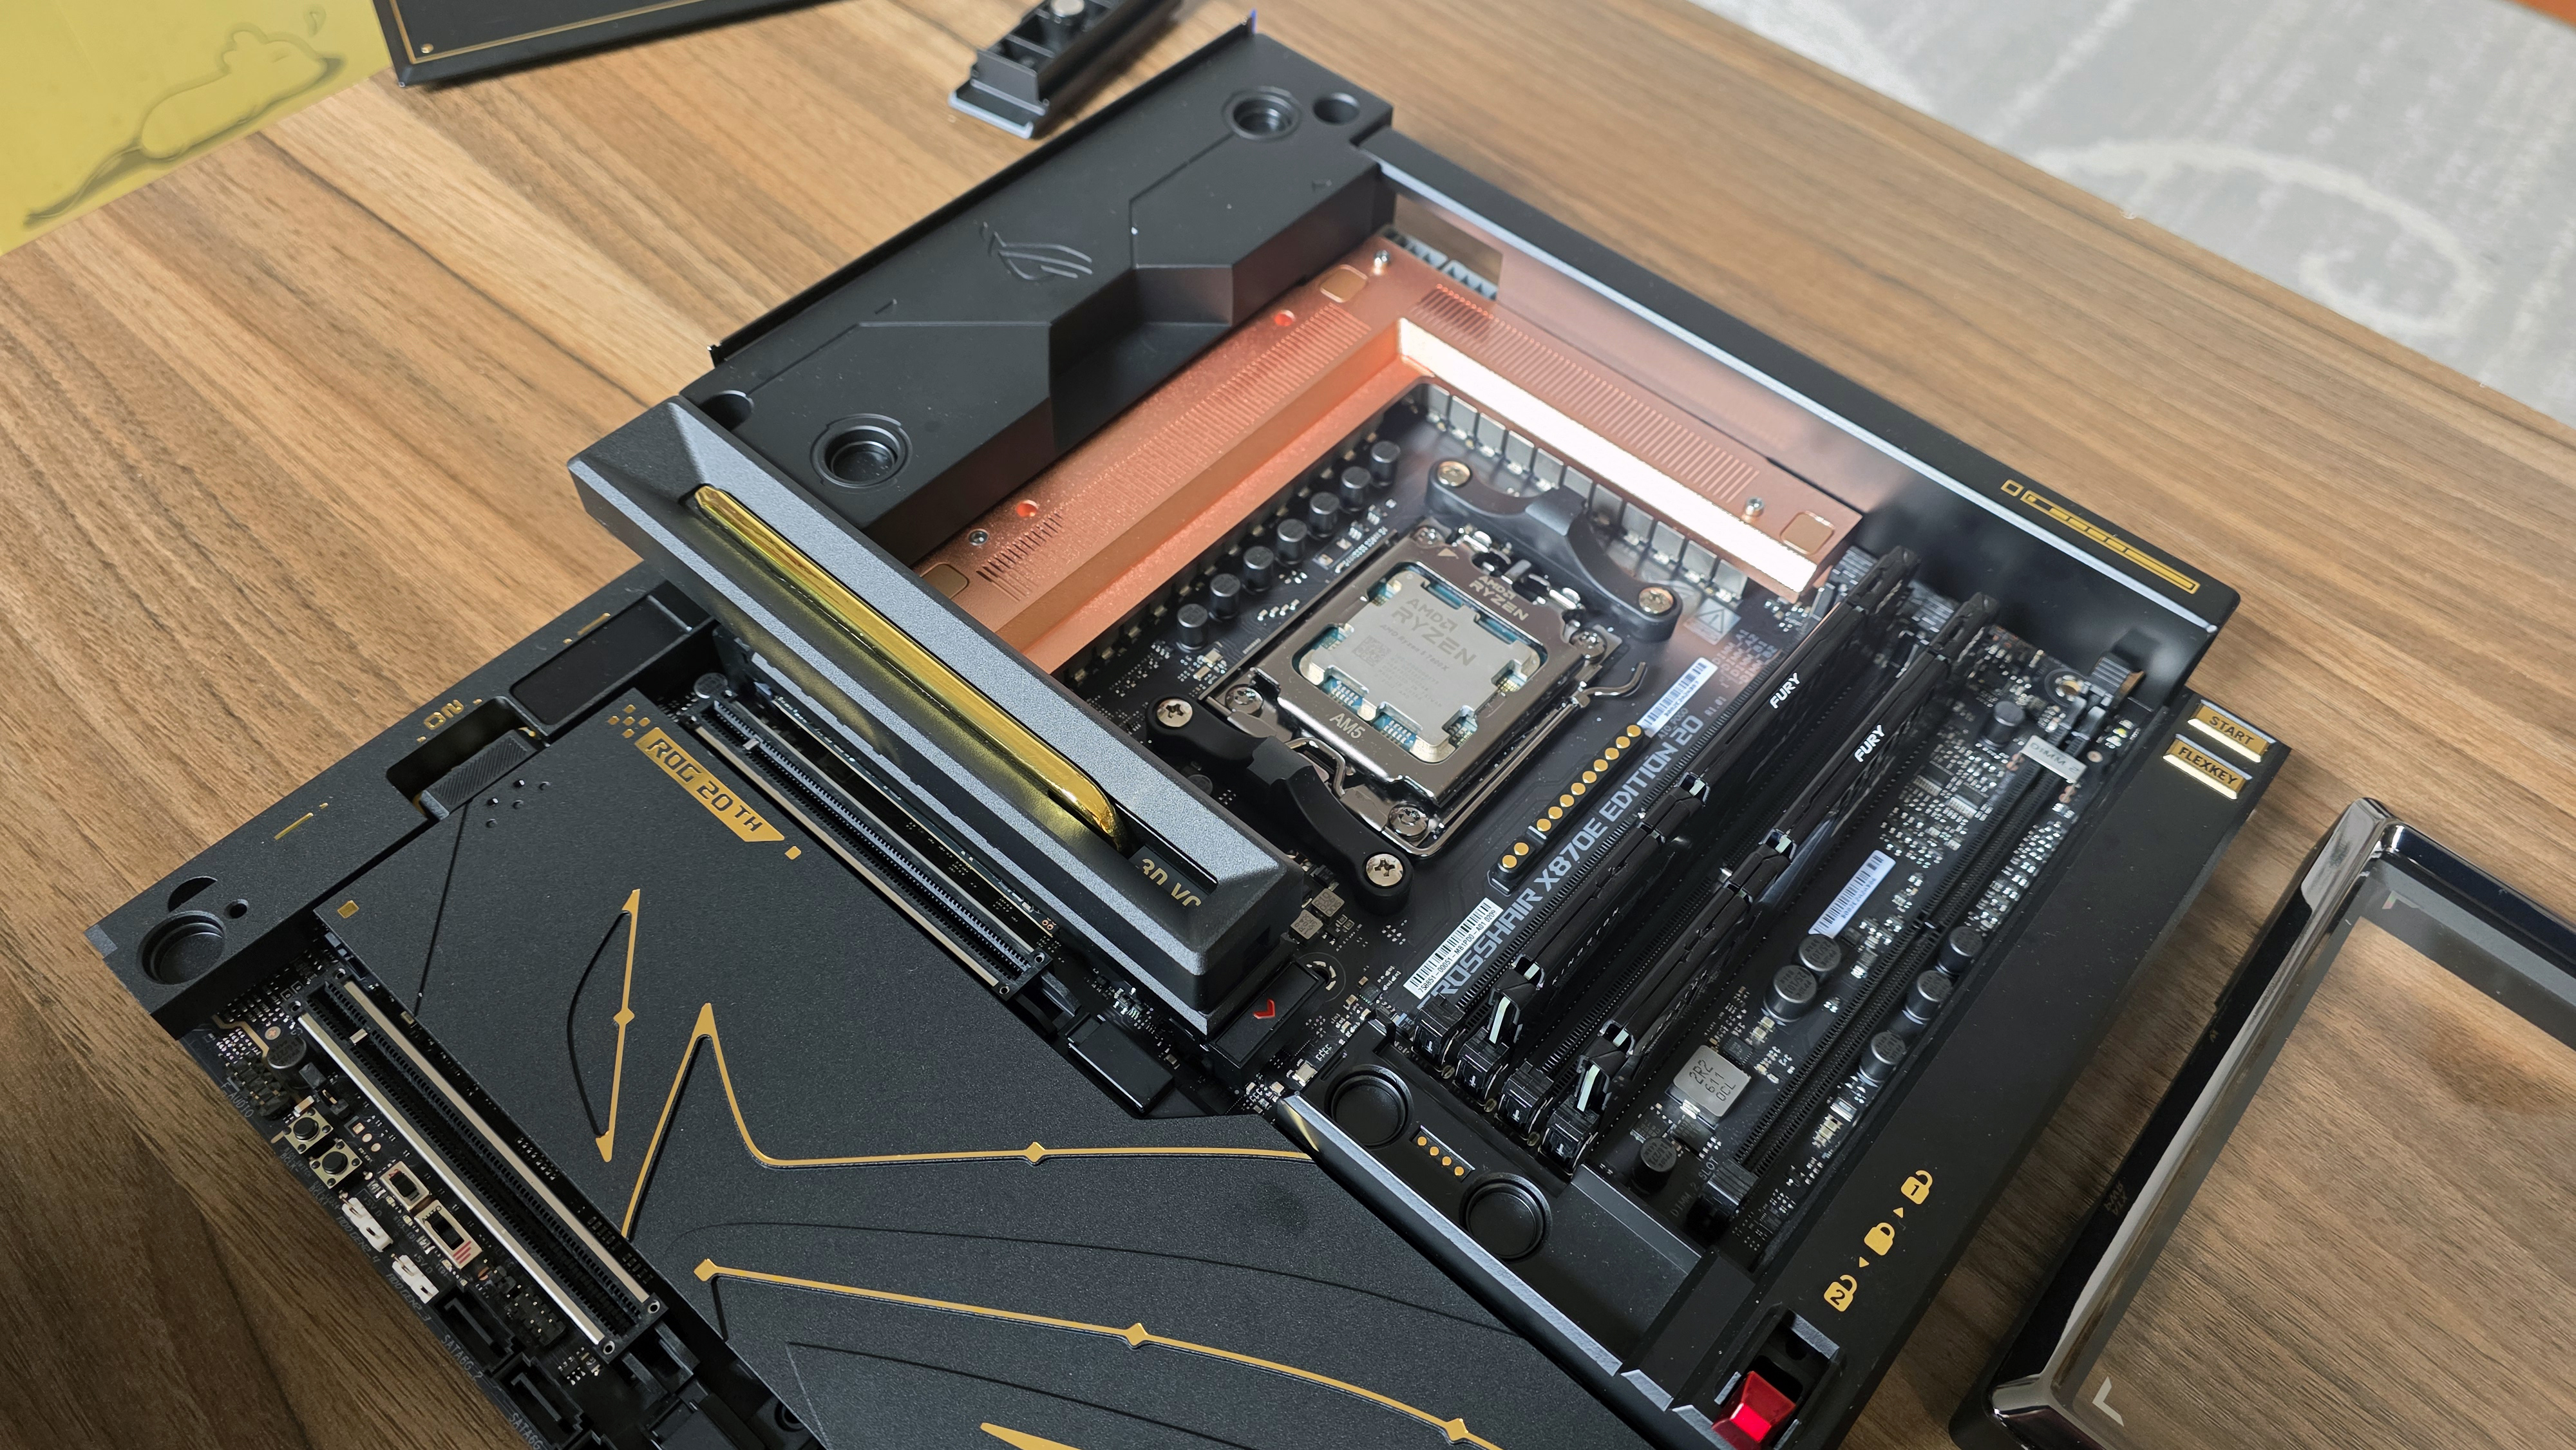
Note that I initially installed a Ryzen 5 7600X here, because it’s the chip I had on hand while taking photos. But I eventually grabbed a Ryzen 9 9950X from the office to install in the system, as it’s a much more appropriate CPU for this otherwise top-end build.
Asus’ guide actually doesn’t tell you to install the RAM until much later, but I installed it after the CPU, because PC building muscle memory told me it was the right time to do it. I didn’t run into any issues, so you could install the RAM here or later on. Just, of course, make sure you put the RAM into the correct slots if, like me, you’re only installing two sticks.
Case, cooler, and power supply
With the SSD, RAM, and CPU in place, I snapped the plate cooler back on, and it was time to start dealing with the GR20 chassis. This is when I really started to realize just how heavy most of these parts are, although I did have to haul all the boxes up two flights of stairs a few days before this. The case weighs just over 20 pounds on its own, and when you start adding the board (10.8 pounds) and the GPU (7.4 pounds), the system gets very heavy, very fast.
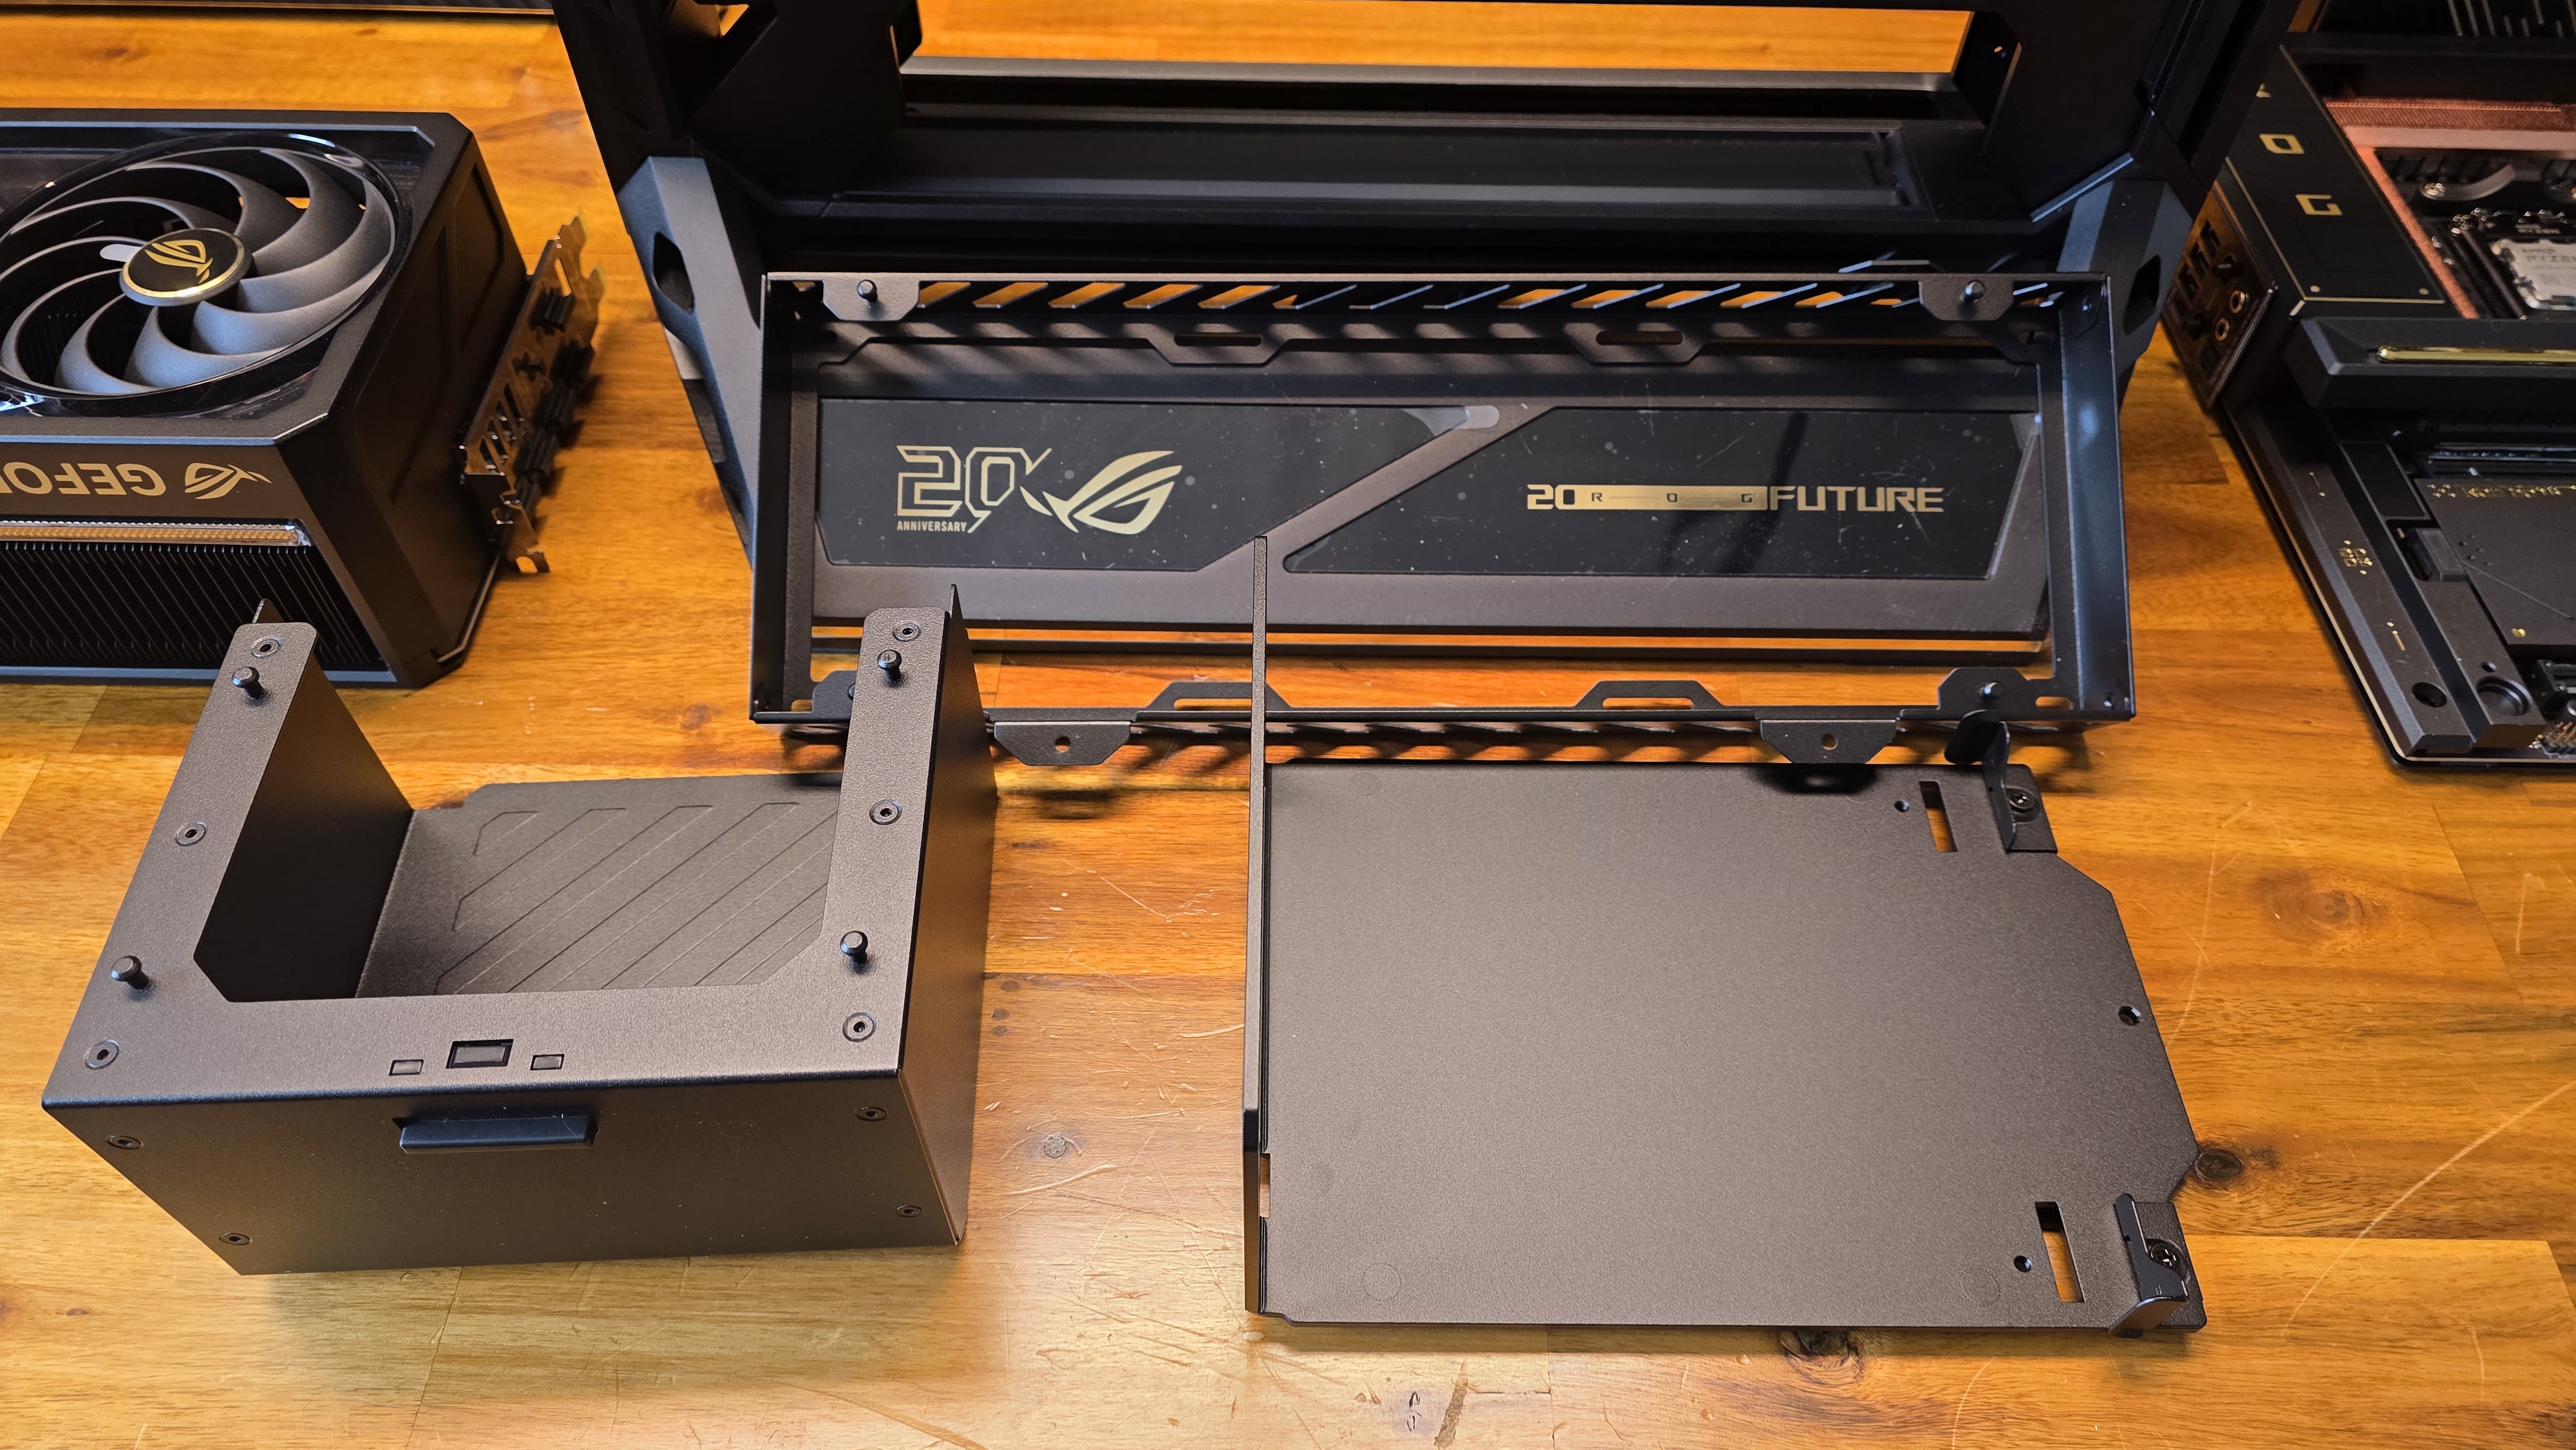
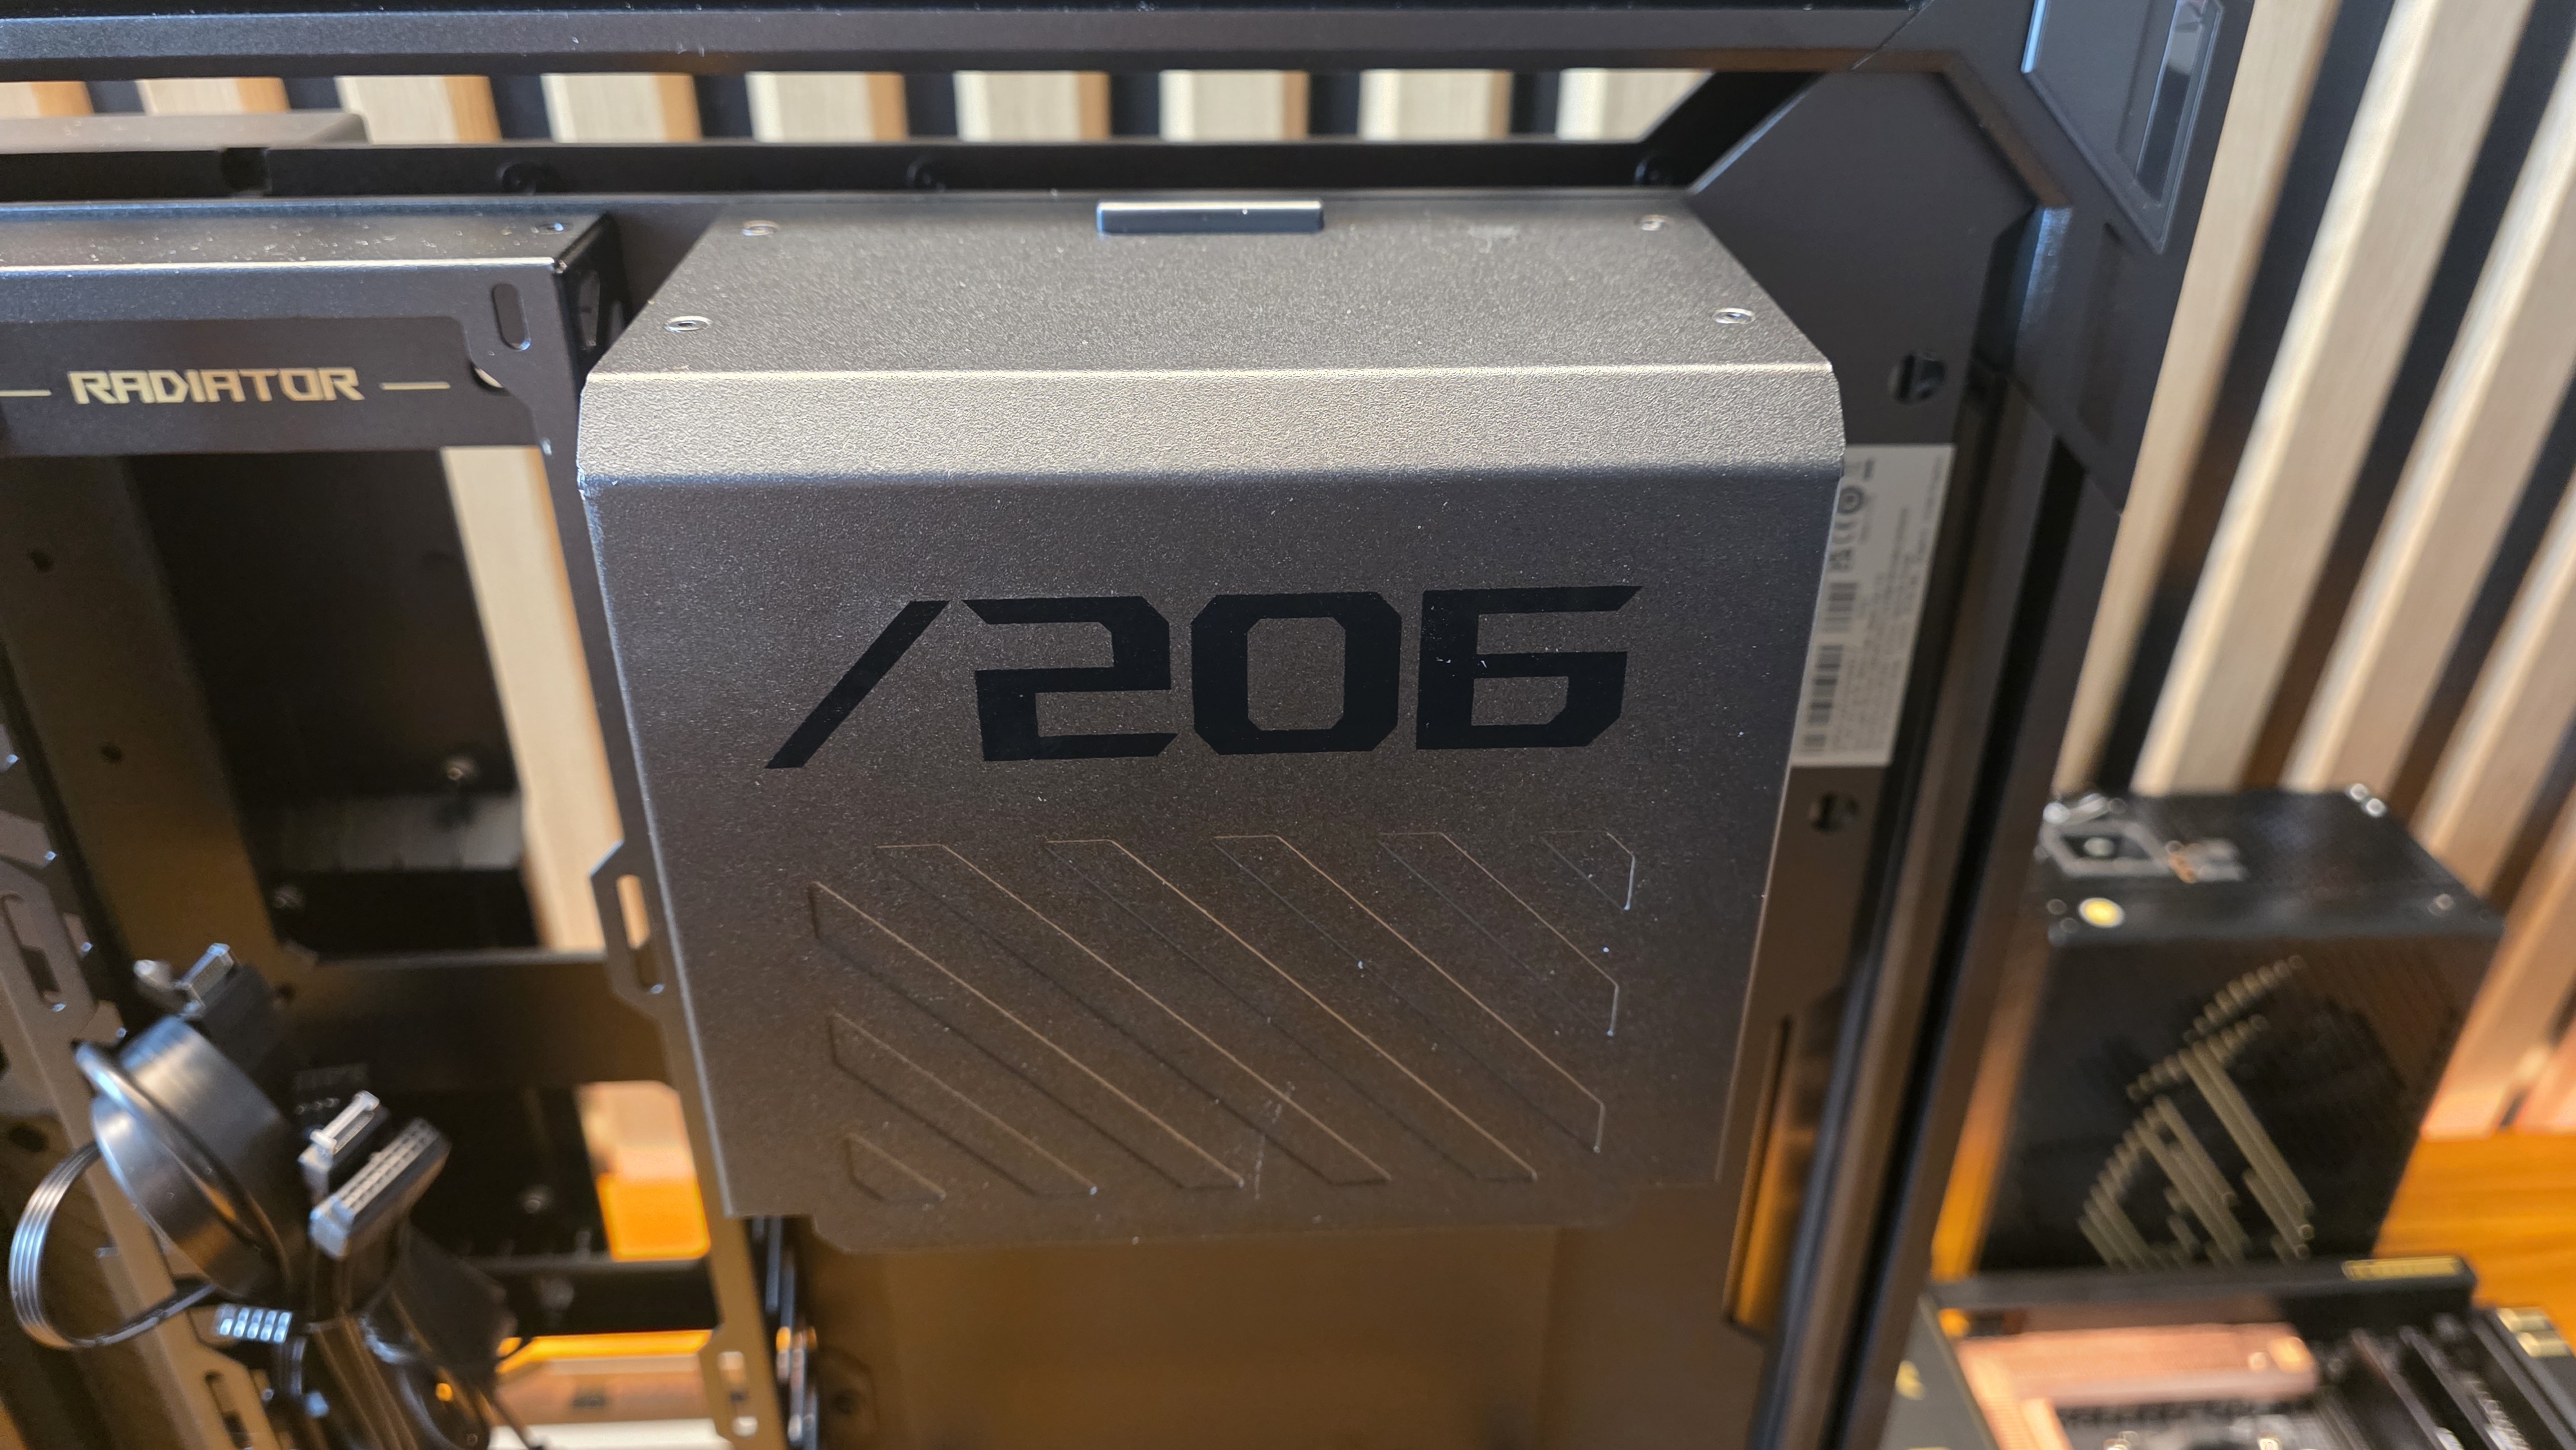
You have to lay the case down in order to install the motherboard, which, since the case is an open frame, I needed to remove some parts from the rear first. A large cable cover pops off with a switch, then I needed to remove a few screws to take off the PSU and radiator brackets. With those parts off, I could put the case on its side (with the base hanging off the edge of my coffee table). I moved the case to the table because it’s lower and therefore a lot easier to install the motherboard.
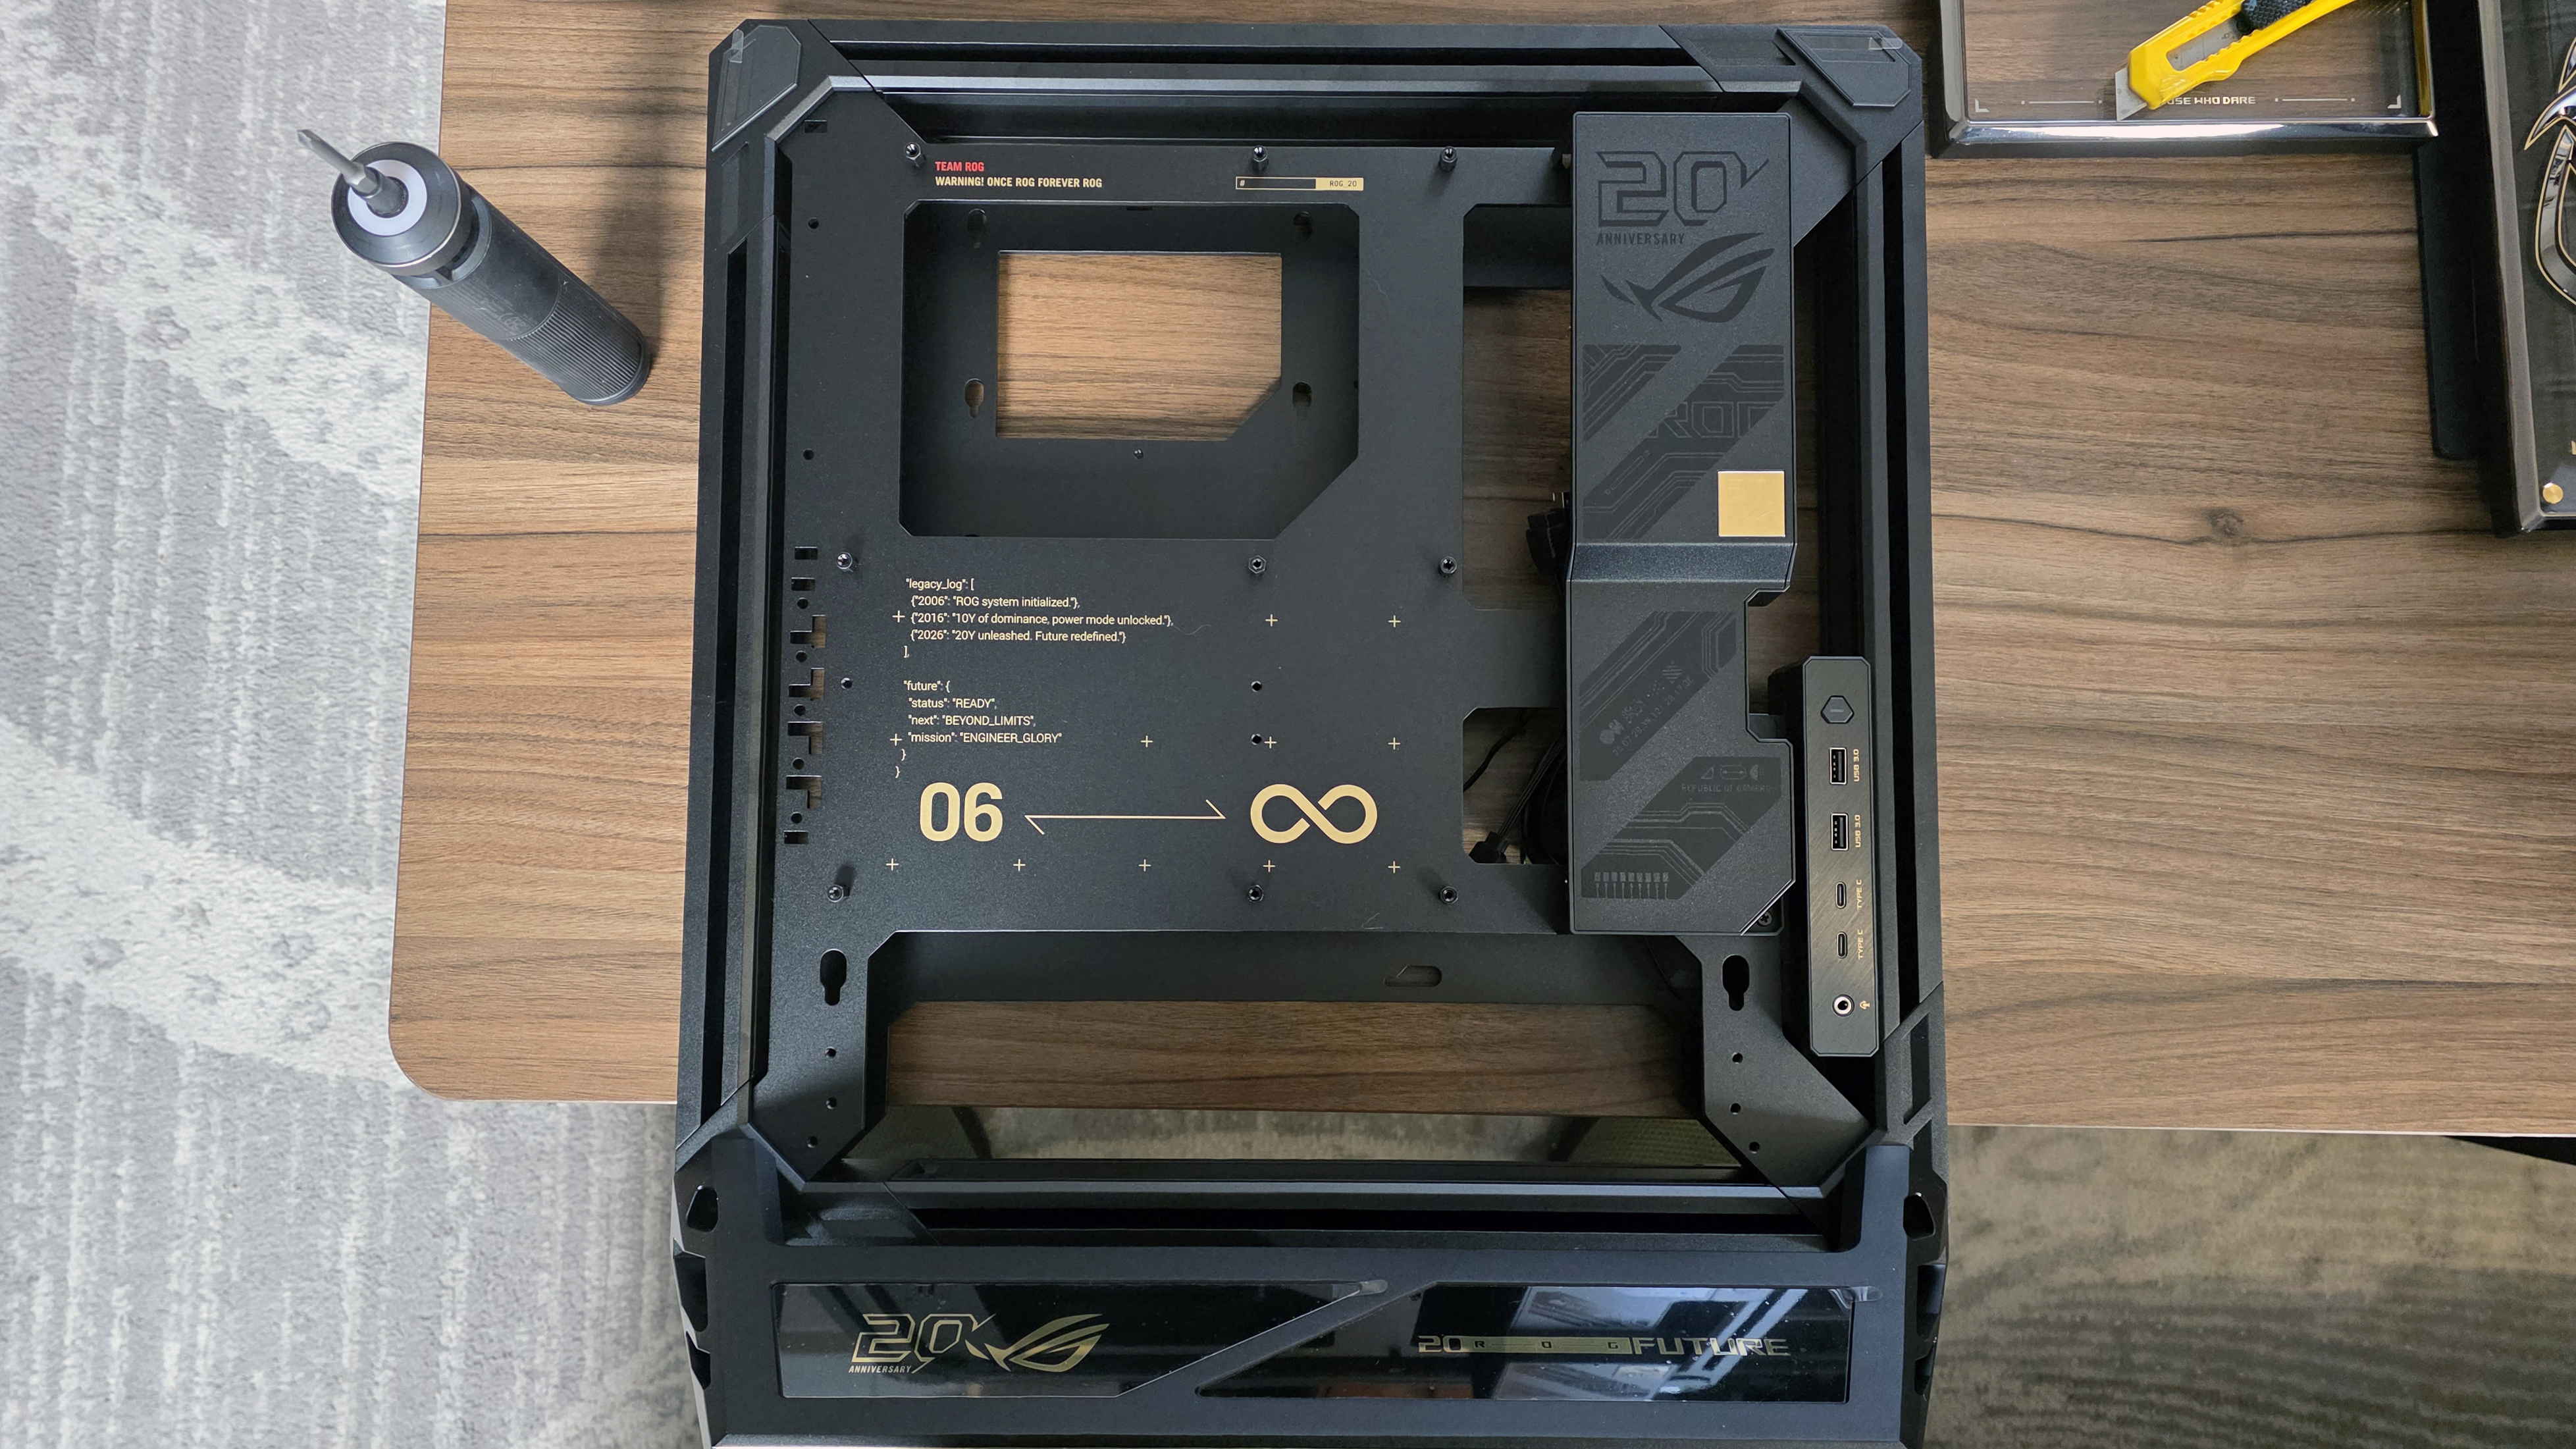
Once aligned to the standoffs, the motherboard drops onto the case (rather dramatically, thanks to its weight) and it’s time to screw it down.
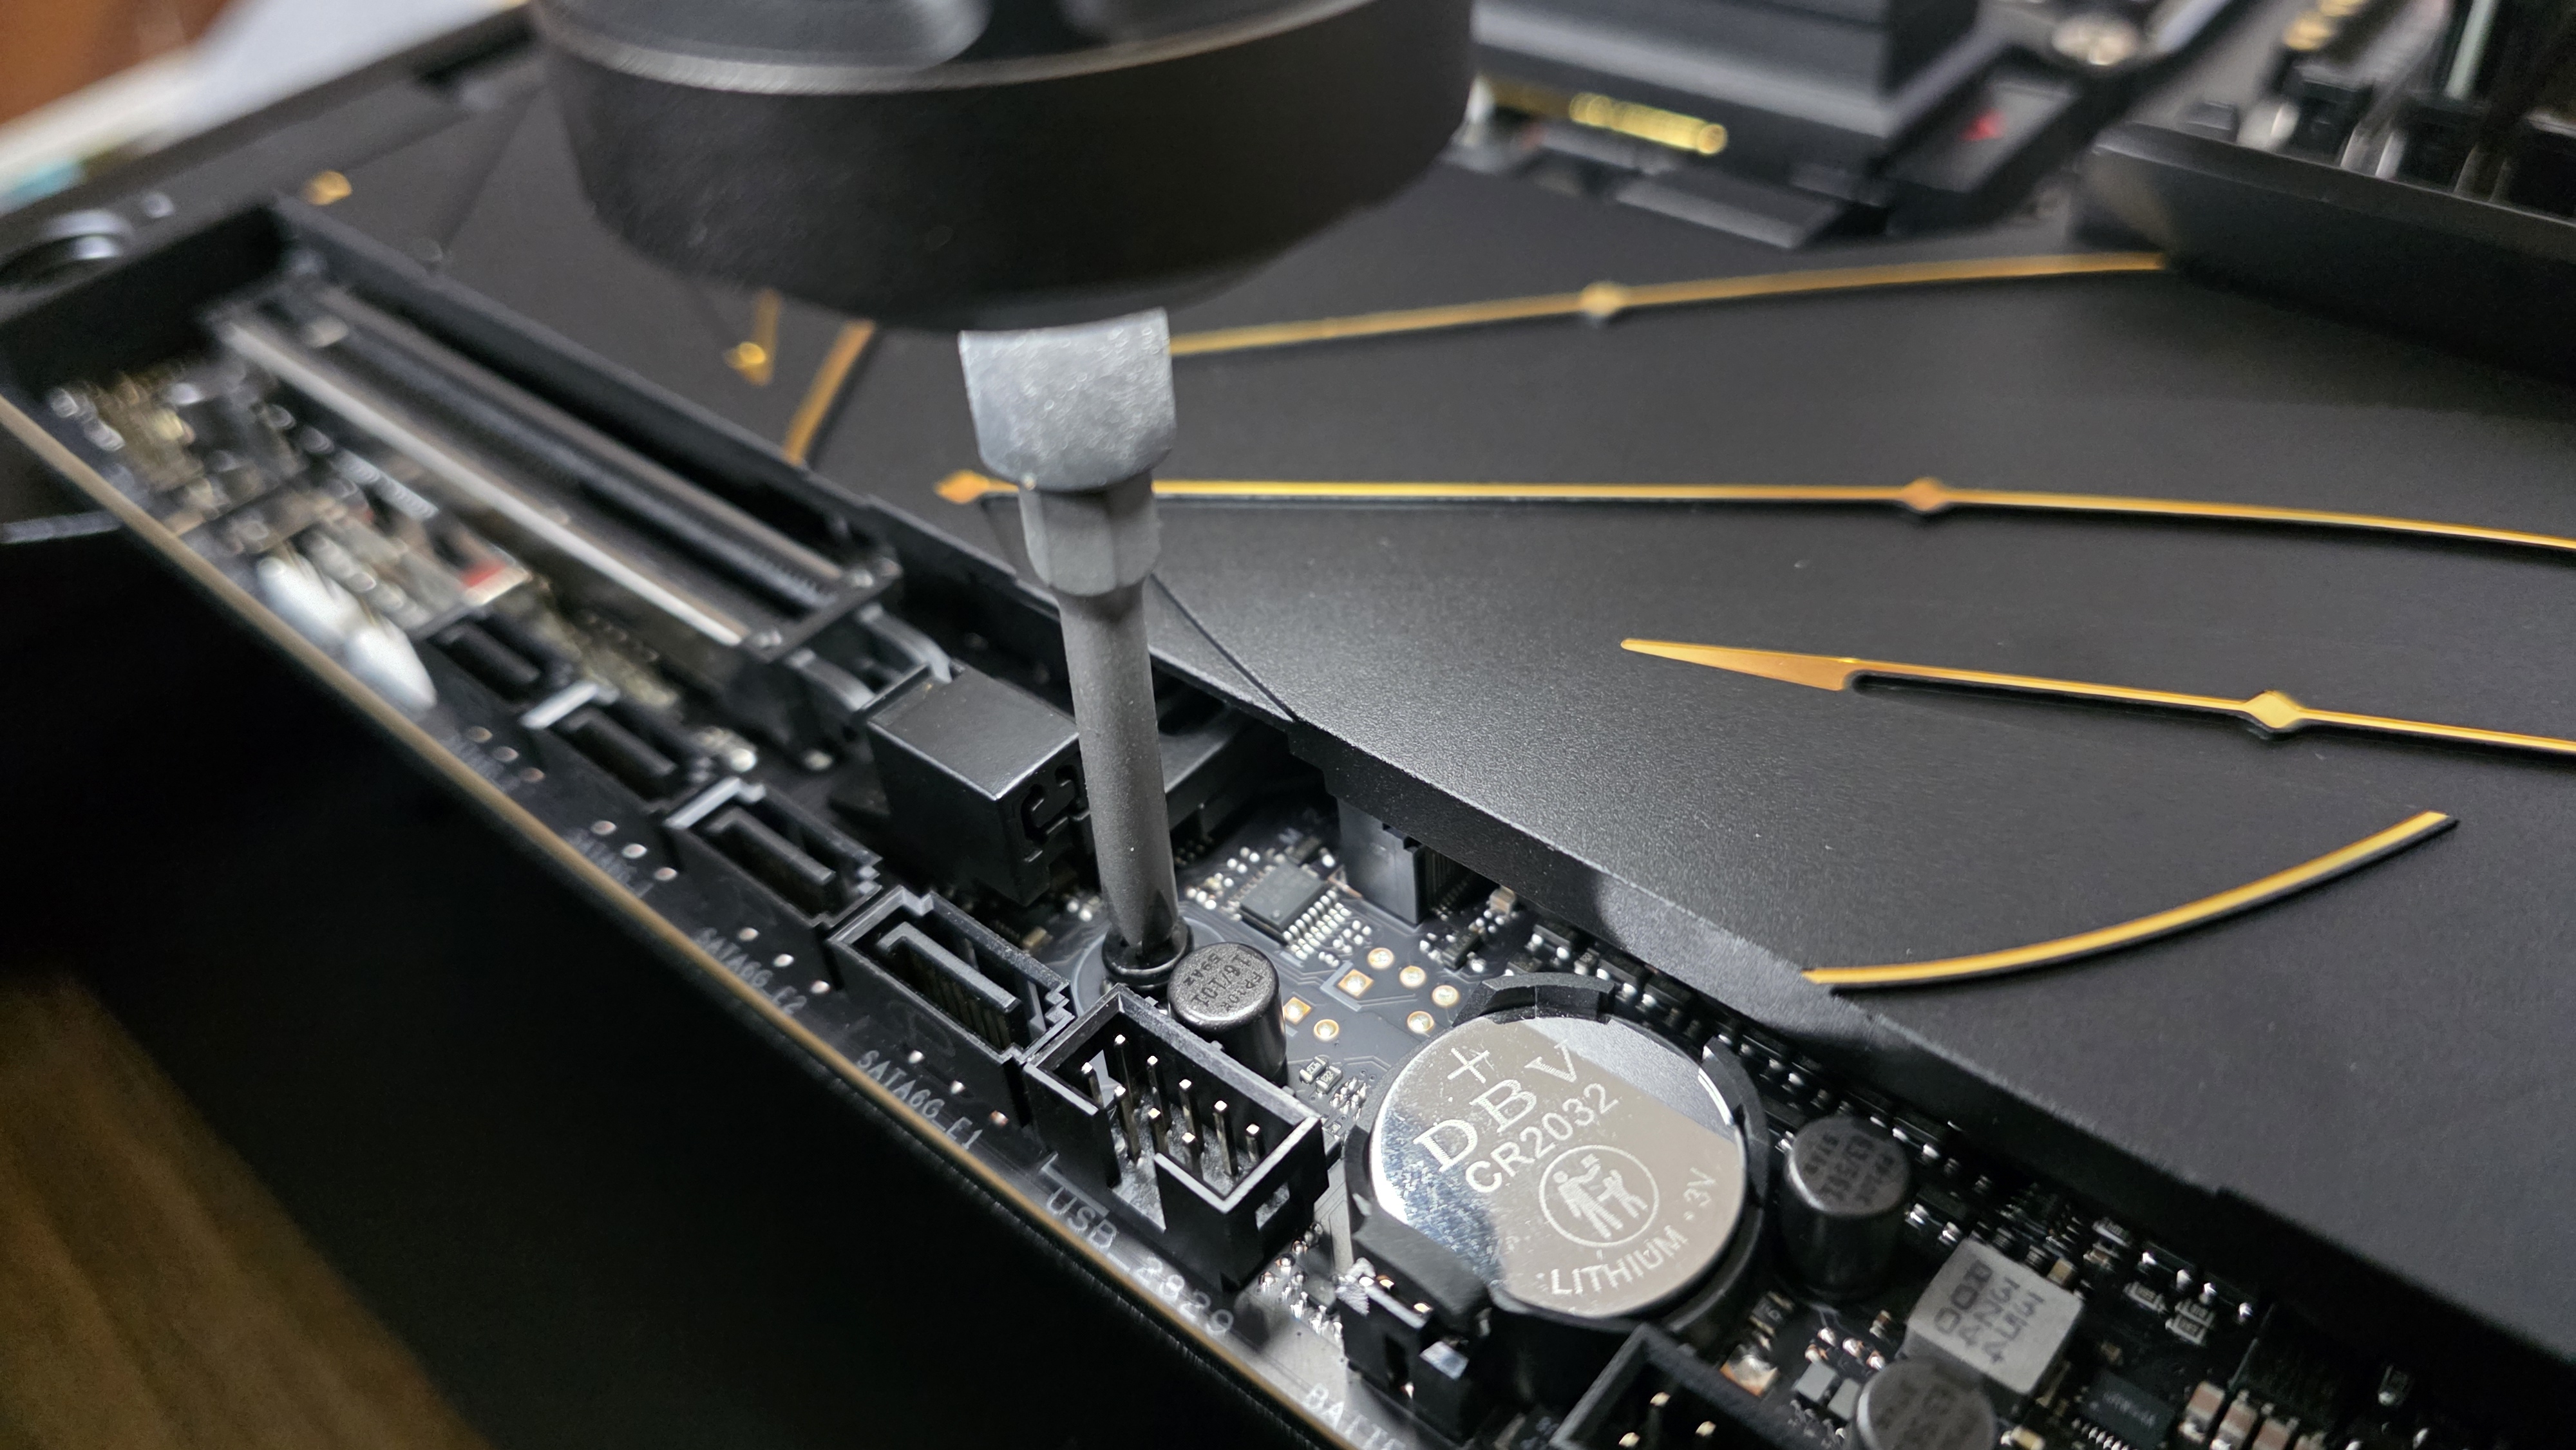
I often skip a few motherboard screws when building PCs. But with the weight of this board and the expensive, heavy GPU that was going to hang off of it, I made sure to install and carefully tighten all nine screws here. Asus’ guide also points out the importance of this, but I didn’t need the warning. In all, motherboard installation was pretty simple, in part because the case is open, so I wasn’t reaching inside a big box to install several screws.
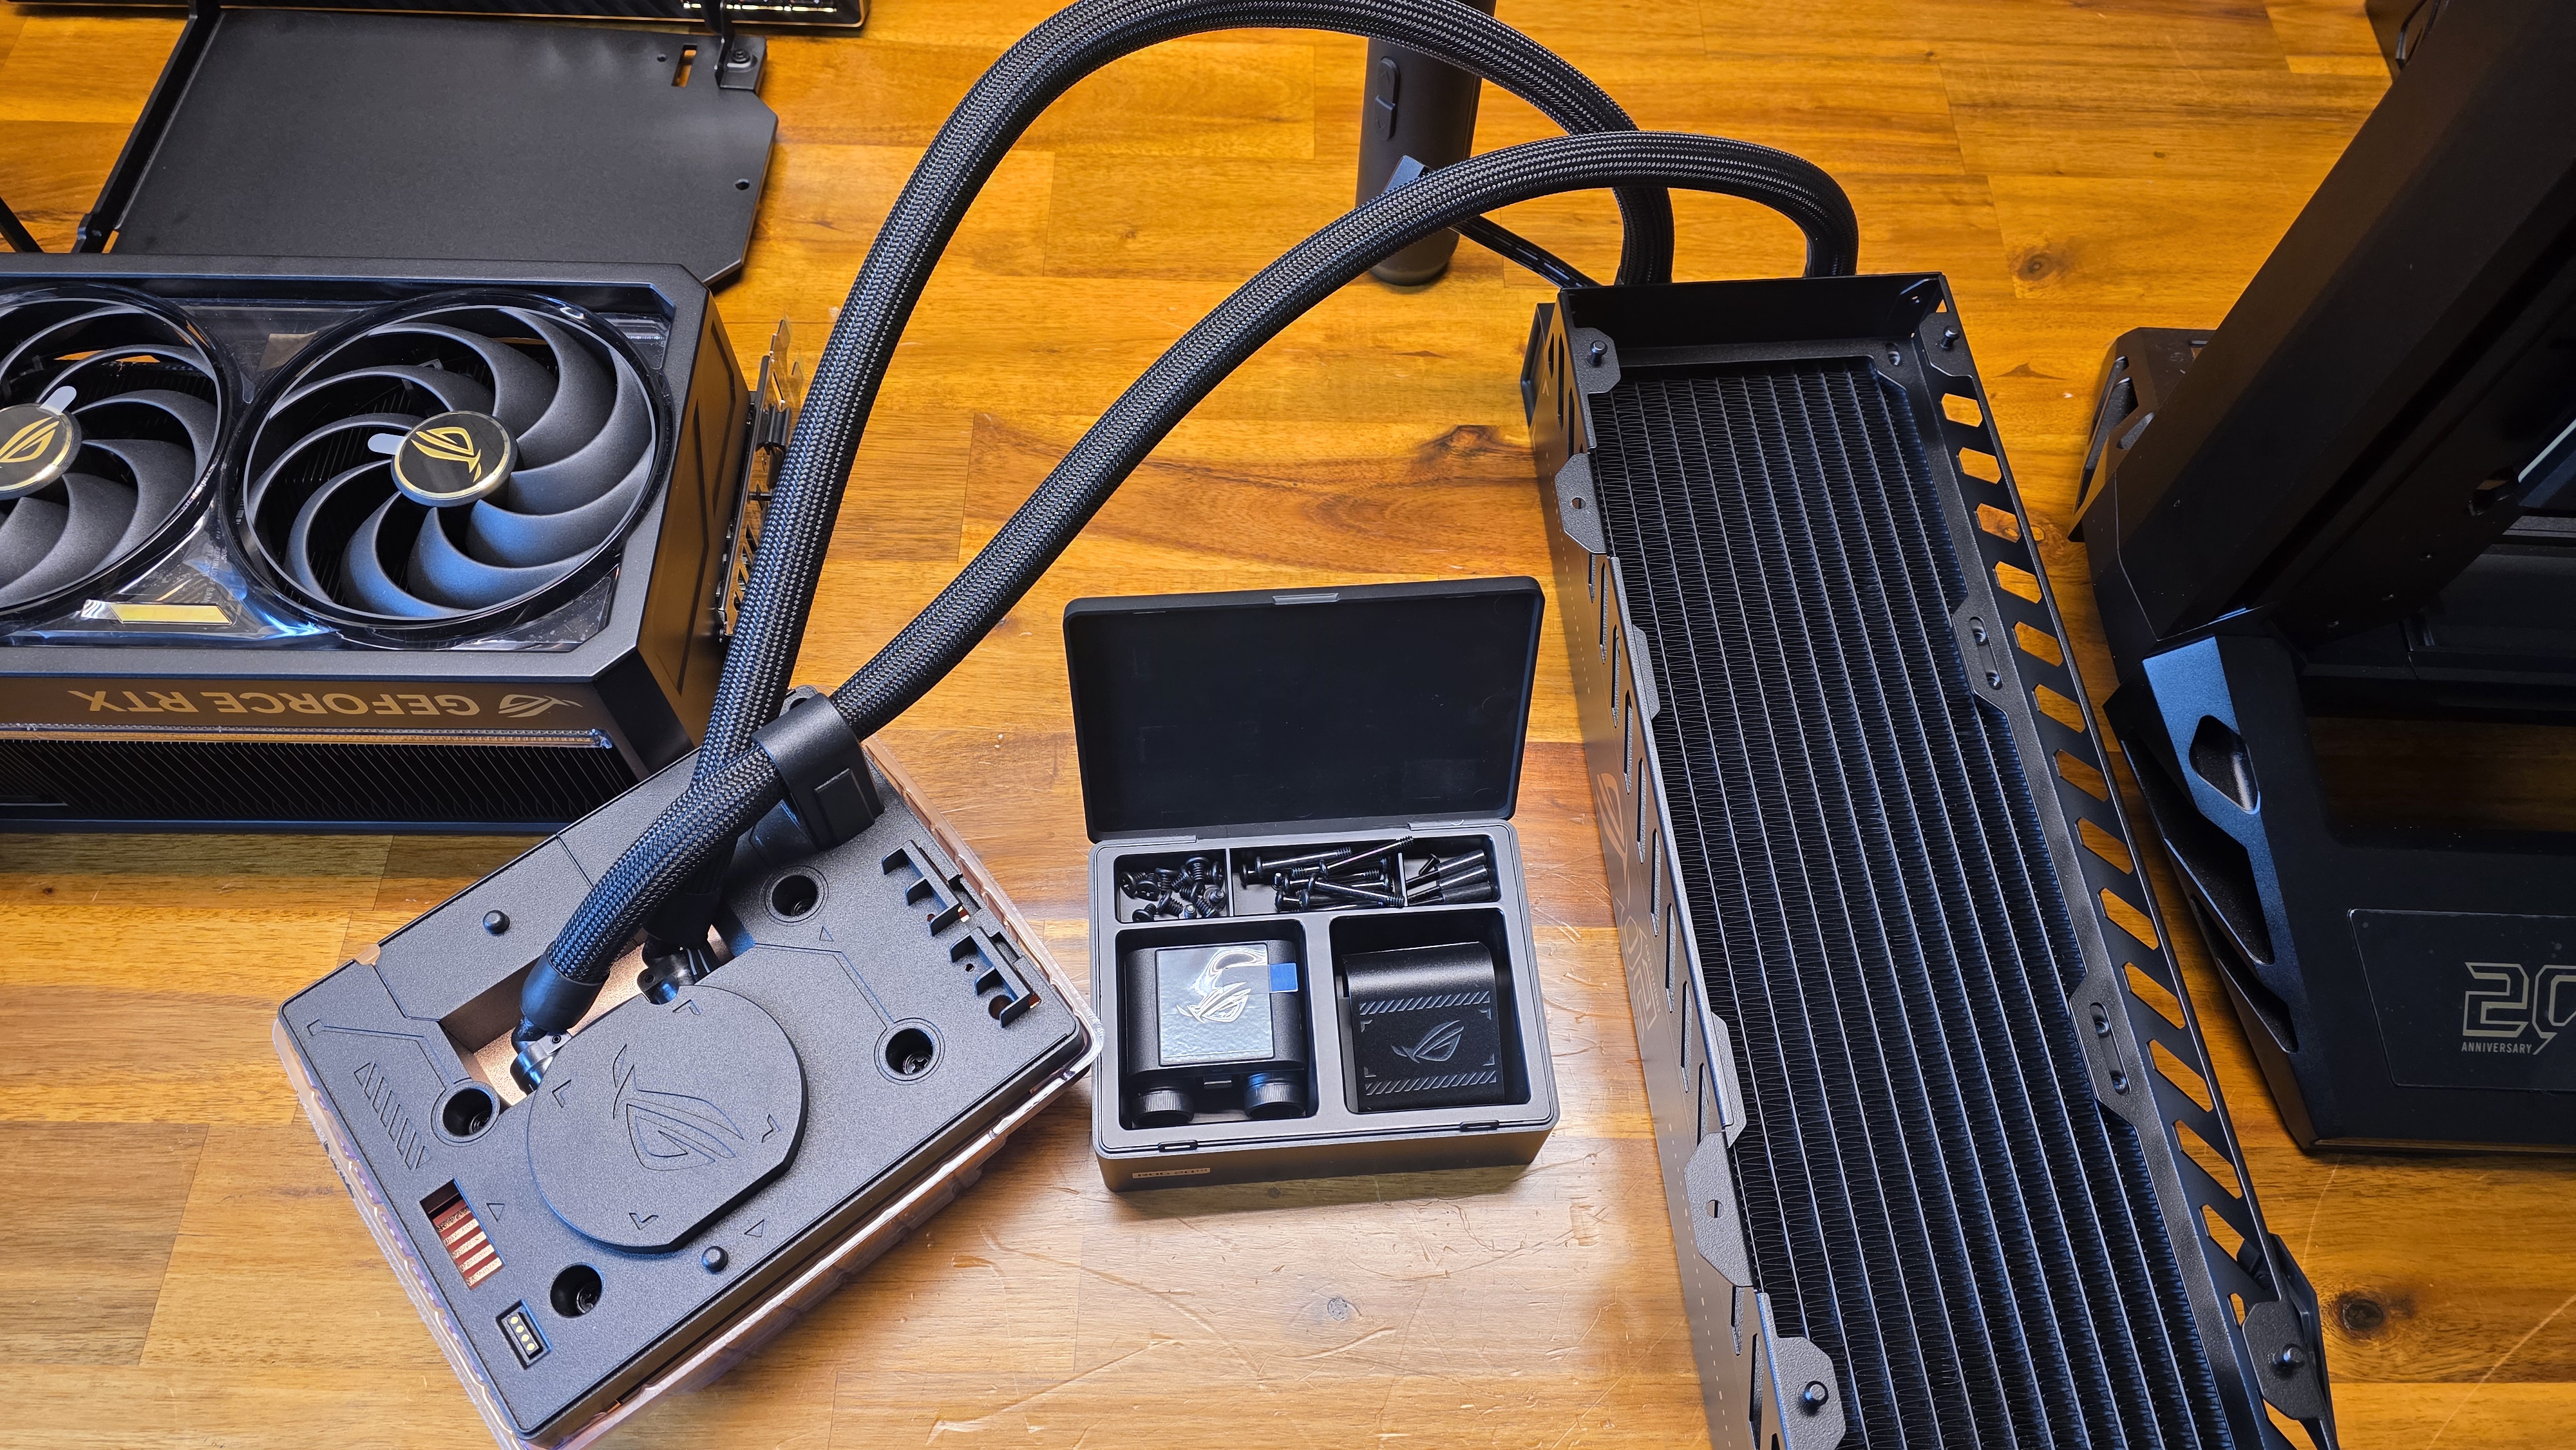
Next, it’s time to stand the case back up and break out the AIO. The cooling block is so heavy with copper that the process feels substantial in a way that most AIO installations don’t. Of course, the sheer cost of the board and cooler probably has something to do with that feeling as well. At least Asus includes the nicest cooling accessory box I’ve ever seen. It has the ROG 20 logo on the top, so you can always remember this very expensive important moment.
First, you need to attach the radiator bracket to the radiator, and Asus’ guide nicely points out that you need to do so with the mounting tabs facing left. This saved me from doing it wrong and having to fix it later. Then, I mounted the bracket and the radiator to the back of the case via four slide-in tabs and two screws, put the case back down on its side, and took the protective plastic covering off the very large and heavy water block.
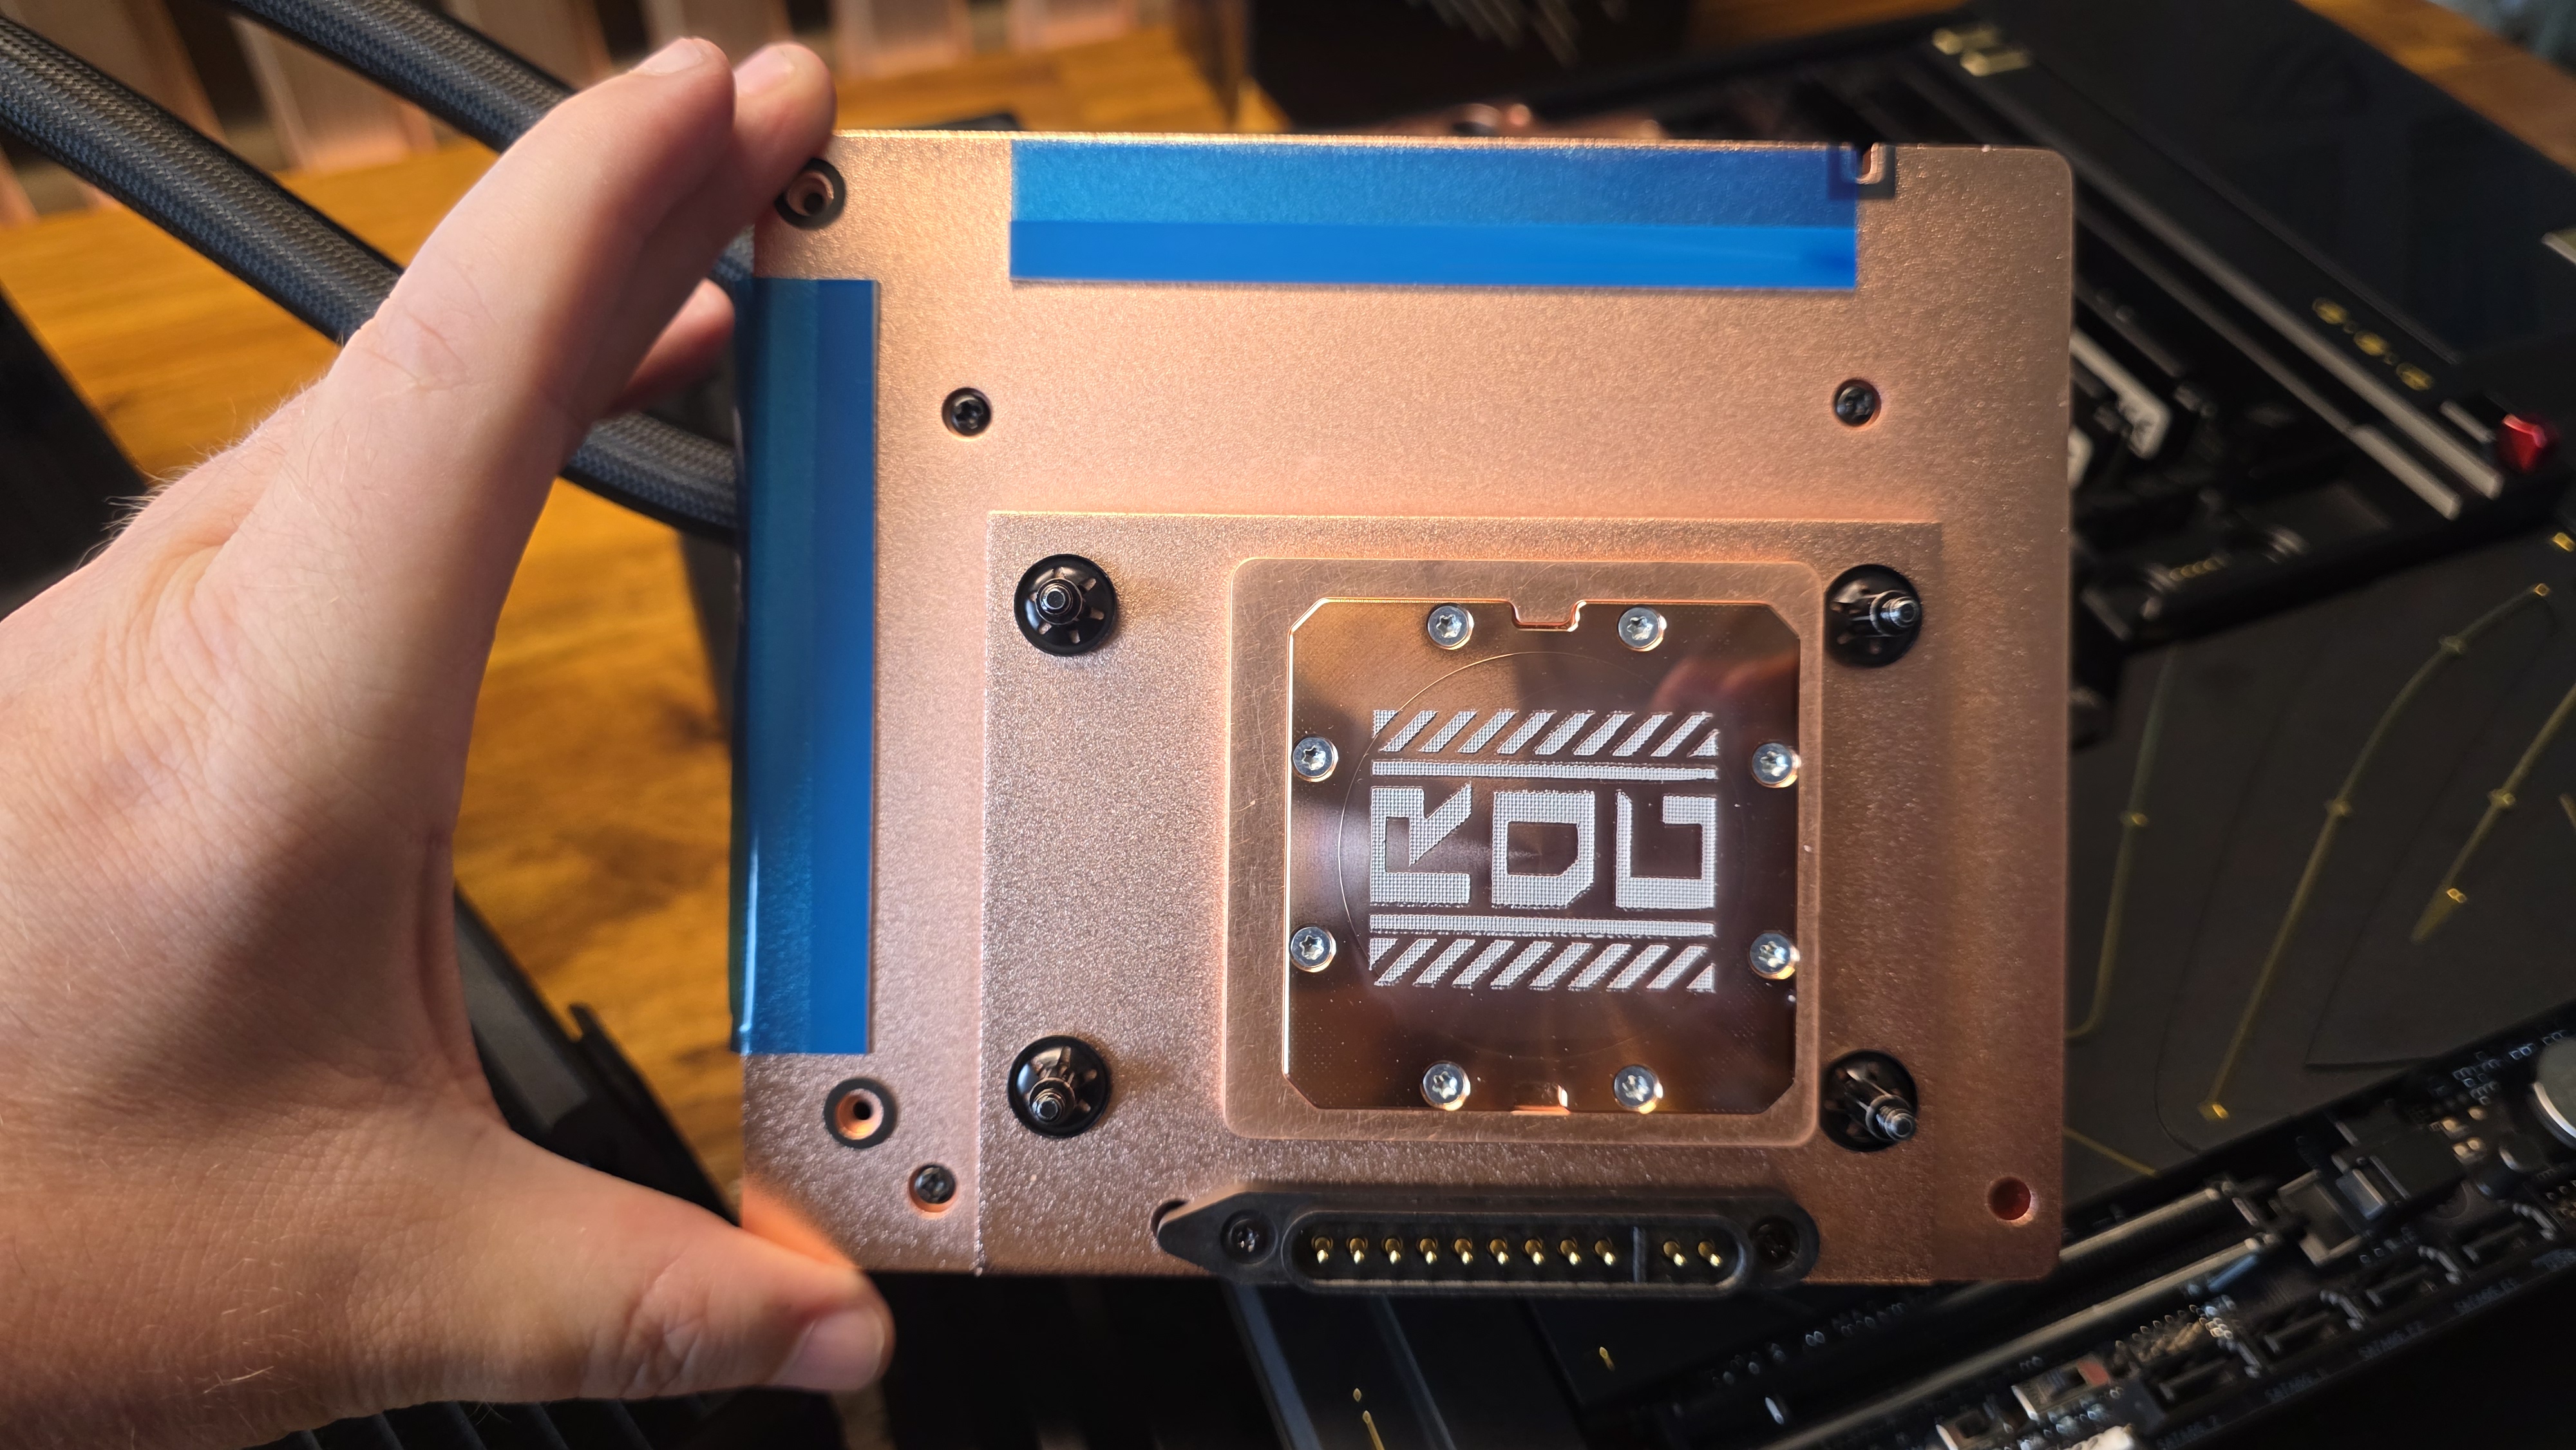
There are a few things to note there. First, there’s Asus’ ROG branding in its paste application. I am not sure this quite qualifies as one of our preferred methods of how to install thermal paste, but it is at least fairly evenly arranged. The blue strips are pre-installed thermal pads that help ensure good thermal transfer from the VRM sinks on the board.
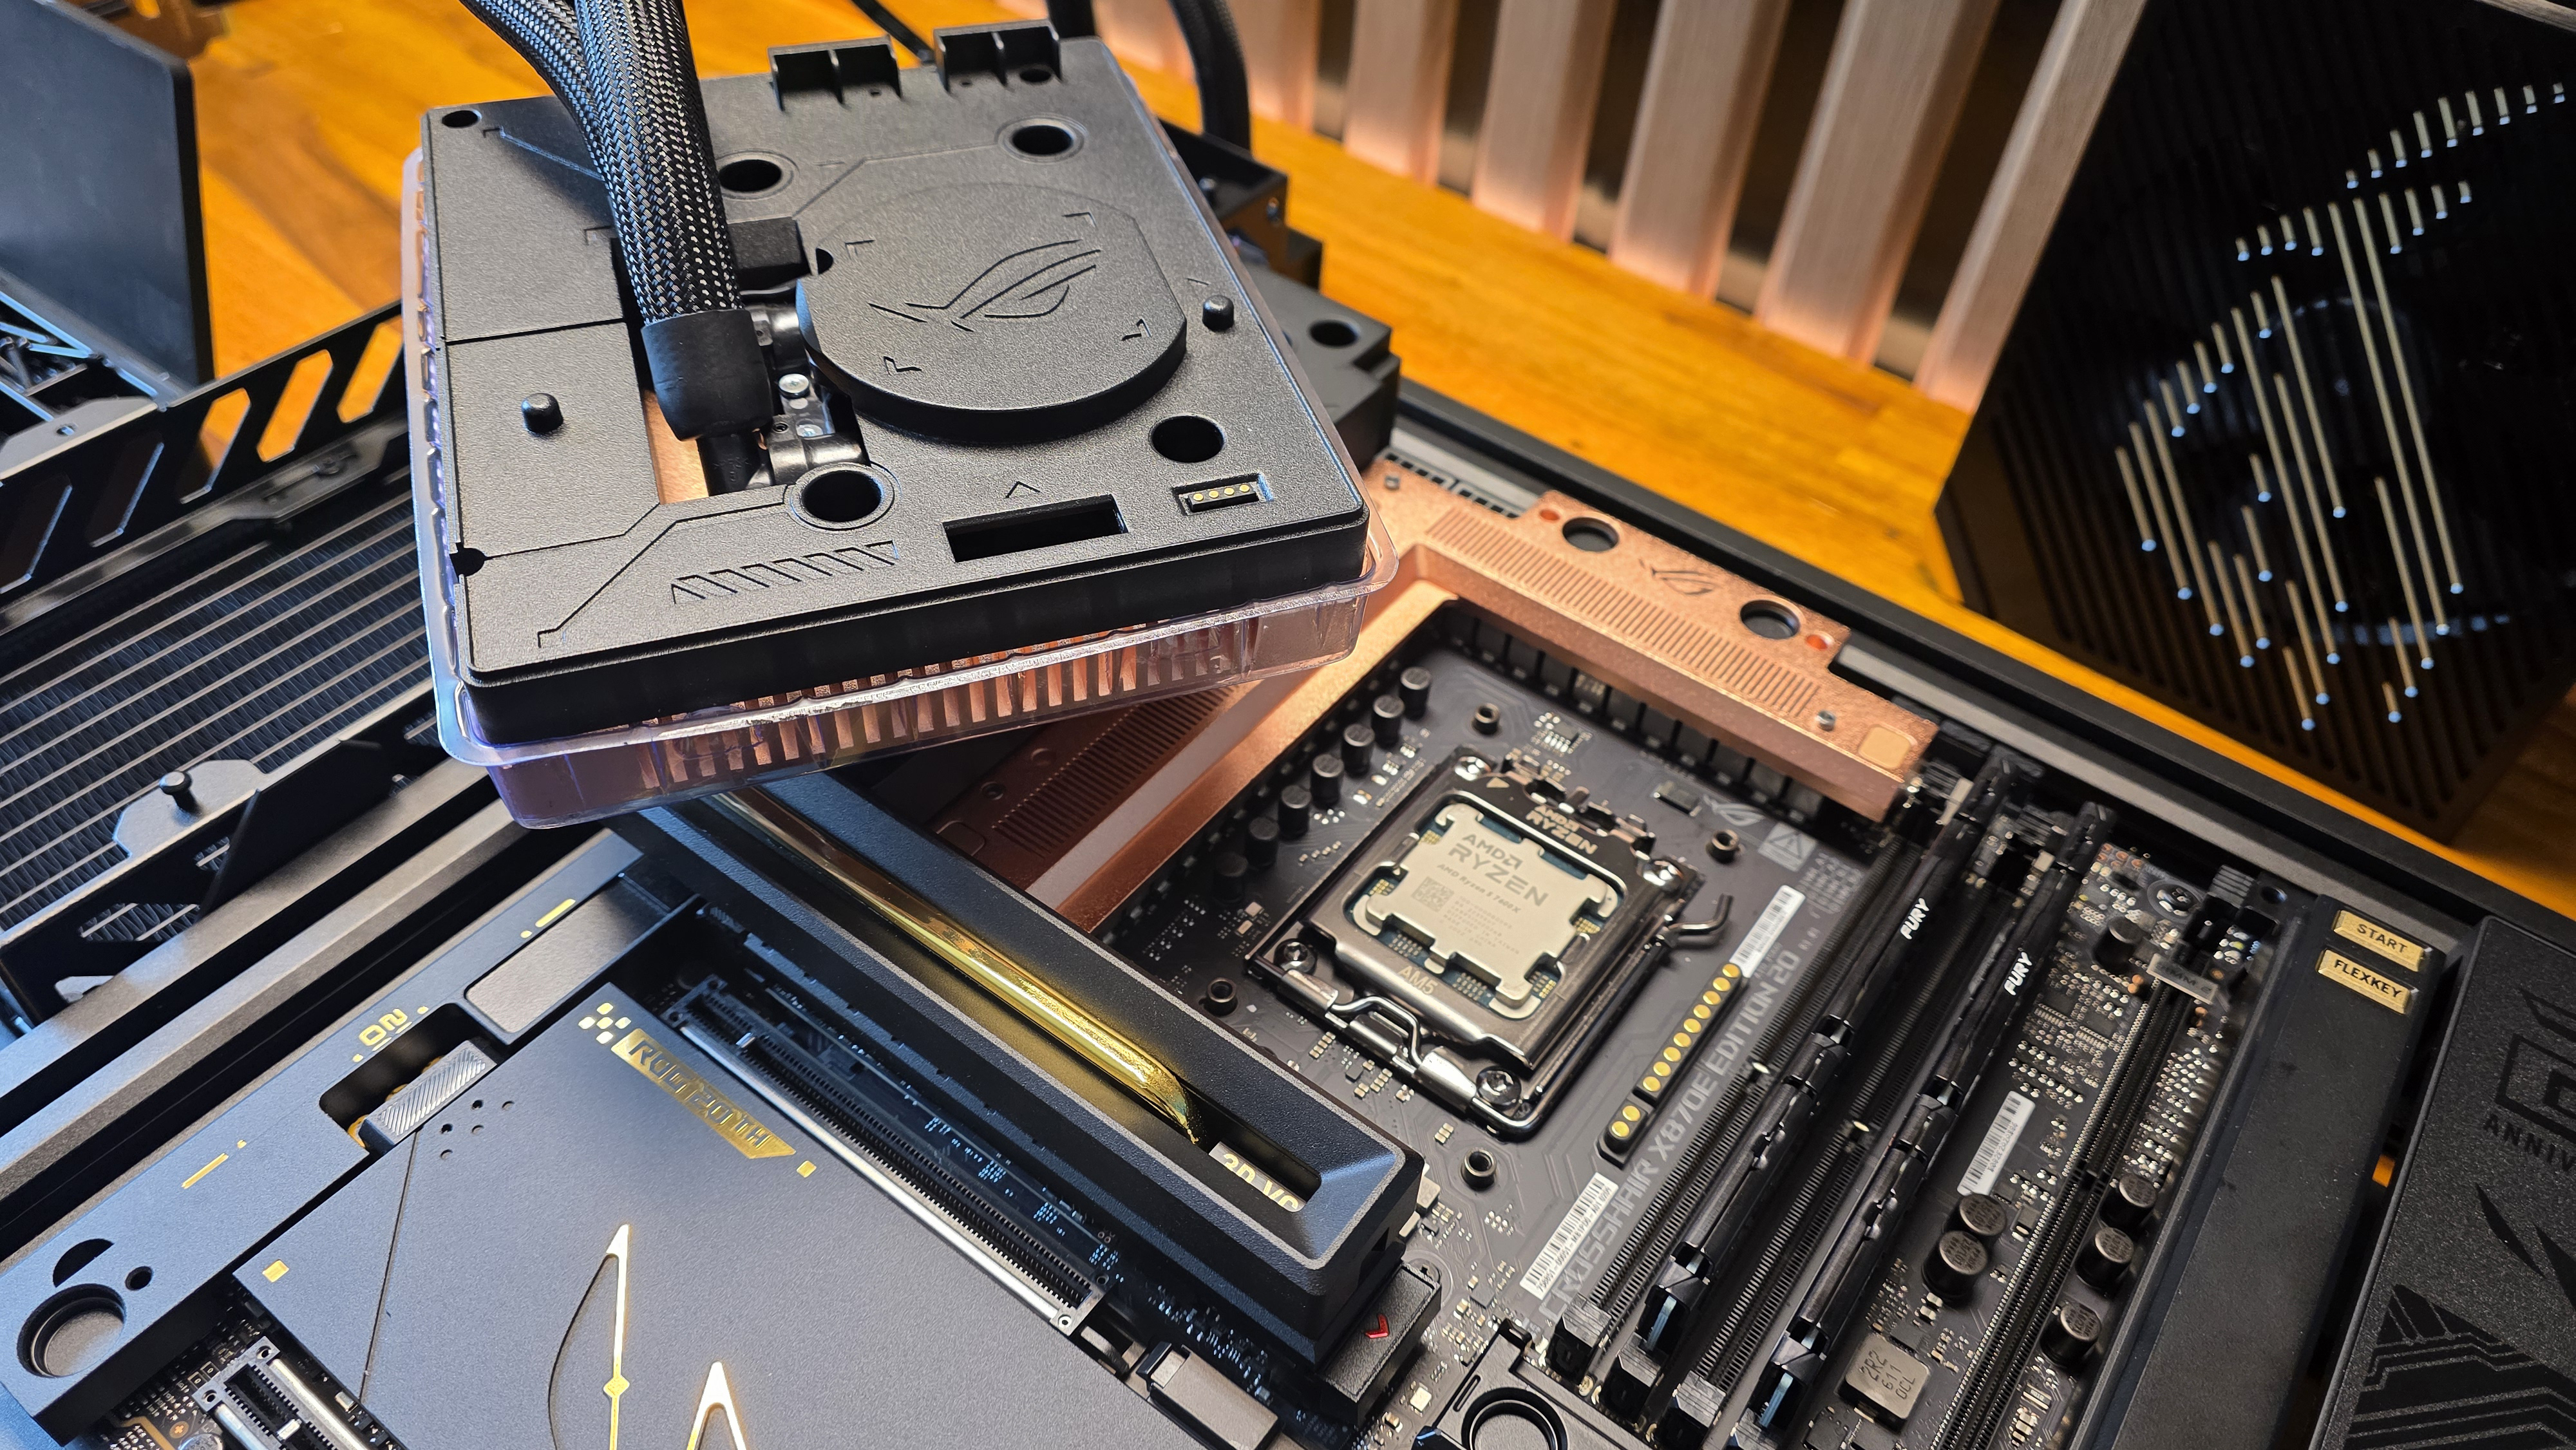
Also note the pogo pins at the bottom of this photo. That is the power and data connection that, corresponding to pads on the board, means you don’t have to plug in any cables for the pump or the screen (the latter of which comes in a separate box and will go on later).
Next, you need to remove the motherboard’s mounting brackets, and the cooler’s pre-installed posts will drop right into the screw holes (carefully, mind you; this thing is hefty). You then need to install four regular screws to install the cooler, and three more proprietary screws around two of the sides to make sure the VRM cooling mates well with the large copper of the cooling plate.
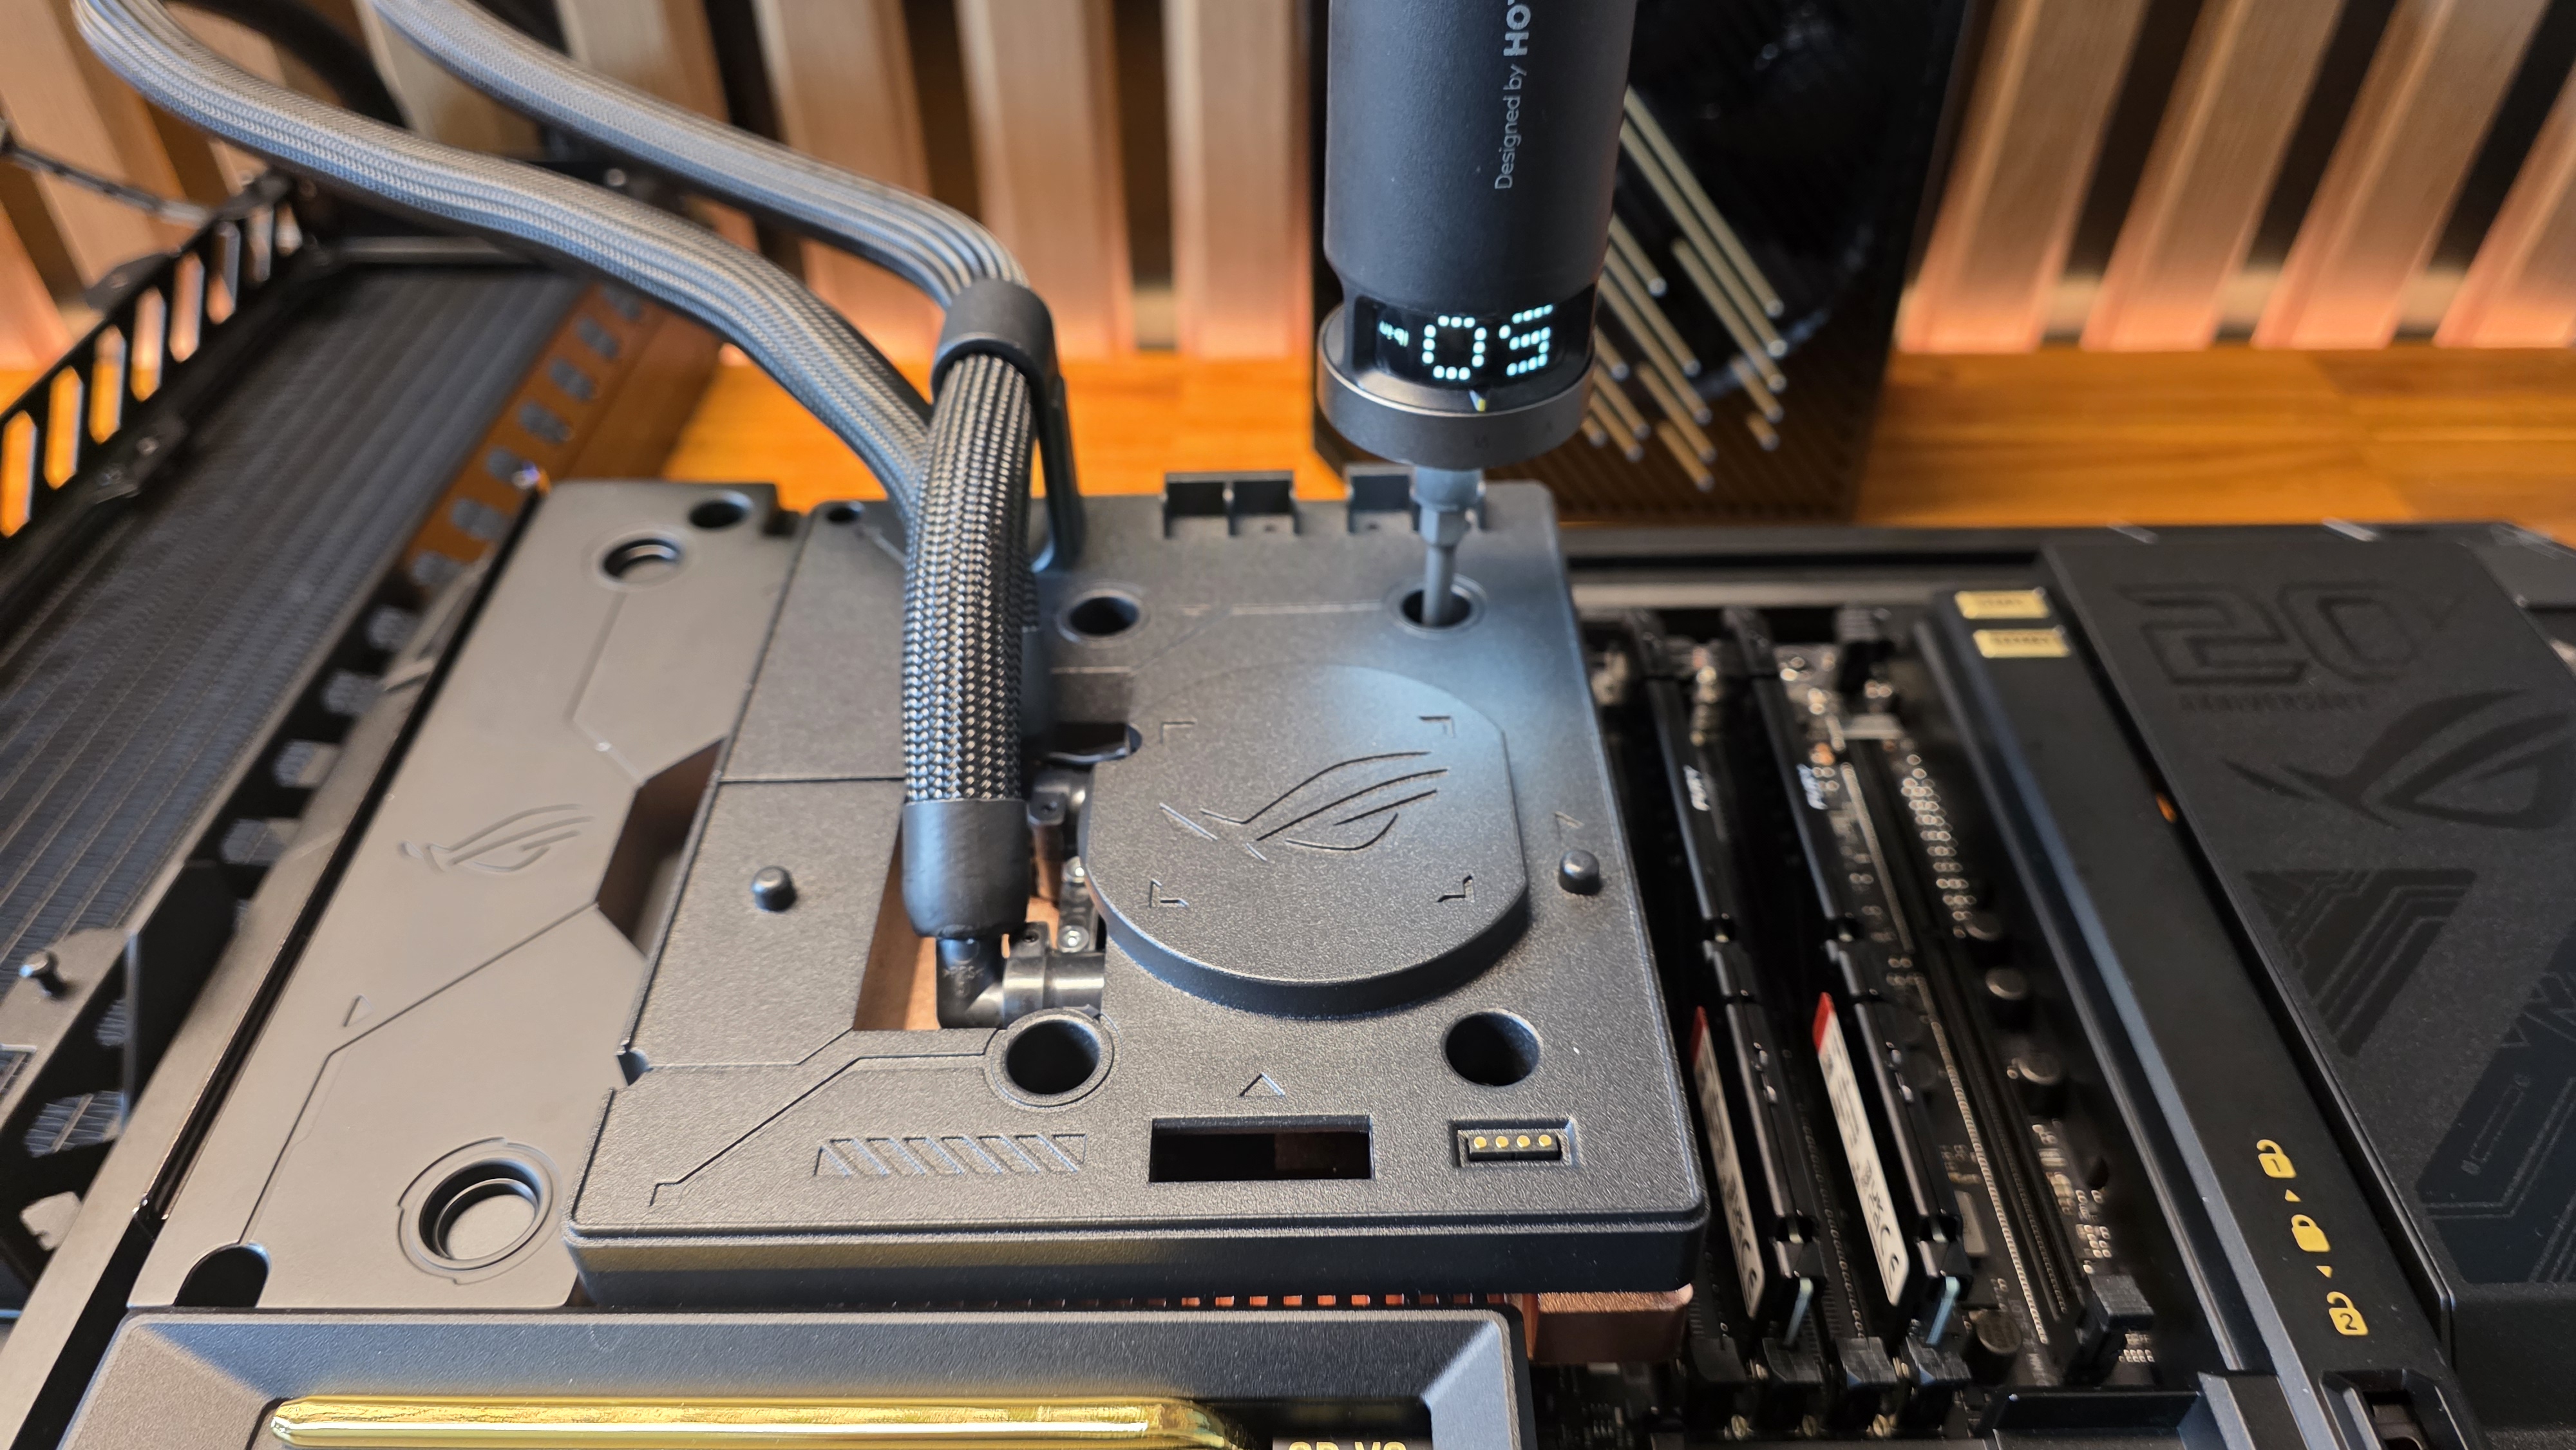
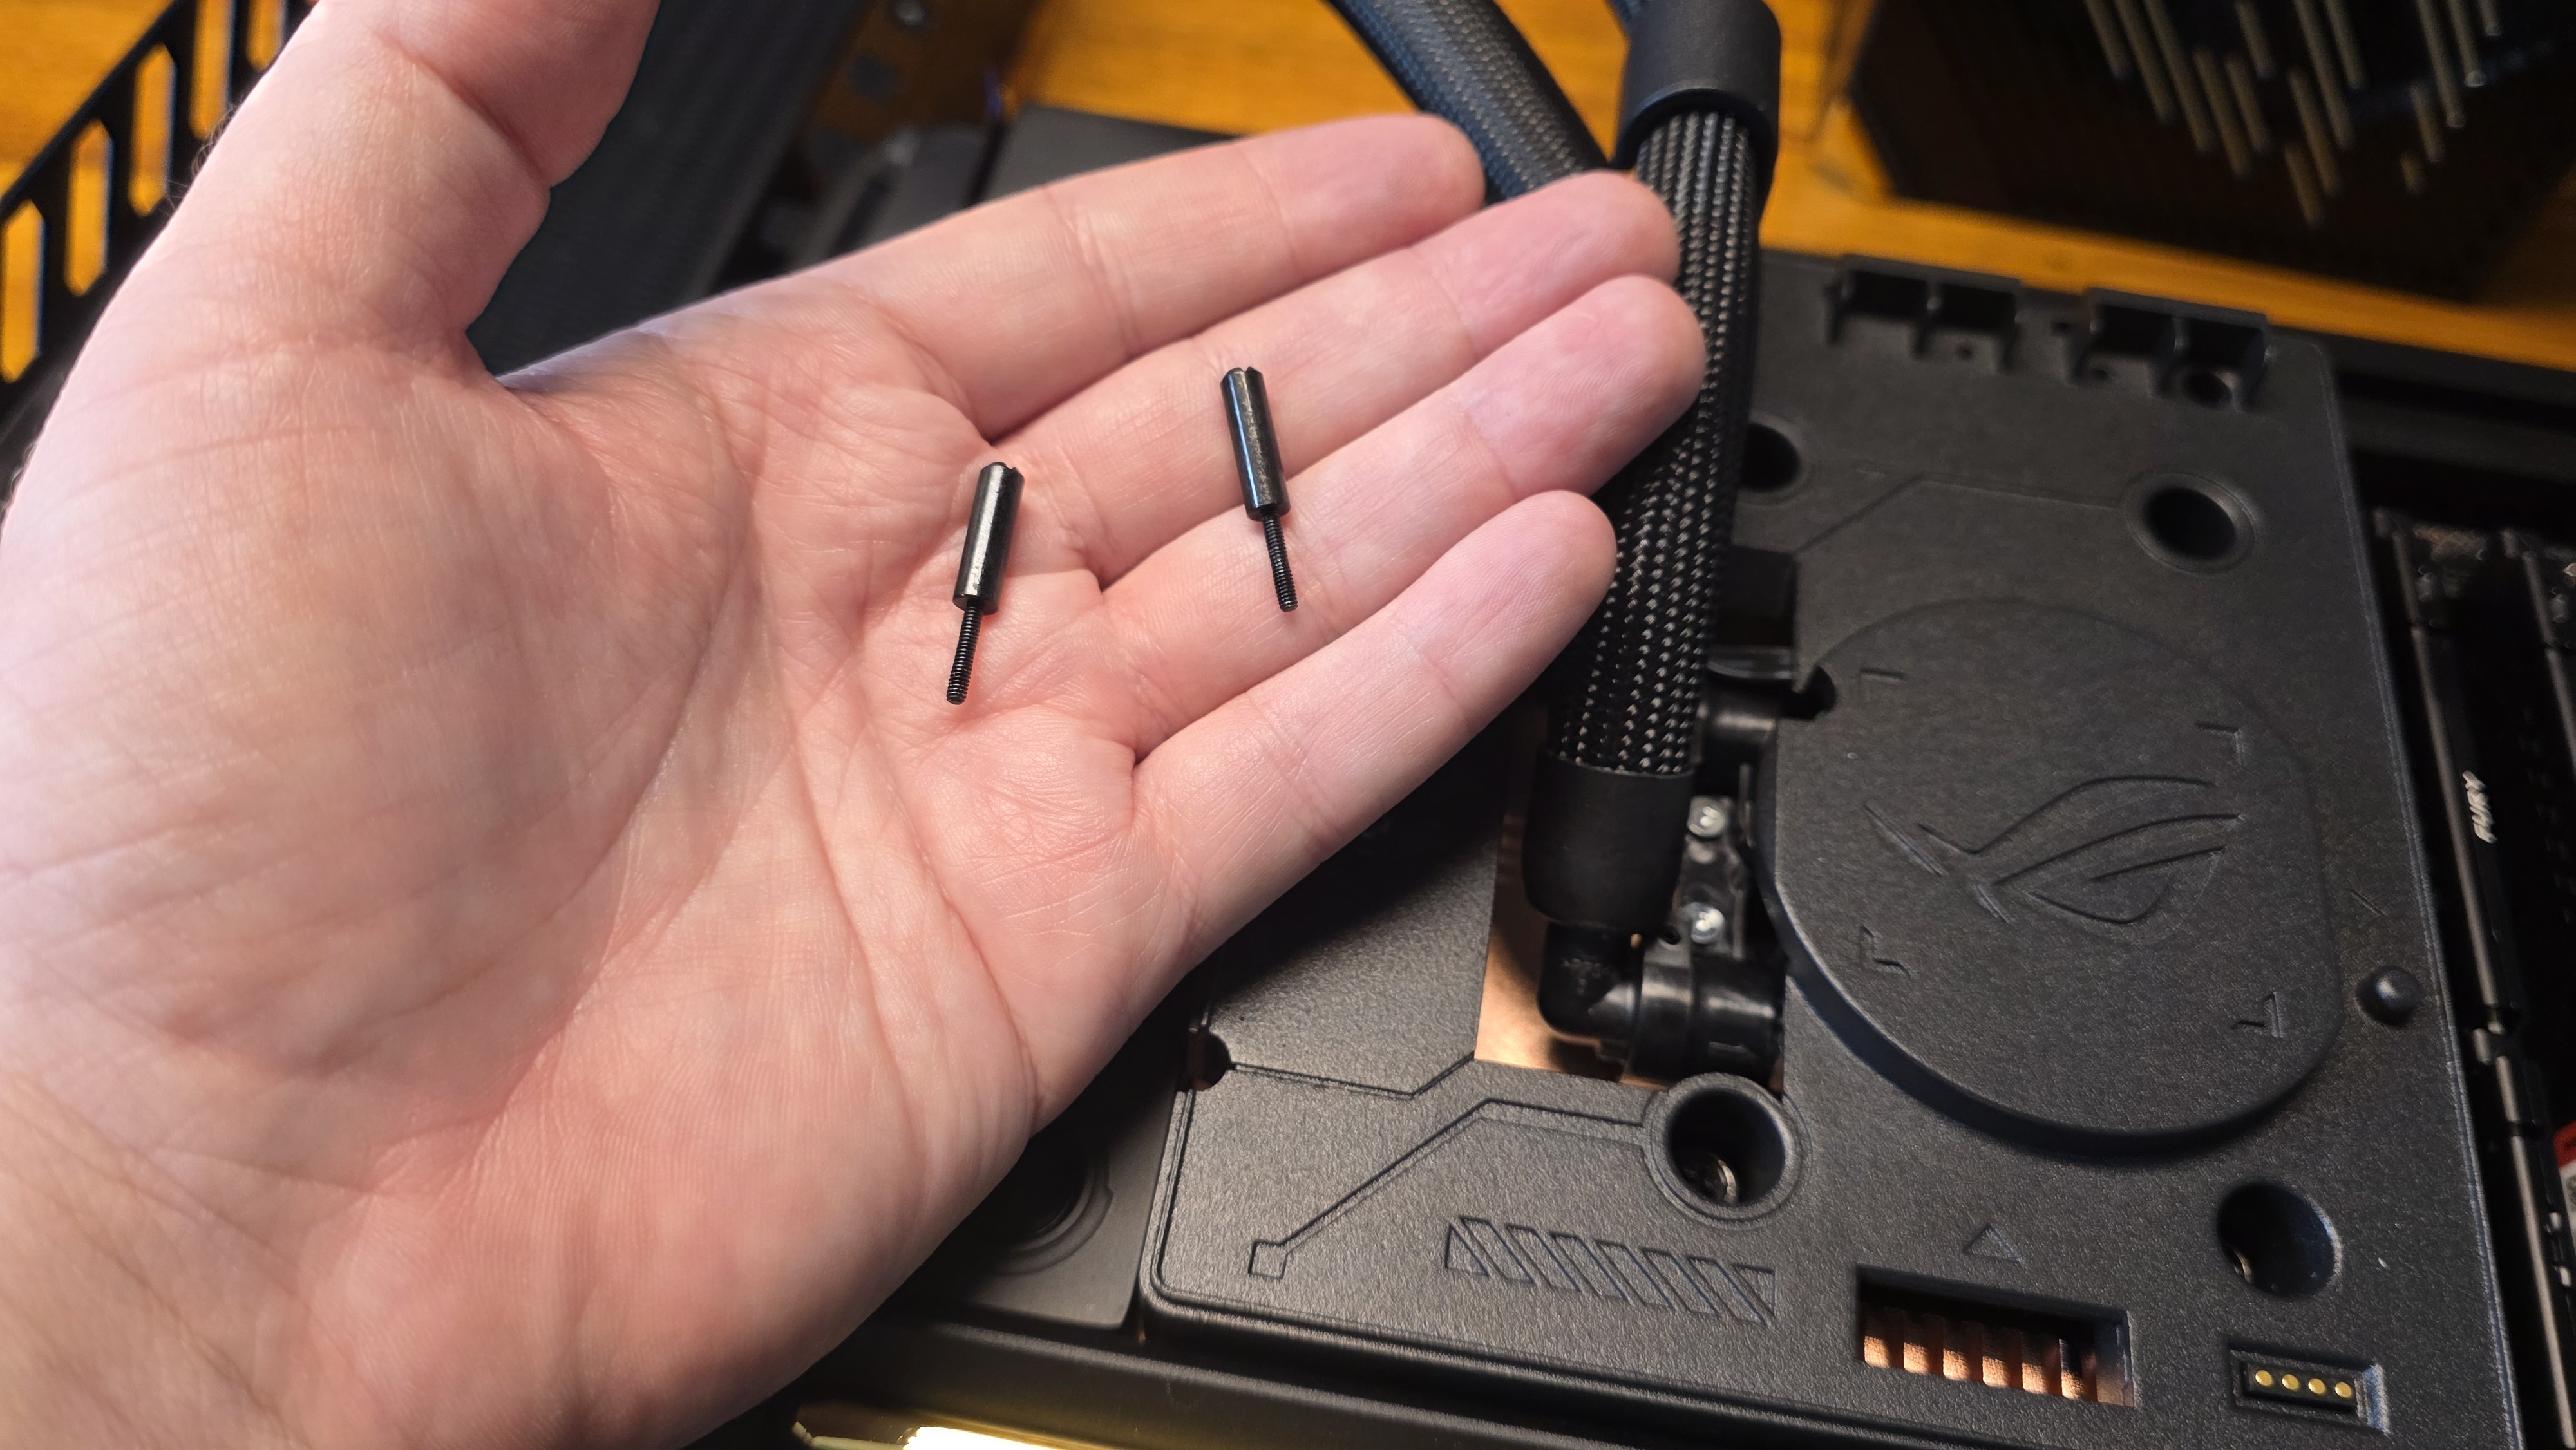
This is, by far, the most secure connection I’ve seen on a consumer cooler. But with all the metal and money involved, that’s a good thing.
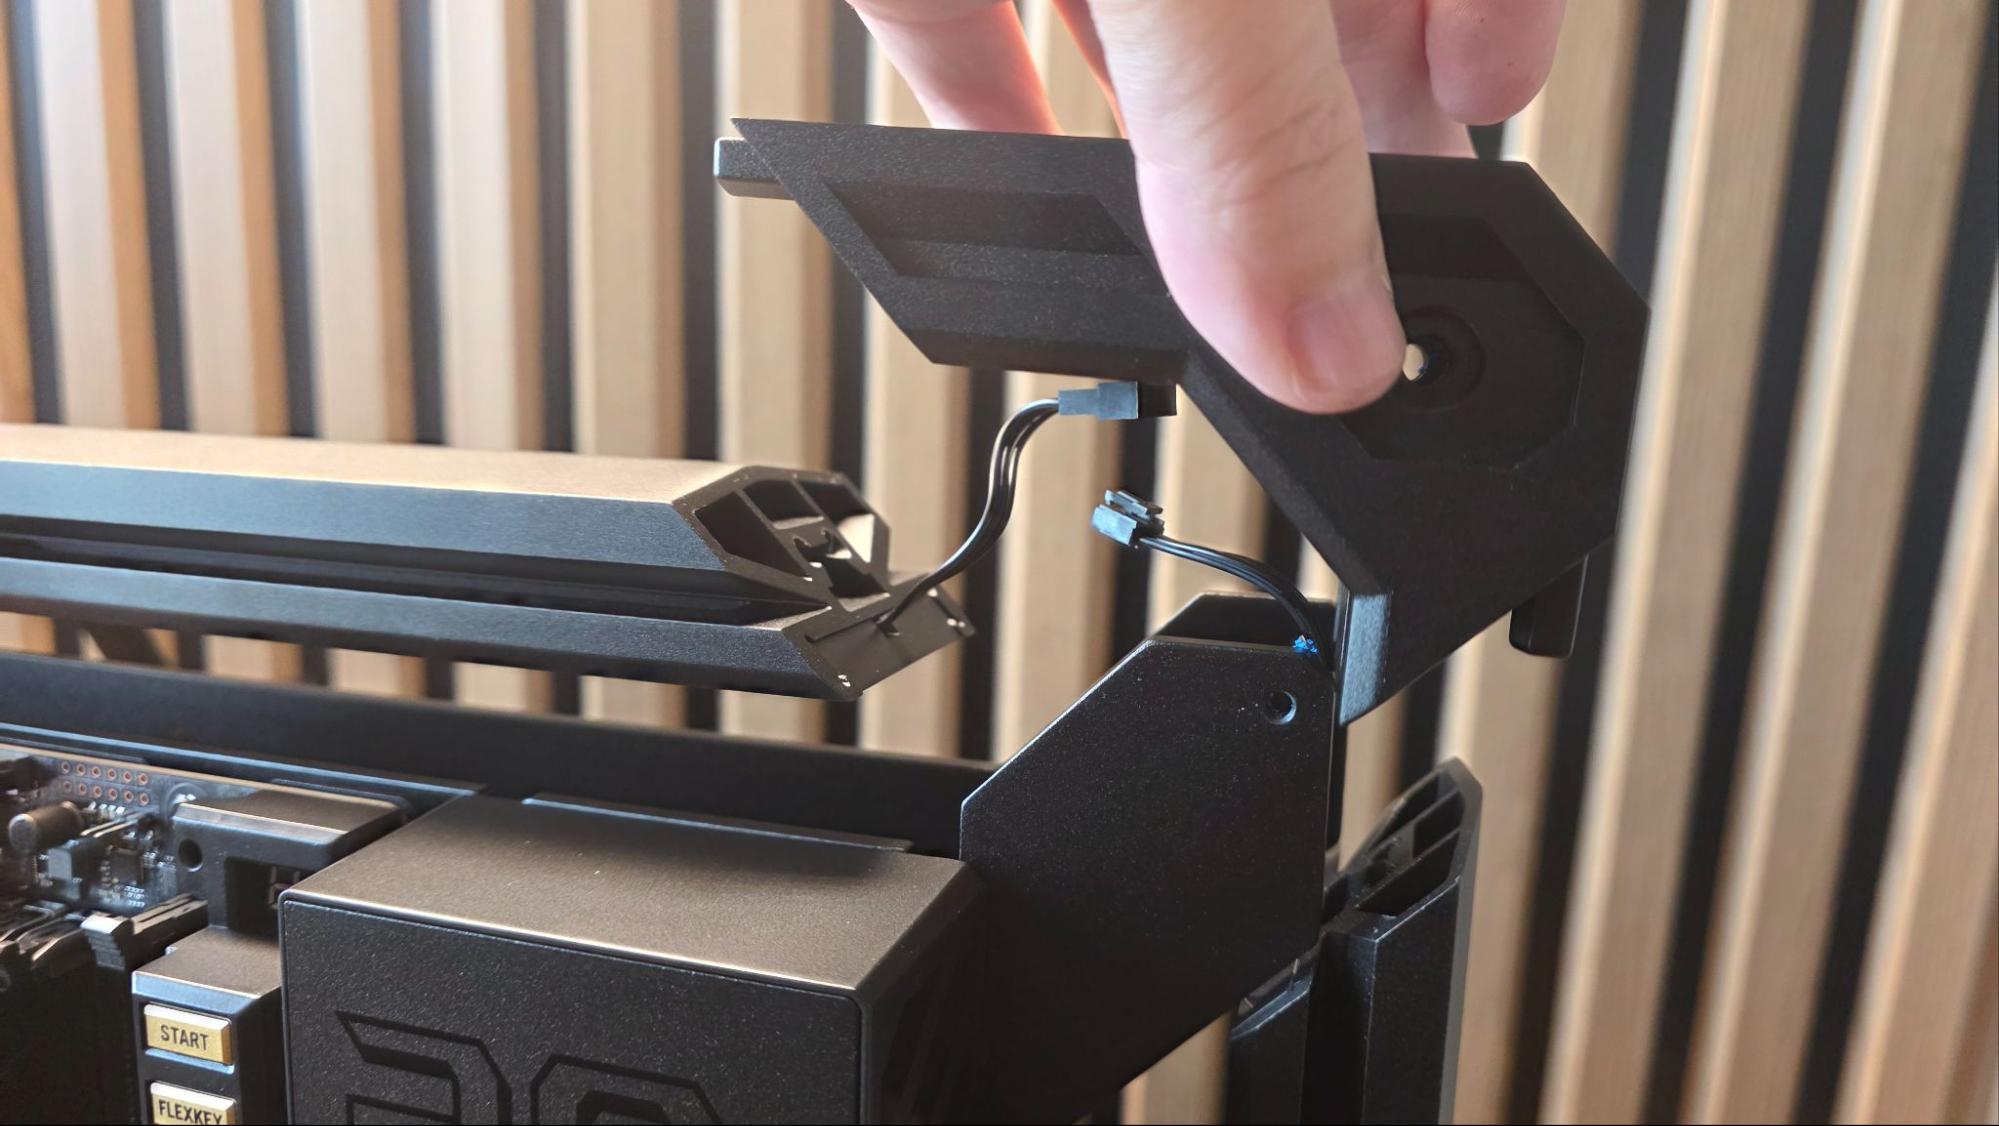
Next, surprisingly, the guide told me I needed to disassemble the upper-right corner of the case, so I stood the system back up. This step is a little involved, as you need to remove a couple of plastic covers that hide access to four screws that need to be removed. Then you need to unplug an RGB cable for the lights embedded in the frame. This lets you pass the AIO tubes through from the back, where the radiator is, to the front motherboard area. Later on, you can tuck the tubes nicely into the space above the motherboard, so they’re a little less visible, although the space does feel a bit cramped.
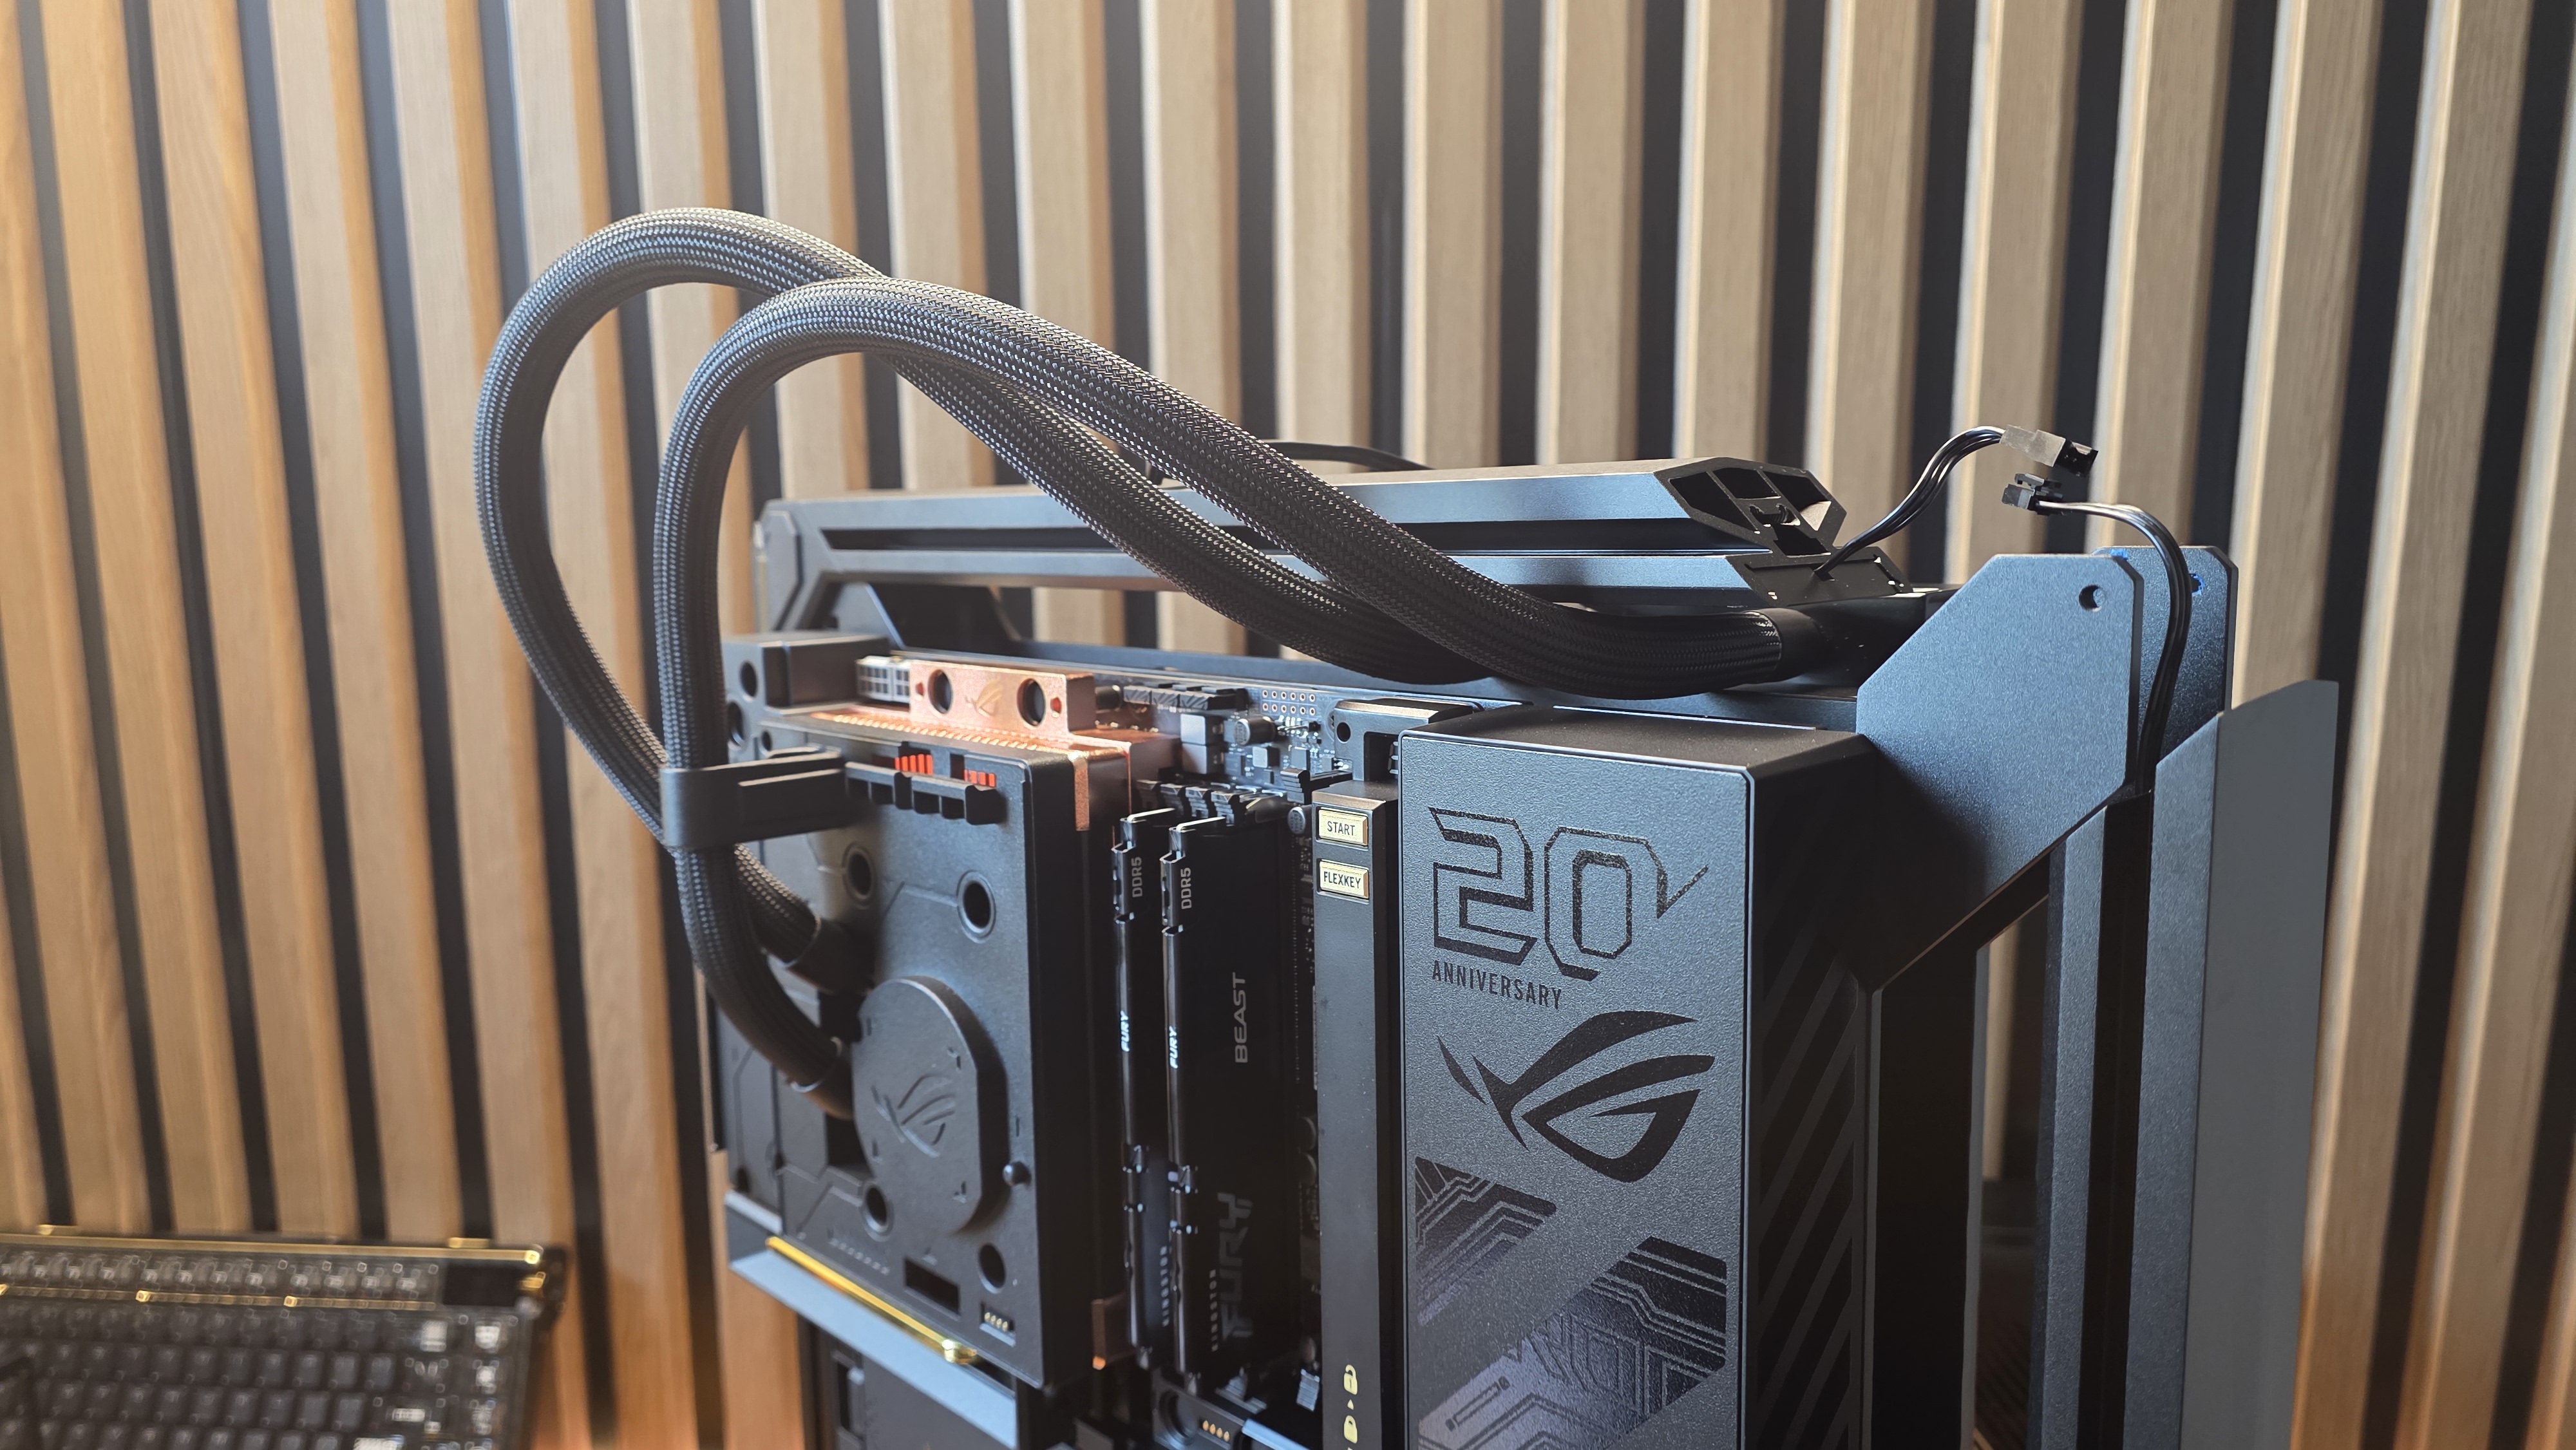
A note on these corners, as it’s one area where the design doesn’t feel or look as premium as I would like (especially given the price). There are pretty large plastic screw cap covers, which magnetically attach just by snapping onto the corner screws. They’re designed to blend into the design of the aluminum frame.
But since these covers are only held on by a small magnet, they have a tendency to move around, and often don’t line up correctly on their own. In fact, when I first took the GR20 case out of its box, one of these covers was stuck to another part of the case, several inches from where it belonged. It’s not entirely clear if this happened during shipping or just in the act of removing the case from its carton.
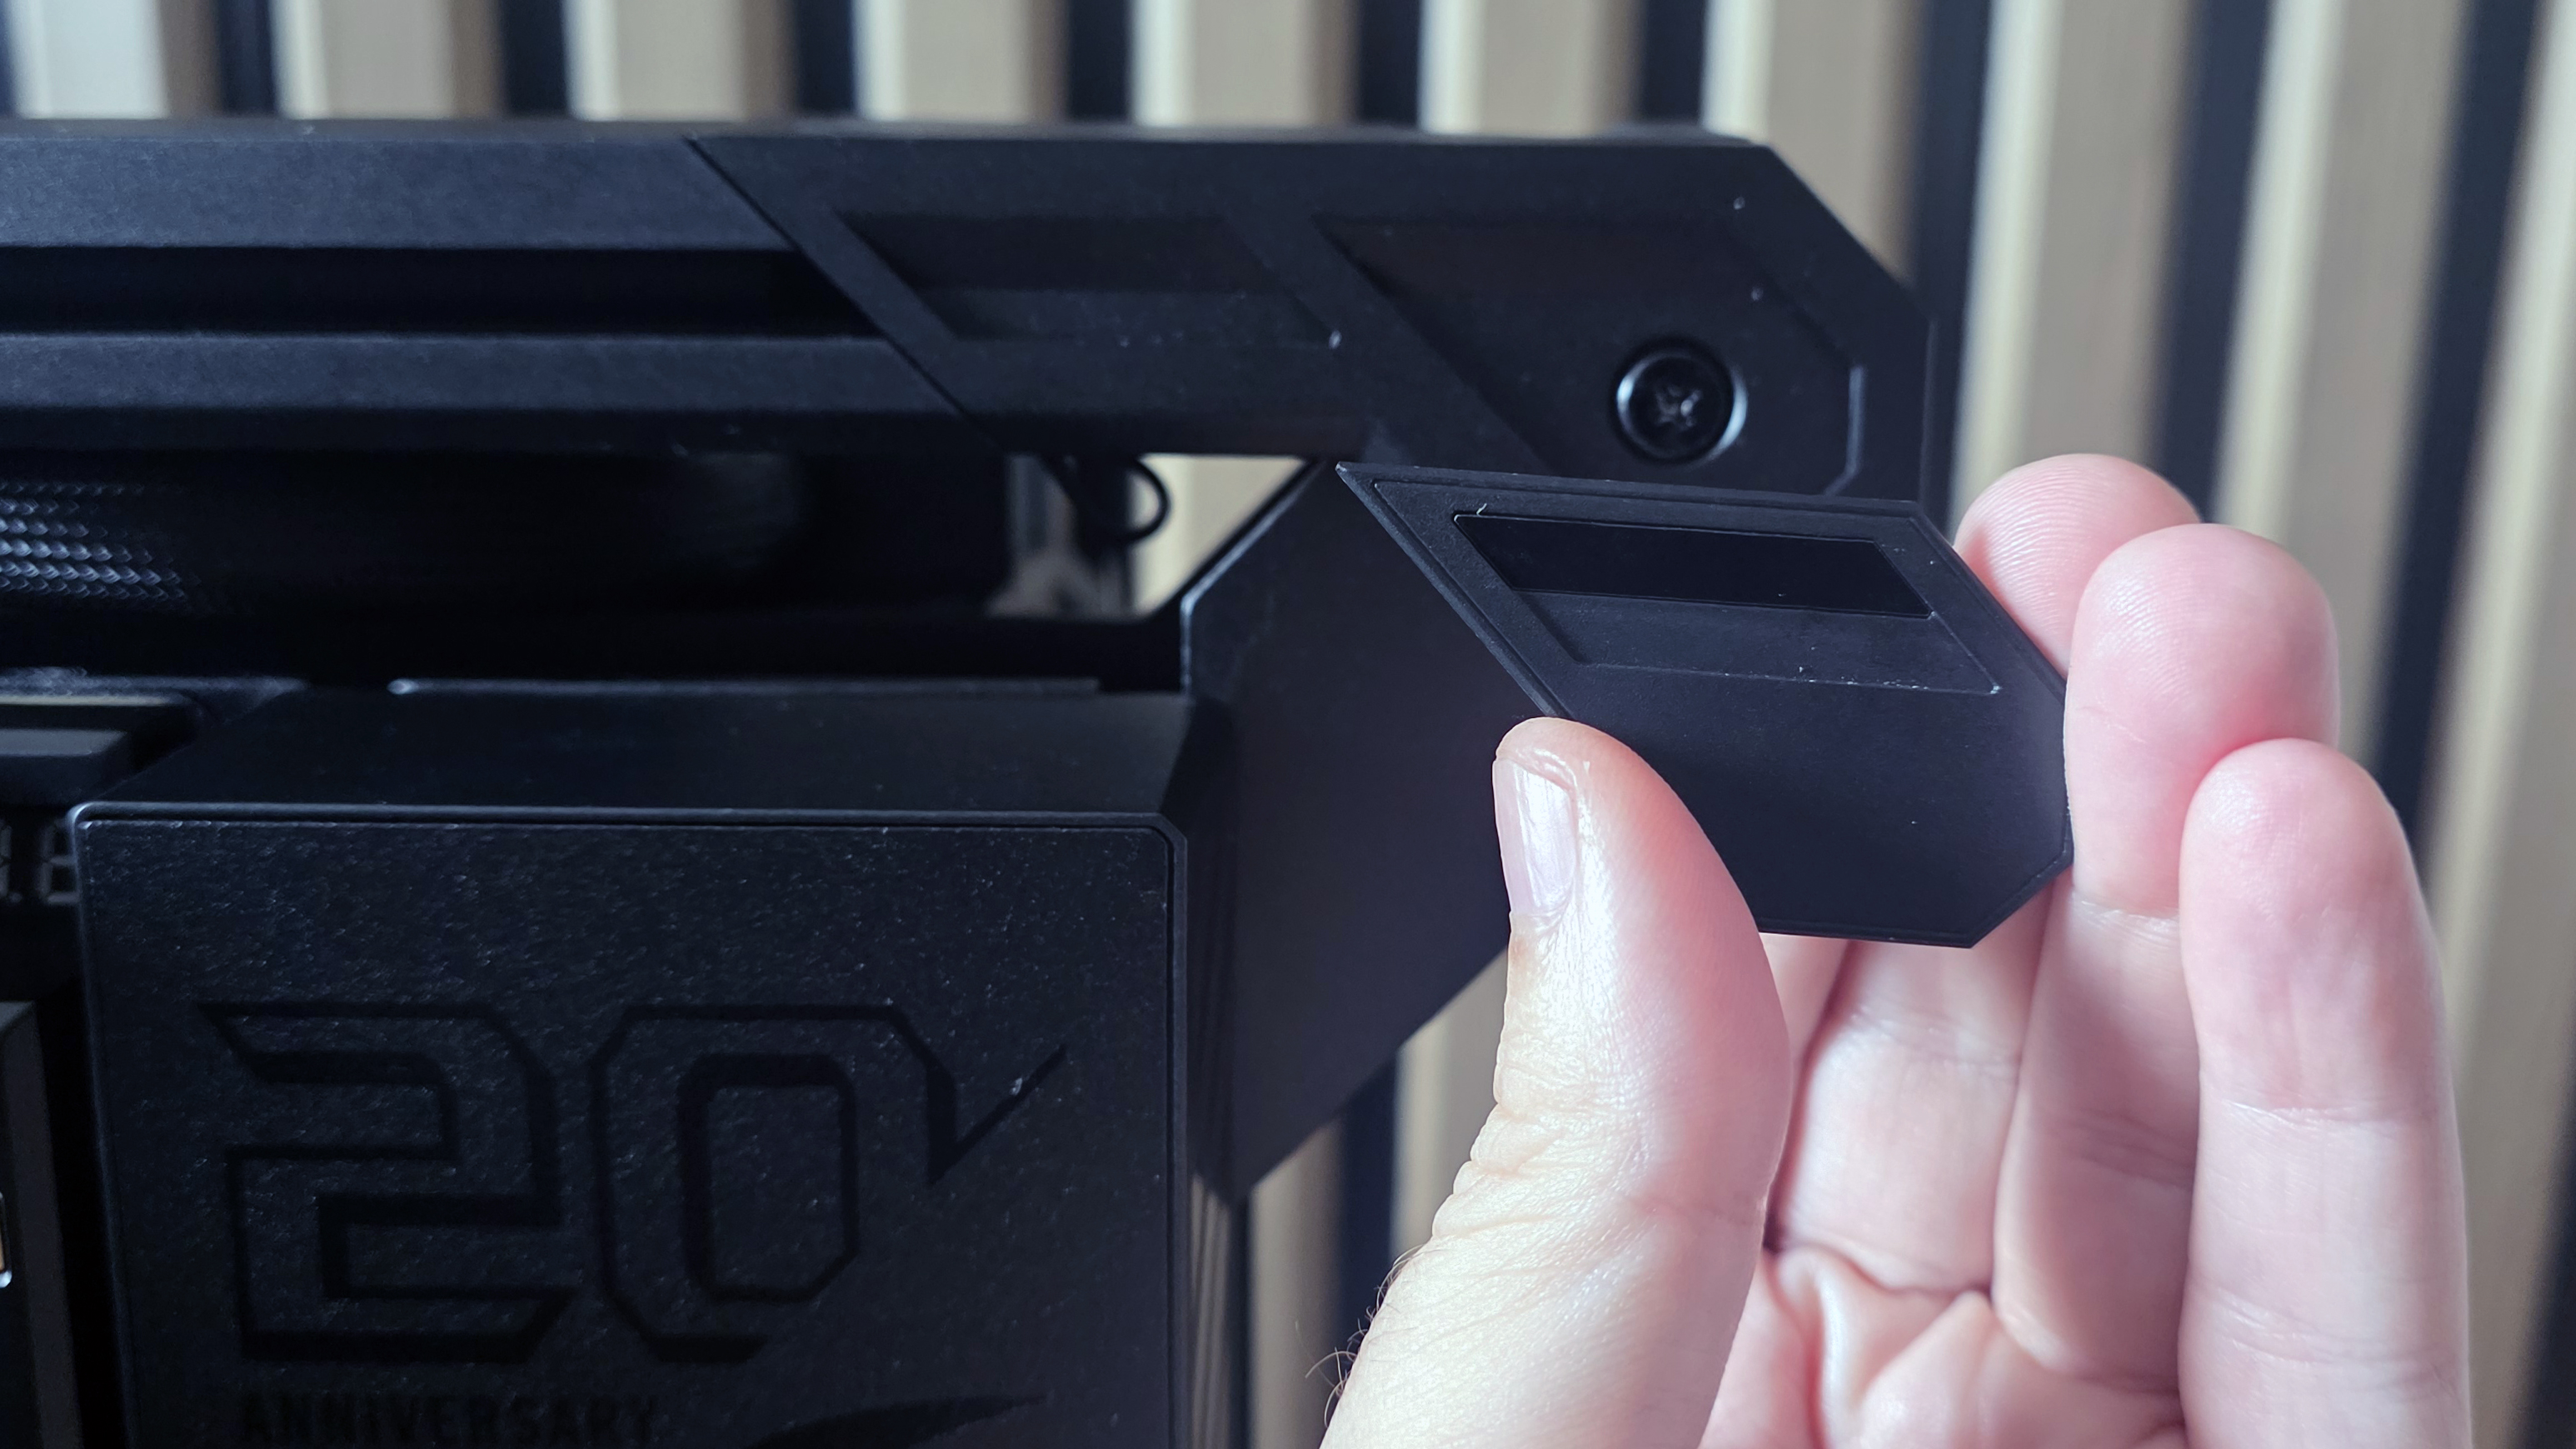
But I often found myself having to nudge them back in place, in part because their corner placement puts them exactly where you instinctively want to grab the case/system to slide it around. And speaking of sliding: the bottom of the chassis has small rubber feet that had a tendency to come off during the build process. They pop into holes in the metal, so reinstalling them wasn’t a problem. But they feel like a bit of an afterthought. Again, given the cost, I would like to see far more substantial rubber feet that don’t easily come off. Because the case and system weigh so much, if the feet come off it’s pretty easy to accidentally gouge your desk or table during the build process as you’re moving things around.
These are both fairly minor quality complaints, but given this is the most expensive system I’ve assembled or tested, at least since the days of quad-SLI, it doesn’t feel great to see parts that clearly cost pennies marring what is otherwise a premium system experience.
Swinging the system around on the bench – which I learned to do by walking it on its corners due to the rubber feet and the system’s heft – it’s time to install the power supply and radiator fans. First, the Thor PSU screws into the cage that was previously removed with four screws on the power plug end of the supply.
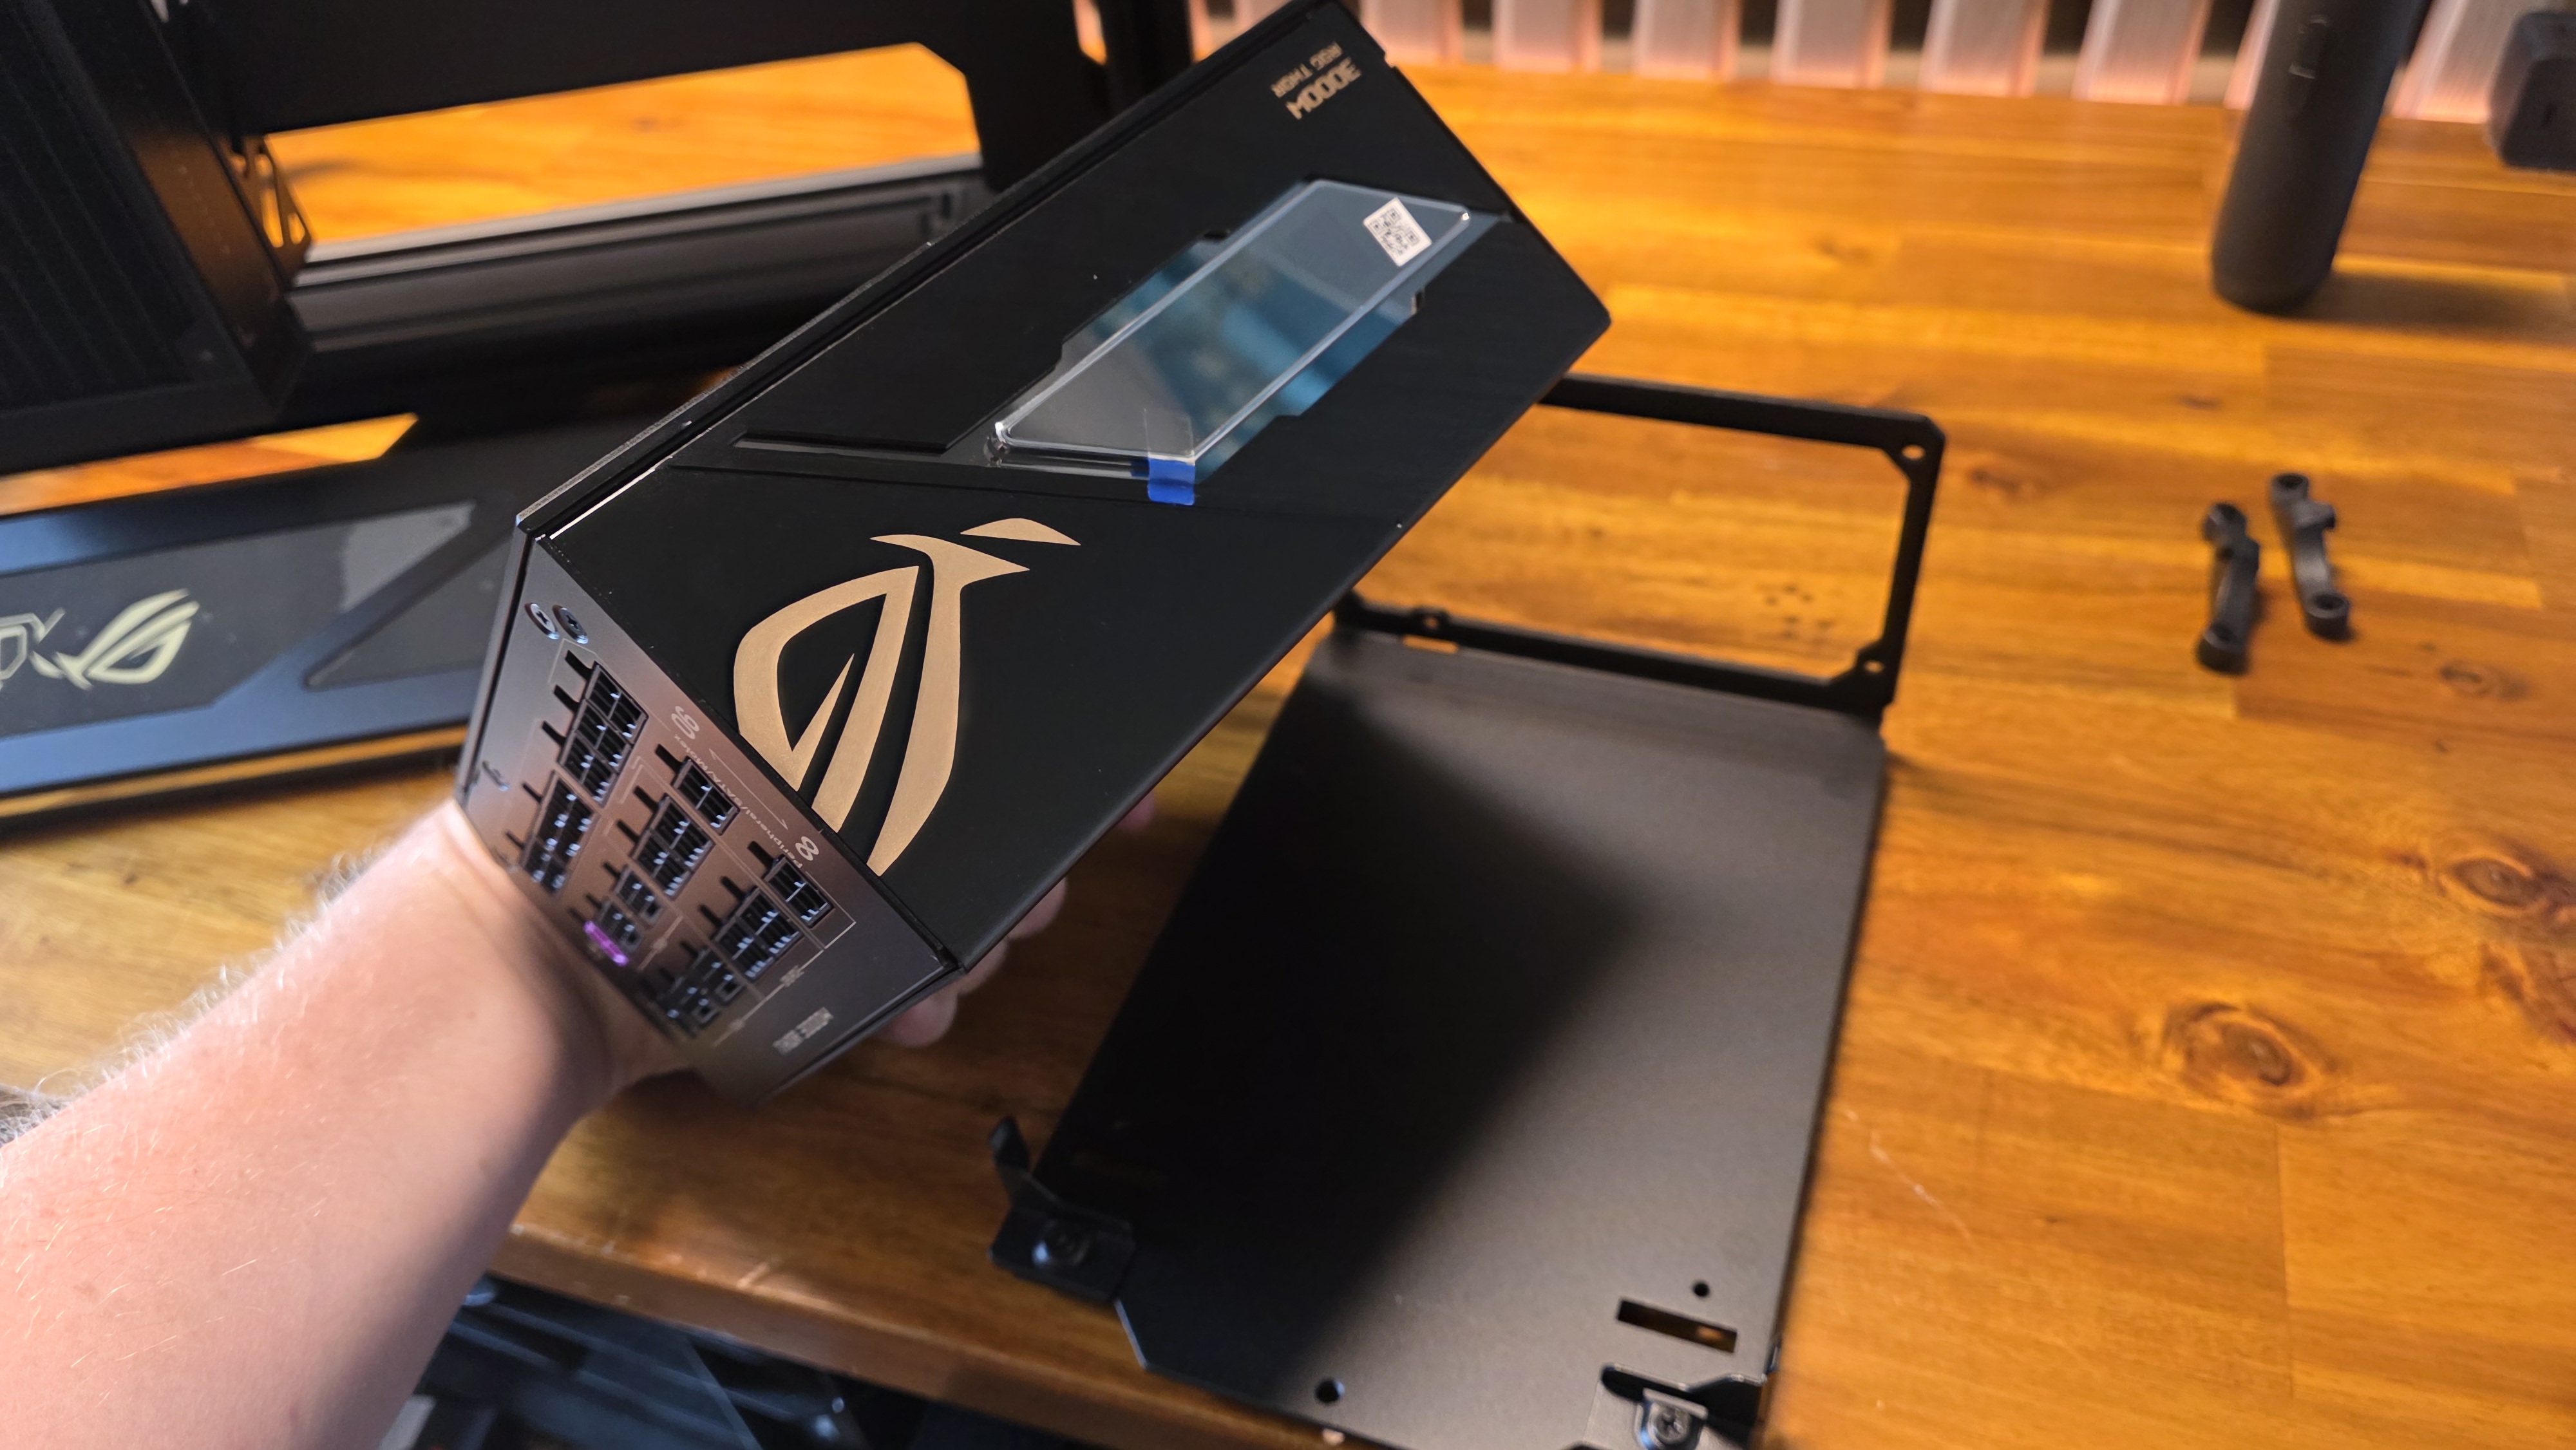
Then the cage and PSU slot back into tabs on the side of the case and attach via a screw. Don’t forget, as I did here, to move the PSU screen to the side of the PSU facing out. Otherwise, you’ll need to remove the PSU or radiator cage again later. Because the opposite side of the PSU and the radiator cage sit close enough together that you can’t remove the screen after installation.
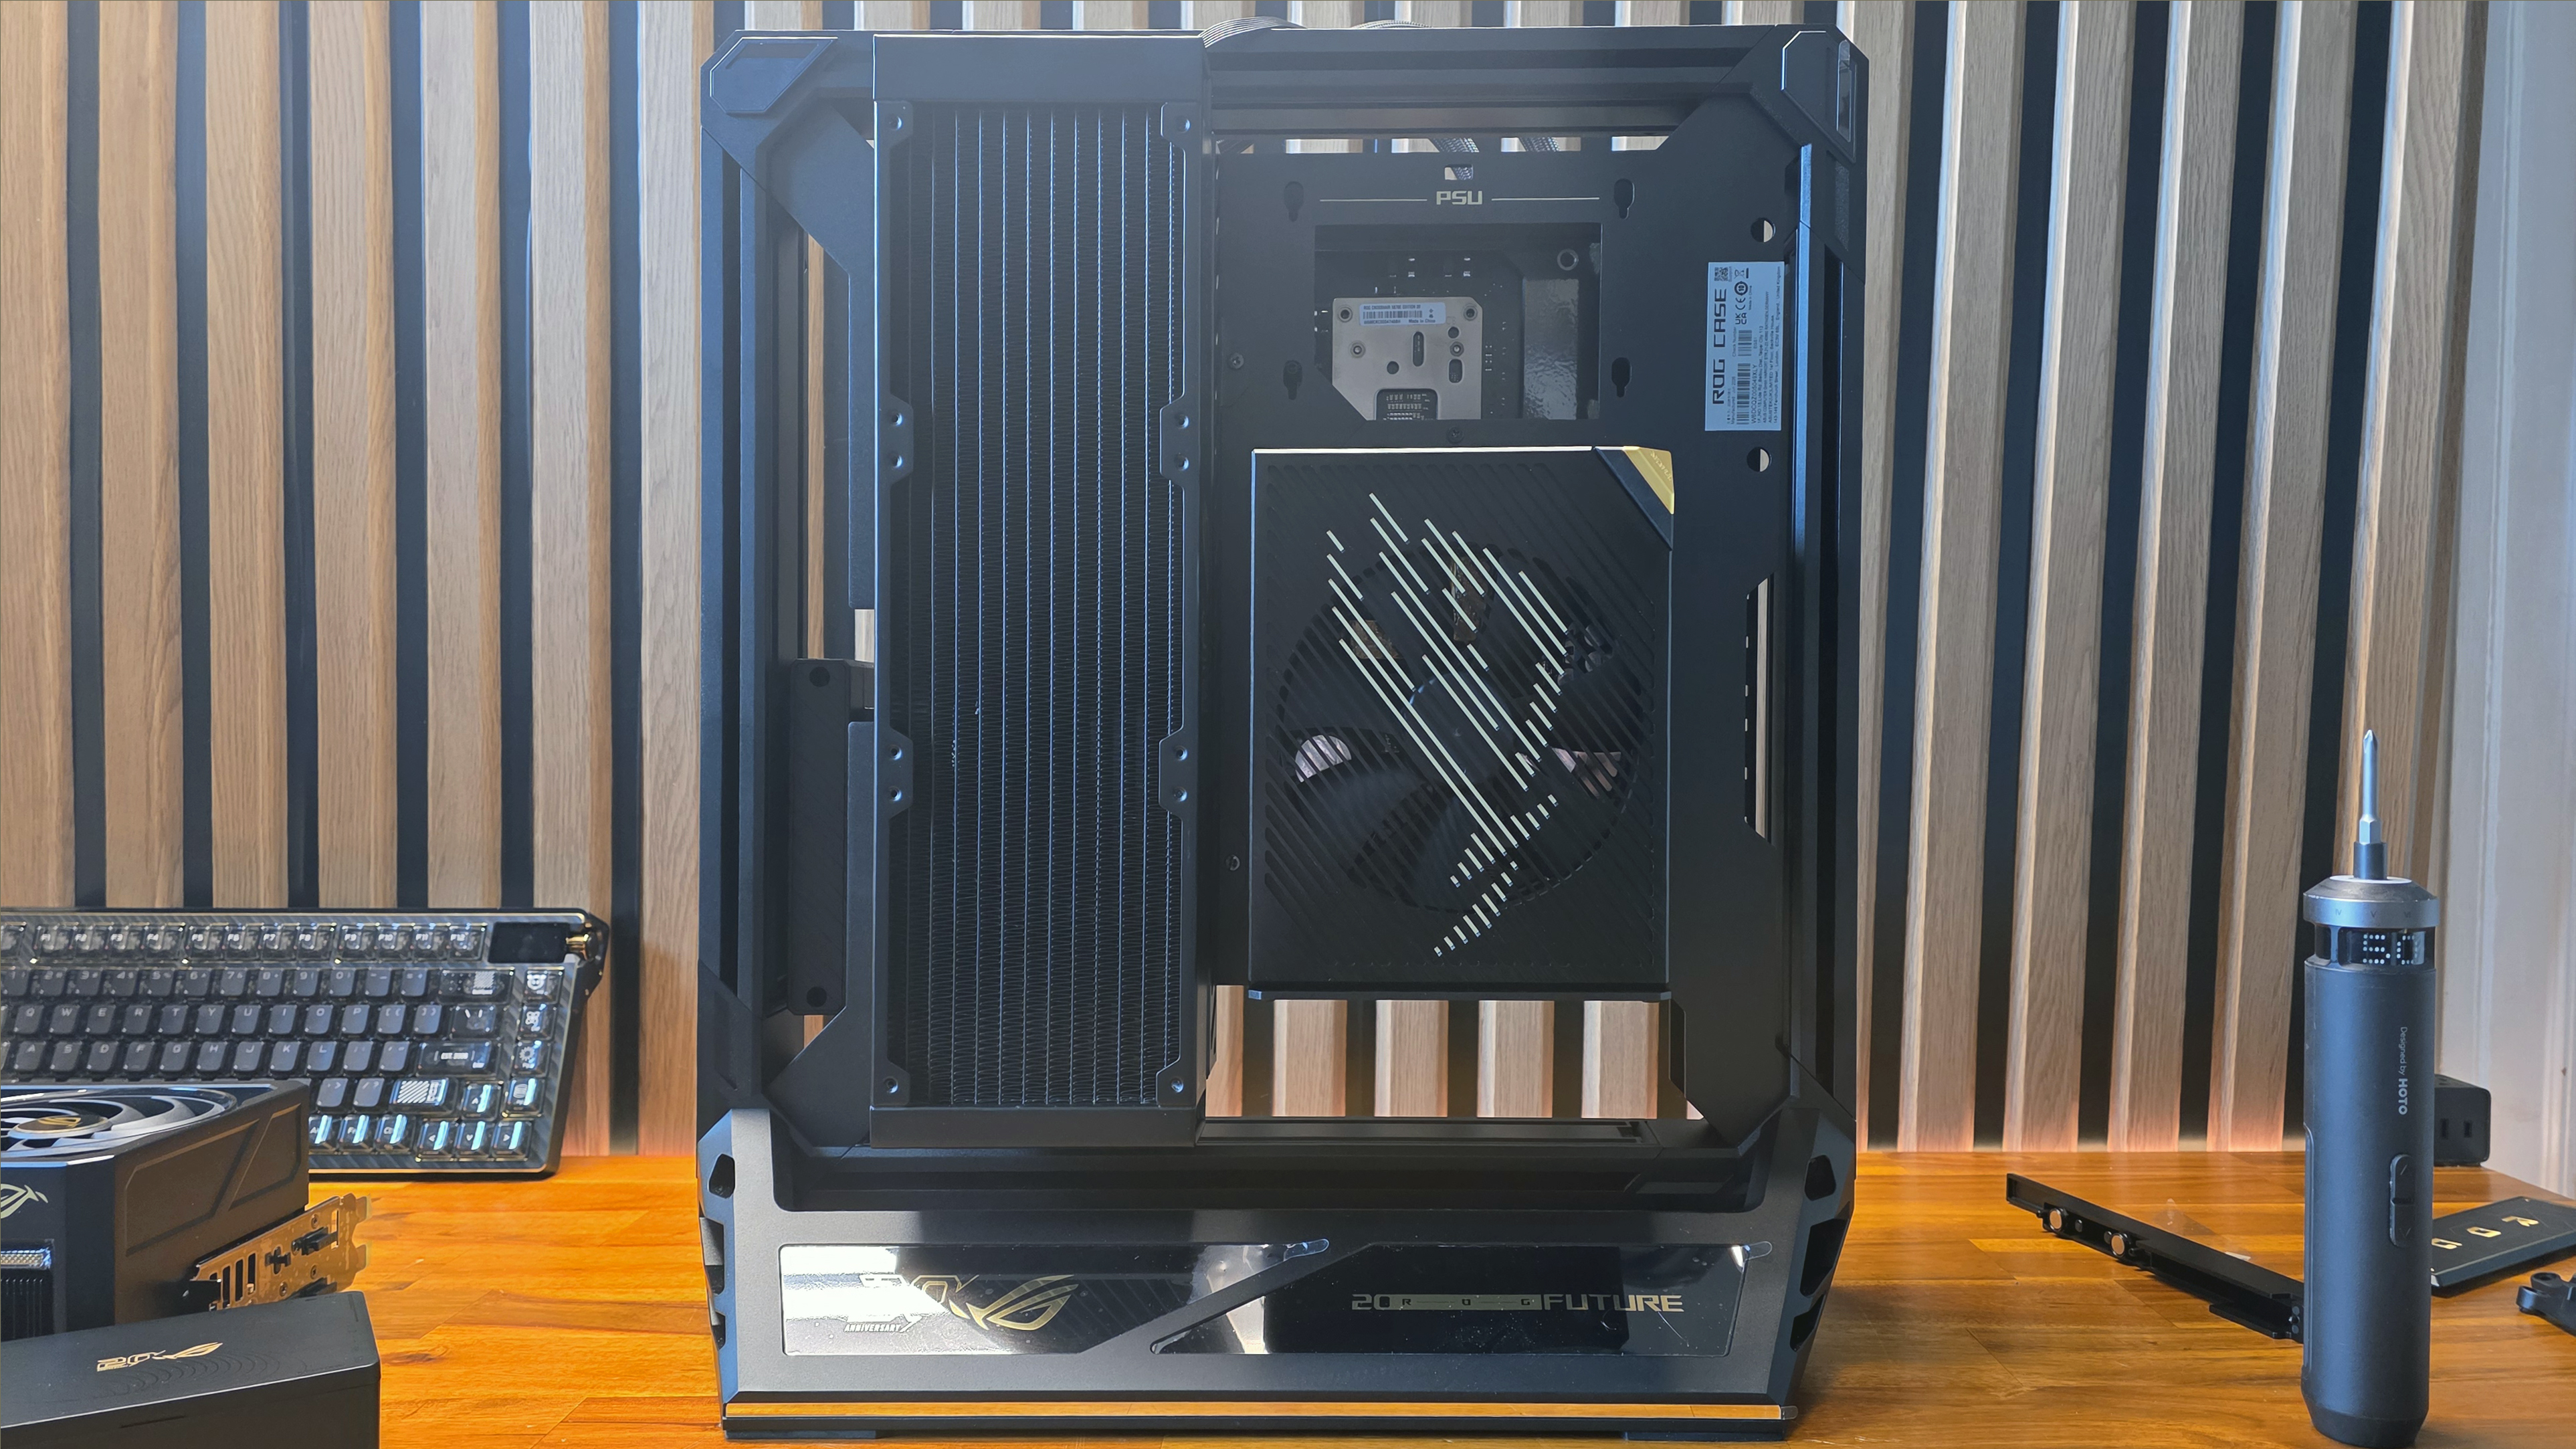
With the PSU in place, it’s time to install the radiator fans. This is made quite easy by the fact that the three spinners come as a single fused unit and, if you follow along via the installation video, Asus points out that the Asus logos on the fan hubs should be facing out.
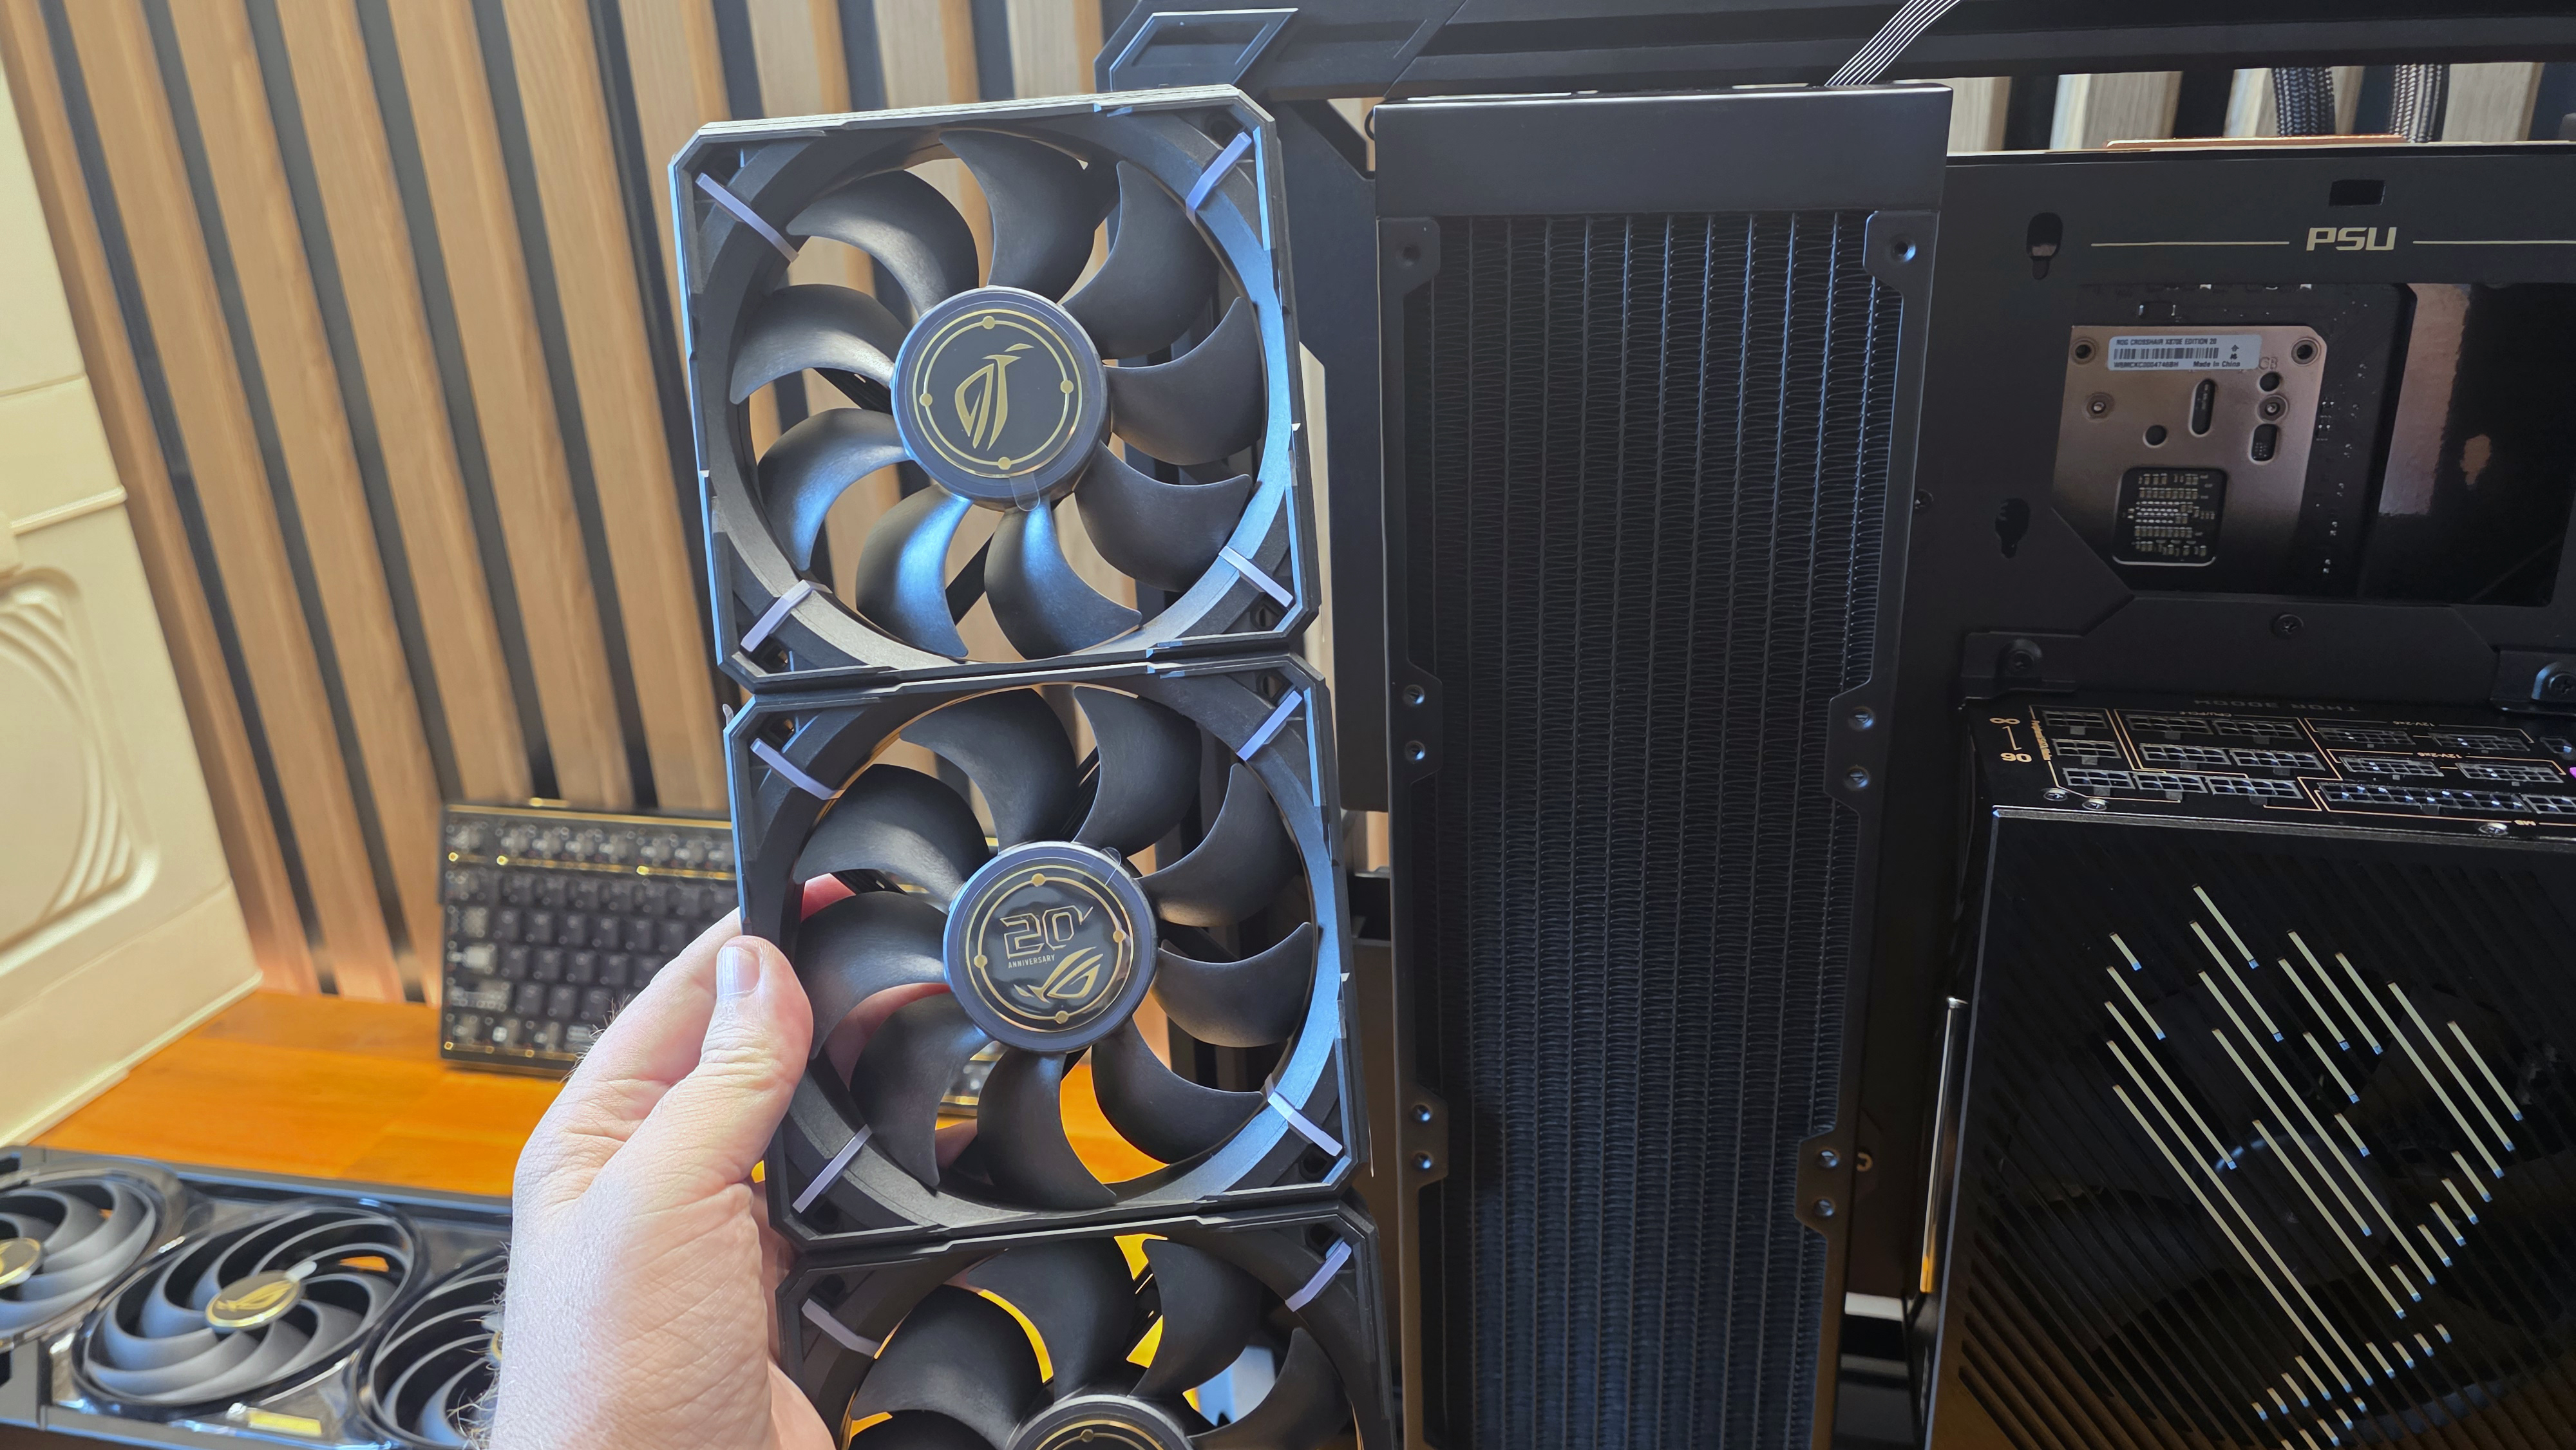
Screw them in via the long screws in the pretty cooling accessory box, and connect them via the single proprietary cable and right-angle connector that extends a few inches out from the top of the radiator.
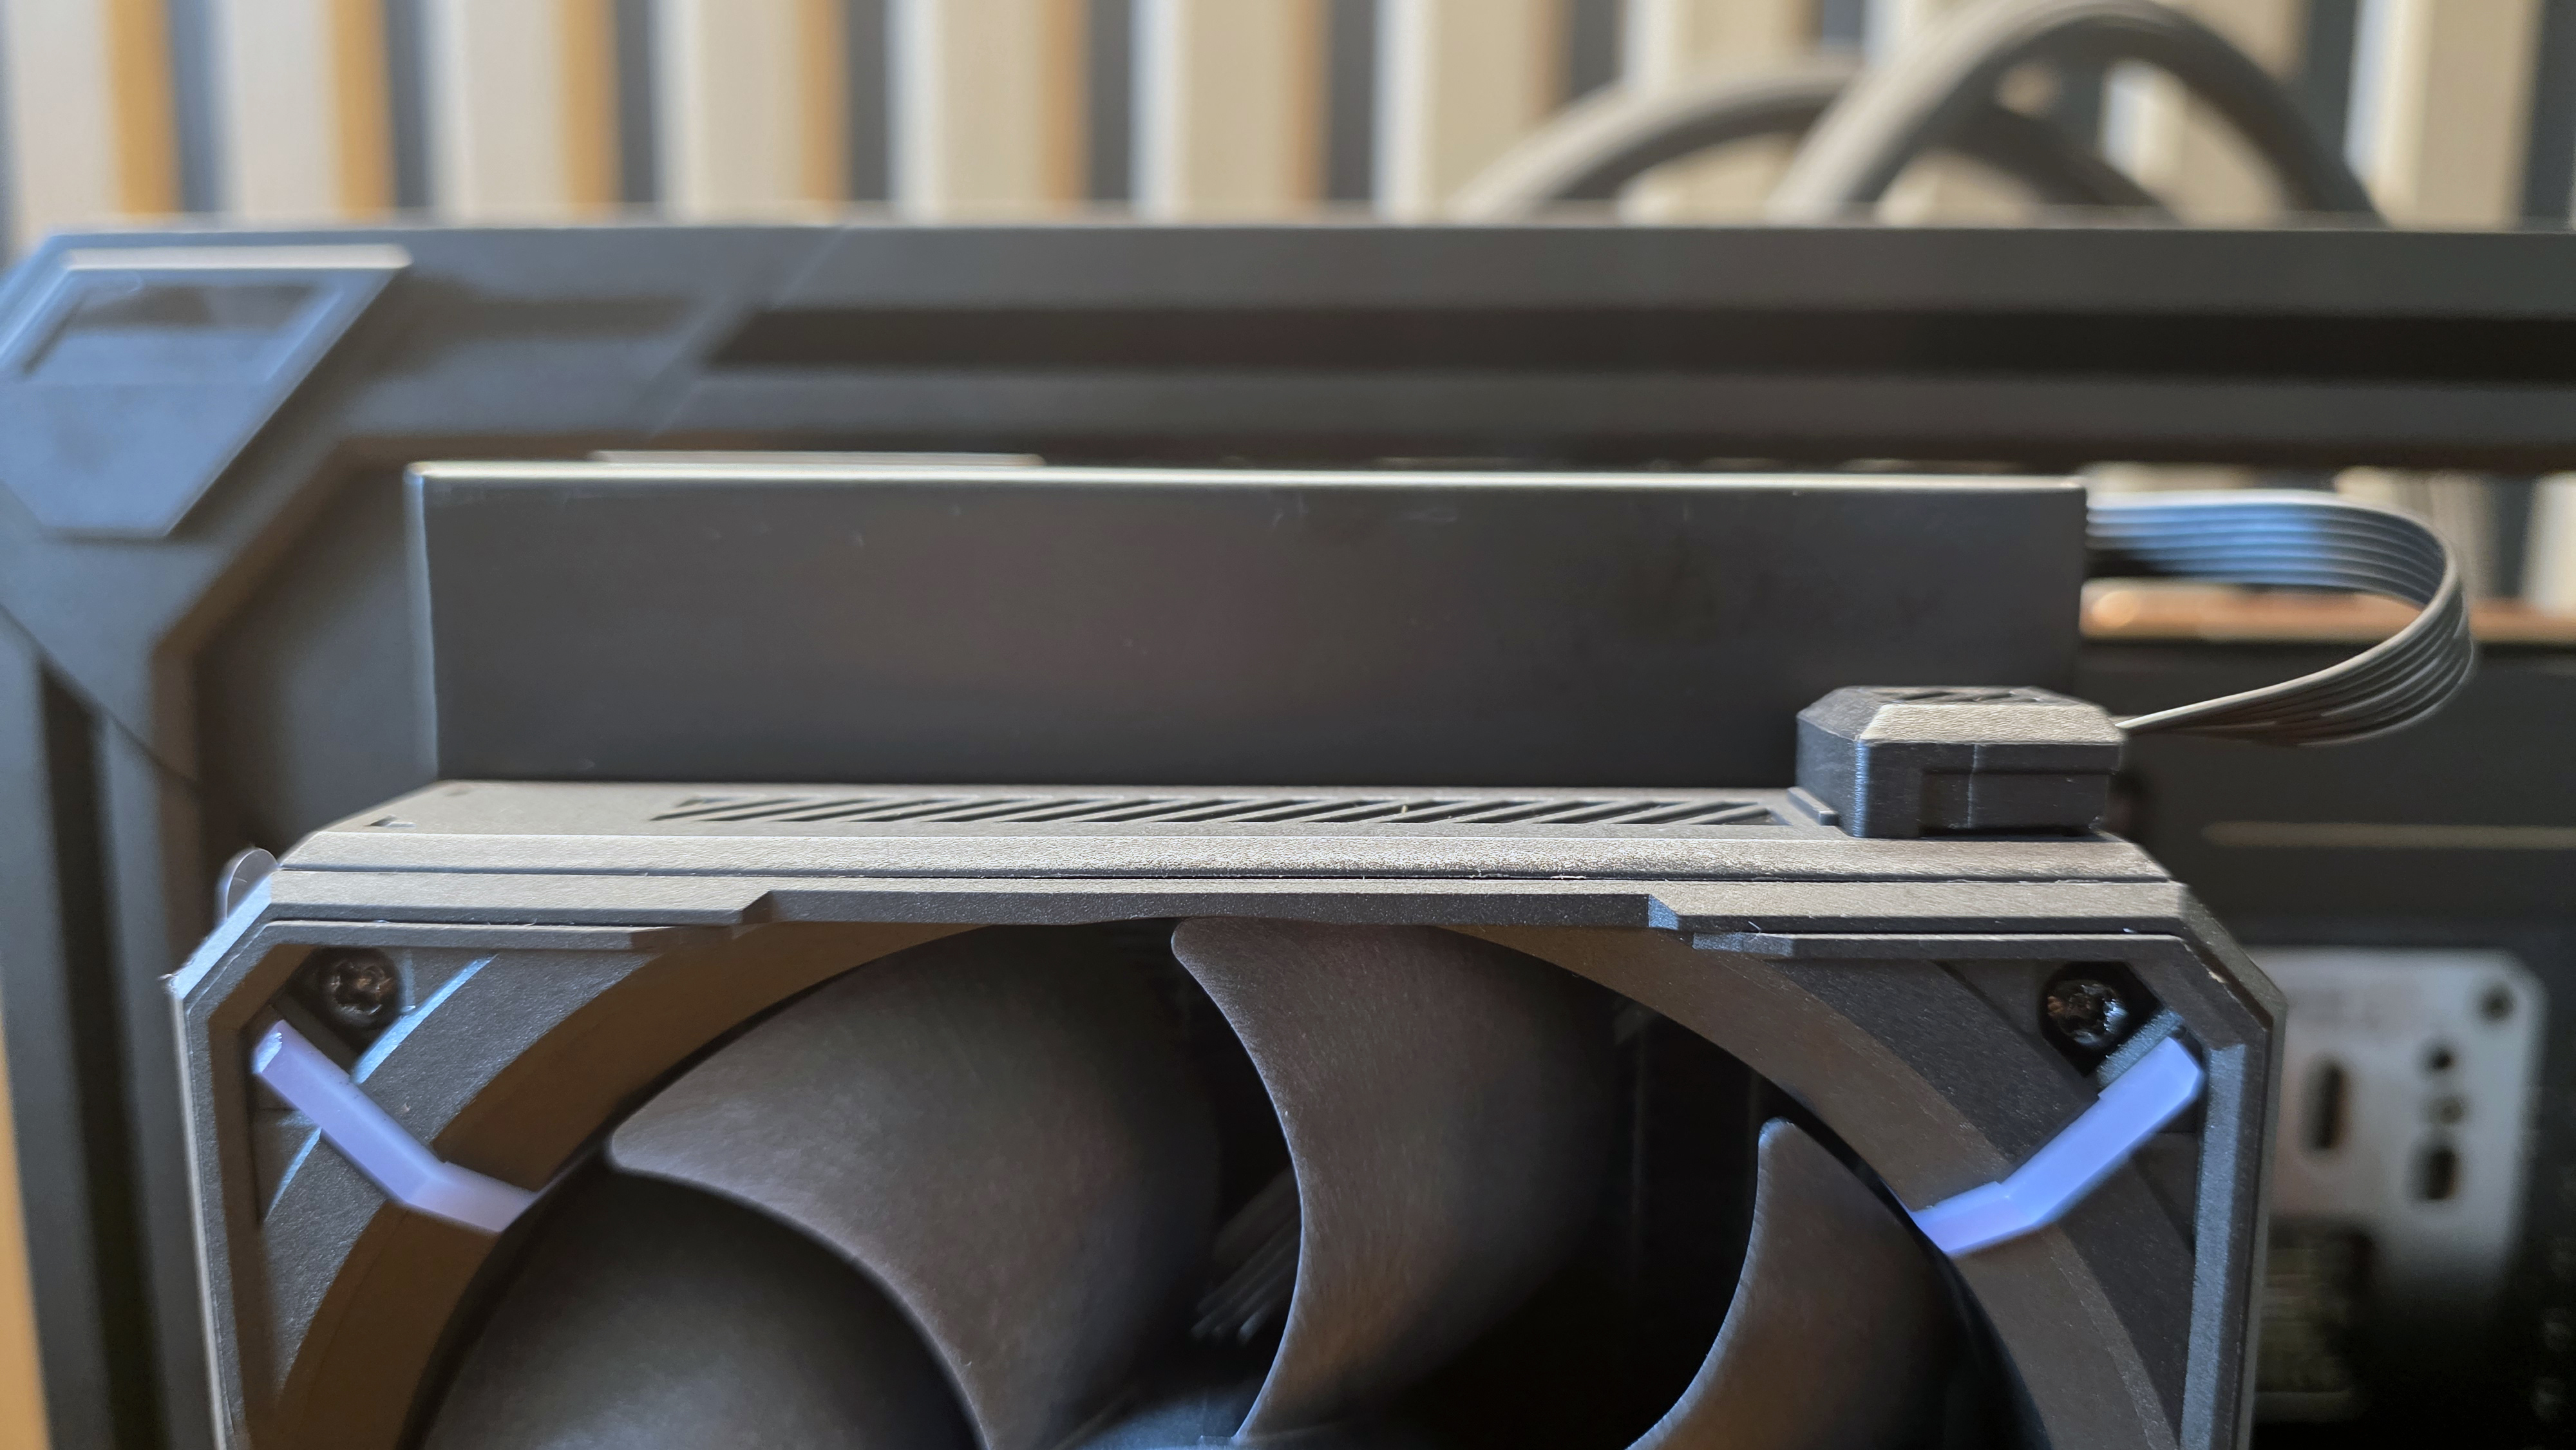
If the plug doesn’t insert easily, turn it around so it angles out. I spent a half minute or so attempting to plug the cable in backward before I figured this out.
Now it’s time to install all the modular PSU cables, and the video guide here just kind of vaguely tells you to thread them all from the hole near the top of the PSU side to the bottom. I did this, somewhat against my better judgement, knowing full well that the supplemental PSU cables were going to need to plug in up top, and I had to fish them out and re-thread them to the top later.
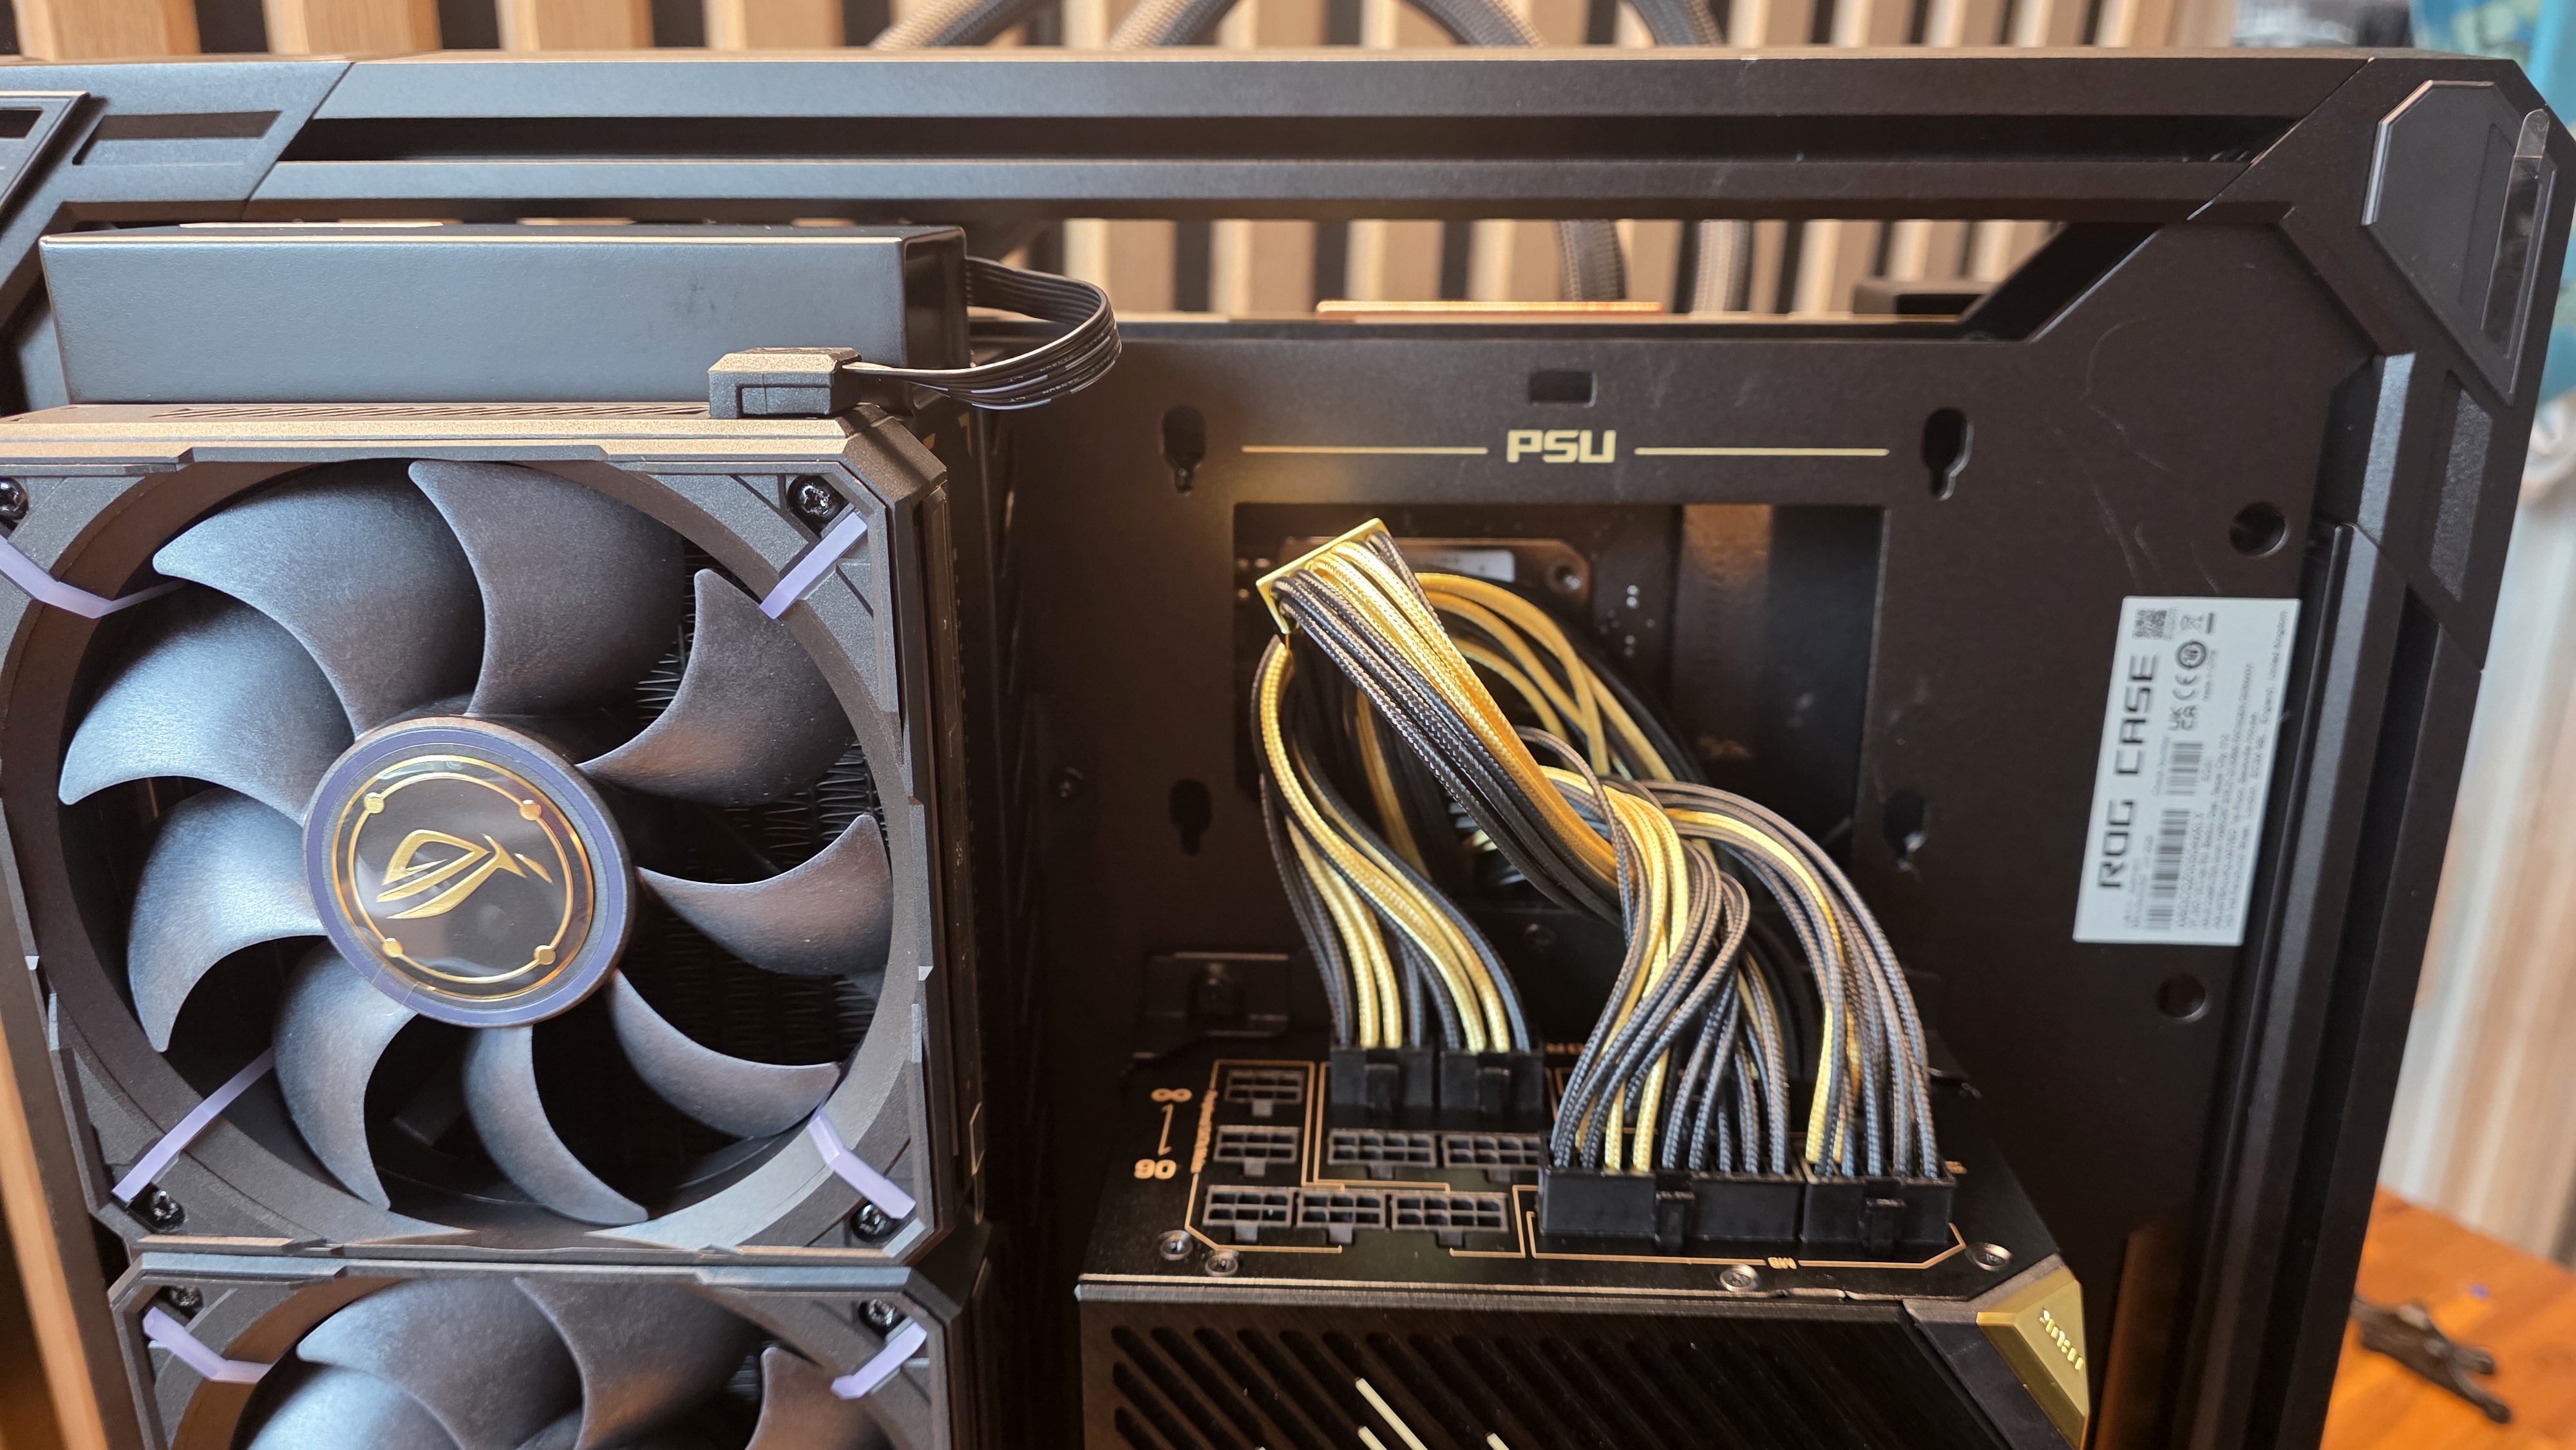
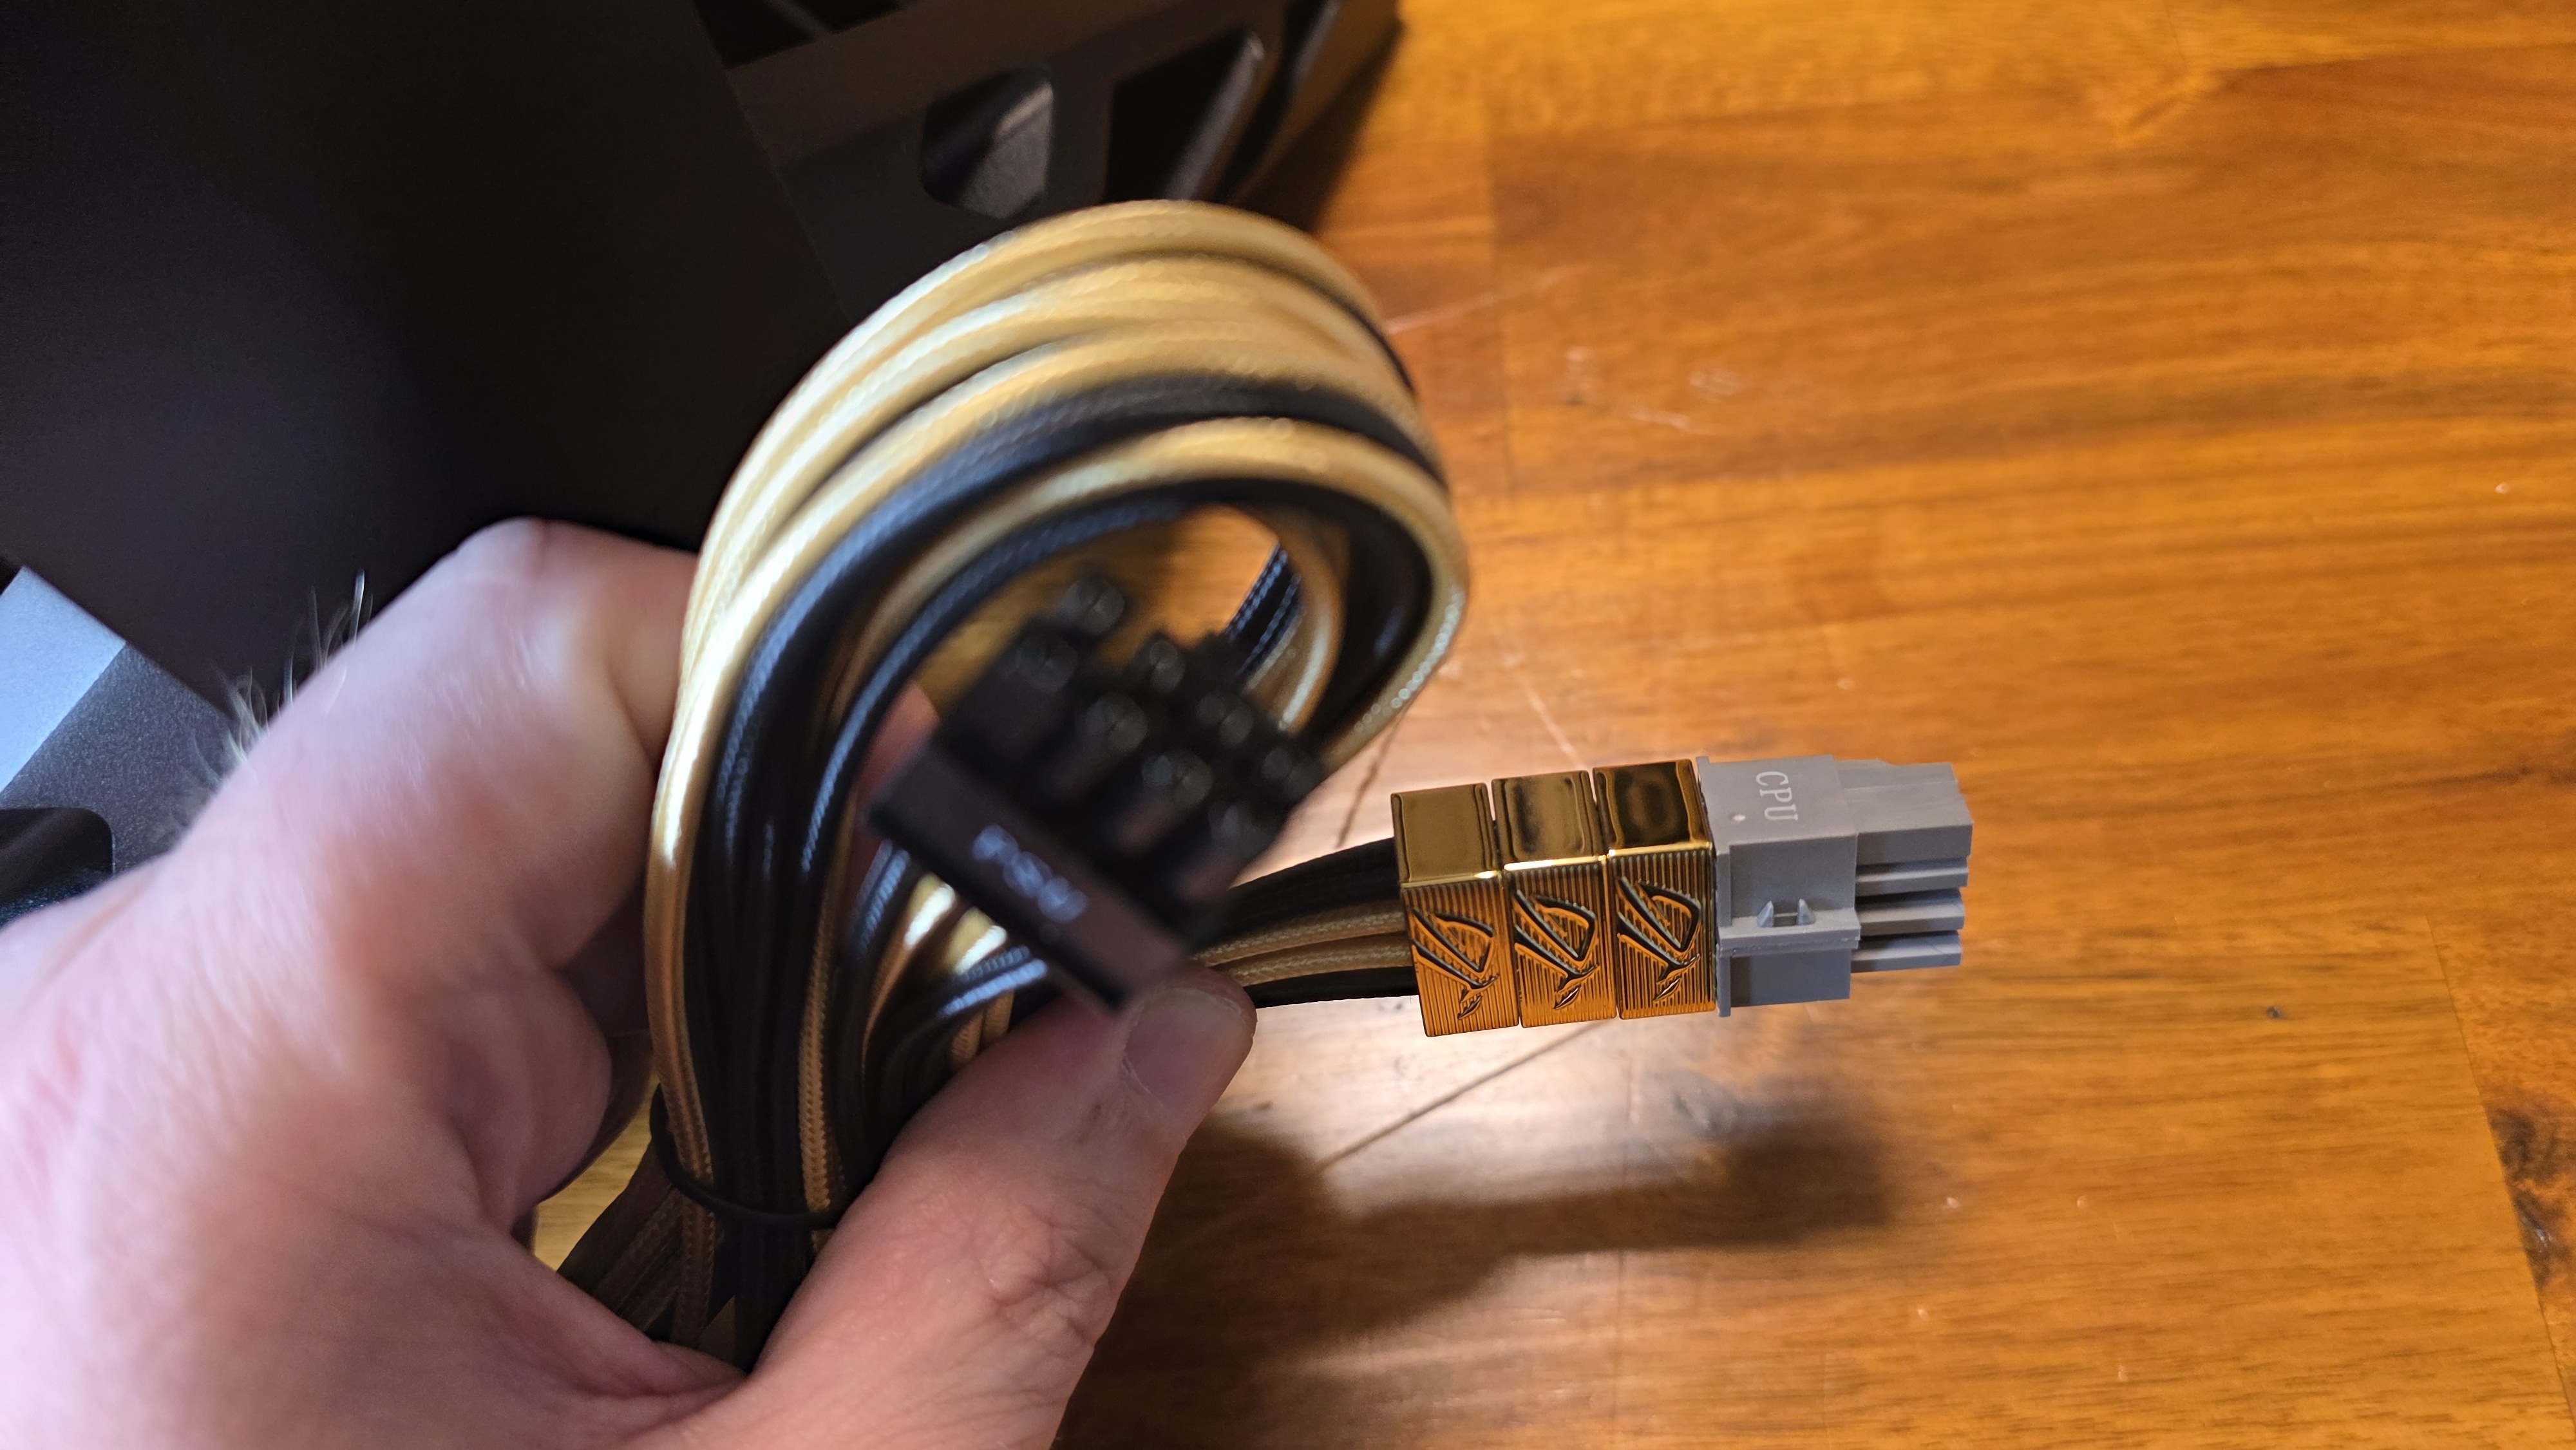
I was a bit confused at first at these plastic, somewhat chintzy-looking gold ROG blocks stacked above most of the plugs. Turns out, they’re pre-installed cable combs, and spacing them out along the cables can make things look a lot better. Don’t waste them near the PSU side of your cable runs, though, because now it’s time to reinstall the cable shroud that covers up this mess.
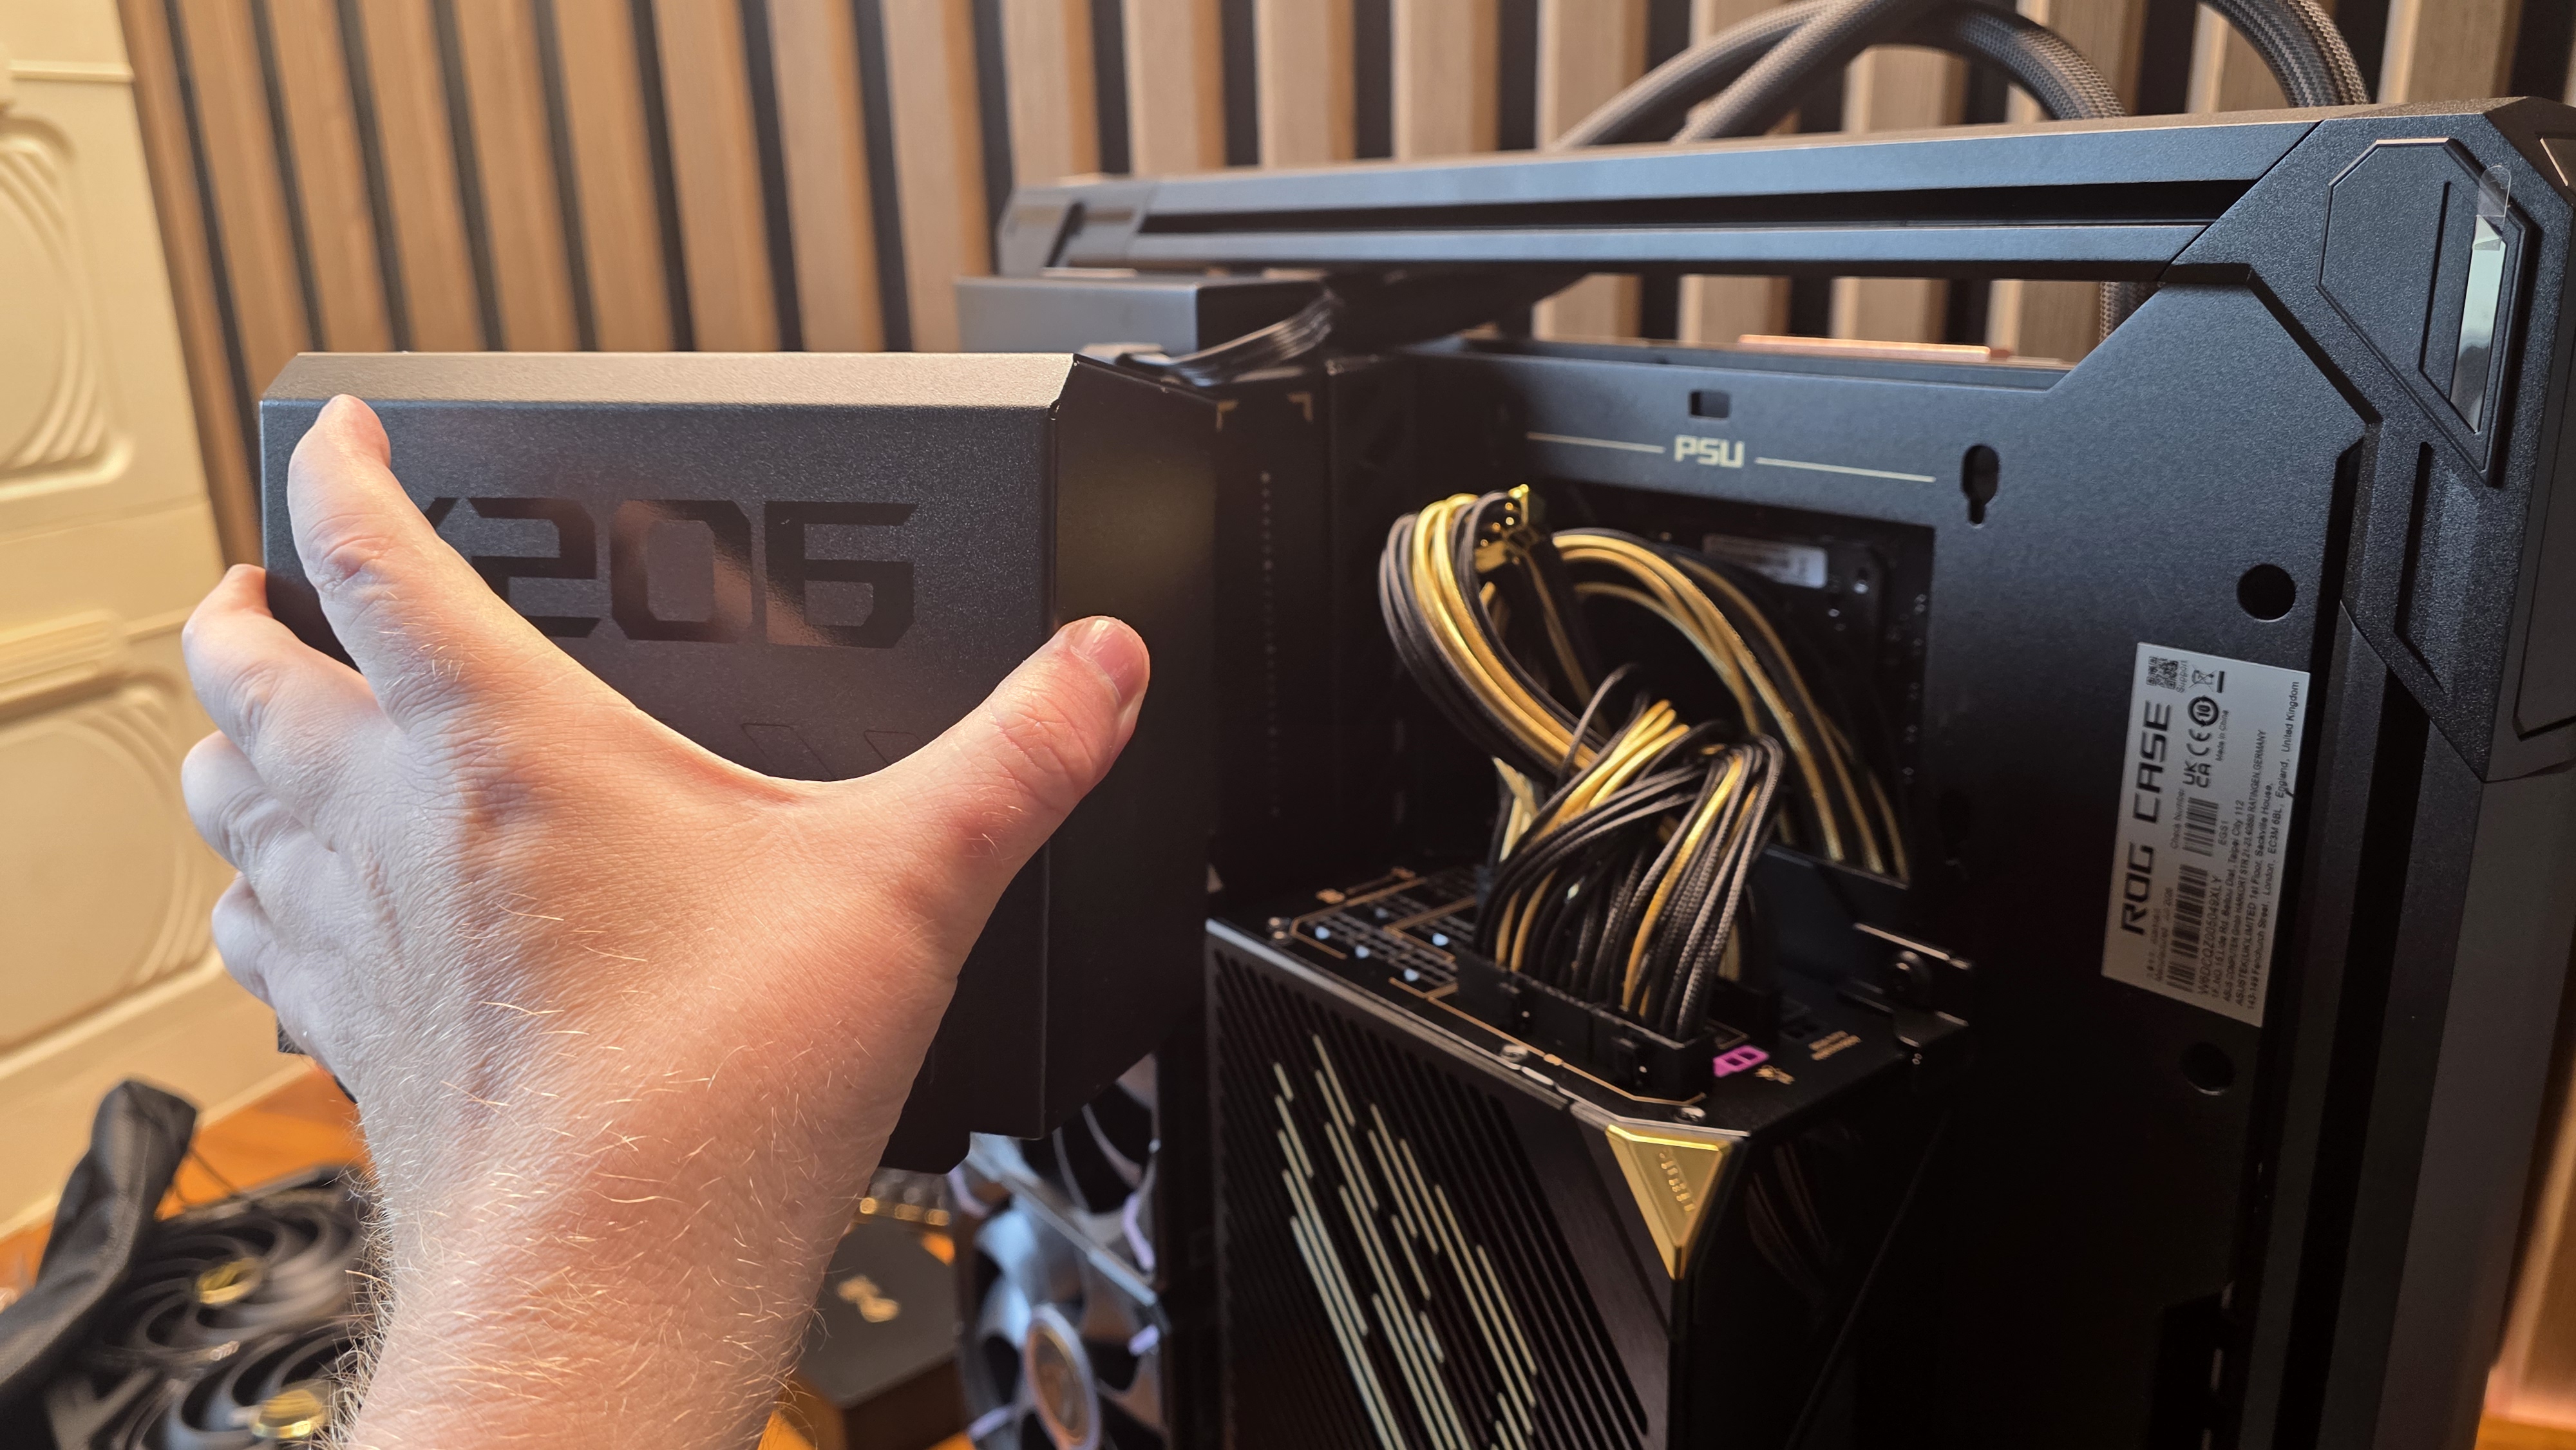
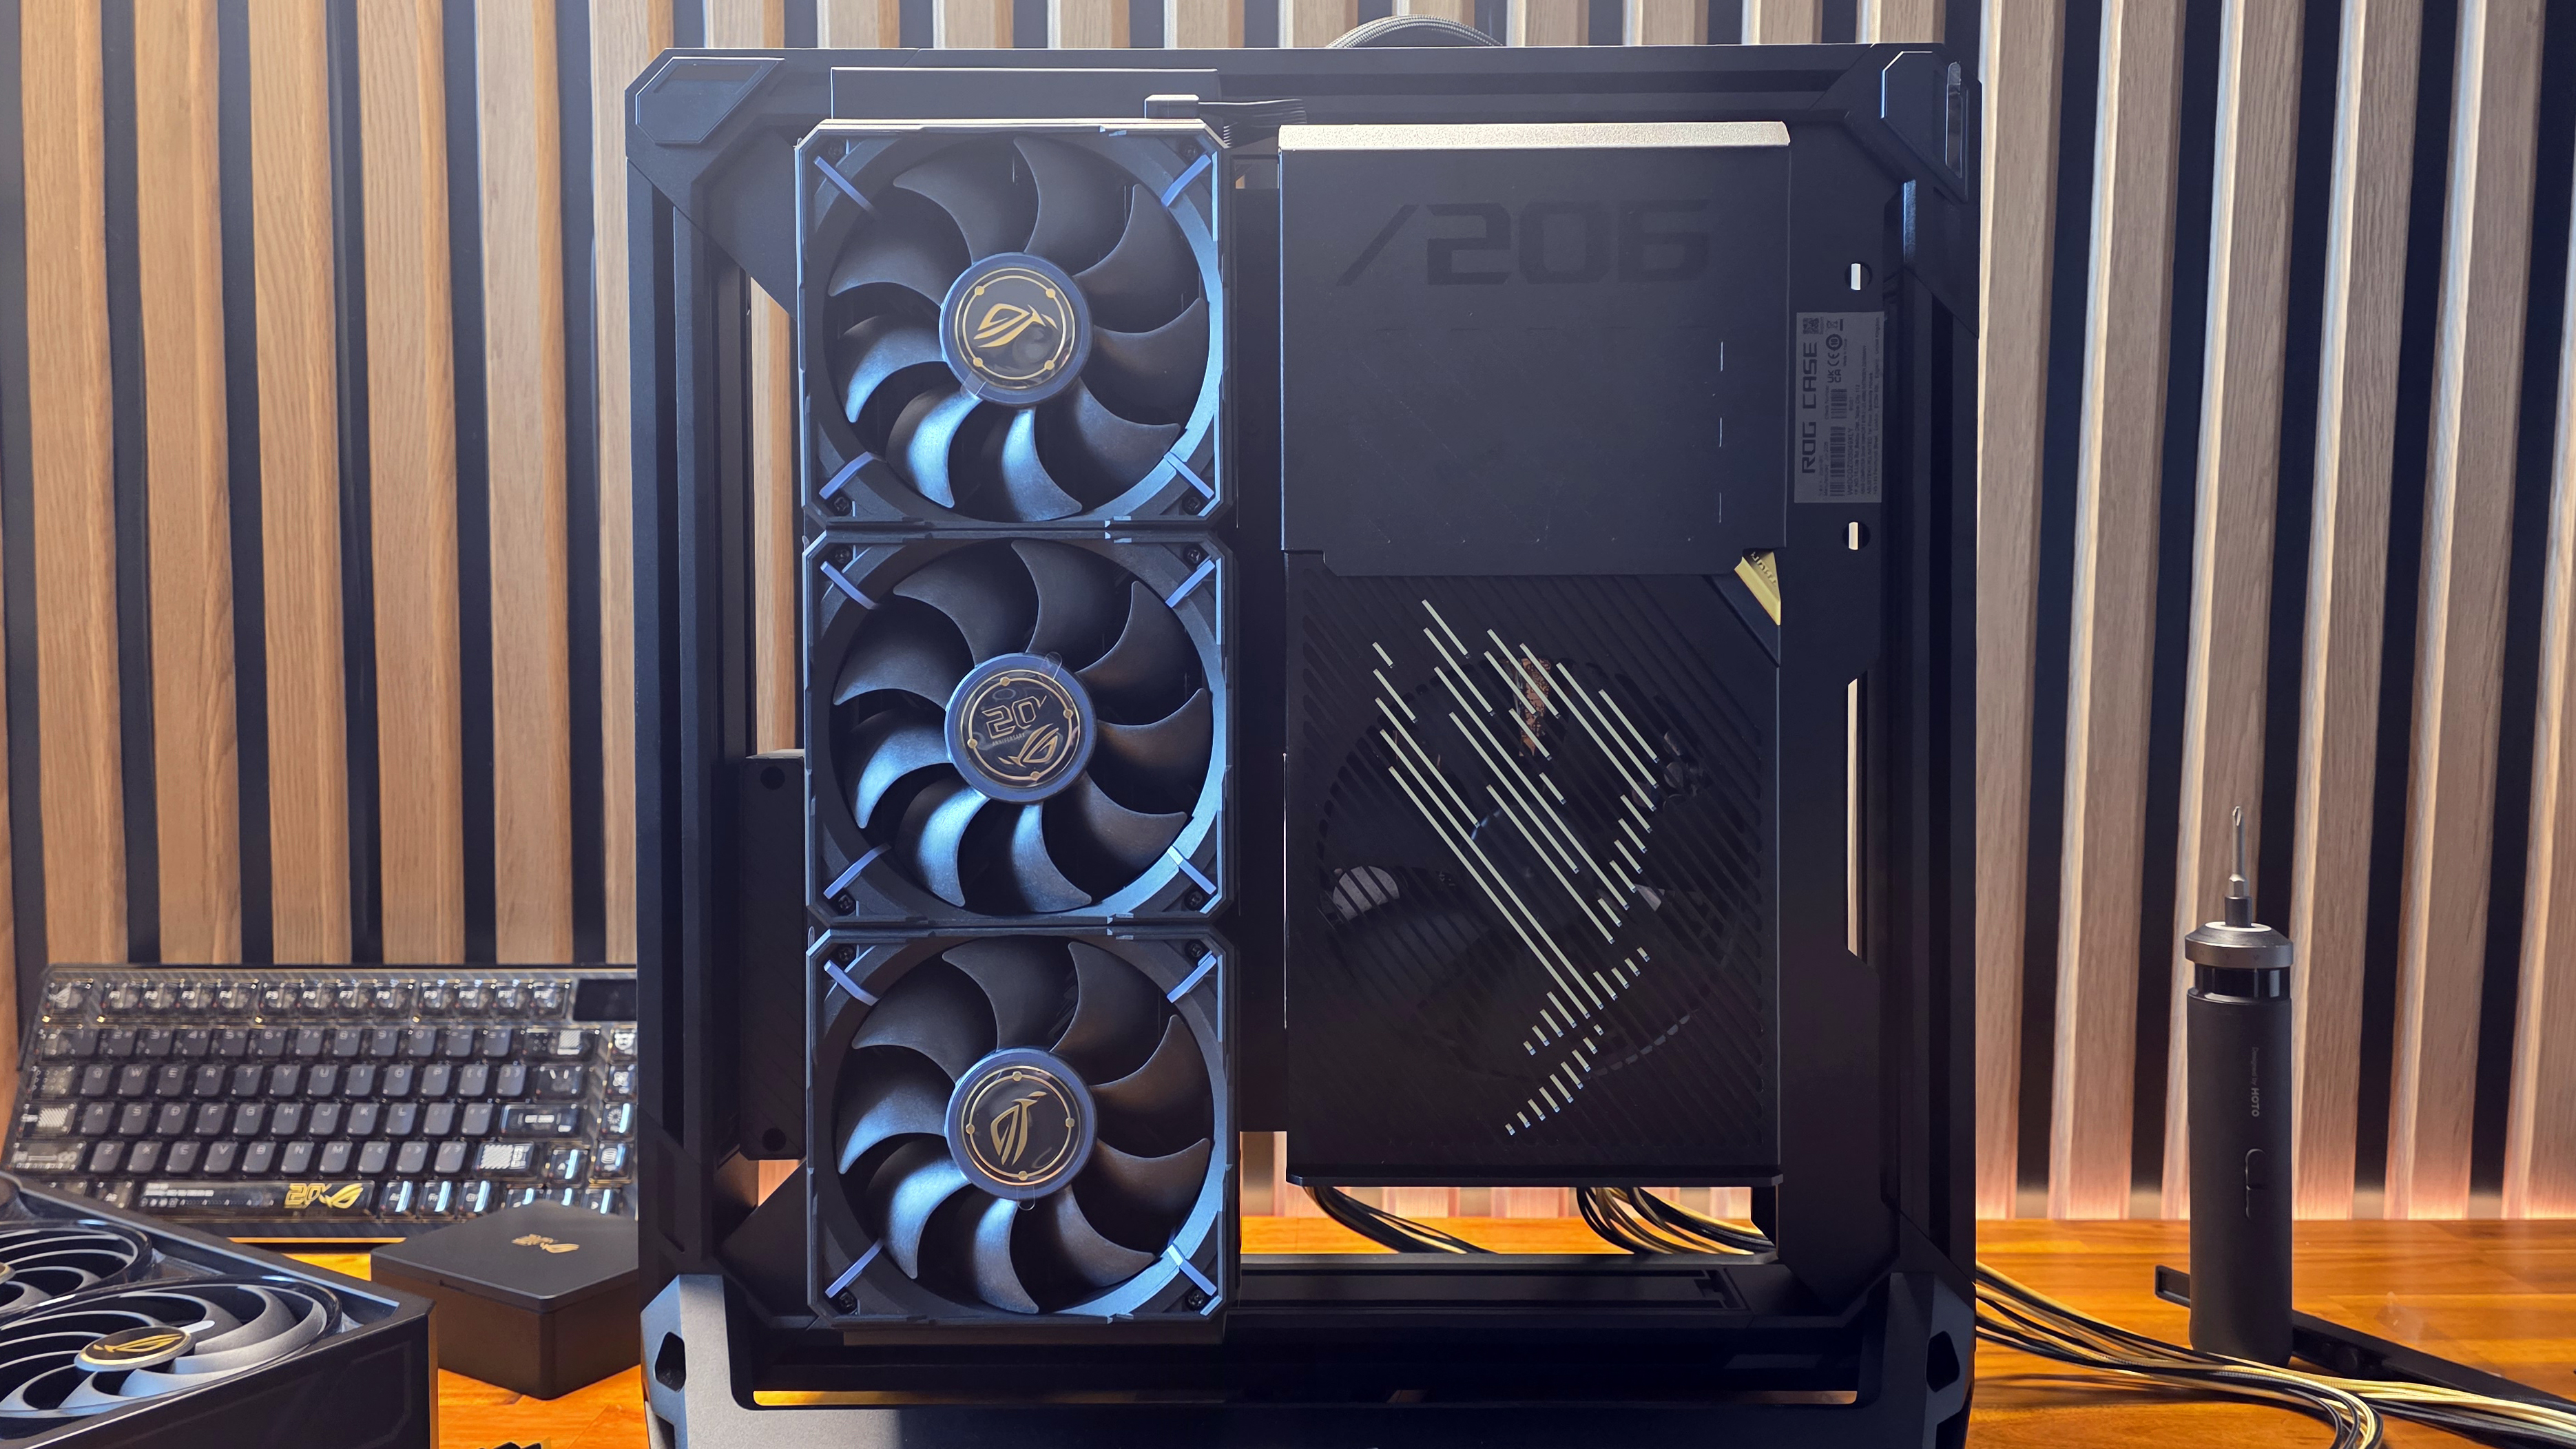
With the PSU, radiator and fans, and cable cover installed, this is one of the cleanest-looking ‘backsides’ of a system I’ve seen in a while. Considering this is also an open-frame case, that’s pretty impressive. Again, as long as you don’t think about price.
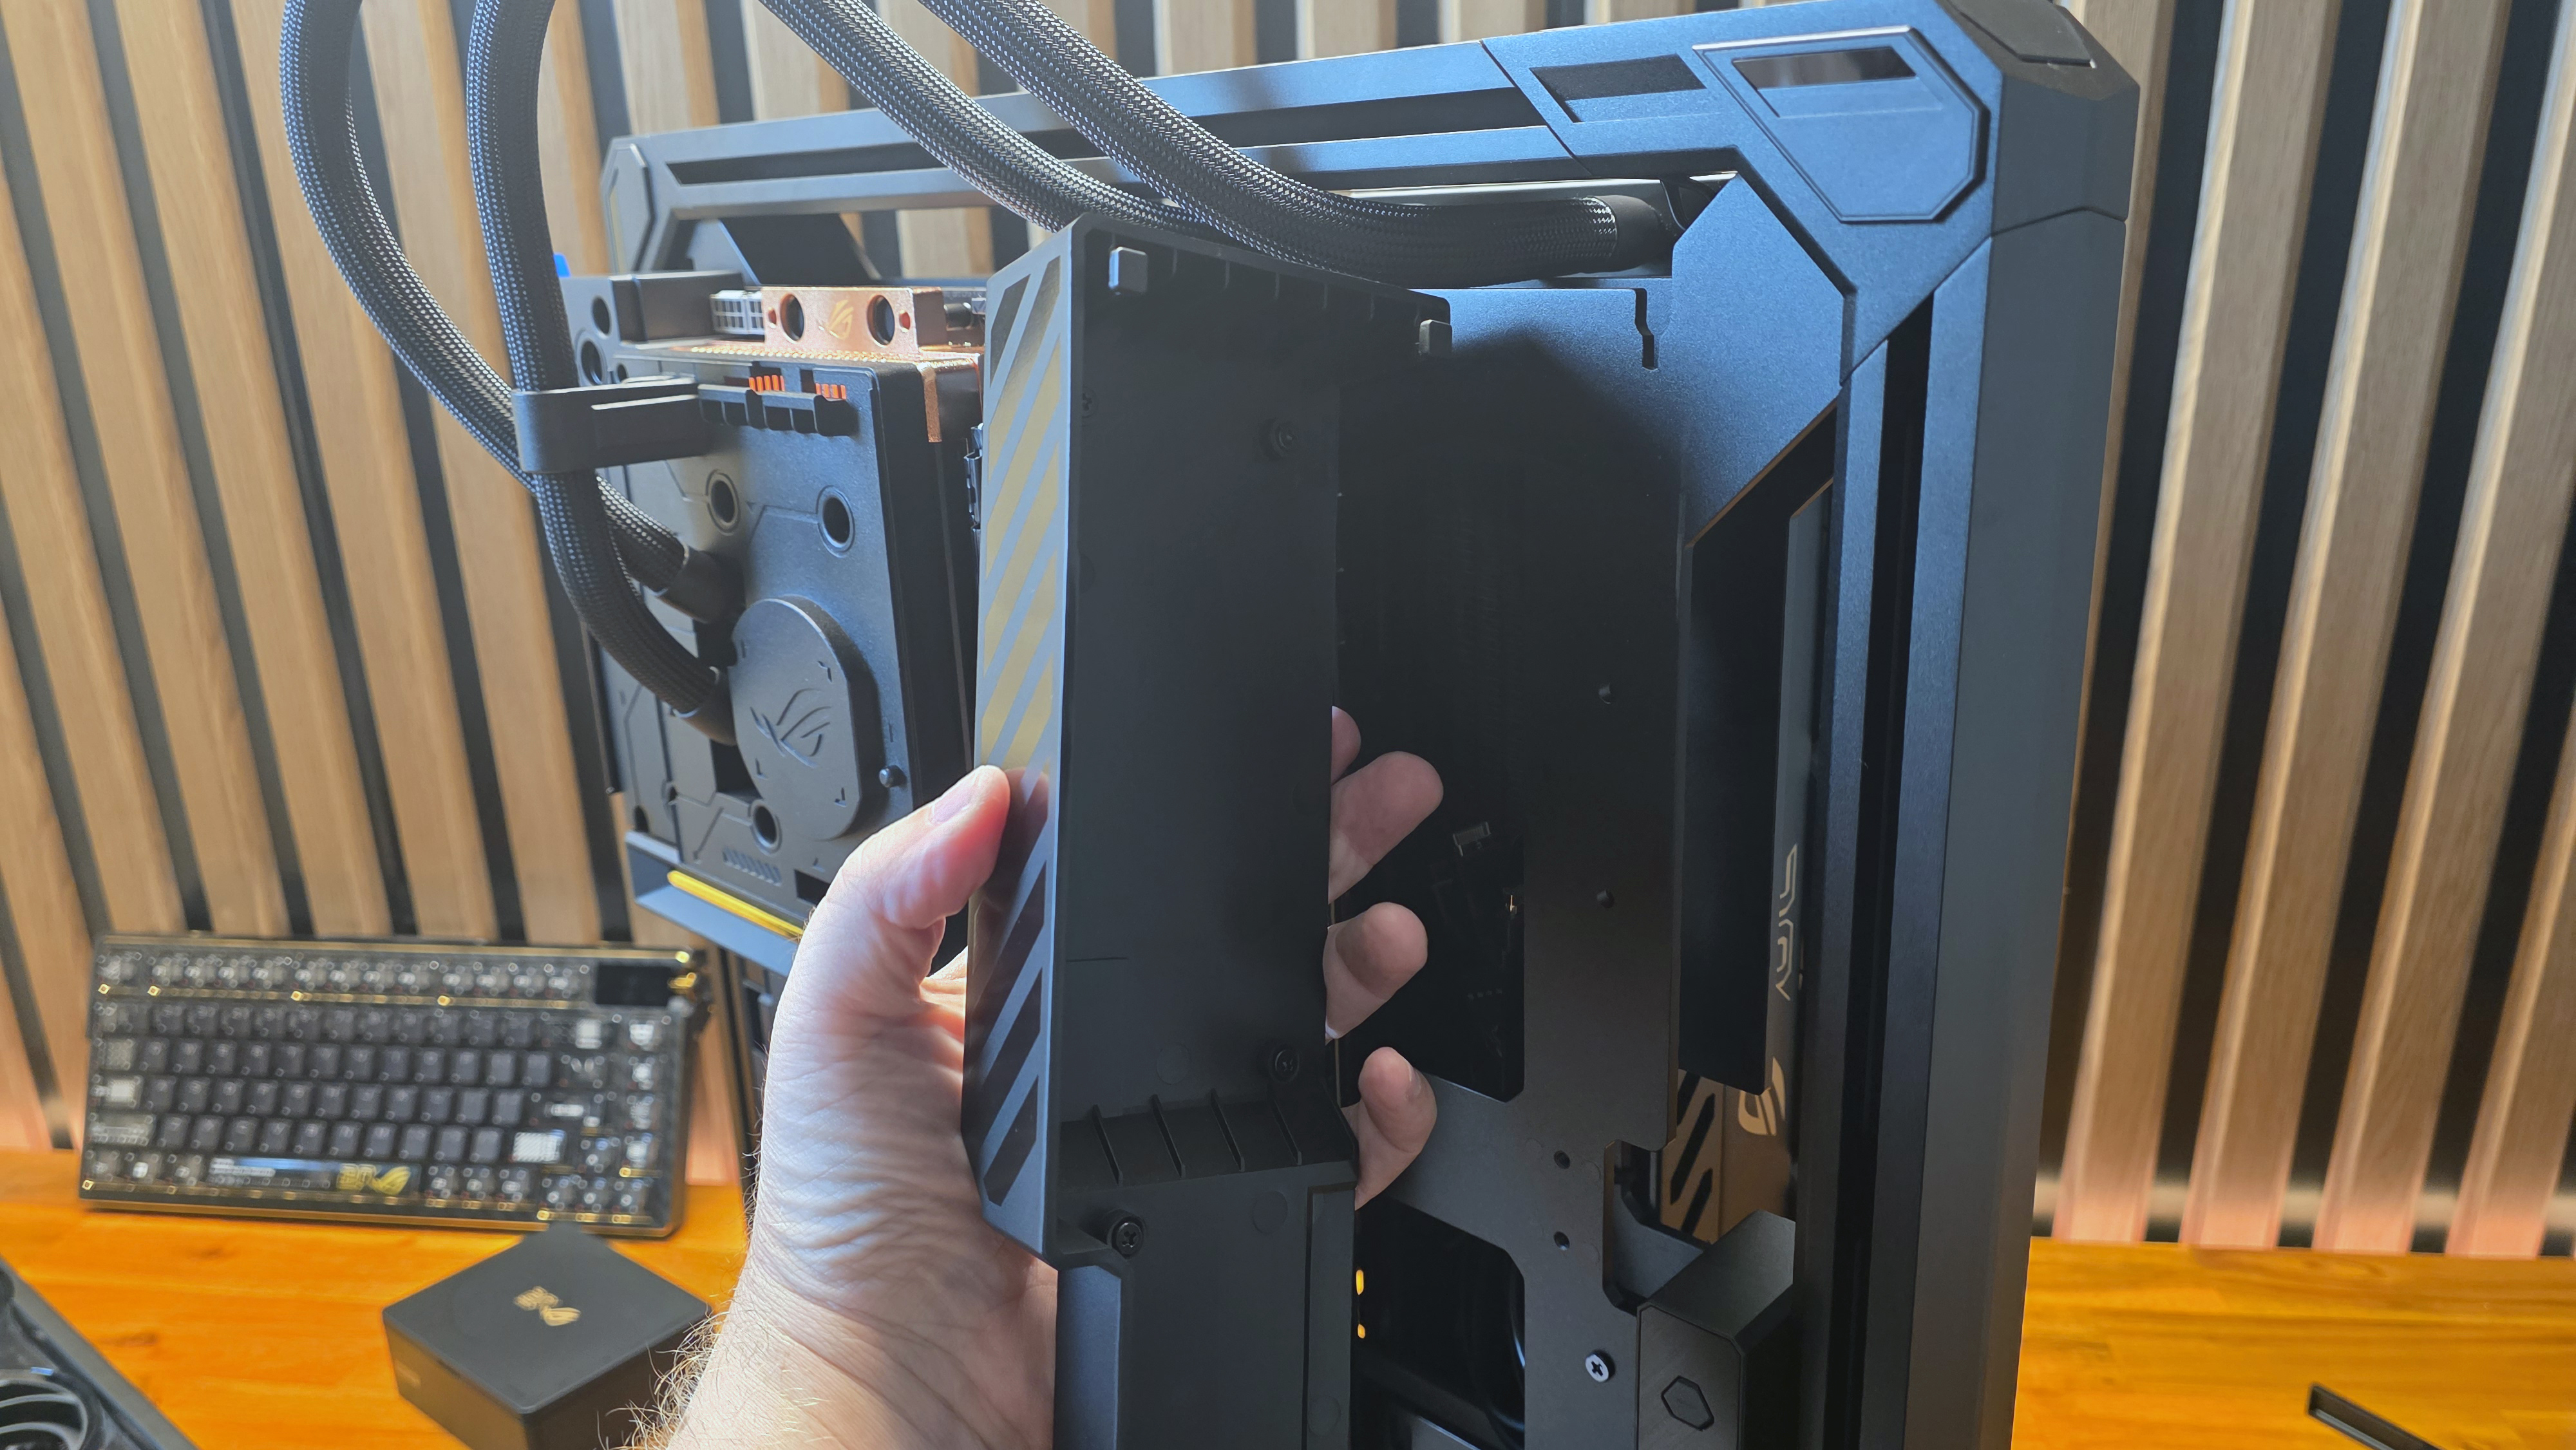
Walking the system back around on my bench, it was time to remove the cable shroud here as well. There’s a single screw on the bottom, and then you need to push the shroud up to release its top tabs. This was surprisingly difficult, and I was worried about pushing too hard, because this is one of the other pieces of the case that’s plastic. But it eventually popped off.
At this point, it’s a good time to remove a couple of screws and move the front panel ports up to the top section if you want. Since I can’t imagine anyone putting this system on the floor, I left it in its default orientation, with the ports near the bottom.
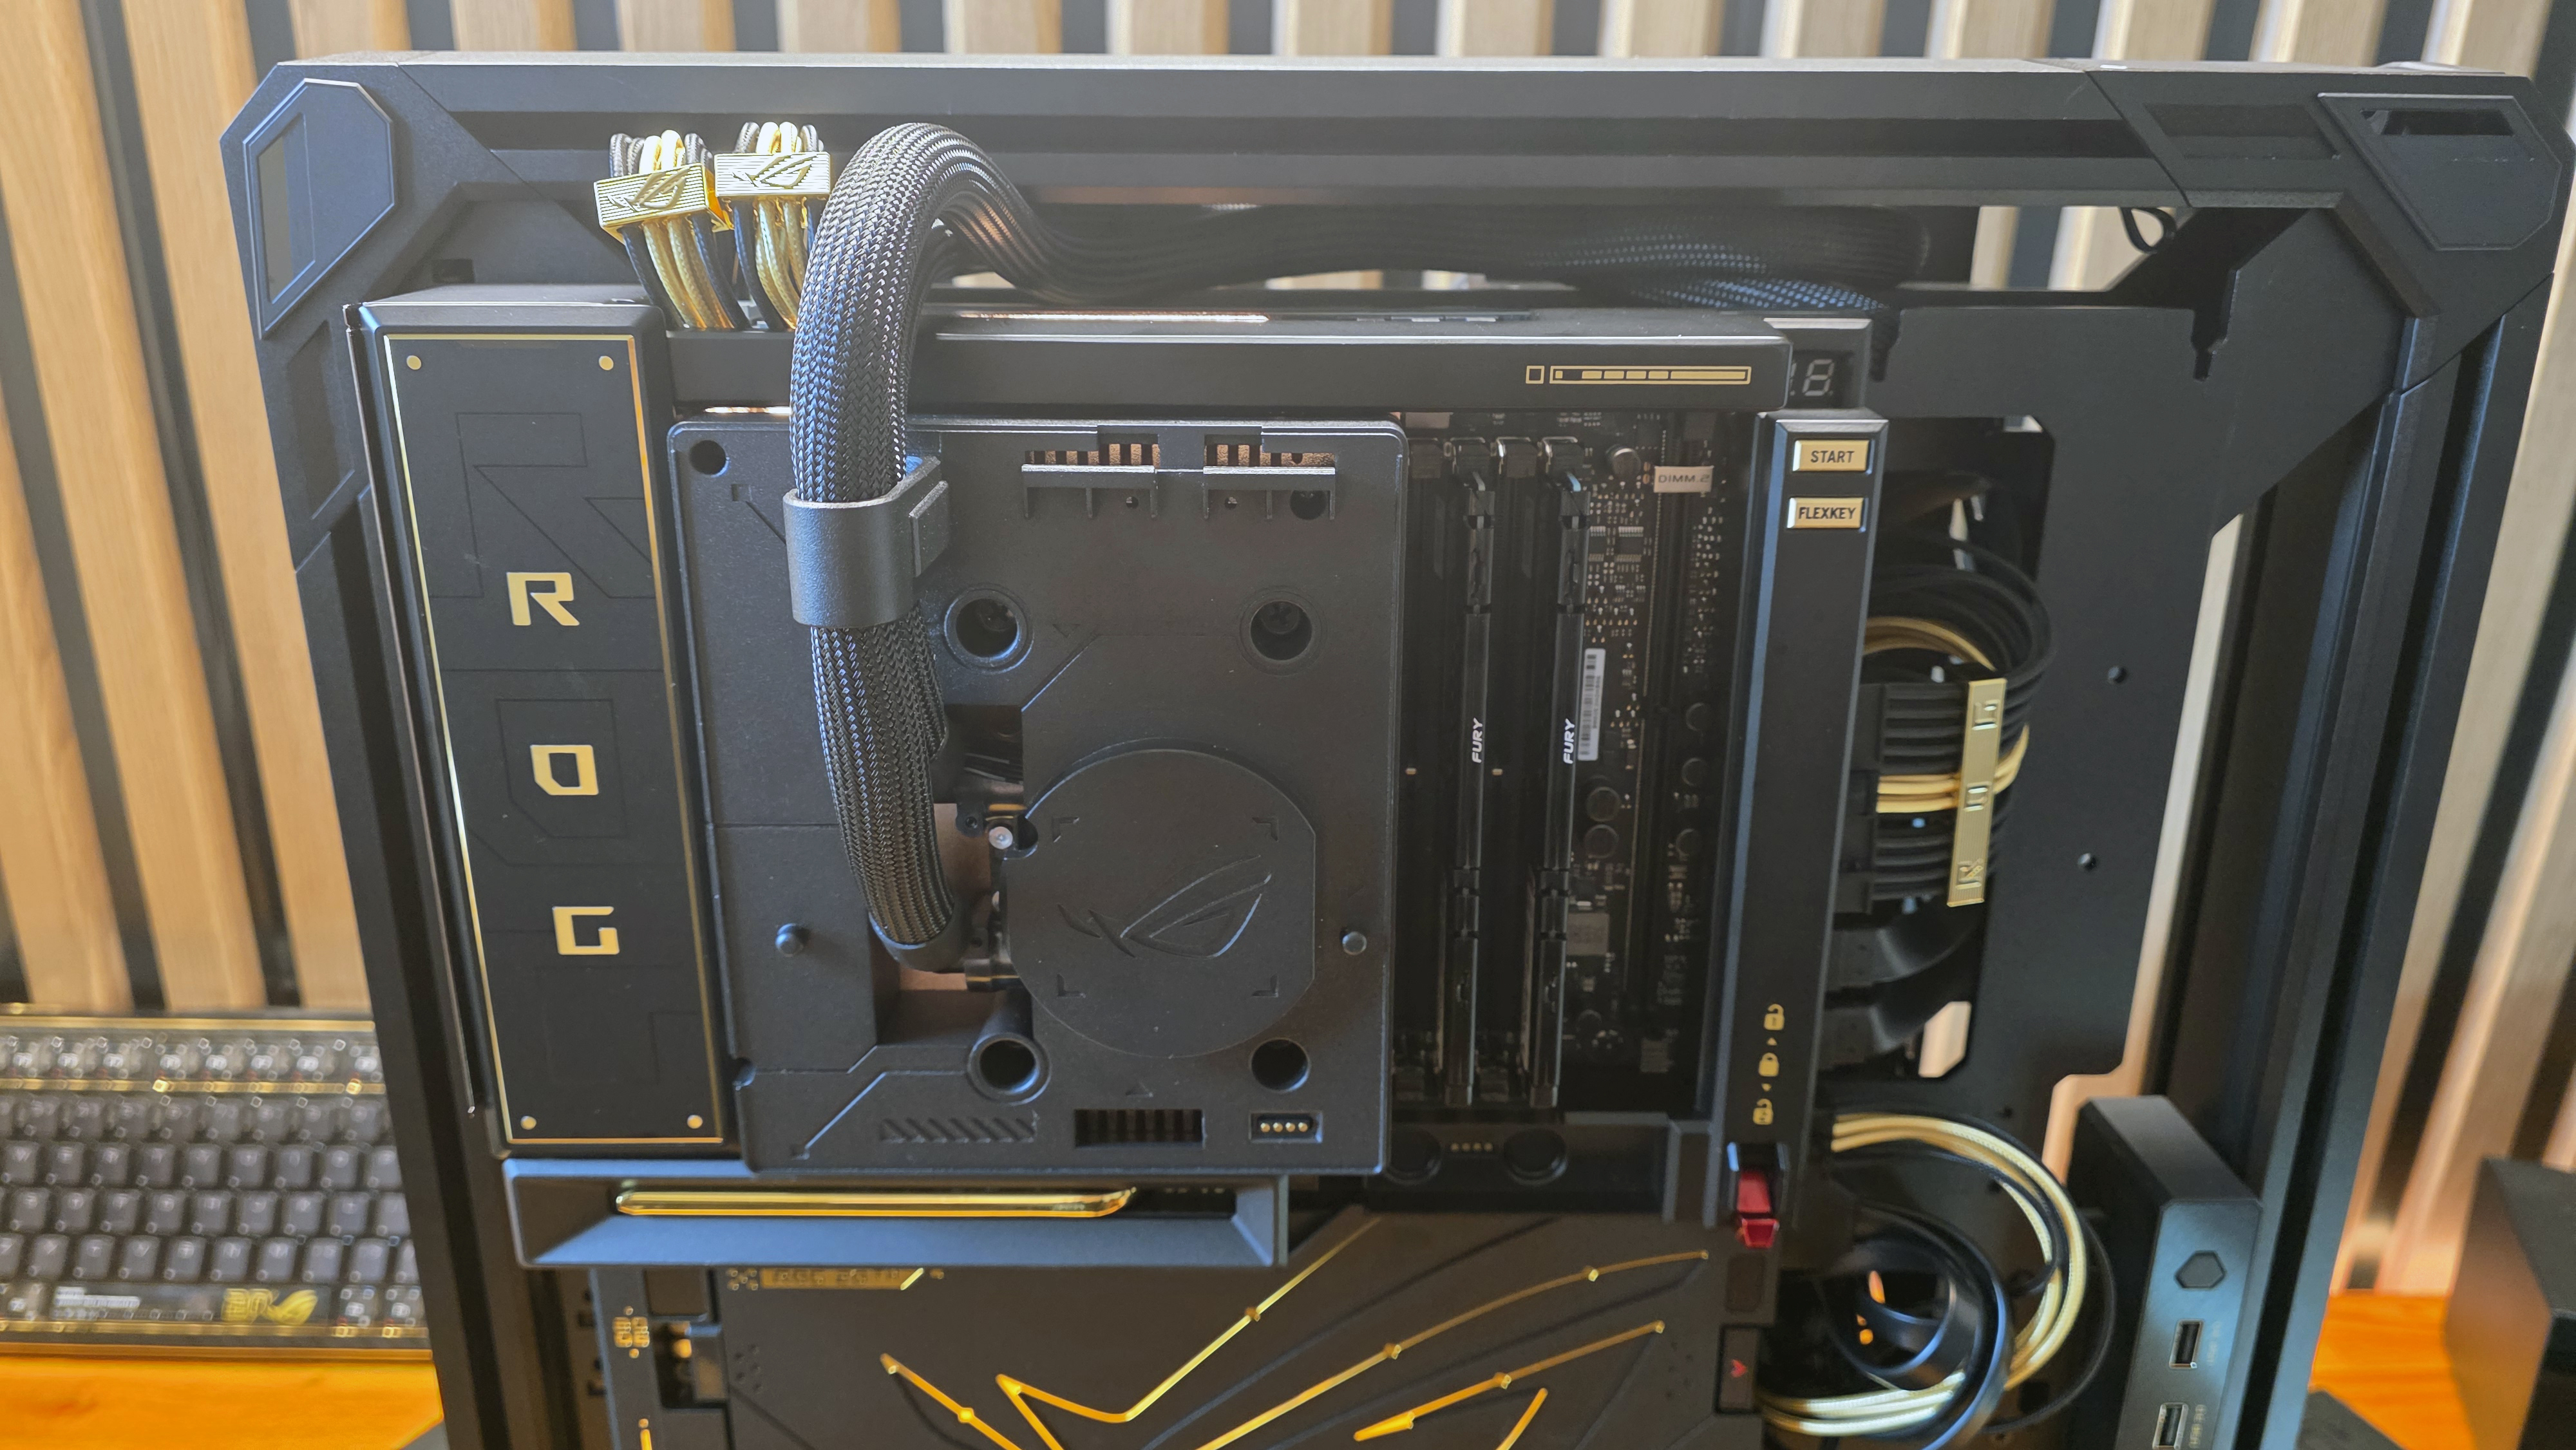
Now it’s time to connect all (or nearly all) of the PSU and other cables. This is fairly straightforward if you’ve built a PC more than a couple times before. The one snag that I ran into was that the video didn’t make it very clear where to plug in the fused front-panel connector, and where I thought it should go, in the lower-right corner of the motherboard, looked to be in the way of putting the plastic cable shroud back on.
I eventually downloaded the manual, saw that I was right, and just had to be extra careful when reinstalling the shroud, running the bottom connection over it rather than down past where the connector lives. The black-and-gold cables look pretty nice, with their cable combs positioned. But most will be hidden when you reinstall the cable shroud on the right side.
Blower fan and GPU
It’s almost time to install the GPU, but first we need to feed it some active airflow. The GR20 ships with a blower fan, again in its own box, that slots into a large horizontal hole near the bottom. Installation is pretty straightforward. You stick the fan in the hole on the bottom of the case, and insert two screws on each side.
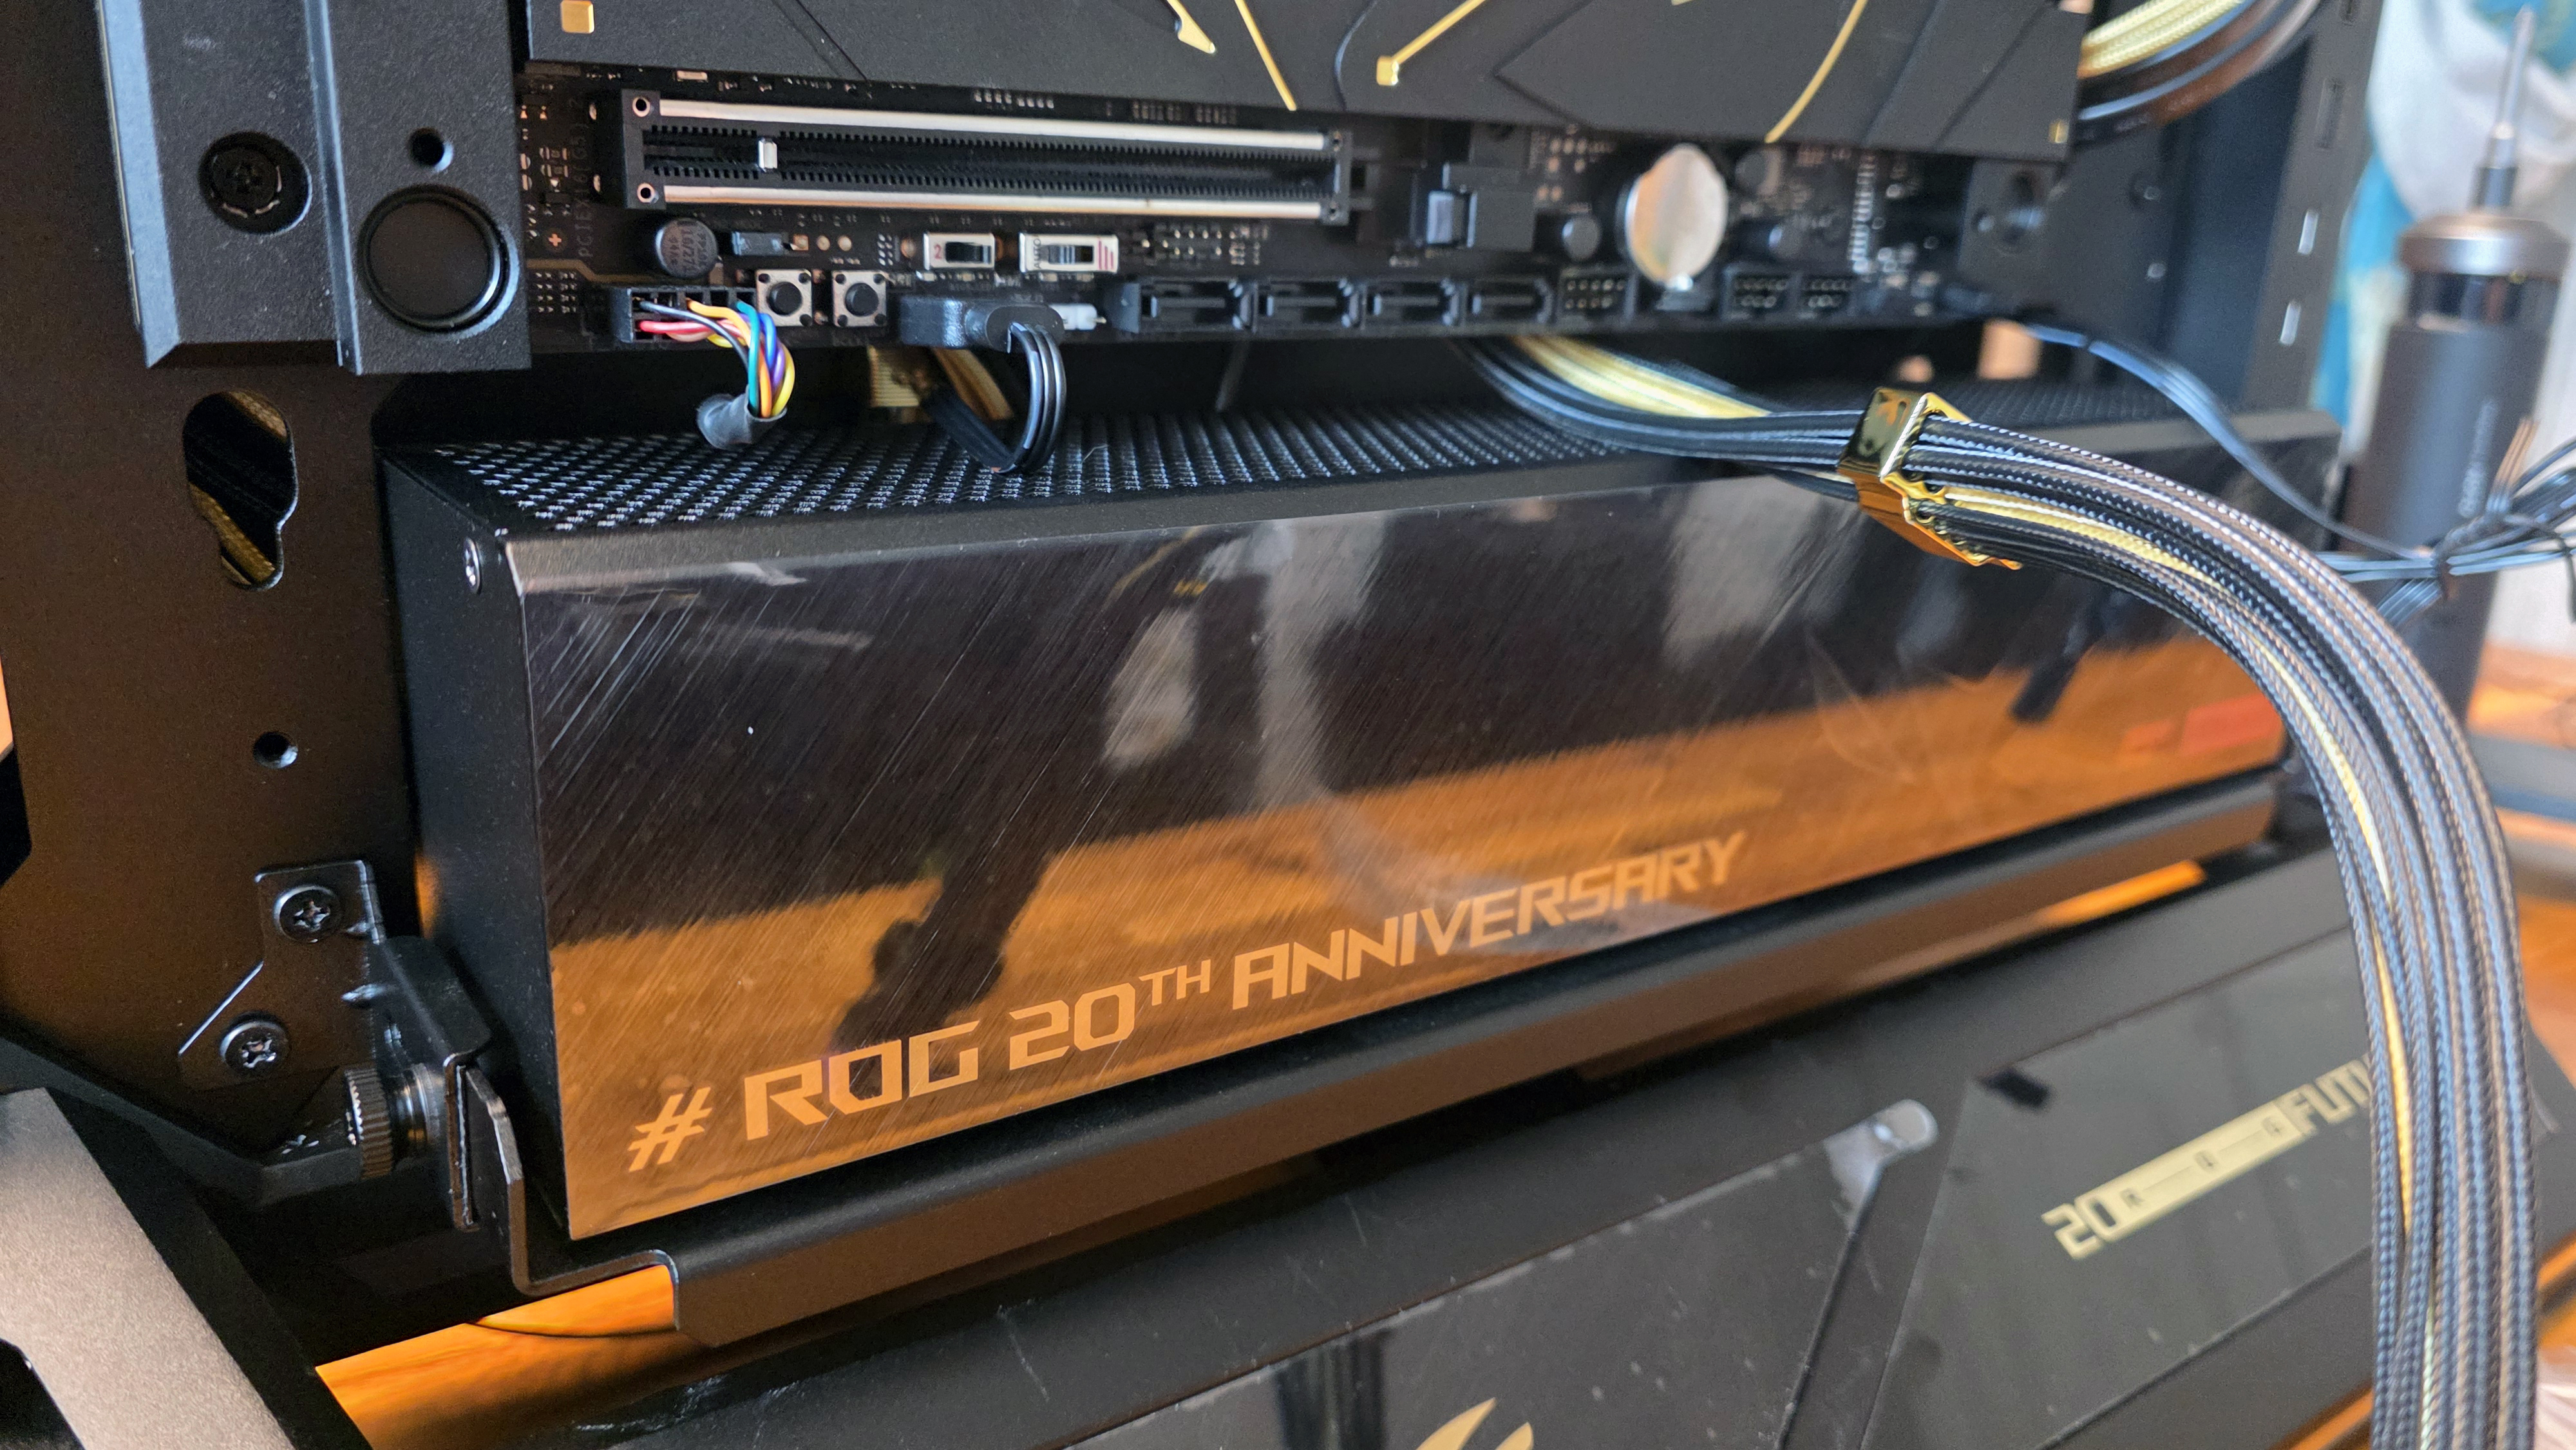
There are also thumb screws that you can loosen to move the fan forward and back a bit, but mostly the fan is just going to blow up across the bottom of the board and onto the ROG Astral 5090 – once it’s installed. First, though, you need to plug in the blower fan, which you can do on any number of fan headers around the board. But since the cable is long enough, I ran it behind the motherboard area and up to the CPU fan header.
Another wrinkle before we get to the GPU: You also have to install brackets for the motherboard’s port area and the GPU port area. The former feels like a decoration. Since the board is secured by several screws, it’s effectively a decorative frame for connectivity. But the GPU port bracket supports half of the very heavy GPU.
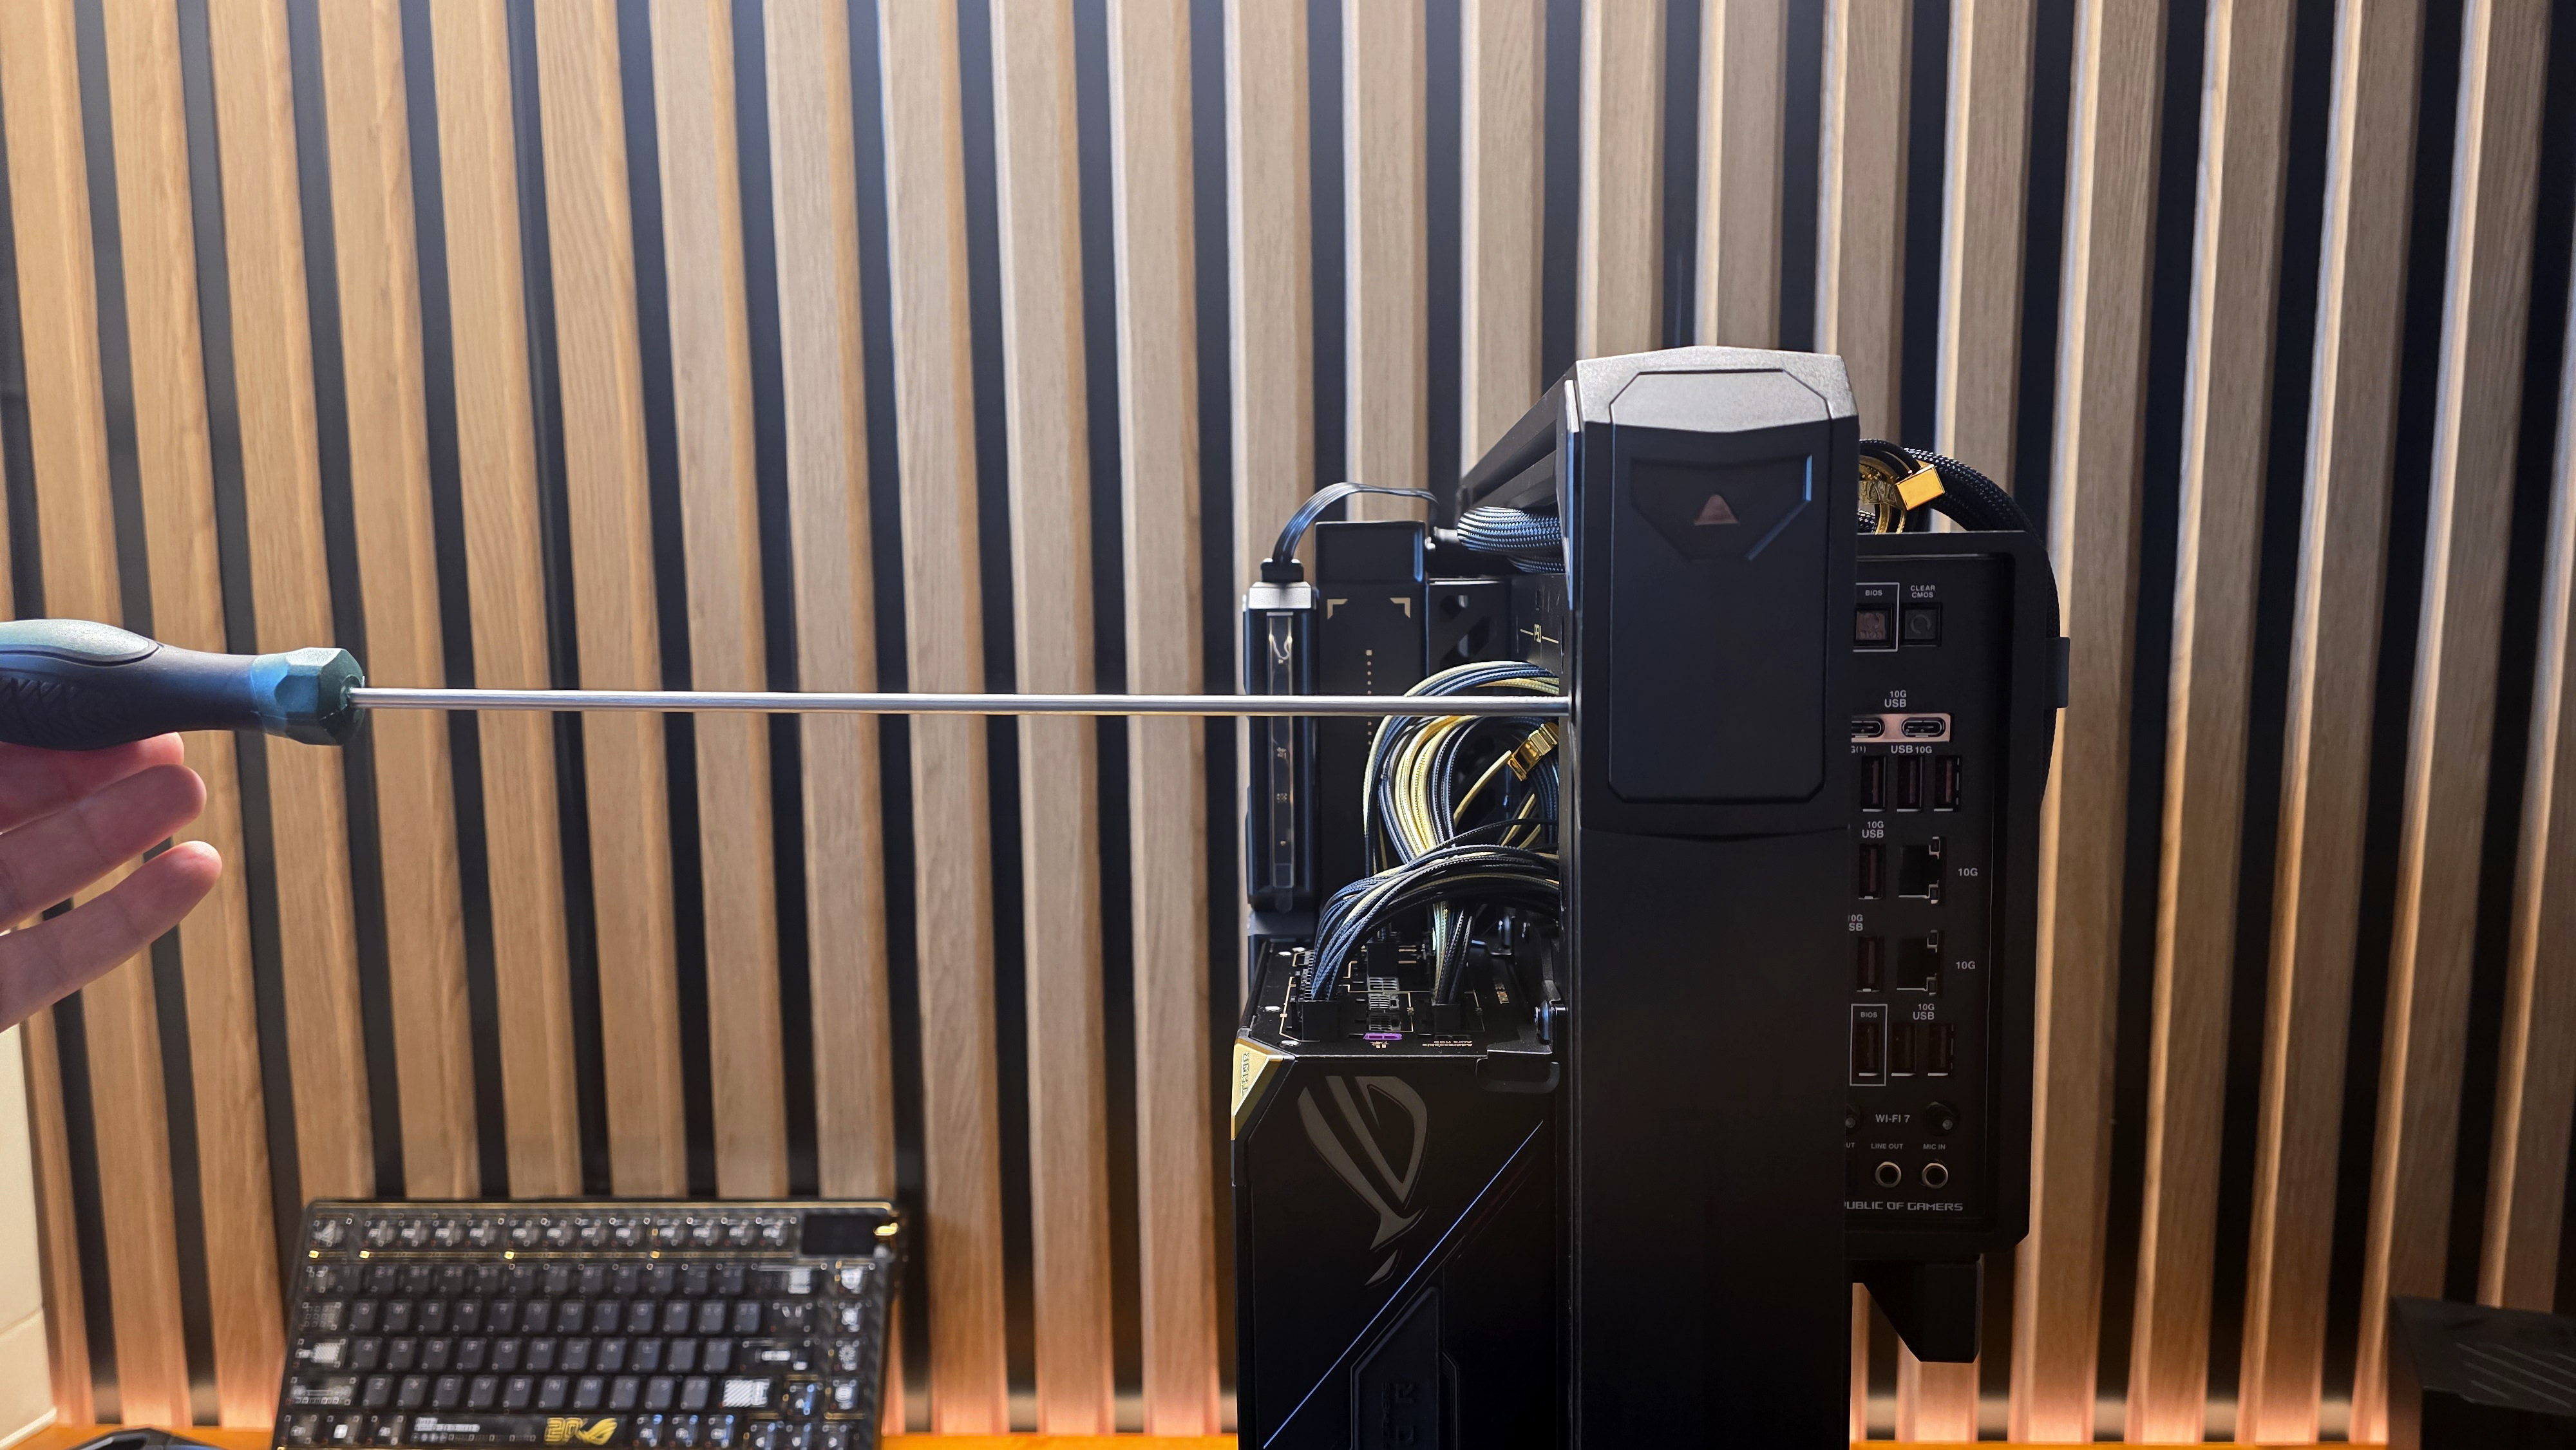
These aluminum brackets poke into small holes on the frame of the case, and this is the one area where I feel like the video installation guide seriously misses the mark. It tells you to attach these brackets from the back with a screwdriver, but it doesn’t say which screws to use, or even show screws being inserted. And because the screw holes are recessed, they are very hard to see, and were deep enough that I had to break out the long screwdriver that I usually use for installing large air coolers.
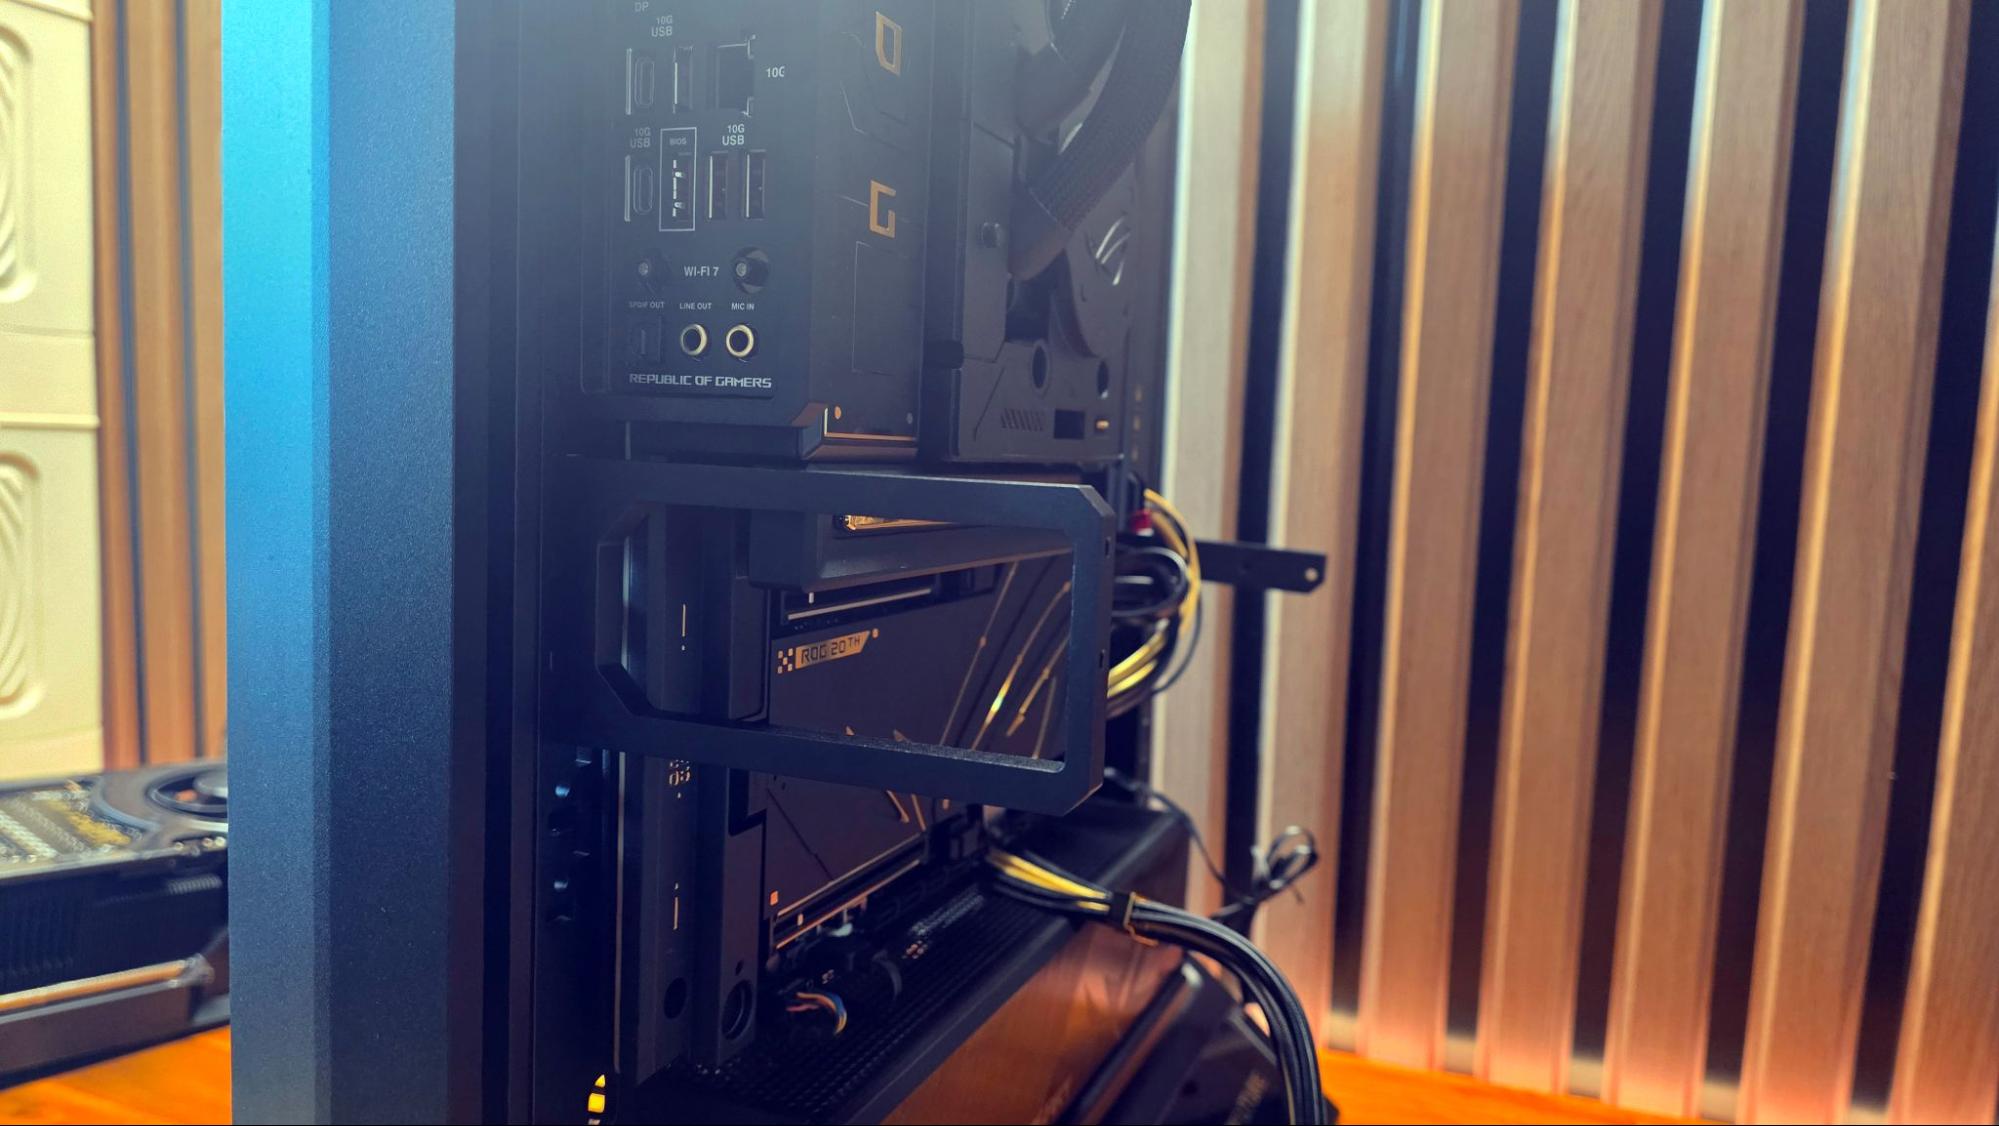
Once I did that and used the same screws from the bag in the previous step (installing the blower fan), getting both of the brackets installed was fairly easy again, easy after I wasted 5-10 minutes figuring out what I was supposed to do here. Again, since the GPU bracket is going to support the port side of your GPU, make sure that the bracket's two screws are tightly torqued.
On the opposite edge of the case (shown on the right side of the image above), you’ll also need to attach a GPU support bracket. This one you’ll want to leave somewhat loose at first, since you’ll have to adjust it once the GPU is installed.
And now, finally, it’s time to install the ROG Astral RTX 5090 Edition 20 GPU. You’ll probably want to (again, gently) lay the system down for this. It, as should be obvious, goes into the x16 slot just below the topmost M.2 heatsink. But because the sink is large and the GPU itself is very large, getting it slotted in requires some extra finesse.
But once the card is fully seated in its slot, you secure it first with the typical bracket screws on the port end, and then with three additional screws on the GPU support bracket side, with holes that you’ll need to adjust so they line up with the holes on the card. If you happen to be using a different card, hopefully this bracket adjusts enough so that it can be placed under the card to support it. Once it’s in place where you need it and the card is secured from both sides, you’ll want to tighten the screw that holds the bracket at the back, so it securely supports your graphics card.
Now, of course, you can attach the 12-pin power connector that was previously threaded out the bottom center of the case into the graphics card. As always, make damn sure it’s fully inserted. But hey, at least with this build, you can see the connector when the system is running, in case it starts smoking or melting.
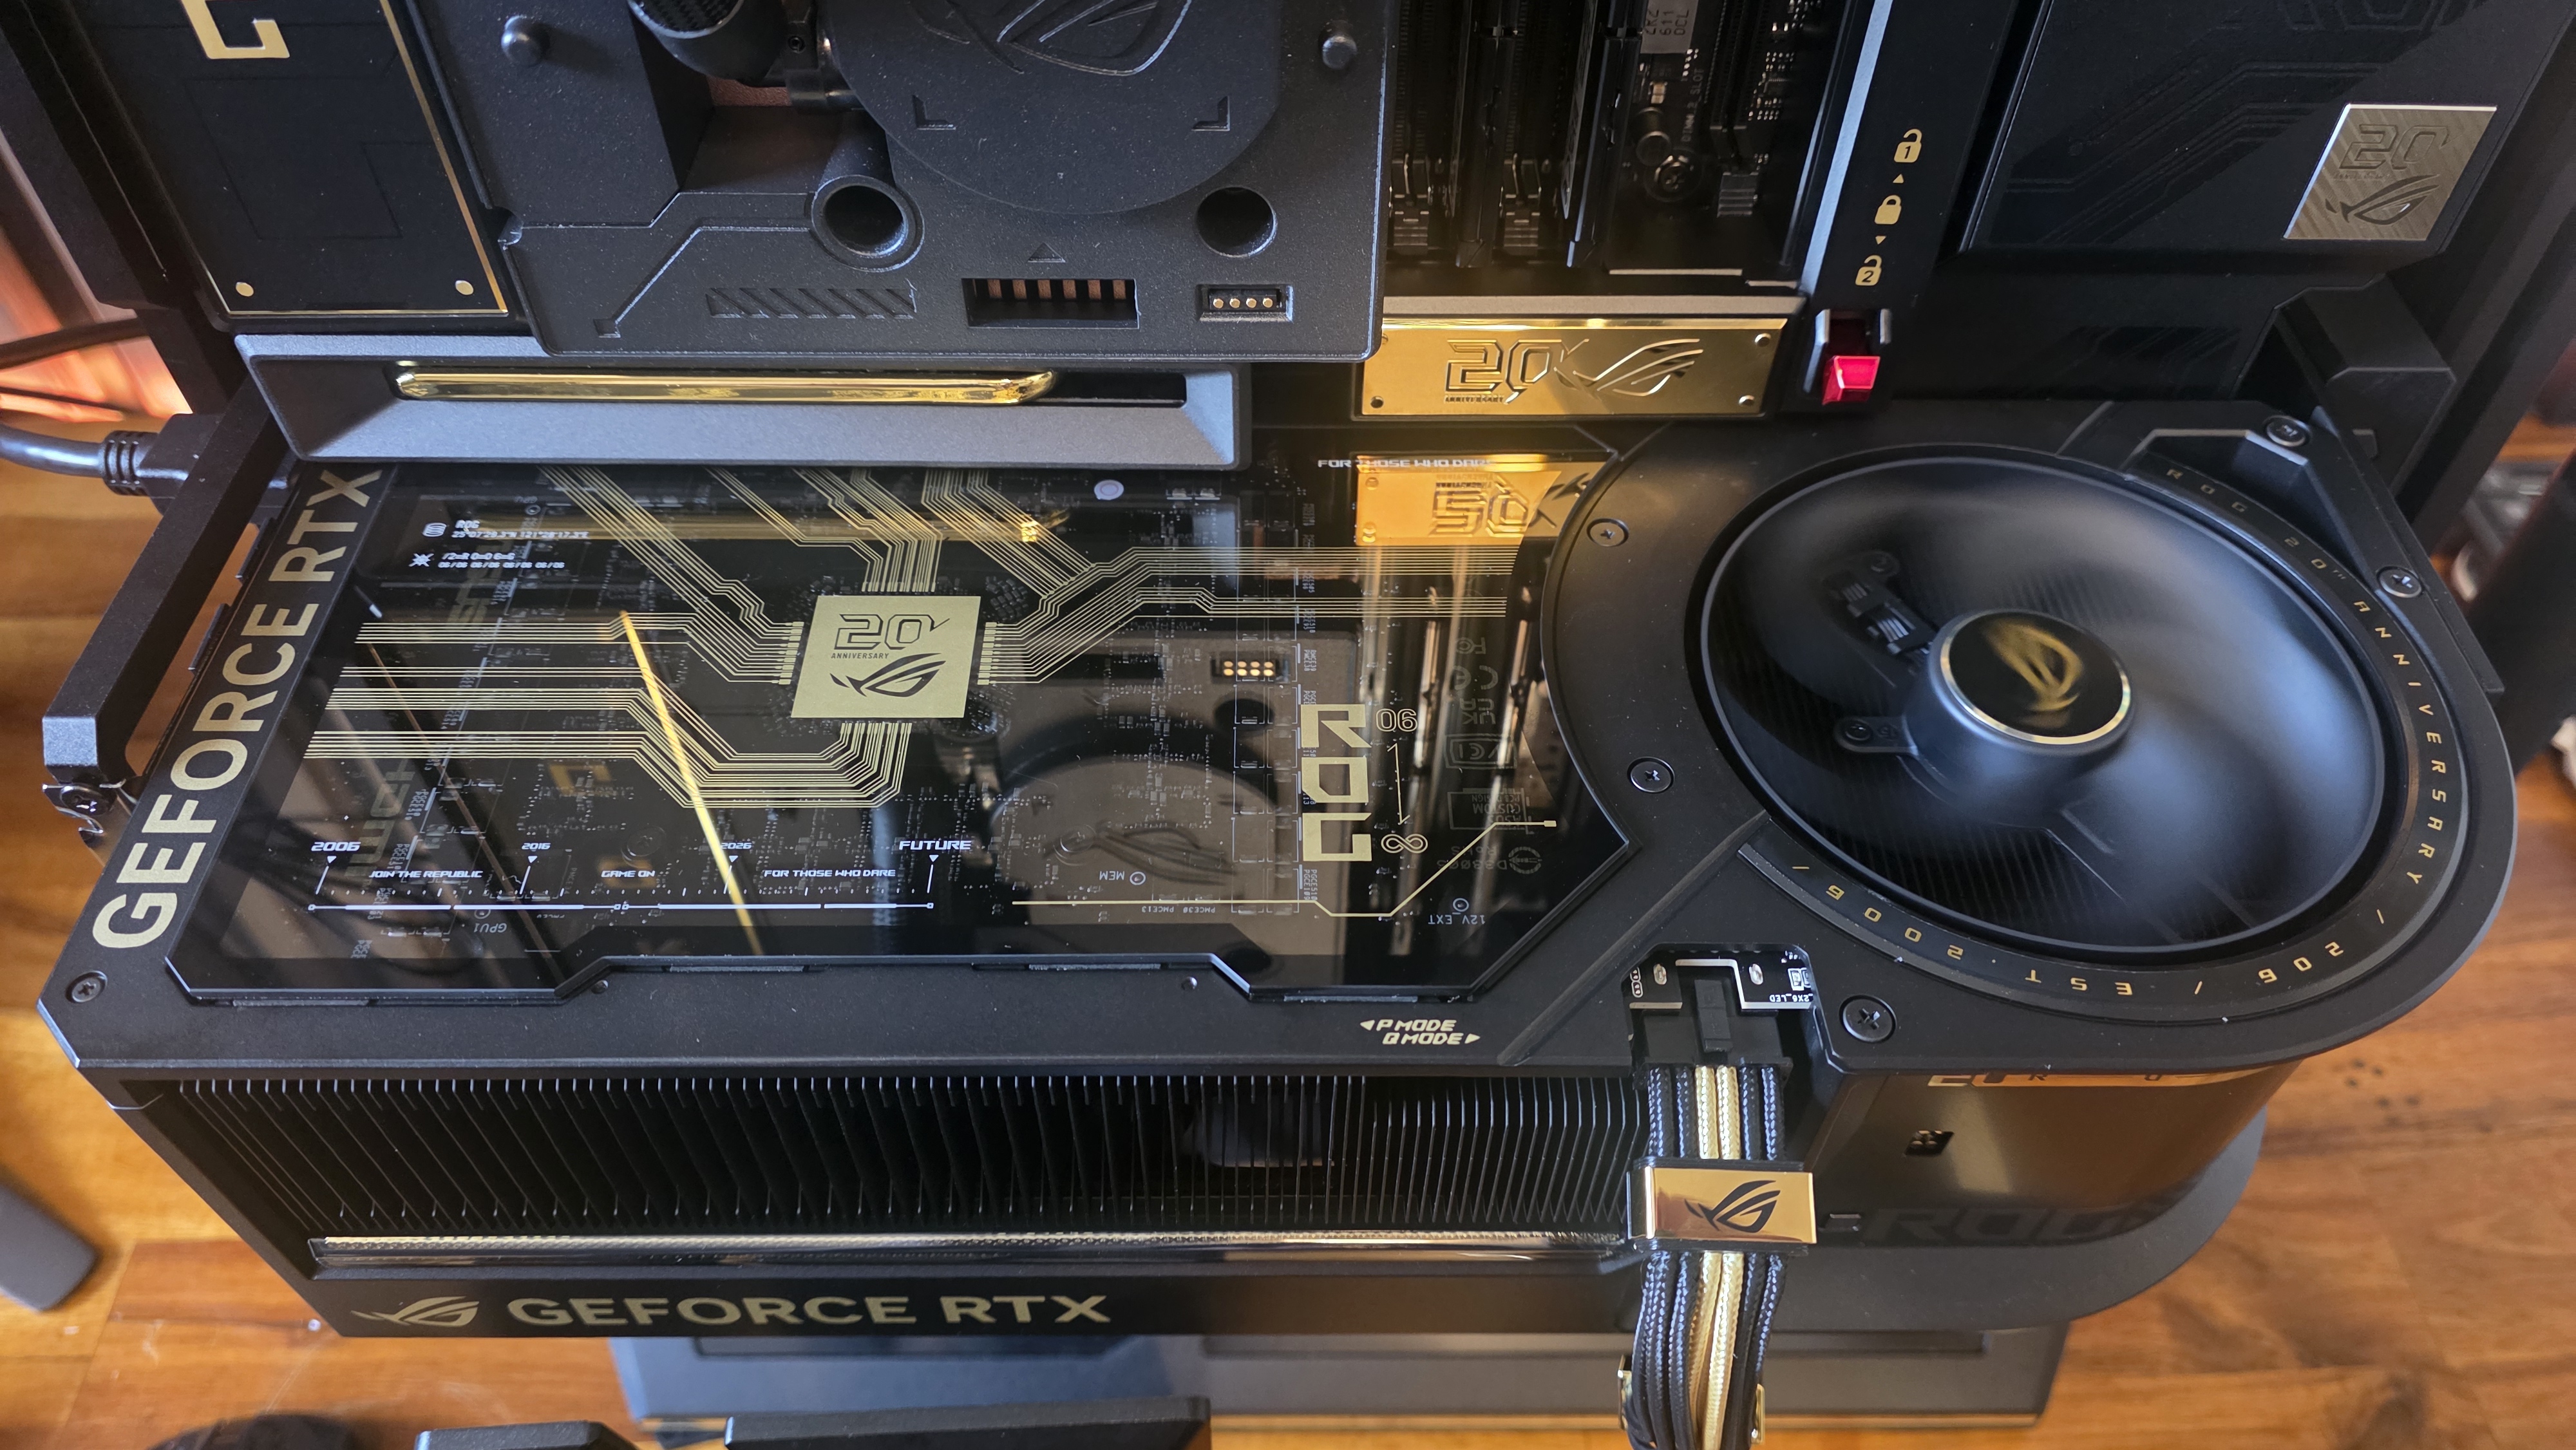
At this point, you can also attach the glass backplate cover if you so choose. It effectively just sits on a hole in the backside of the GPU, held in place by some magnets. It looks nice, but I wish it would drop down slightly to be more flush with the top edge of the card.
Time to deploy the AMOLED
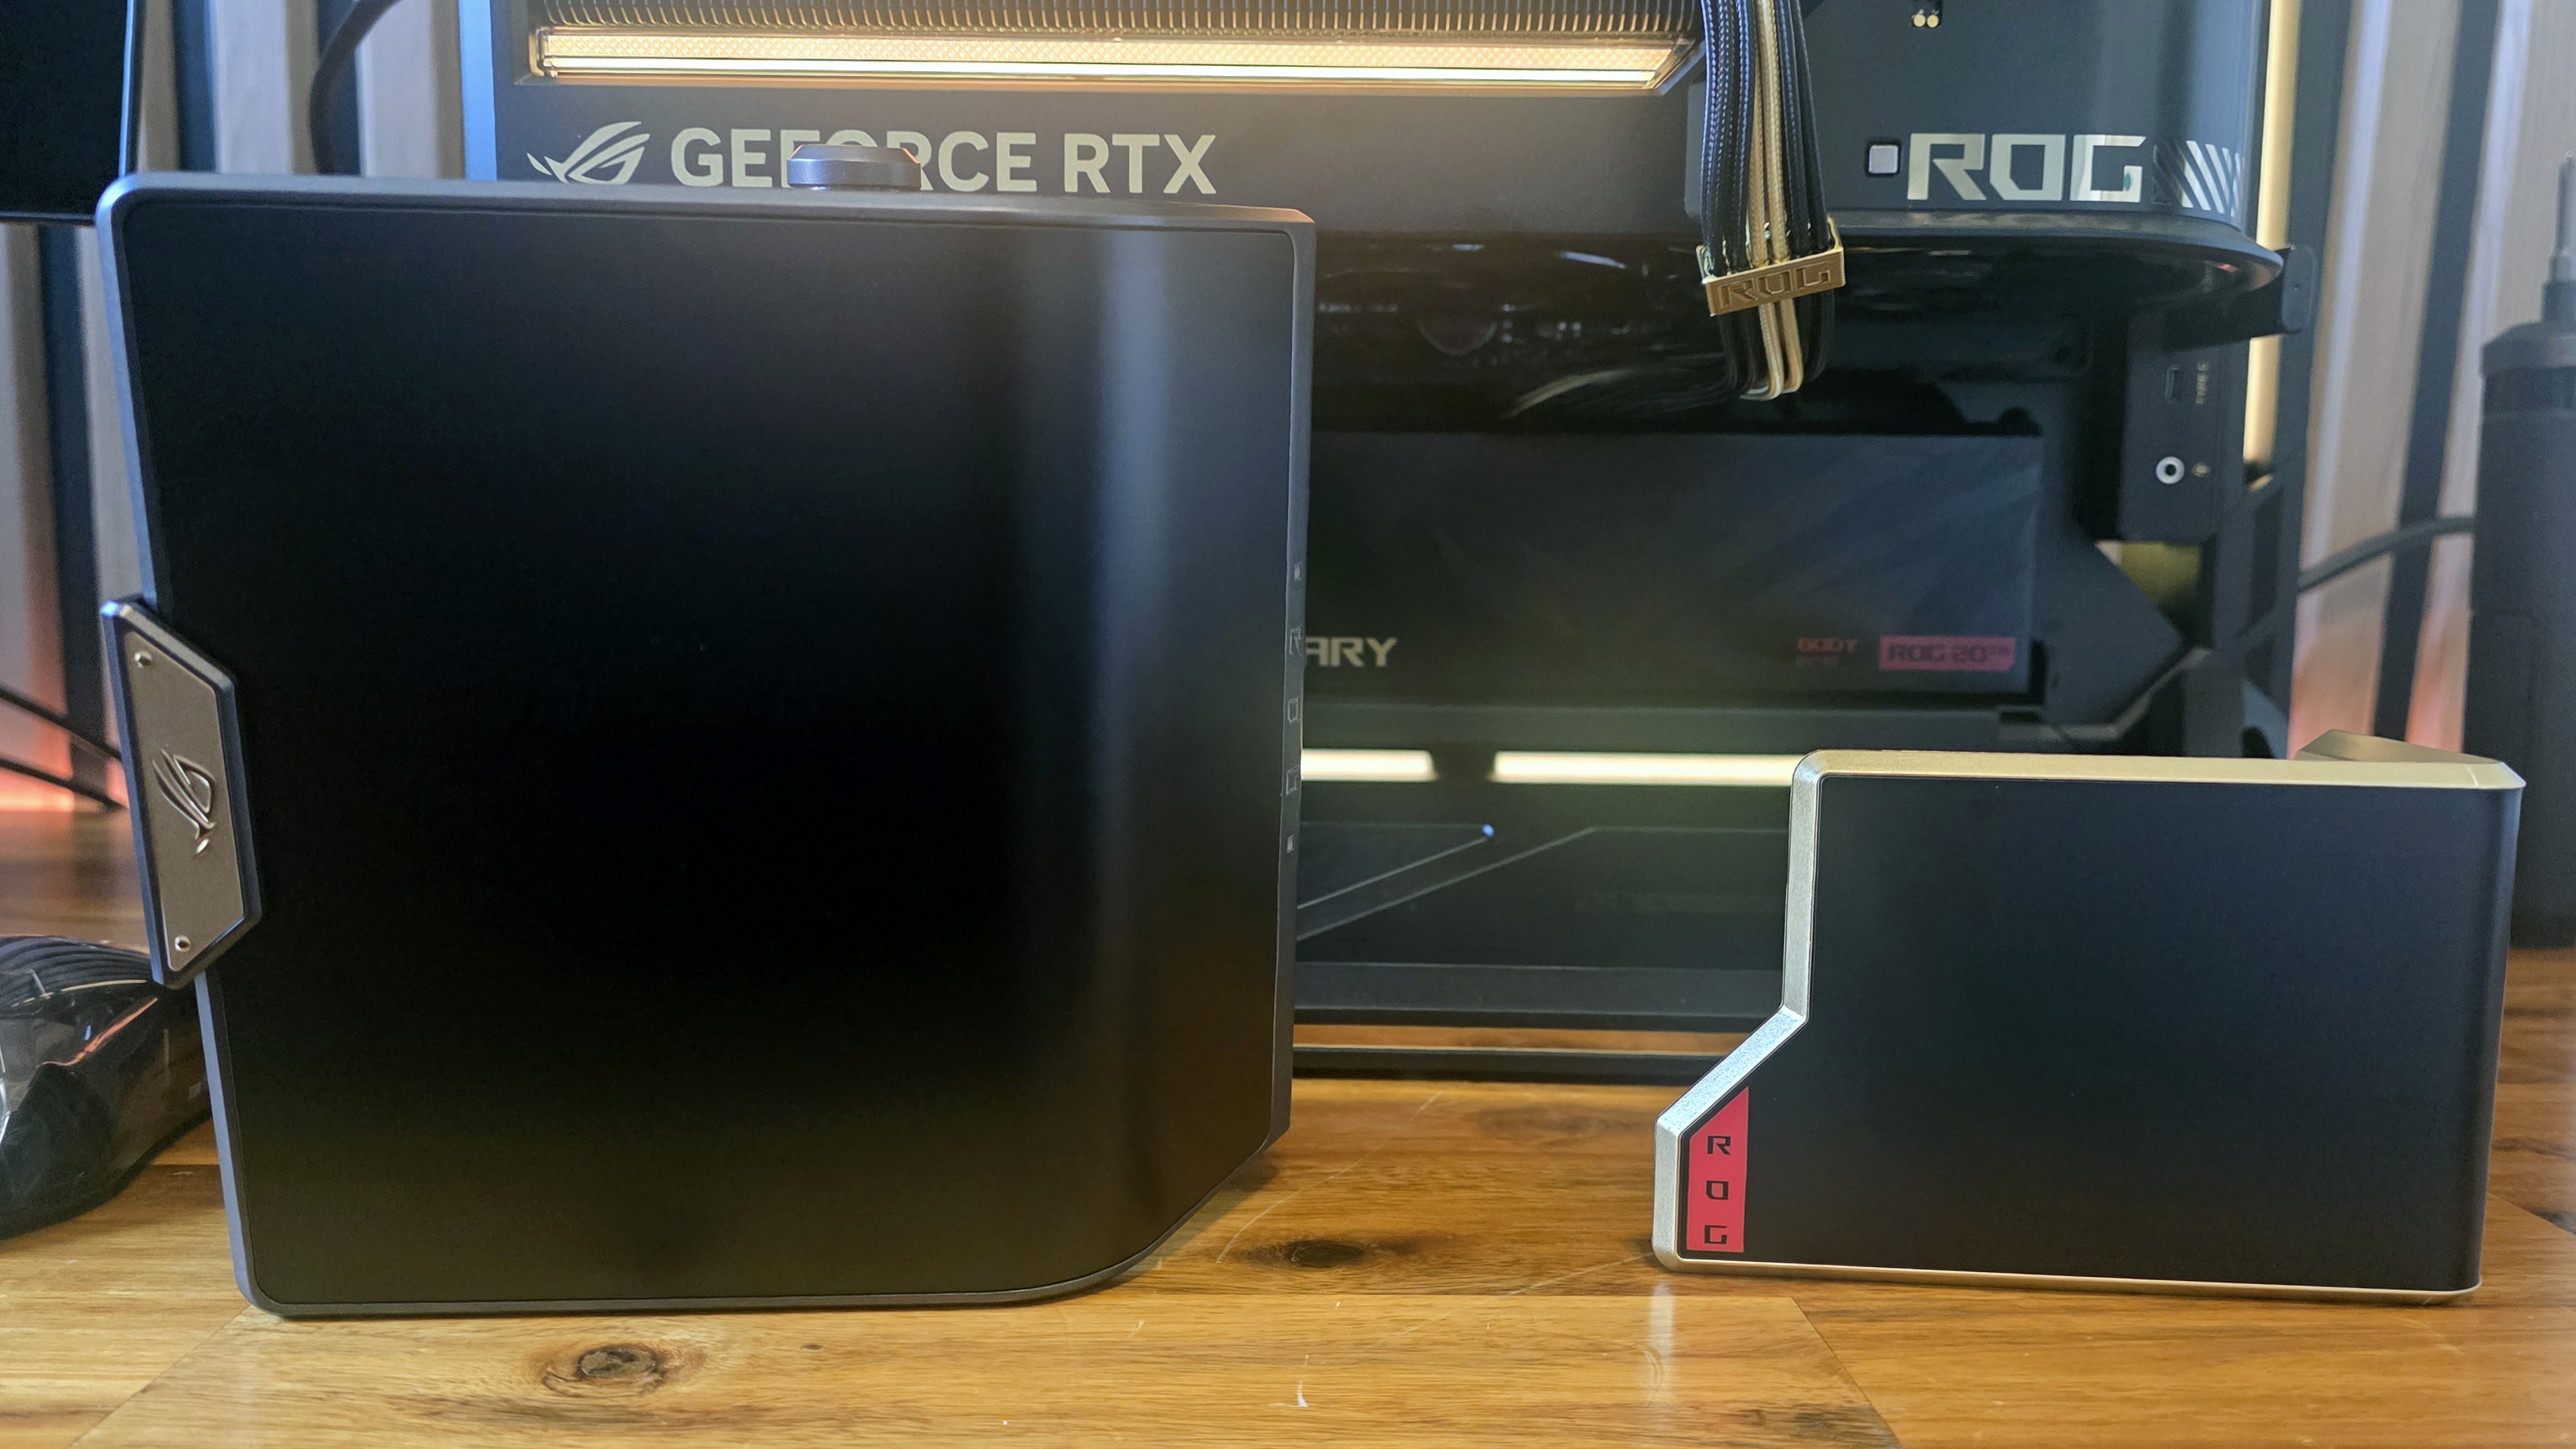
With the primary components in place, it’s time to install the curved screens, in the penultimate addition to this build. Both effectively just snap in place. The larger cooler screen requires that you line up a U-shaped groove under the liquid cooling tubes, insert the screen mechanism into a couple of tabs, and then press down gently until the pogo pins make contact with the pads on the cooler.
Note that Asus markets this screen as swiveling, but it really only moves two or three degrees forward or back. That might be enough to reduce some glare, but you’ll generally want to have the screen angled toward you if you want to easily see what’s on it. It’s also not really a single screen, but clearly a pair of curved screens stacked on top of each other.
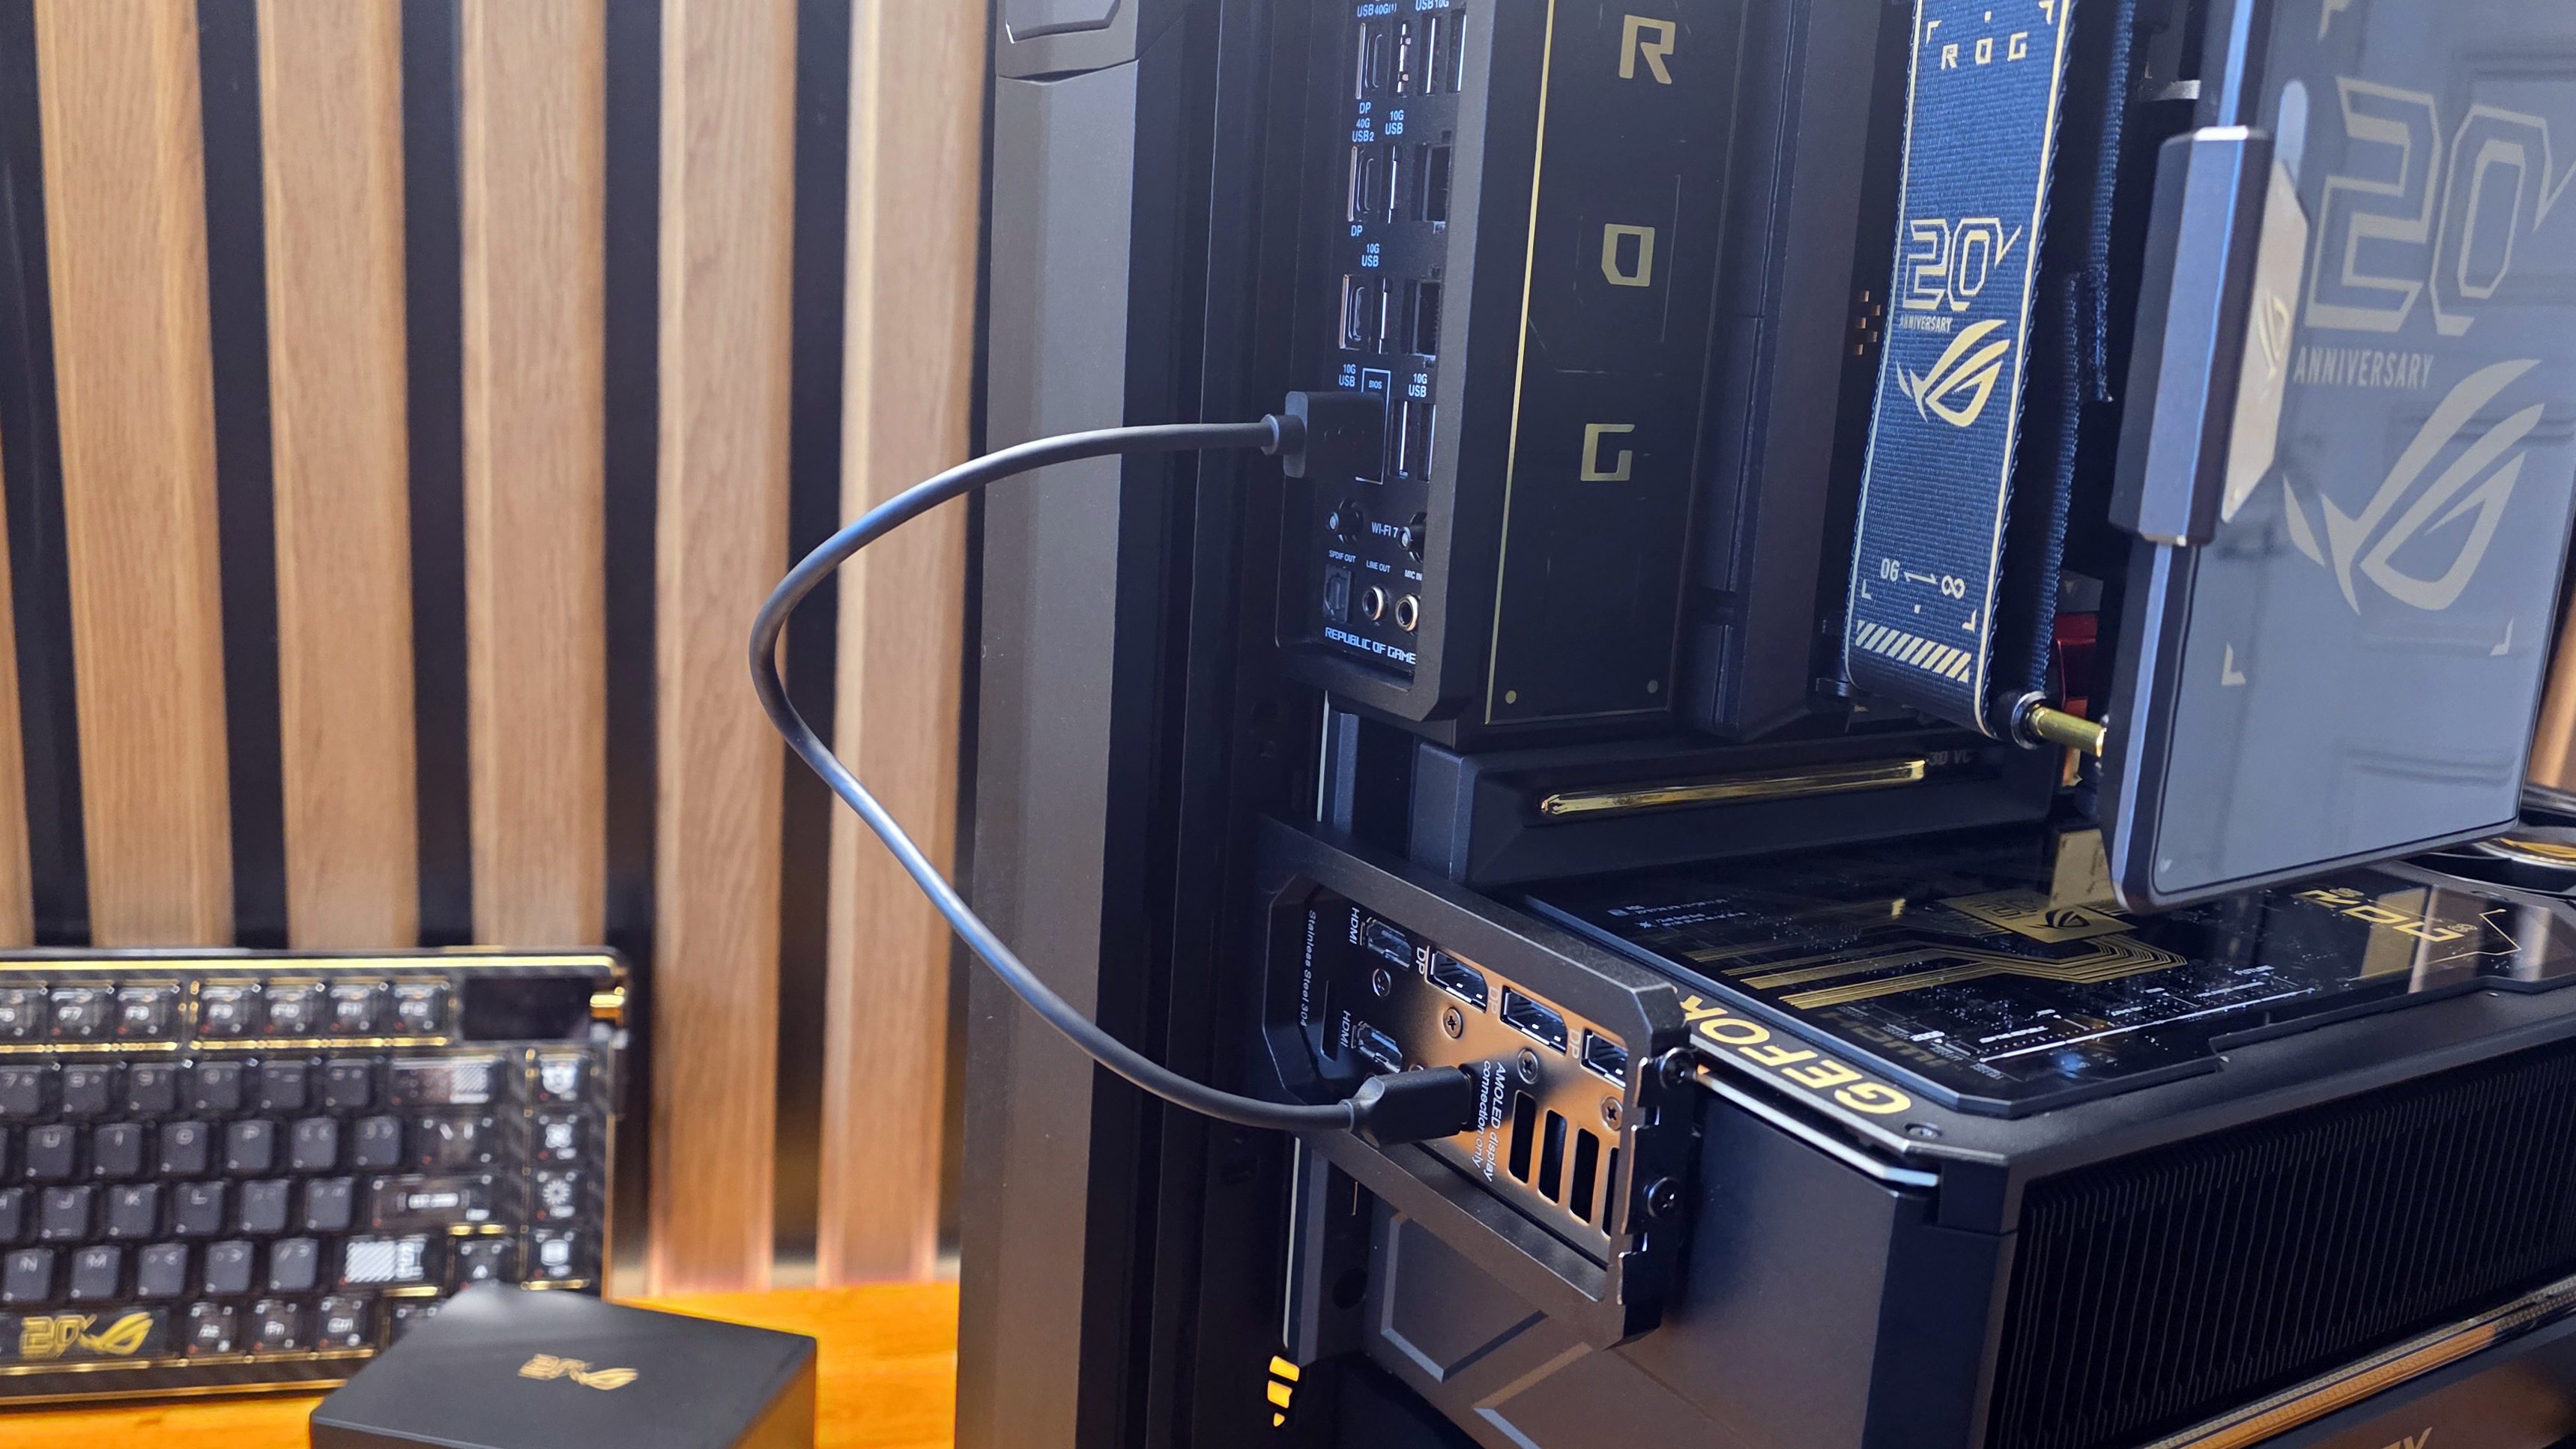
The GPU screen is far easier to install, snapping right into the end of the card in the area where you can see the metal connection pads. But it has its own wrinkle. For this screen to work at all, you need to connect an included USB cable from the Type-C port on the card to a Type-A port on your motherboard. This is easy enough to do, and the motherboard has 8 Type-A ports, along with two more on the front of the case, so I doubt you’ll miss one port. But for a GPU with a screen that costs $6,000, it feels kinda lame to have to run a USB cable to get the screen to work.
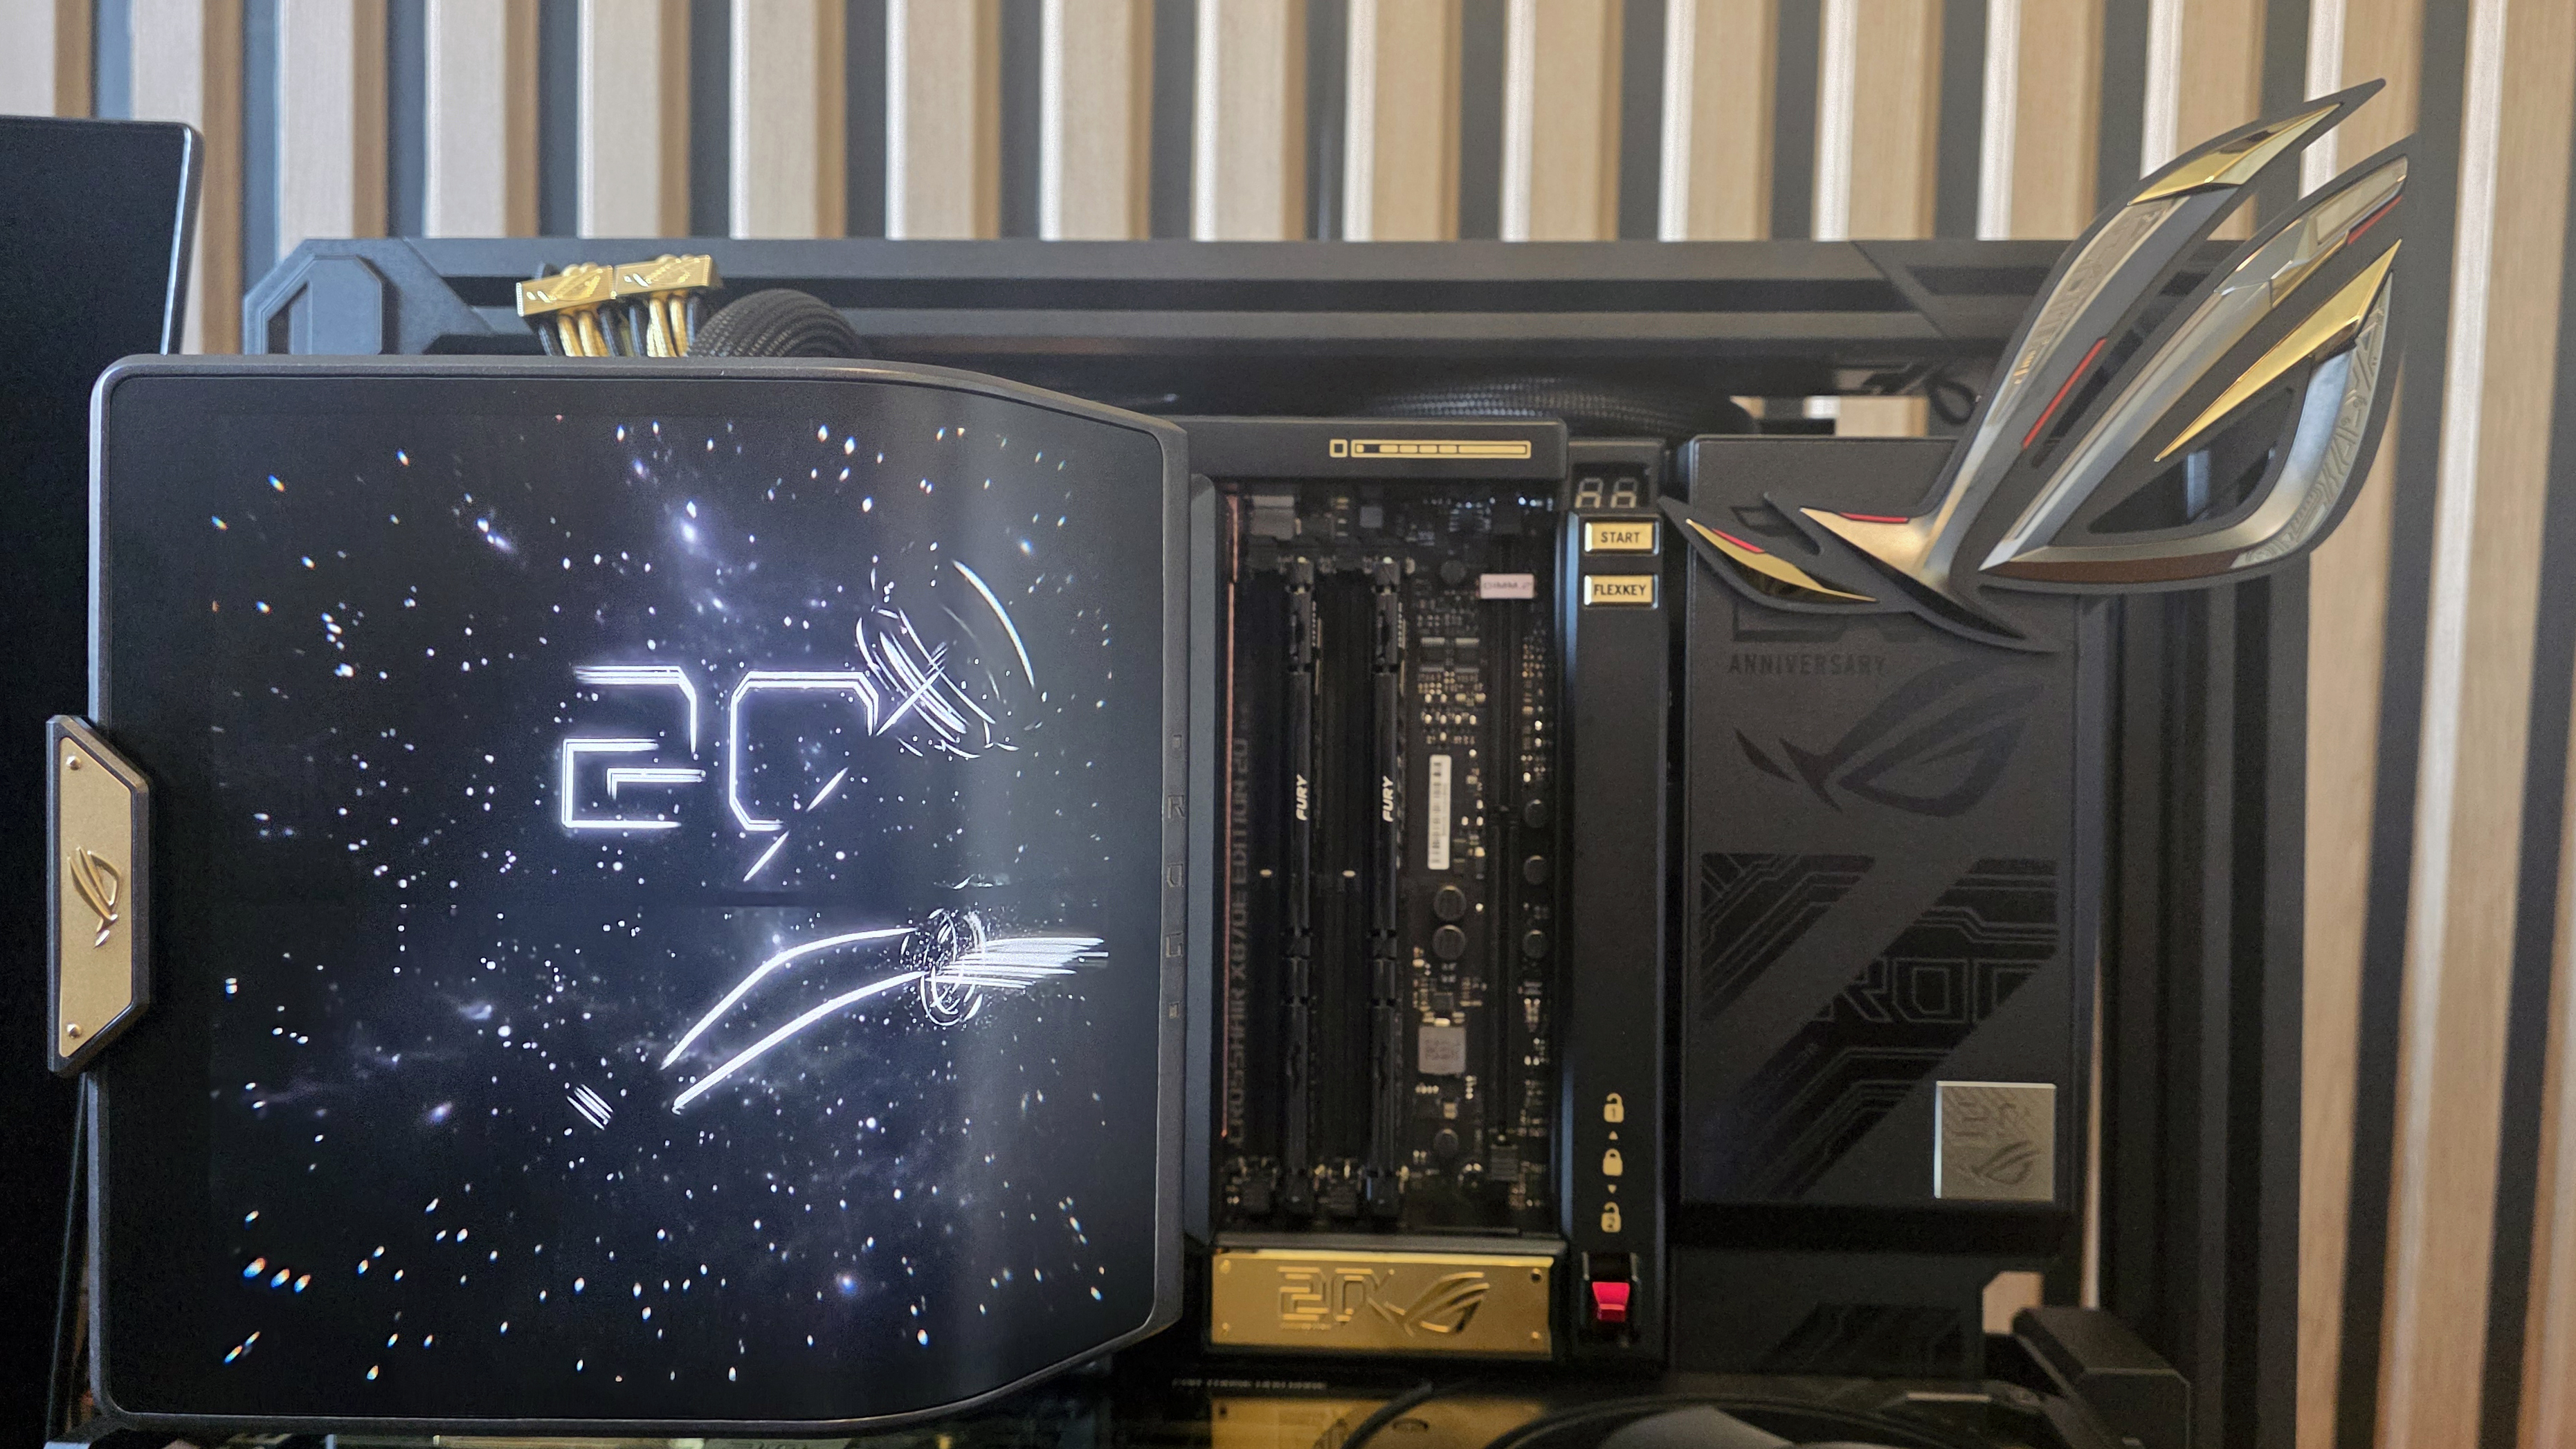
Lastly, and I would argue most optionally, Asus also includes a large magnetic ROG logo that you can attach to the steel front of the otherwise plastic cable shroud on the front. It is pretty detailed and matches the gold accents of the rest of the system. But personally, I think it looks tacky here in a way that (somehow) the rest of the design doesn’t. If you really want to show off your devotion to the Republic of Gamers, this big magnet might look better on your refrigerator or somewhere else than on a $15,000 gaming PC that’s already adorned with screens that, by default, display the ROG logo on the regular.
Personally, I’m going to stick this large ROG magnet on the side of the beer fridge that lives under my test bench, next to my magnetic Corsair external SSD and my Orkney Skull Splitter ale sticker. If any of my non-gamer friends ask what it means, I’ll tell them it represents the Republic of Guzzlers. Really though, I just like a nice lunch beer – I swear.
Using the Asus ROG Edition 20 PC
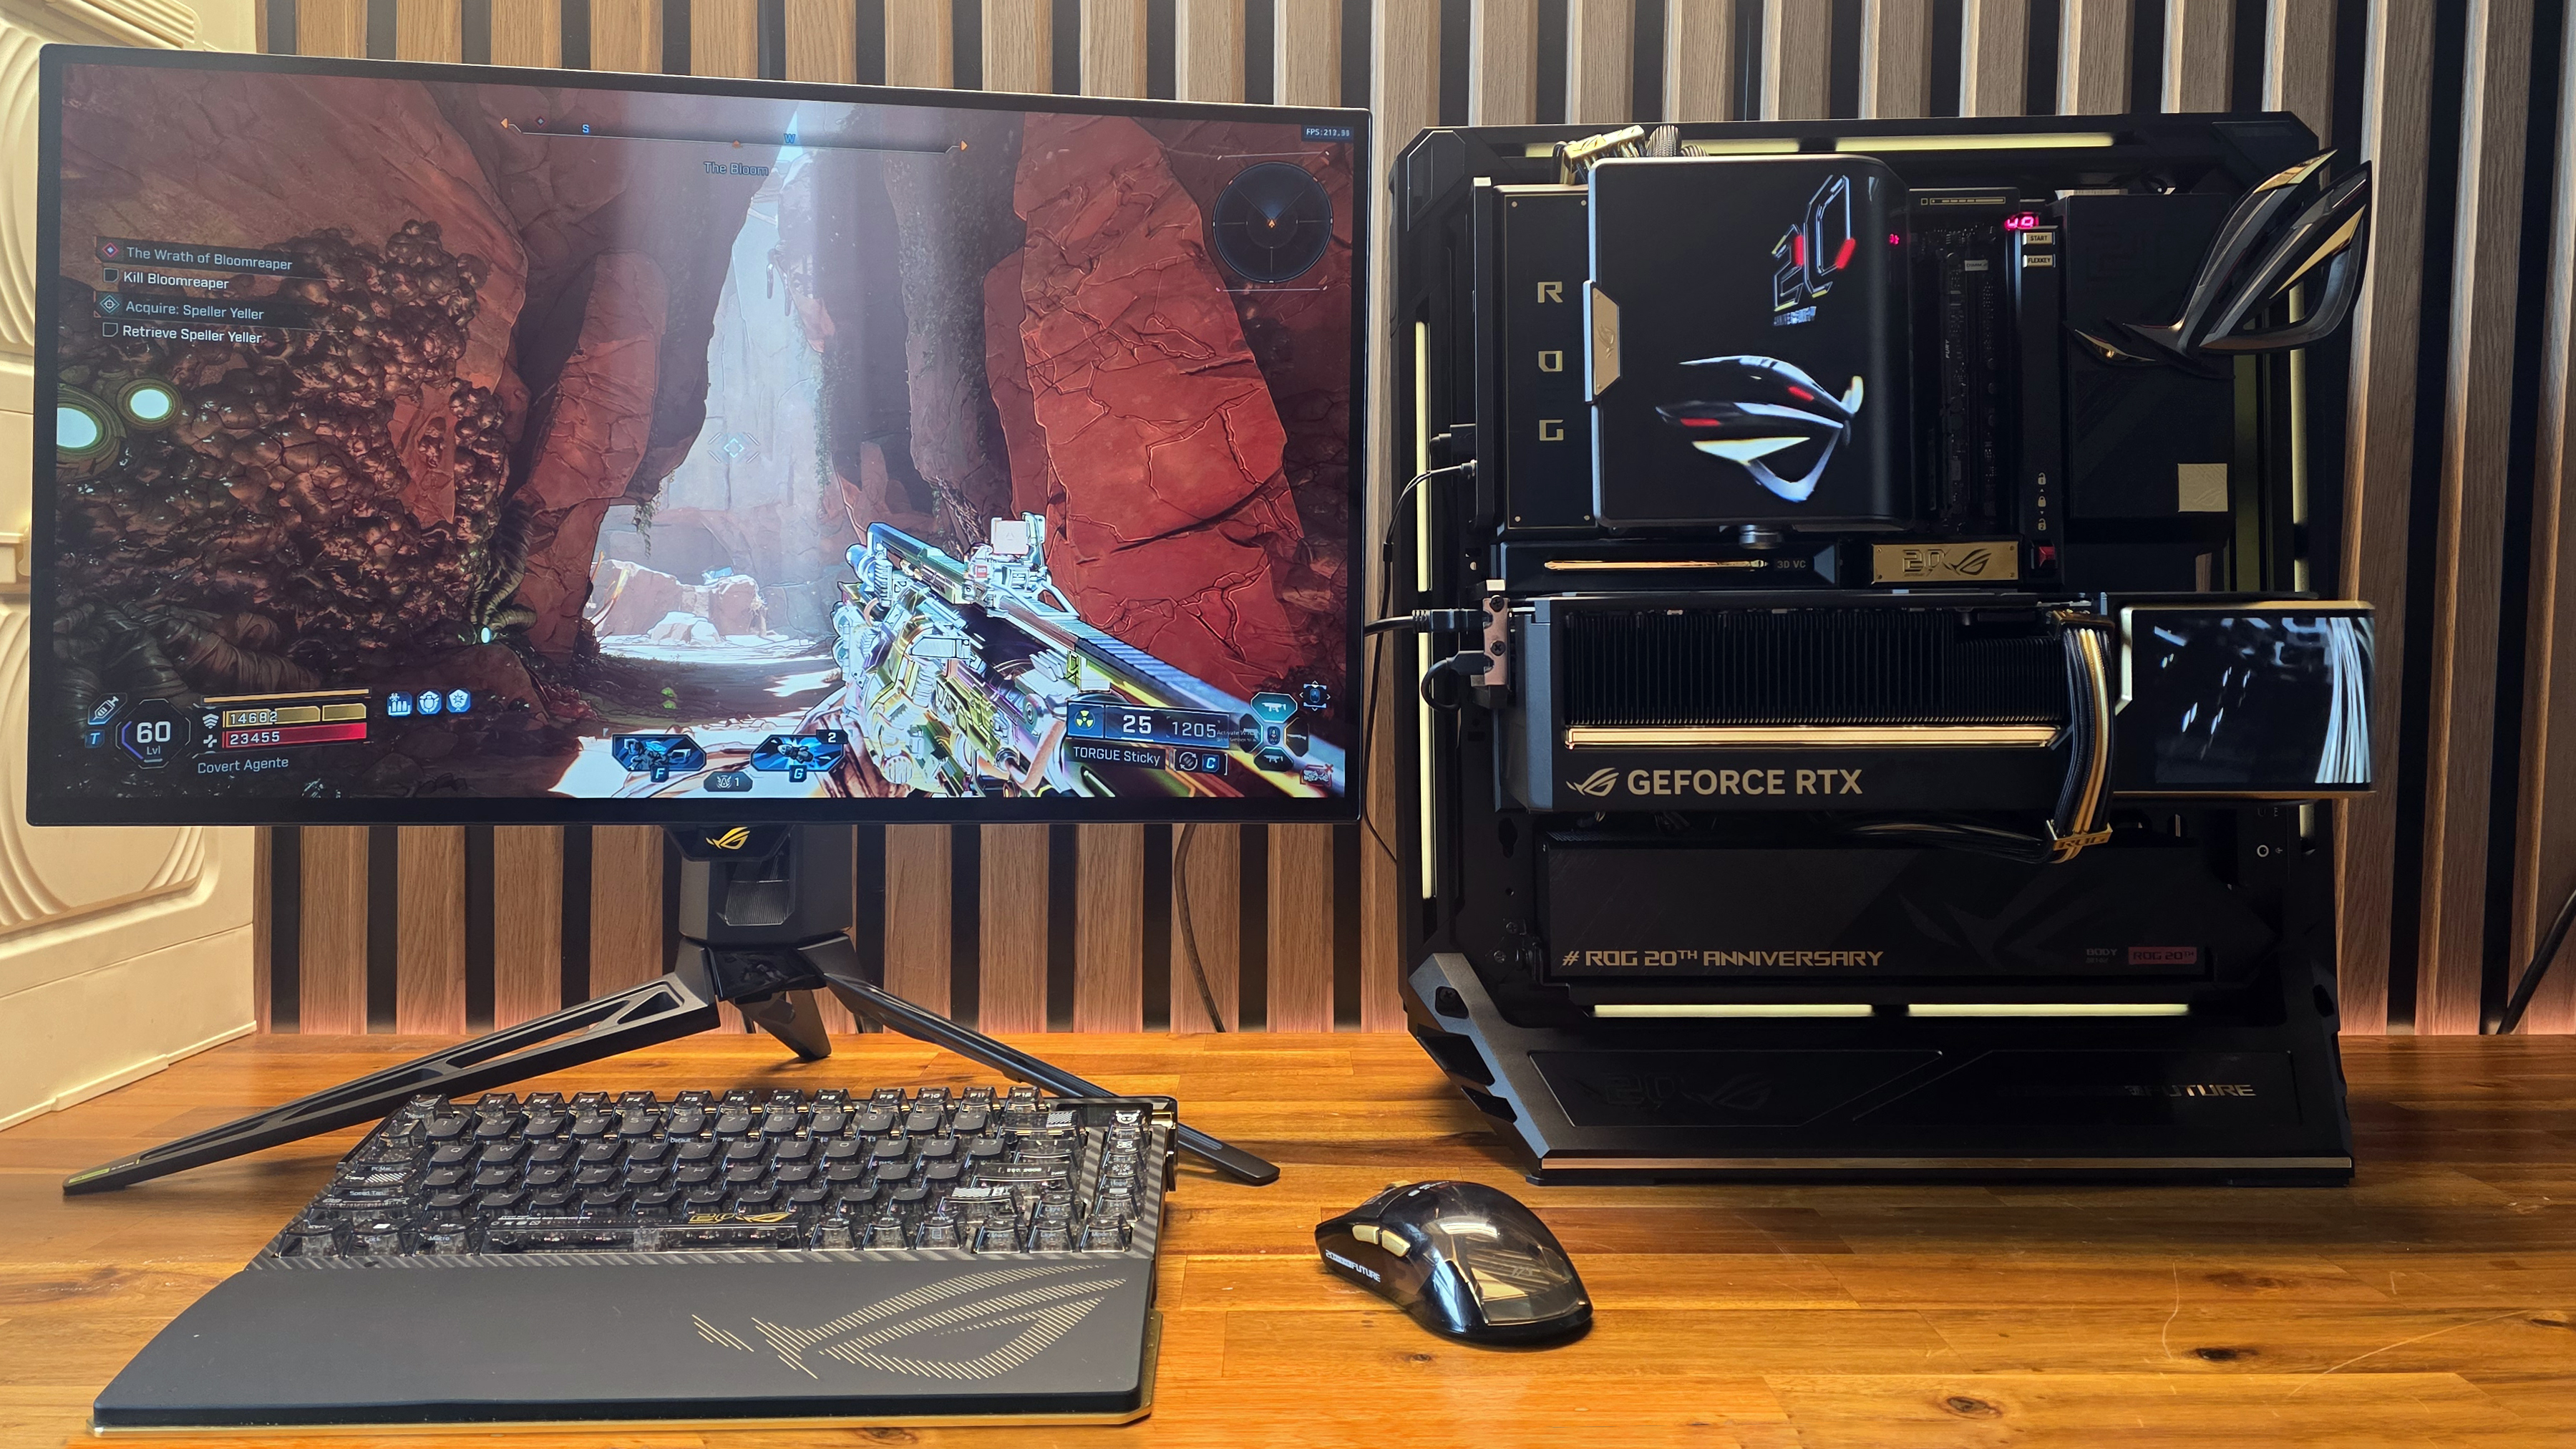
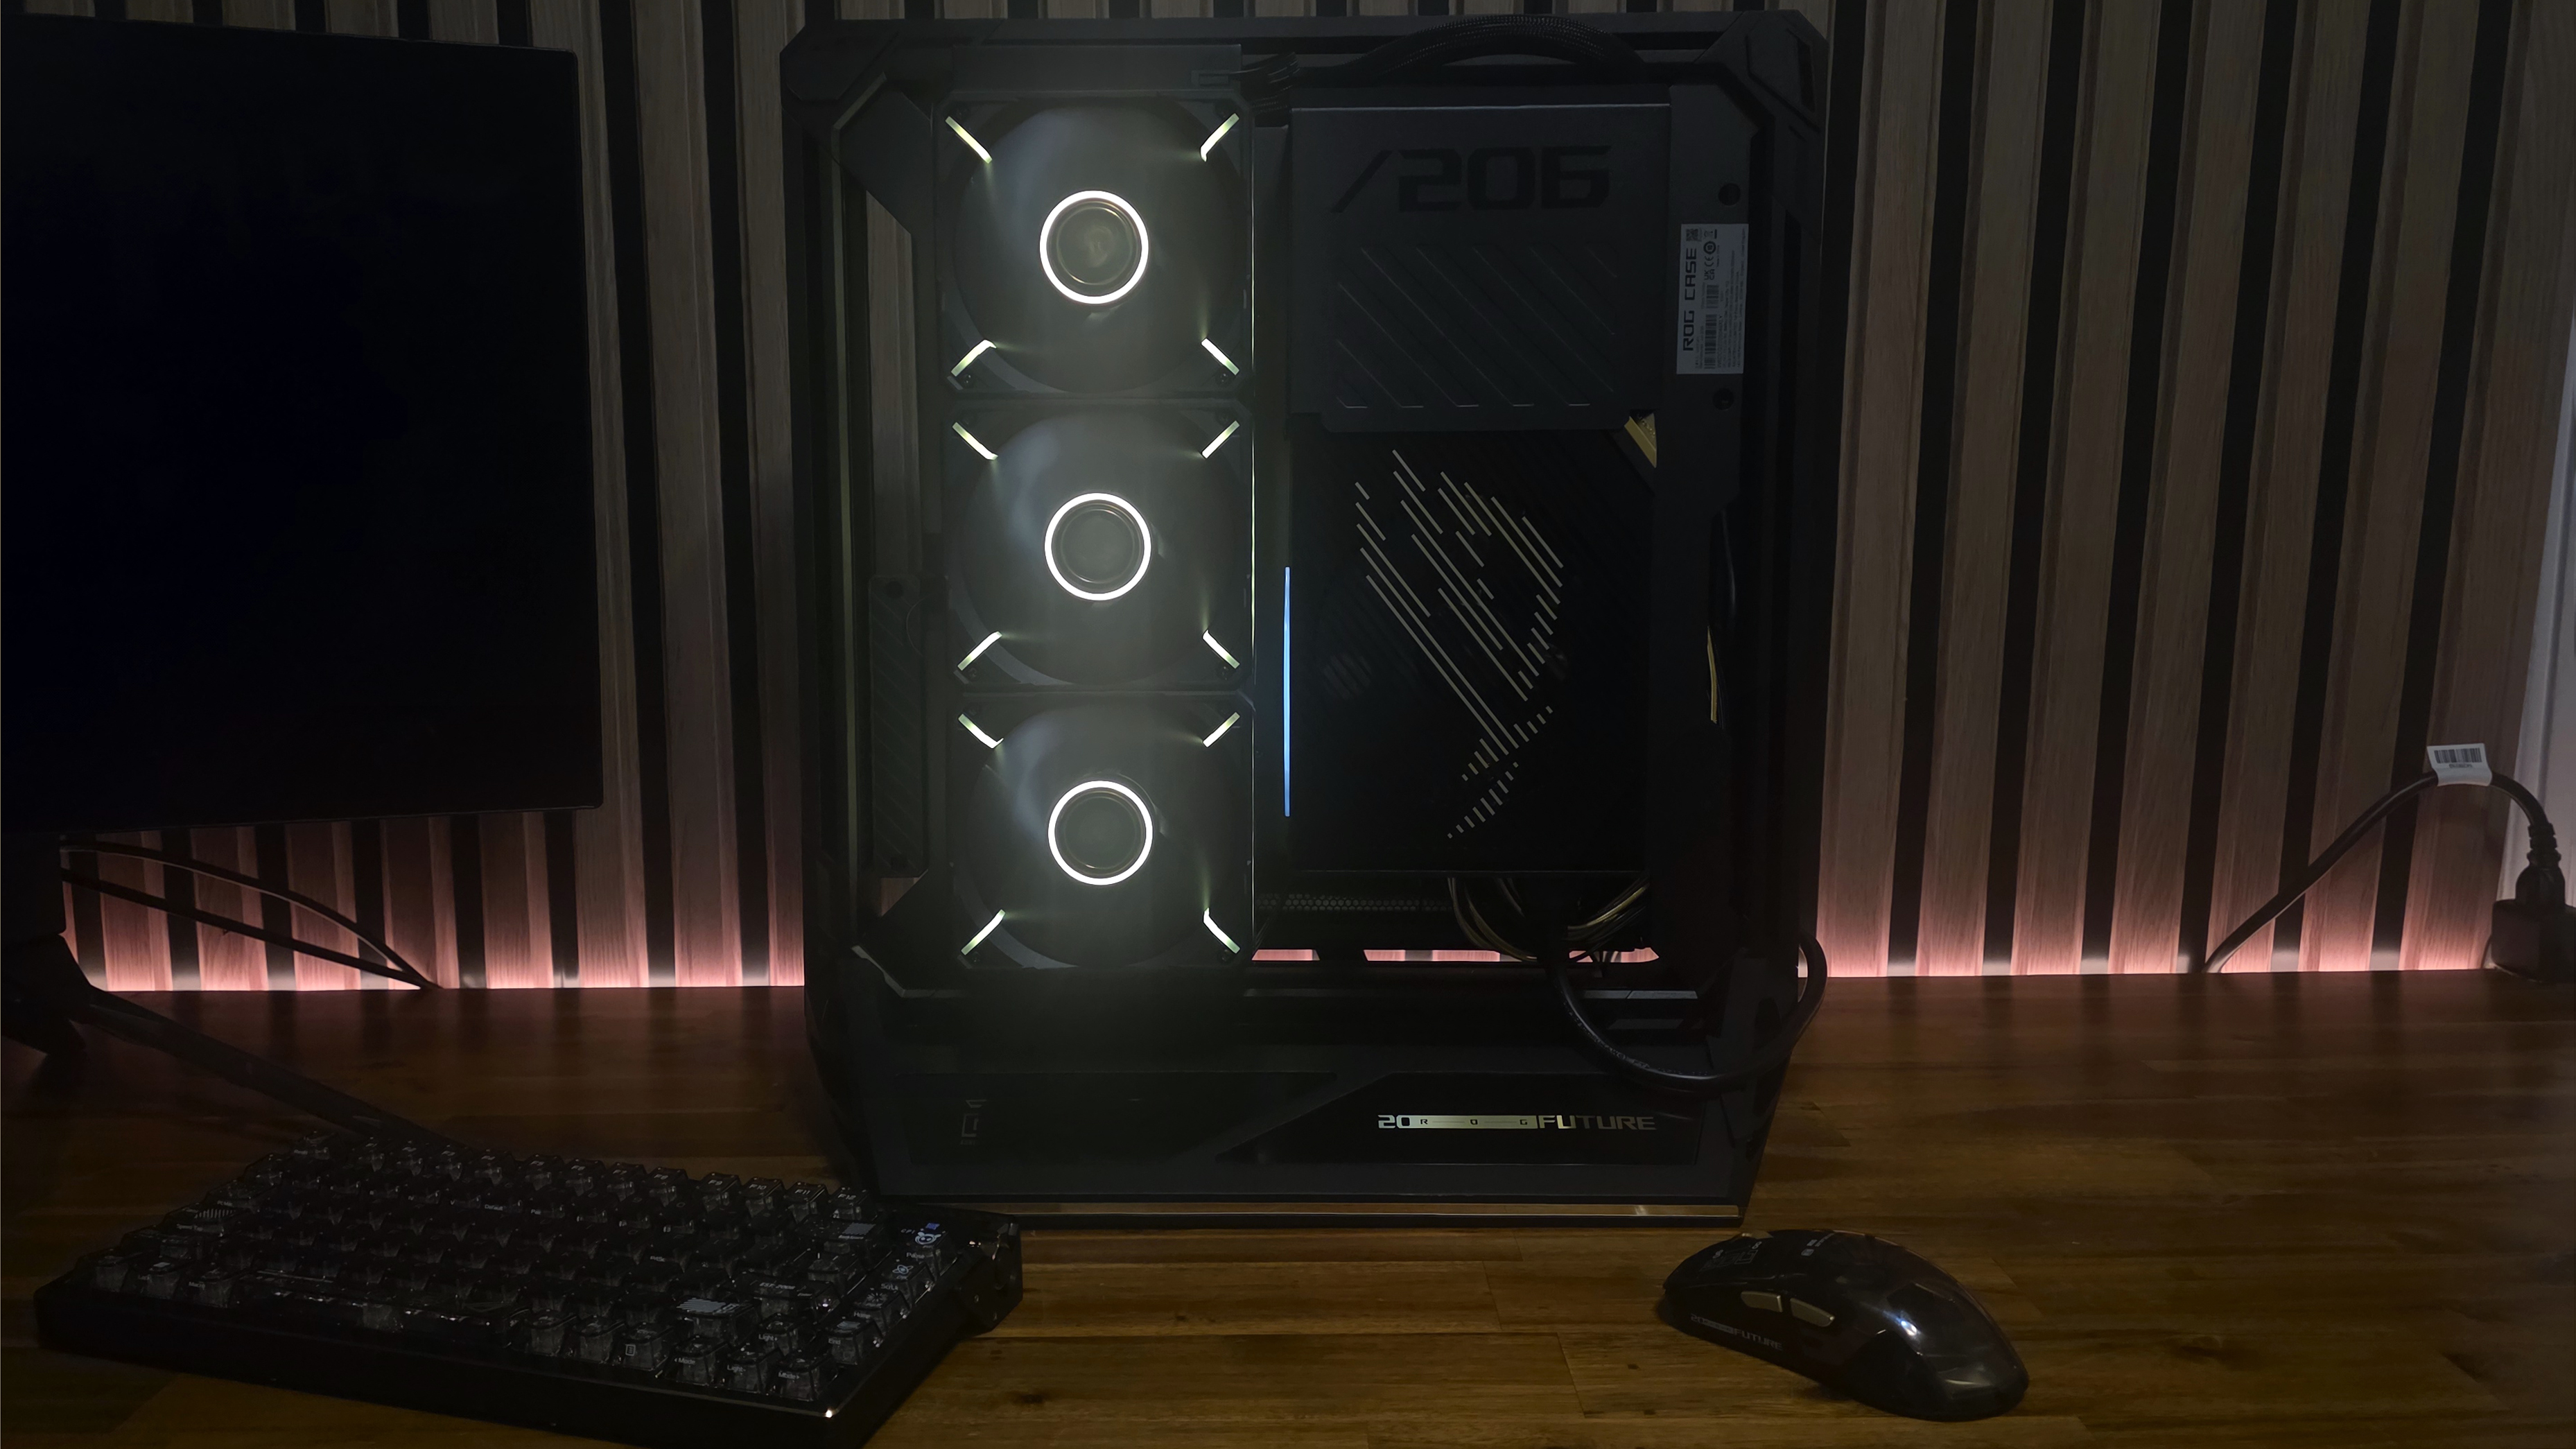
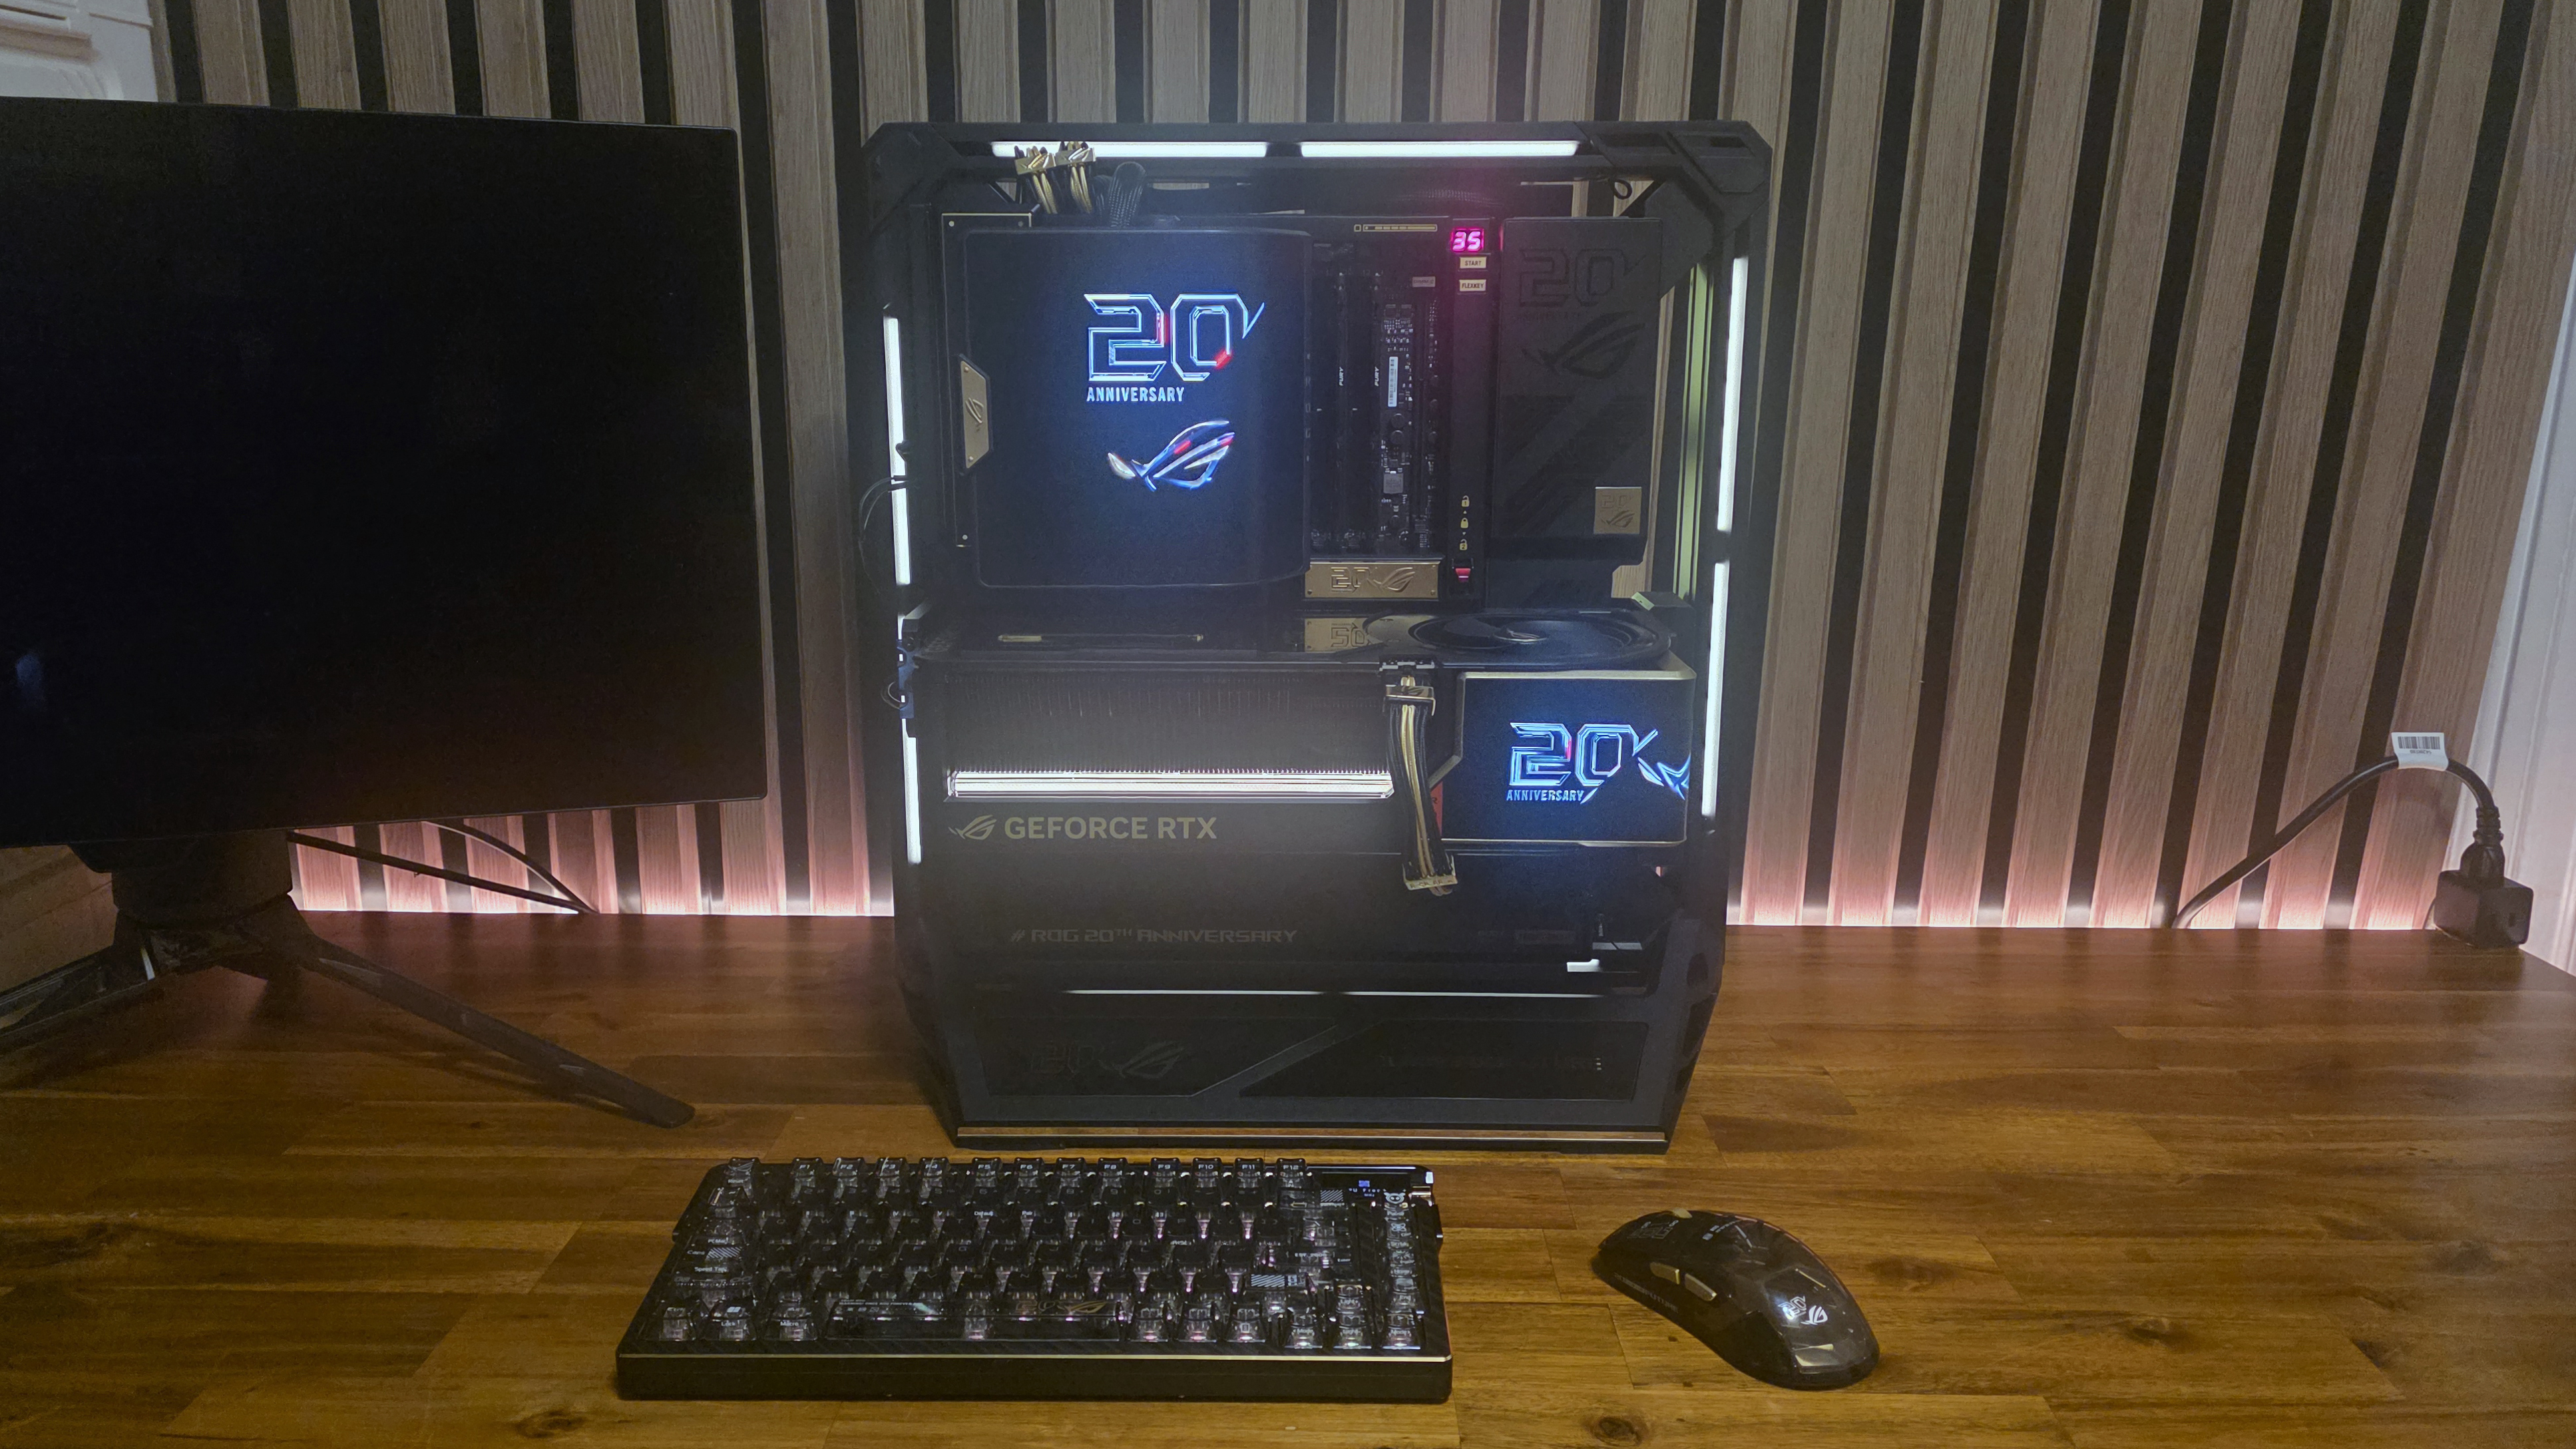
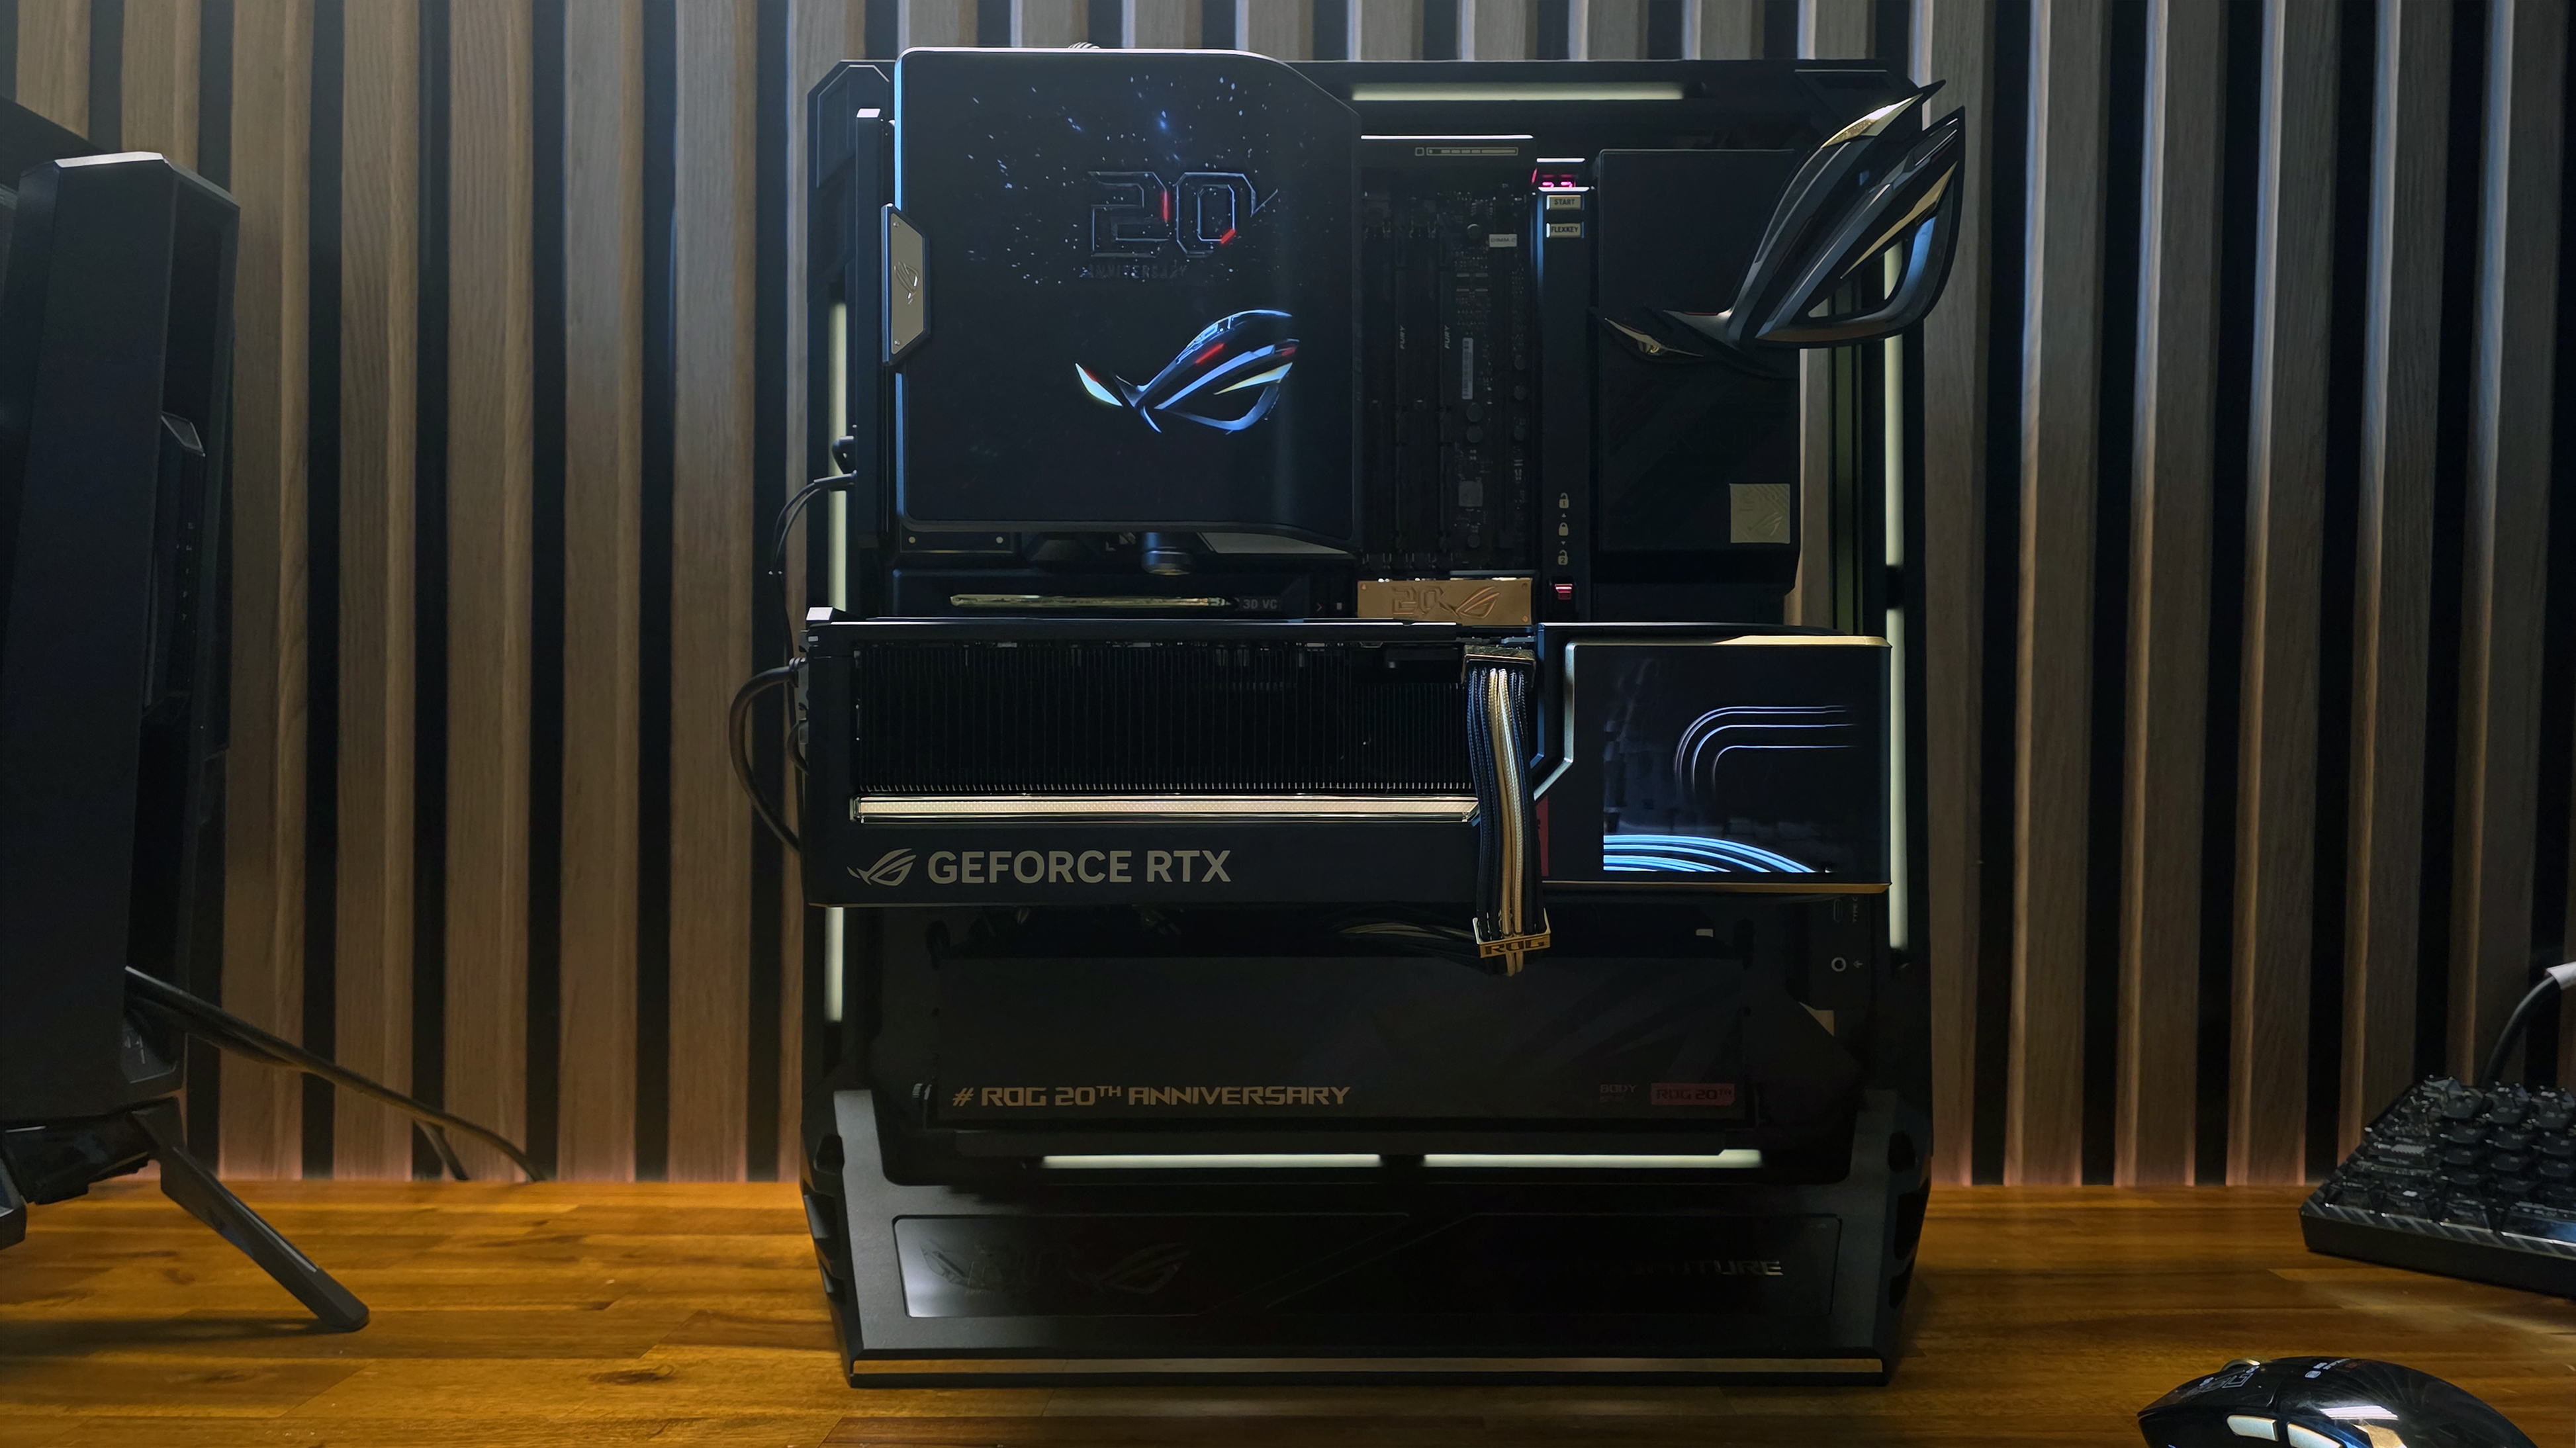
I didn’t have as much time as I would have liked to benchmark this monster PC or get a long-term sense of what it’s like to use it as a gaming and productivity rig. I may add to this section in the coming days as I spend more time with the system, but after about a day of using it after it was built, installing an OS, drivers, and playing a few PC games, I did get some strong initial impressions.
First off, for a high-end rig in an open case, with the beefiest GPU I’ve ever personally used, this machine is surprisingly quiet. I didn’t do anything more strenuous than play Borderlands 4, and admittedly my air conditioner was droning away from a nearby window. But the cooler and blower fans remained quiet. And the four fans on the GPU were noticeable when I was standing in front of the PC, but remained at both a level and a pitch that I would expect from a mainstream gaming rig inside a traditional case, not a top-end monster rig with all its cooling inches from my ears. At some point, I’ll have to listen to the system again when it’s cool enough to live without my air conditioner.
On the topic of heat, though: this 5090 sure kicks out a lot of it when gaming. And to some degree that’s no surprise. My personal system with a 4090 sits below my desk, and when I’m gaming at high settings on my 4K OLED TV, the PC feels like a small space heater blowing on my legs. However, things were on another level when using the Asus PC on my bench. The blower fan was pushing air up from the bottom, and the GPU fans were busy dispersing the heat from rendering the menu screen of Borderlands 4. The taller-than-desk-height of my bench was also probably a factor. But all that heat was literally blowing in my face, while my air conditioner worked to cool me from one side, a few feet away.
After about 10 minutes, I needed a break from the hot air blowing on me. And while my setup isn’t typical unless maybe you tend to game at a standing desk, I think even in a typical gaming setup, you may want to put this machine a little further away from you than a typical gaming PC. It’s not that it generates more heat than other high-end rigs, but its open-frame nature and the bottom blower fan distribute that heat much differently than a more traditional case, where most of the heat is exhausted out the back or the top, away from you.
Here, most of the heat seems to come forward, directly off the motherboard. And if your desk is cramped, I don’t think that would lend itself to a comfortable gaming experience – at least during the warmer months. I’d suggest planning to position the system 3-4 feet from your monitor and your face. If that means you have to upgrade your desk, you should. The system also weighs nearly 60 pounds, so you might want to anyway – and if you spent this many thousands of dollars on a gaming rig, you can almost certainly also afford a new slab of furniture for it to sit on.
Also, I find it curious that Asus’ ROG 20th anniversary GPU supports two power connectors (a typical 12VHPWR and a back-connector power option, and yet the motherboard the company expressly pairs it with isn’t a back-connector board that lets you take advantage of the extra wattage the GPU can take and that the 3000W PSU can dish out.
Perhaps a couple of factors were involved in the pairing. U.S. households aren’t typically wired for the voltage required to pull significantly more than 1600W. And maybe the average well-off PC builder willing to spend over $10,000 on a GPU, motherboard, cooler, and power supply might not always be astute enough to play around with a GPU capable of drawing up to 800W all on its own. I could see the whole ROG 20th Anniversary line becoming a financial burden pretty fast if the company had to deal with a significant number of RMAs and customer complaints on what must be low-volume hardware that costs several thousand dollars. Those who really want to experiment with shoving 800W into an RTX 5090 can buy the GPU separately, along with one of Asus’ compatible BTF motherboards.
A cost-no-object, screen-packed powerhouse
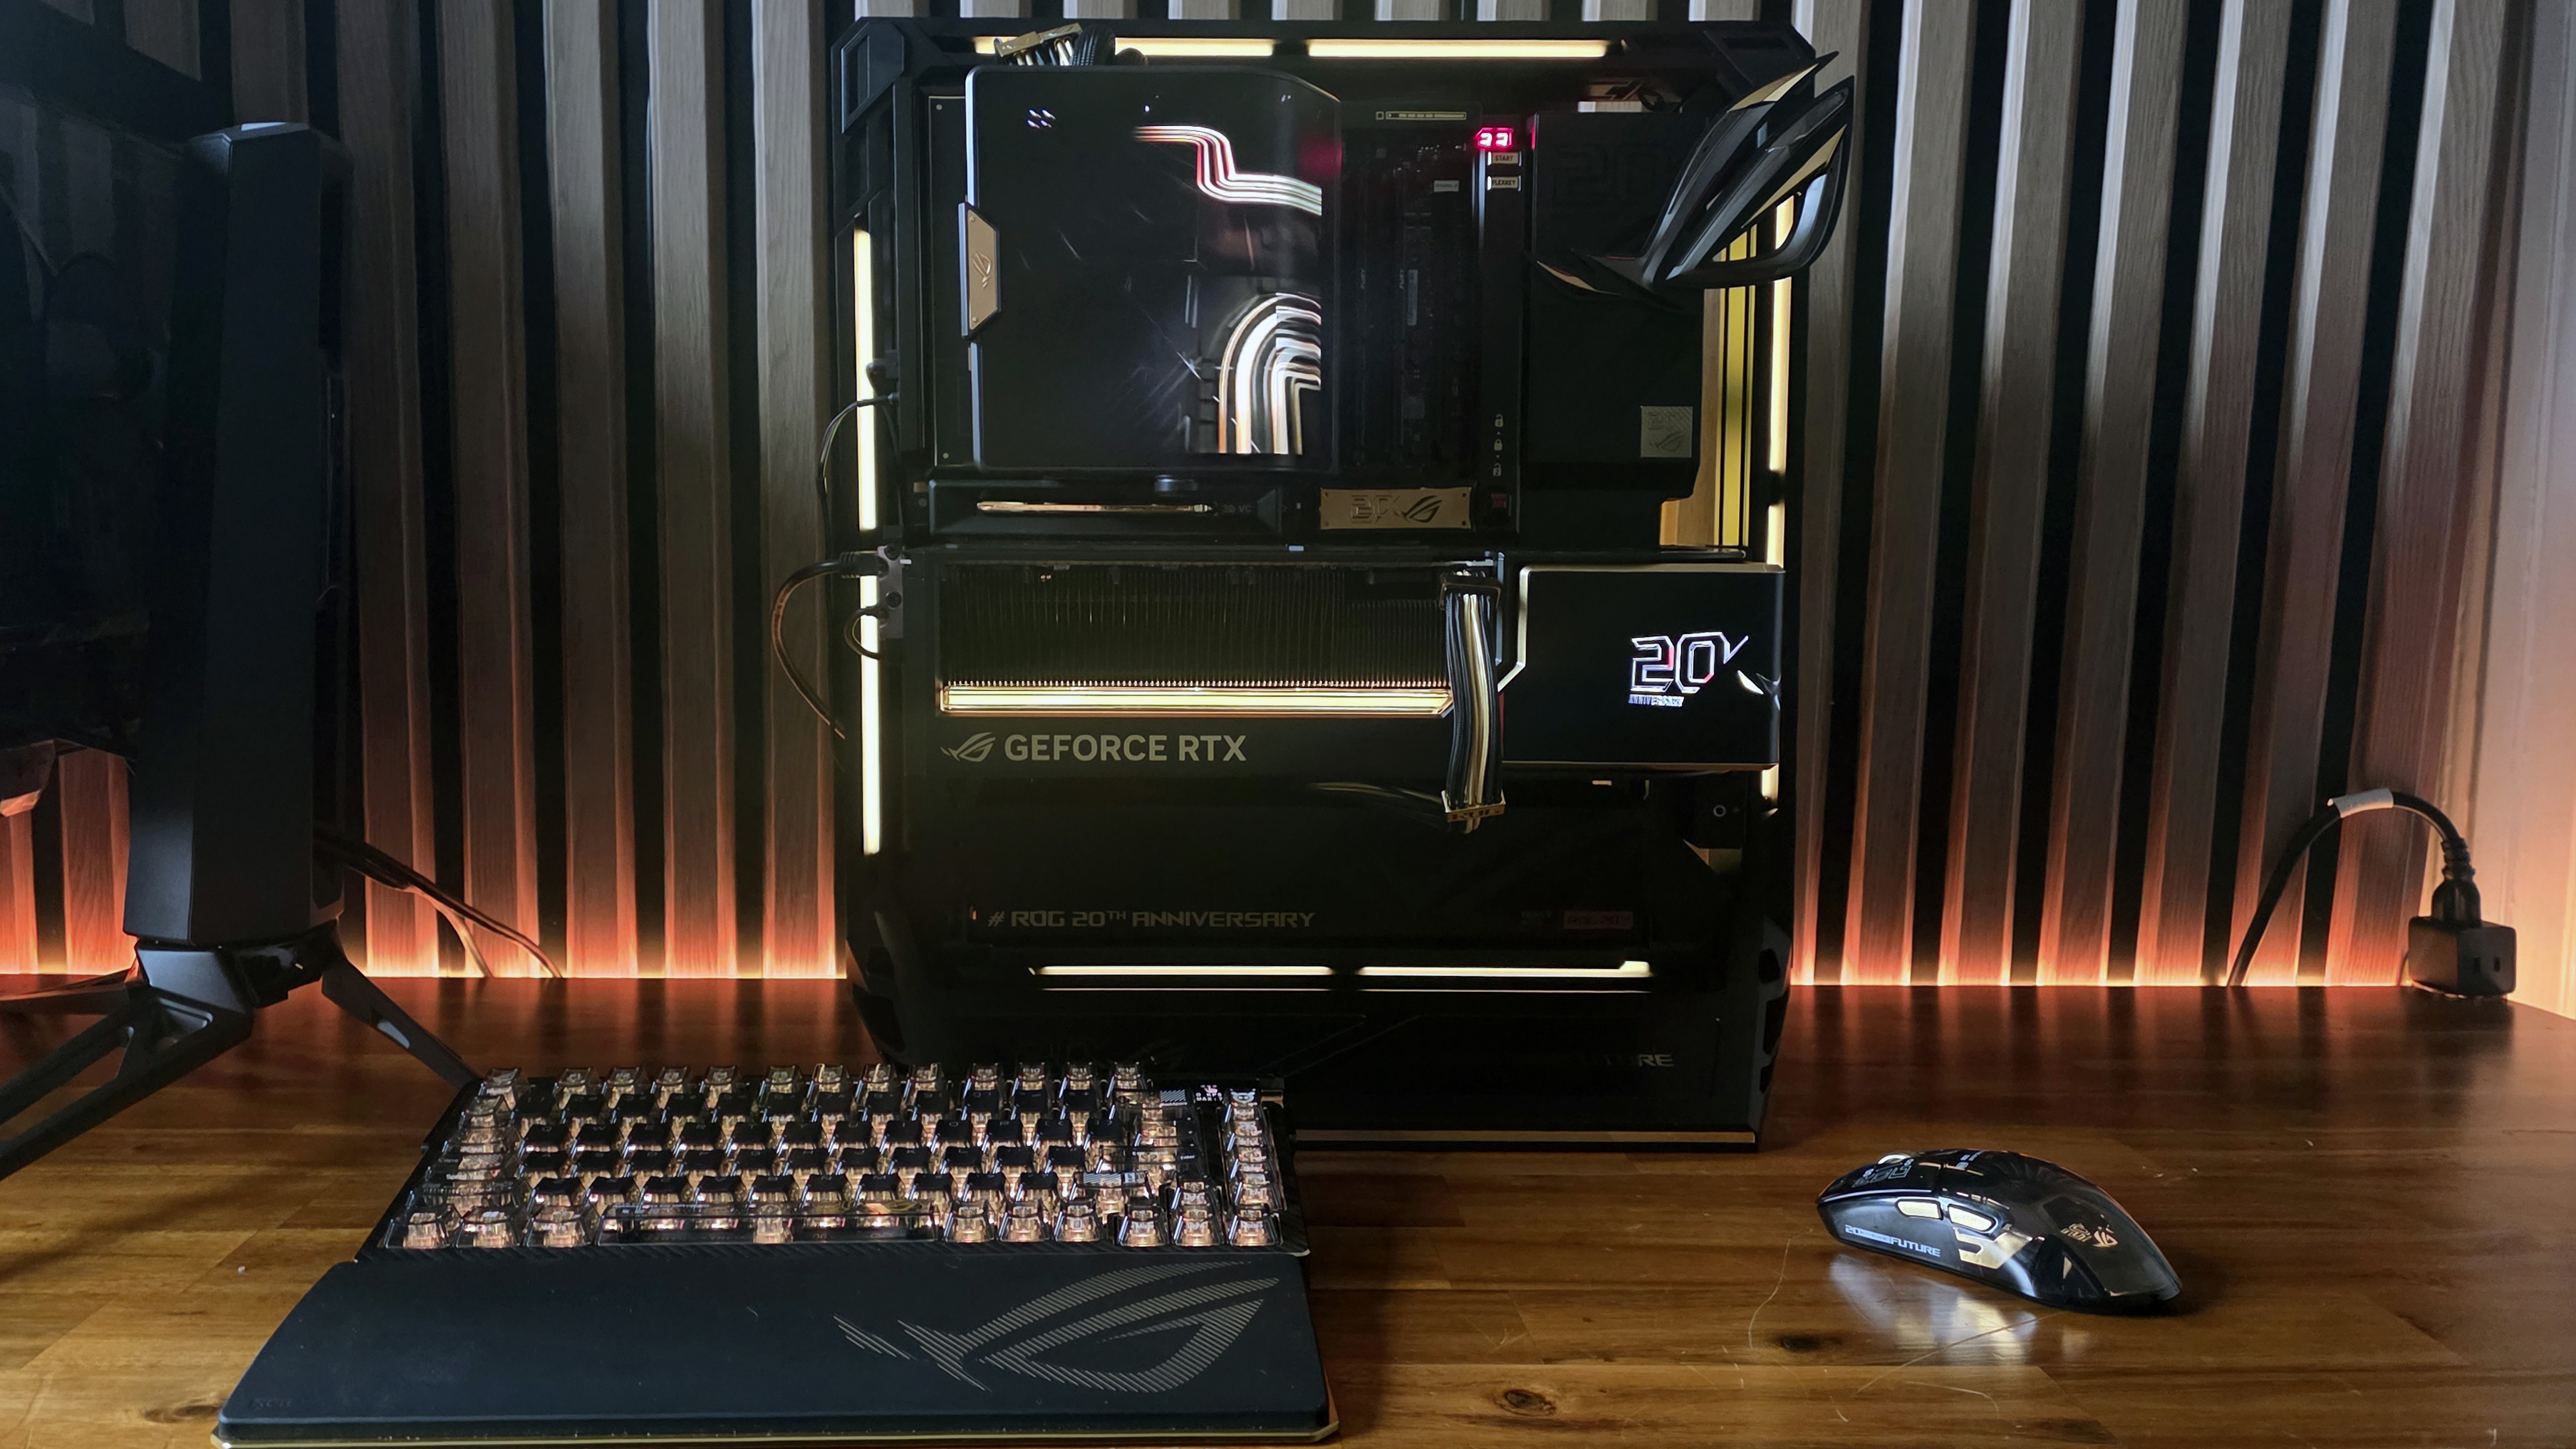
Circling back to cost, there’s just no getting around the fact that this system is ridiculously expensive. Putting aside the peripherals, the RAM, the SSD, and the CPU, the core ROG 20 components here costOver $10,000. Even at today’s inflated prices, you can get a more typical RTX 5090, a capable 1300W power supply, a premium X870E motherboard, a good 360mm AIO cooler, and one of the best PC cases for well less than $6,000. Cut a couple of corners and wait for a deal here and there and you could get nearly the same level of performance for not much more than $5,000 – half the price of Asus’ ROG Edition 20 parts.
Of course, those components won’t have multiple curved AMOLED screens, several pounds of copper to cool your CPU and VRMs, or a unique open-frame case like the GS20. And Asus’ ROG line has always put performance, materials, and premium design over affordability. It’s not like anyone who has been paying attention to the brand for two decades was expecting it to celebrate its anniversary by putting out cheap parts. High-end ROG components have always demanded a premium, and now that nearly everything in this space costs more, the premium has increased as well – at least for this iteration of its product line.
Also, as much as I’m not typically the type to build a PC with parts from mostly the same company, it was refreshing to actually be able to control every bit of RGB lighting with a single piece of software. I just wish Armory Crate didn’t need to download and update what seemed like 12 different modules and require multiple reboots before it could recognize and adjust the lighting on all the components in this build.
- MORE: Best PC Builds for Gaming
- MORE: How to Build a PC
- MORE: Best Gaming PC Deals